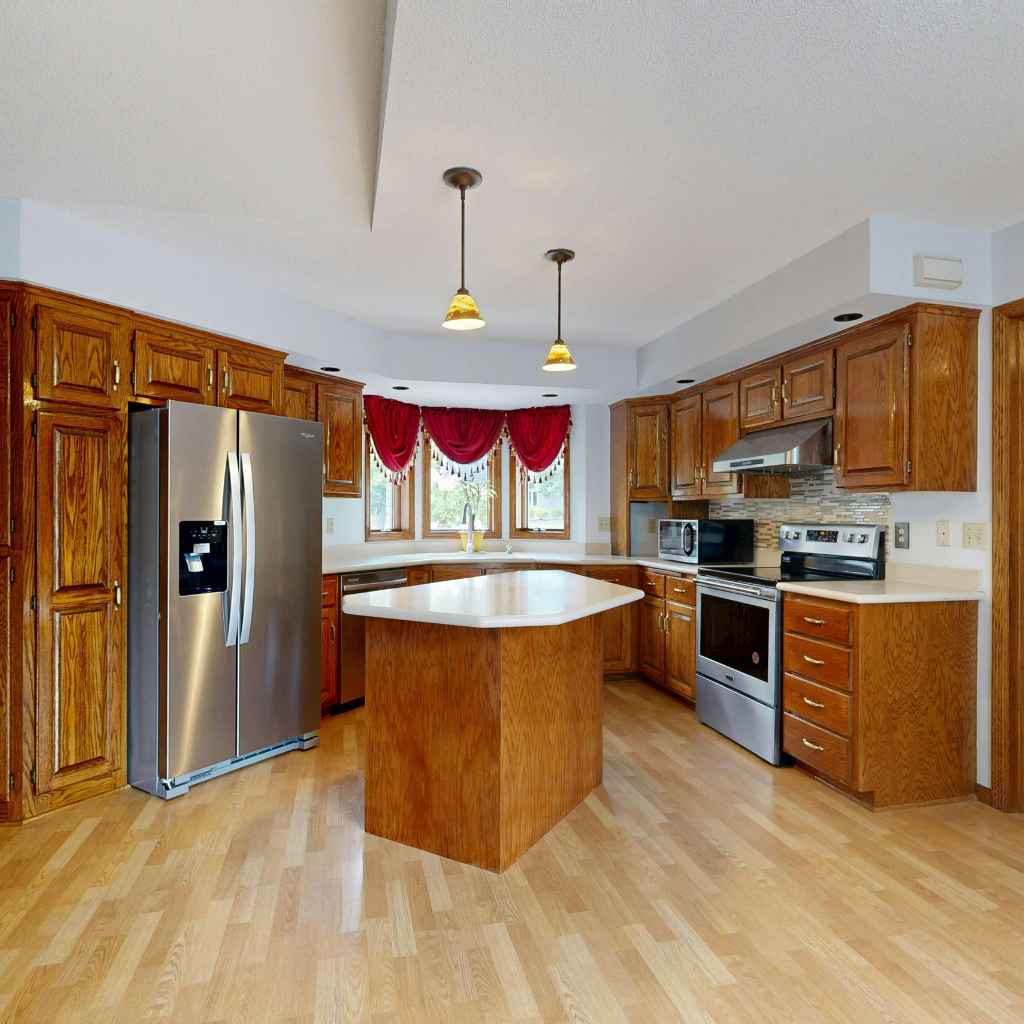
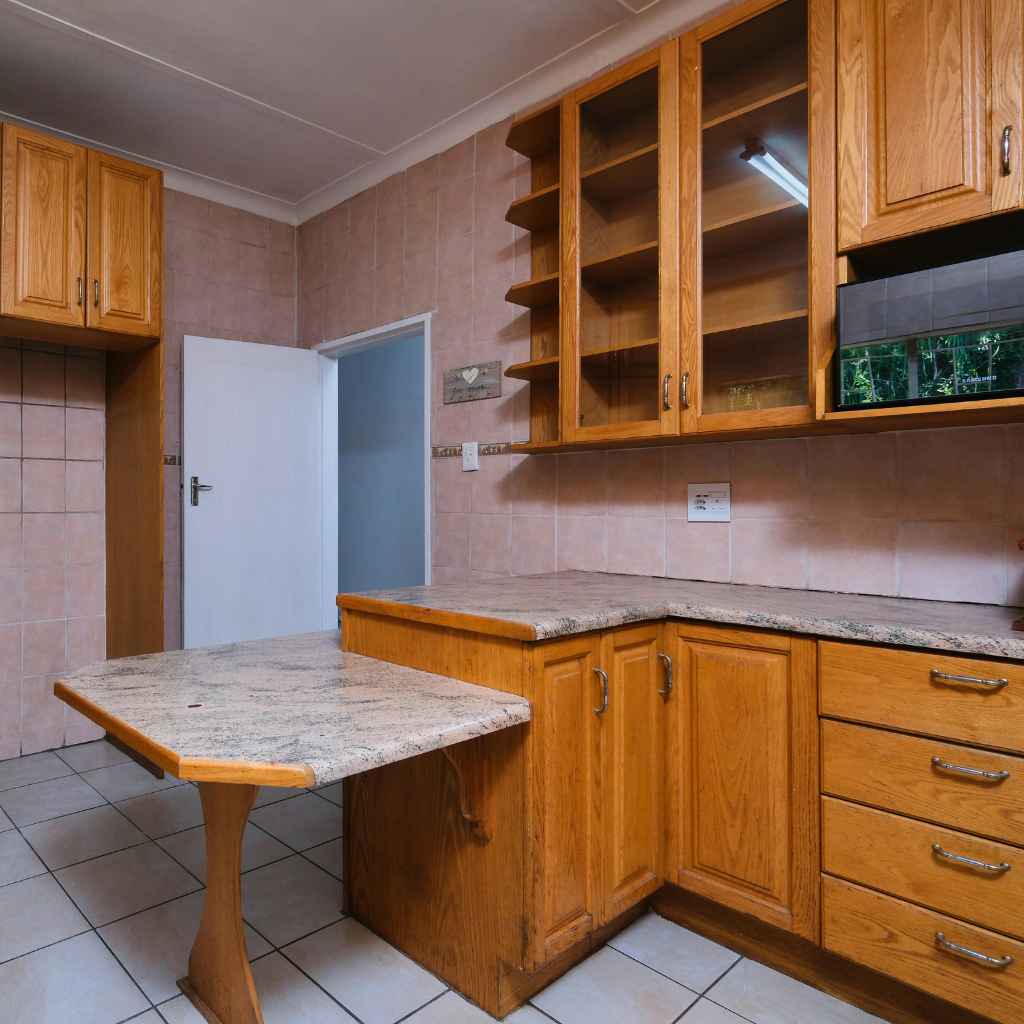
How to Refinish Maple Cabinets: Best Local DIY Pro Guide
Many folks wonder about How to Refinish Maple Cabinets: Best Local DIY Pro Guide. It sounds like a lot of work, and for someone new to it, it can seem a bit tricky. You might worry about making mistakes or not getting the perfect look.
Curious about the mechanism? See how a hinge works and the main hinge types.
Don’t fret! This guide breaks it down into simple steps. We will walk you through everything you need to know to make your maple cabinets look brand new, right in your own home.
Get ready to transform your kitchen with this easy-to-follow plan.
Prepare Your Maple Cabinets for Refinishing
This part is all about getting your cabinets ready. It’s like cleaning up before painting a room. You need to make sure the surface is clean, smooth, and ready for the new finish. Skipping these steps can mean your new paint or stain won’t stick well, or it might look bumpy. We’ll cover how to remove hardware, clean the cabinets thoroughly, and prepare the surface so your refinishing project turns out beautifully. This preparation is key to a professional-looking result, making your DIY efforts shine.
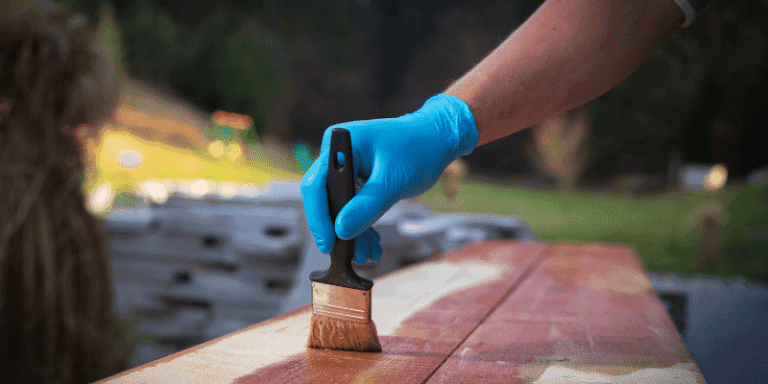
Remove Hardware and Doors
Taking off the cabinet doors and hardware is the very first step. This makes it much easier to work on each piece separately. You can get to all the edges and sides without bumping into anything.
It also helps prevent accidental damage to your hardware or the cabinet boxes.
Unscrew all door hinges and drawer pulls. Keep all the screws organized in bags, maybe labeled for each door or drawer. This stops you from mixing them up later.
Carefully remove each door from its hinges. It’s a good idea to have someone help you, especially for larger doors, so they don’t drop.
Take off any drawer fronts. These usually have screws on the inside.
Properly removing hardware ensures you can reattach everything easily once the refinishing is complete. It also allows for a cleaner, more thorough job on both the doors and the cabinet frames.
Clean Maple Cabinets Thoroughly
Cabinets collect a lot of grease and grime, especially in the kitchen. You need to get rid of all that before you do anything else. A good cleaning makes sure the new finish sticks properly.
Use a degreaser designed for kitchen cabinets. Spray it on a cloth first, not directly on the cabinets, to avoid drips. Wipe down all surfaces, paying attention to areas around handles and corners.
For stubborn spots, you might need a gentle scrub brush. Work in small sections.
After degreasing, wipe everything down with a clean, damp cloth to remove any residue from the cleaner. Then, dry the cabinets completely with a separate clean cloth.
This cleaning step is vital. If you don’t remove all the grease and dirt, the new finish can bubble or peel. A clean surface is the foundation for a lasting, beautiful makeover.
Sanding for Surface Preparation
Sanding is crucial to create a smooth surface. It helps the new finish adhere better. You don’t need to remove the old finish, just scuff it up.
Start with medium-grit sandpaper, around 120 to 150 grit. This removes any minor imperfections and creates a good base.
Sand with the wood grain. Always go in the direction the wood grows. This prevents scratches that are hard to hide.
After the medium grit, switch to a finer grit, like 180 or 220 grit. This makes the surface super smooth.
Wipe away all the dust after sanding. A tack cloth works best for this, as it picks up fine dust particles.
Don’t rush the sanding process. Taking your time here will pay off with a much smoother and more professional-looking final result. A well-sanded surface is the secret to a great refinish.
Choosing Your Maple Cabinet Refinishing Method
Once your cabinets are prepped, it’s time to decide how you want them to look. There are a few popular ways to refinish maple cabinets. Each method gives a different feel to your kitchen. We’ll explore staining, painting, and even liming wax, explaining what each one involves and what kind of look you can achieve. This will help you pick the method that best suits your style and skill level.
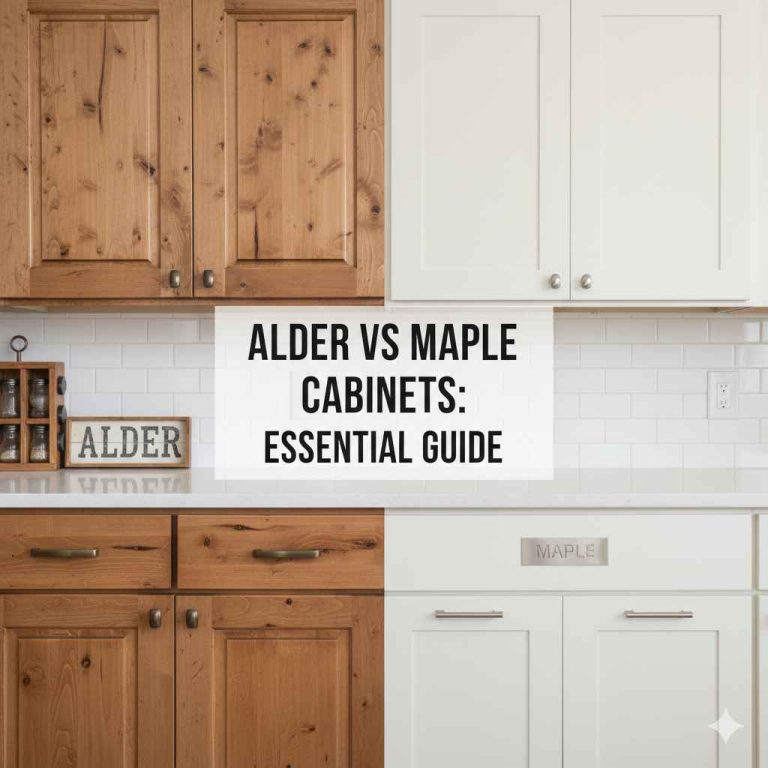
Staining Maple Cabinets for Natural Beauty
Staining lets the natural grain of the maple show through. It enhances the wood’s existing beauty. Maple has a fine, even grain that takes stain very well.
Choose a stain color that complements your kitchen’s style. Darker stains can give a more dramatic look, while lighter stains keep it airy.
Apply the stain evenly with a brush or cloth. Work in small sections.
Wipe off excess stain with a clean cloth, again following the wood grain. The longer you leave the stain on, the darker the color will be.
Allow the stain to dry completely as per the product instructions. This usually takes at least 24 hours.
Staining is a great way to refresh your cabinets without completely changing their character. It highlights the natural wood, giving your kitchen a warm and inviting feel.
Painting Maple Cabinets for a Fresh Look
Painting offers a huge range of color options. You can completely change the look of your kitchen. It’s a popular choice for modernizing older cabinets.
Select a high-quality cabinet paint. Paints designed for cabinets are durable and have a nice finish.
Apply a primer first. This helps the paint stick better and covers the wood grain.
Apply thin, even coats of paint. Multiple thin coats are better than one thick coat.
Allow each coat to dry completely before applying the next. Sand lightly between coats with very fine sandpaper for a smooth finish.
Painting requires patience, especially when applying multiple thin coats. However, the result is a durable, refreshed cabinet appearance that can dramatically transform your kitchen’s aesthetic.
Using Liming Wax for a Whitewashed Effect
Liming wax gives a subtle whitewashed look. It settles into the wood grain, highlighting it. This creates a rustic or coastal feel.
After preparing the wood, apply the liming wax with a brush or cloth. Work it into the wood grain.
Let the wax sit for a few minutes to start to dry.
Wipe off the excess wax with a clean, soft cloth. You want the white pigment to stay in the grain but be removed from the surface.
Once you’re happy with the look, seal the wax with a clear topcoat. This protects the finish.
Liming wax is a unique way to update maple cabinets. It provides a lighter, distressed appearance without completely obscuring the natural wood texture. It’s a less common but very stylish option for a unique kitchen design.
Applying the Finish and Sealing Your Cabinets
After choosing your method, the next big step is applying the new finish. This is where your cabinets start to look transformed. Whether you are staining, painting, or using wax, the application process is critical for durability and appearance. We will cover the best ways to apply your chosen finish, ensuring it’s even, smooth, and long-lasting. Proper sealing is also vital to protect your hard work.
How to Apply Stain or Paint Evenly
Applying stain or paint evenly is key to a professional finish. It takes practice, but following a few simple rules makes a big difference.
Always work in good lighting. This helps you see if you are missing any spots or applying too much.
Use the right tools. High-quality brushes and rollers designed for your finish will give a smoother application. For staining, lint-free cloths are excellent.
Apply in thin, consistent coats. For paint, this means multiple light coats rather than one heavy one. For stain, it means applying and wiping off excess evenly.
Follow the wood grain for all applications. This ensures the finish looks natural and hides any slight imperfections better.
Allow adequate drying time between coats. Rushing this step can lead to smudging, peeling, or an uneven finish. Check the product’s recommended drying times.
The goal is a smooth, uniform appearance. Even application prevents blotchiness and ensures the color is consistent across all your cabinet doors and drawer fronts. This is where your patience really pays off.
Top Coating for Durability
A topcoat, also called a sealant or clear coat, is essential. It protects your new finish from wear and tear. Kitchen cabinets get a lot of use, so this step is very important.
Choose a durable topcoat. Polyurethane or a water-based polycrylic are common choices for cabinets. Look for one that is resistant to moisture and stains.
Apply thin, even coats. Just like with paint or stain, multiple thin coats are better than one thick one.
Allow each coat to dry thoroughly. Lightly sand with very fine sandpaper (like 320 grit) between coats if recommended by the product. This helps the next coat adhere better and creates a smoother surface.
Wipe away all dust after sanding before applying the next coat. A tack cloth is perfect for this.
The topcoat is what makes your refinished cabinets last for years. It shields them from everyday kitchen life, keeping them looking fresh and new. Don’t skip this vital protective layer.
Reassembling Your Cabinets
Once all the finishes and topcoats are completely dry and cured, it’s time to put everything back together. This is the exciting part where you see your hard work come to life.
Reattach the cabinet doors to the frames. Make sure to use the original screws or new ones of the same size.
Reinstall the drawer fronts. Line them up carefully before screwing them in from the inside.
Attach all the hardware, like knobs and pulls. This is your chance to update them if you chose new ones.
Test all doors and drawers to ensure they open and close smoothly. Make any necessary adjustments to hinges or drawer slides.
This final step brings your kitchen transformation to completion. Seeing the doors and drawers back in place with their fresh new look is incredibly satisfying.
Troubleshooting Common Issues in Refinishing
Even with the best plans, sometimes things don’t go exactly as expected. It’s normal to run into a few snags when you’re refinishing cabinets. Knowing how to fix common problems can save you a lot of stress and help you achieve the look you want. We’ll cover issues like blotchiness, uneven color, and finish problems, providing simple solutions so you can tackle them with confidence.
Dealing with Blotchy Staining
Blotchiness happens when stain absorbs unevenly into the wood. Maple can sometimes be prone to this. It looks like dark and light patches where the color isn’t consistent.
Use a pre-stain wood conditioner. This product helps the wood absorb the stain more evenly. Apply it before the stain and let it dry according to instructions.
Try a gel stain. Gel stains sit on the surface more and are less likely to soak in unevenly, which helps prevent blotchiness.
Apply stain in thin coats. Instead of trying to get the color in one go, build up the color with multiple thin layers. Wipe off excess quickly.
If the blotchiness is already there, you might need to sand it down and start over, making sure to use a wood conditioner this time.
Patience is key here. Rushing the staining process can lead to these uneven results. Using a conditioner and thin coats are your best bet for a uniform stain color.
Fixing Uneven Paint Coverage
Uneven paint coverage often happens when coats are too thick or not applied evenly. Streaks or patches of lighter color can appear.
Ensure you are using thin coats. If you see lines or marks, it usually means the paint is too thick. Lightly sand and reapply a thinner coat.
Check your brush or roller. Worn-out tools can leave streaks. Using a high-quality brush or roller designed for cabinets can prevent this.
Work in consistent strokes. Try to paint in the same direction with smooth, overlapping strokes. Don’t go back over areas that are already partly dry.
If there are visible lines, lightly sand the area once dry and apply another very thin coat, feathering the edges.
Good paint coverage comes from thin, consistent layers. It’s about building up the color slowly rather than trying to cover everything in one thick application.
Addressing Finish Imperfections
Sometimes, you might get drips, bubbles, or dust specks in your finish. These can happen if the environment isn’t clean or if the finish is applied too thickly.
For drips, carefully sand them down once dry. Then, apply a very thin new coat, feathering the edges.
Bubbles can happen if the finish is applied too quickly or if you used the wrong applicator. Try to avoid over-brushing. If they appear, you might need to sand and reapply.
Dust specks are often unavoidable in a home environment. Once the finish is completely dry, you can try gently rubbing the surface with a very fine sandpaper (like 0000 steel wool) or a polishing compound.
Always ensure your workspace is as dust-free as possible. Close windows and doors while painting or sealing.
Most finish flaws can be fixed with careful sanding and a light reapplication of the finish. The key is to address them as soon as you notice them, once the previous coat is dry.
Frequently Asked Questions
Question: How long does it take to refinish maple cabinets
Answer: Refinishing maple cabinets usually takes several days to a week, depending on the method you choose and how much drying time is needed between coats. It’s not a quick weekend project if you want a professional result.
Question: What is the best primer for maple cabinets
Answer: A high-quality bonding primer or a stain-blocking primer is best for maple cabinets. These primers help the paint adhere well and prevent any natural wood undertones from showing through your new color.
Question: Can I use a sprayer to refinish my cabinets
Answer: Yes, using a paint sprayer can give a very smooth, professional finish. However, it requires practice to get the technique right and may involve more prep work to protect surrounding areas from overspray.
Question: Do I need to seal cabinets after painting
Answer: Absolutely. After painting, applying a durable topcoat or sealant is crucial. It protects the paint from scratches, moisture, and daily wear, making your cabinets last longer and look better.
Question: What is the difference between stain and paint for cabinets
Answer: Stain soaks into the wood and enhances its natural grain, offering a translucent color. Paint covers the wood entirely, offering a solid color and a completely new look. Stain shows wood texture, while paint can create a smooth or textured finish depending on application.
Conclusion
You have now learned How to Refinish Maple Cabinets: Best Local DIY Pro Guide. This process involves careful preparation, choosing your finishing method, and applying it with care. By following these steps, you can transform your kitchen cabinets yourself.
Enjoy your beautiful, updated kitchen.