How to Install Hardwood Over Concrete
Putting hardwood floors down over a concrete slab can seem tricky. Many people wonder if it’s even possible or if it’s too hard for a beginner. The good news is, it’s very doable with the right steps.
This guide will walk you through everything you need to know for Installing Hardwood Over Concrete: A Complete Guide. We’ll make it simple and clear, so you can get beautiful hardwood floors in your home. Let’s get started with what you’ll need and how to prepare.
Preparing Your Concrete Subfloor for Hardwood
Getting the concrete subfloor ready is the most important step when Installing Hardwood Over Concrete: A Complete Guide. A clean, dry, and level surface ensures your new hardwood floors look great and last for years. If the concrete isn’t prepared right, you could have problems like warping, squeaking, or even moisture issues.
This section covers all the essential preparation steps.
Cleaning the Concrete Surface
Before you do anything else, your concrete needs to be spotless. Dust, dirt, grease, and old adhesives can all prevent your hardwood from bonding properly or can cause unevenness. You want a surface that’s as clean as possible.
- Thoroughly sweep or vacuum the entire concrete area. Get into all the corners and along the edges.
- Use a concrete degreaser if there are any oil or grease stains. Follow the product’s instructions carefully. Rinse the area completely afterward.
- Scrape off any old glue, paint, or other debris. A stiff-bristled brush or a floor scraper can help. Make sure to get everything removed.
Checking for Moisture
Moisture is the enemy of hardwood floors. Concrete slabs, especially those on or below ground level, can hold moisture. Too much moisture can cause hardwood to swell, warp, or even rot over time.
You need to test your concrete for moisture content.
- The standard test is the calcium chloride test. This involves placing special cups filled with calcium chloride pellets on the concrete. These pellets absorb moisture from the air. After 24-72 hours, you weigh the pellets to see how much moisture they’ve absorbed.
- Another method is using an electronic moisture meter. These devices can give you a quick reading of the moisture level in the concrete. Always follow the manufacturer’s instructions for the meter.
- Results from these tests will tell you if you need a vapor barrier. A vapor barrier is a plastic sheeting that stops moisture from migrating from the concrete into your hardwood. Most manufacturers recommend a vapor barrier when installing over concrete.
For example, a home built on a basement slab might have higher moisture readings than a home with a crawl space. If your test shows readings above 5 pounds per 1000 square feet per 24 hours for a calcium chloride test, or above 75% relative humidity with in-situ probes, a vapor barrier is essential.
Ensuring the Concrete is Level
Hardwood floors need a flat surface to lay down smoothly. High spots or low spots in the concrete can cause your new floors to creak or even crack. It’s important to make sure the concrete is as level as possible.
- Use a long level or a straight edge to check for unevenness. Place it across the concrete in various directions.
- For small low spots, you can use a concrete leveling compound. This is a self-leveling material that you pour into the low areas. It spreads out and dries to create a flat surface.
- For high spots, you might need to grind them down. A concrete grinder with a diamond wheel can remove small high areas. Be careful not to create new low spots.
One common scenario is a garage slab that slopes slightly towards a garage door. If this is the area where you’re Installing Hardwood Over Concrete: A Complete Guide, you’ll need to level it perfectly for the hardwood to look its best.

Choosing the Right Hardwood and Installation Method
Not all hardwood is created equal, and the way you install it over concrete matters a lot. The type of hardwood and the method you choose depend on your specific situation and the look you want. This section helps you pick the best options for your project.
Solid vs. Engineered Hardwood
When Installing Hardwood Over Concrete: A Complete Guide, you have two main types of hardwood to consider: solid and engineered. Each has its own pros and cons, especially when going over concrete.
- Solid hardwood is made from a single piece of wood. It’s beautiful and can be sanded and refinished many times. However, solid hardwood is very sensitive to moisture and temperature changes. It is generally not recommended for installation directly over concrete, especially in basements or areas prone to humidity.
- Engineered hardwood has a core of plywood or high-density fiberboard with a thin layer of real hardwood veneer on top. This construction makes it more stable and less prone to expanding or contracting with humidity changes. Engineered hardwood is the preferred choice for Installing Hardwood Over Concrete: A Complete Guide because of its stability.
An example: If you’re Installing Hardwood Over Concrete: A Complete Guide in a ground-level living room, engineered hardwood is usually the safer bet than solid hardwood. Engineered planks are often designed to be glued down or floated over concrete.
Installation Methods: Glue-Down vs. Floating
Once you’ve chosen engineered hardwood, you need to decide how to attach it to the concrete. The two main methods for Installing Hardwood Over Concrete: A Complete Guide are glue-down and floating.
- Glue-down installation means using a special adhesive to bond the hardwood planks directly to the concrete subfloor. This method results in a very solid feel underfoot and helps to prevent the planks from moving. It’s often recommended for engineered hardwood as it provides excellent stability.
- A floating floor is not attached to the subfloor at all. Instead, the planks are locked or glued together at the edges. The entire floor then “floats” over the concrete, often with an underlayment or vapor barrier beneath it. This method can be easier and quicker for DIYers.
When Installing Hardwood Over Concrete: A Complete Guide, always check the hardwood manufacturer’s recommendations. They will specify which installation methods are suitable for their products and for concrete subfloors. Using the wrong method can void the warranty.
Underlayment and Vapor Barriers
Regardless of whether you glue down or float, an underlayment and vapor barrier are crucial. The vapor barrier protects the wood from moisture coming up from the concrete. The underlayment provides cushioning, sound dampening, and can help smooth out minor imperfections in the subfloor.
- A vapor barrier is typically a 6-mil polyethylene sheeting. It needs to be installed with all seams overlapped and taped securely to create a continuous barrier. Any holes or gaps can let moisture through.
- The underlayment sits on top of the vapor barrier. There are many types available, some of which combine both vapor barrier and cushioning properties. Choose one that is compatible with your hardwood flooring and installation method.
For instance, if you are Installing Hardwood Over Concrete: A Complete Guide in a high-traffic area like a hallway, a good quality underlayment can make a big difference in comfort and sound.
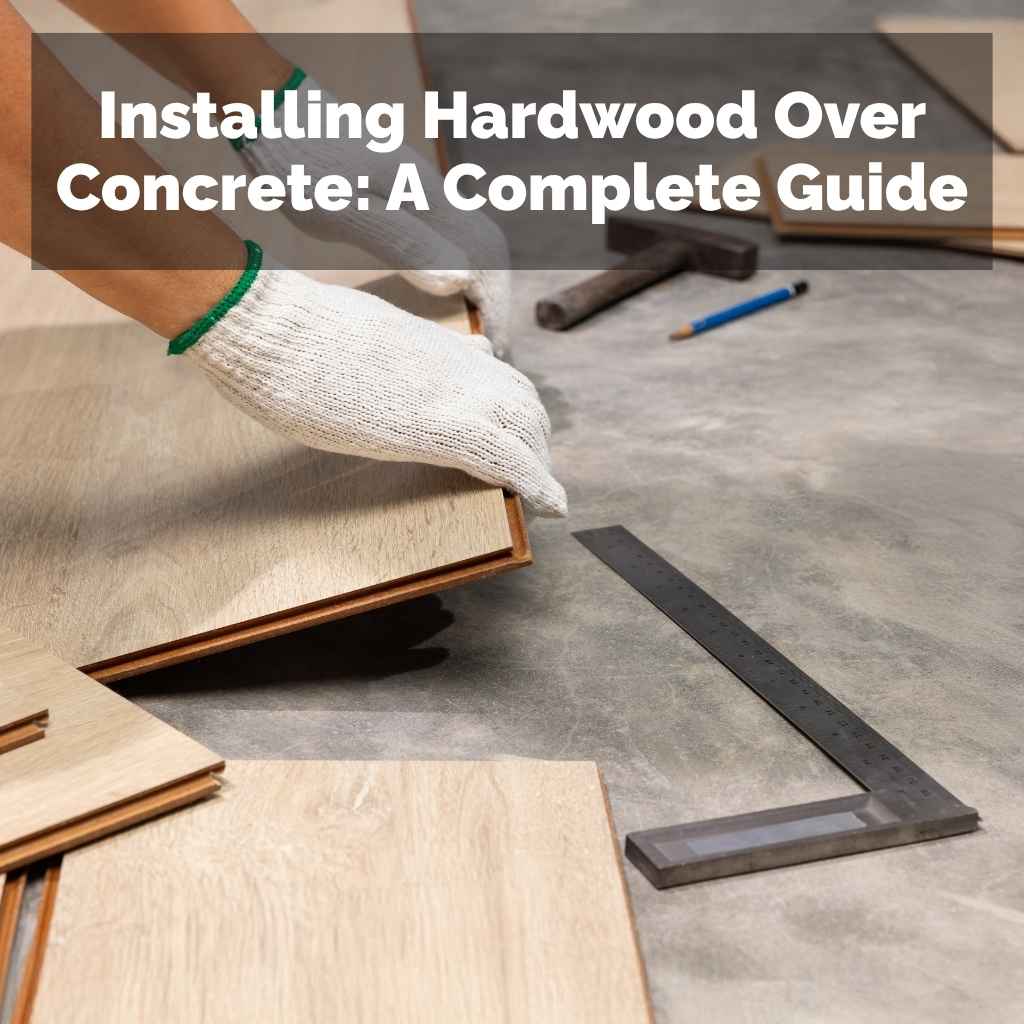
The Step-by-Step Installation Process
Now that you’ve prepared the subfloor and chosen your materials, it’s time for the actual Installing Hardwood Over Concrete: A Complete Guide. This process requires attention to detail and careful work. Follow these steps to achieve a beautiful, professional-looking floor.
Planning Your Layout
Before you lay down the first plank, plan how you want the floor to look. This is especially important for engineered hardwood. A good layout can make a small room feel larger and can hide imperfections.
- Determine the direction of the planks. Most people run planks parallel to the longest wall in the room. This can make the room appear more spacious.
- Find the center of the room and mark a chalk line. This line will be your guide for laying the first row of planks. Ensure the first row will be a full plank width to avoid a very narrow strip at the opposite wall.
- Account for doorways and transitions. You’ll want the planks to run consistently through openings to create a seamless look.
When Installing Hardwood Over Concrete: A Complete Guide, consider the natural light in the room. Planks laid perpendicular to the main light source can highlight imperfections.
Installing the First Row
The first row is critical because it sets the stage for the entire floor. It needs to be perfectly straight and along your chalk line.
- Start by laying the first plank along your chalk line, with the tongue side facing the wall. You may need to cut off the tongue on the side facing the wall for a cleaner fit against the wall. Leave a small expansion gap (usually 1/4 inch to 1/2 inch) between the plank and the wall. This gap is important to allow the wood to expand and contract.
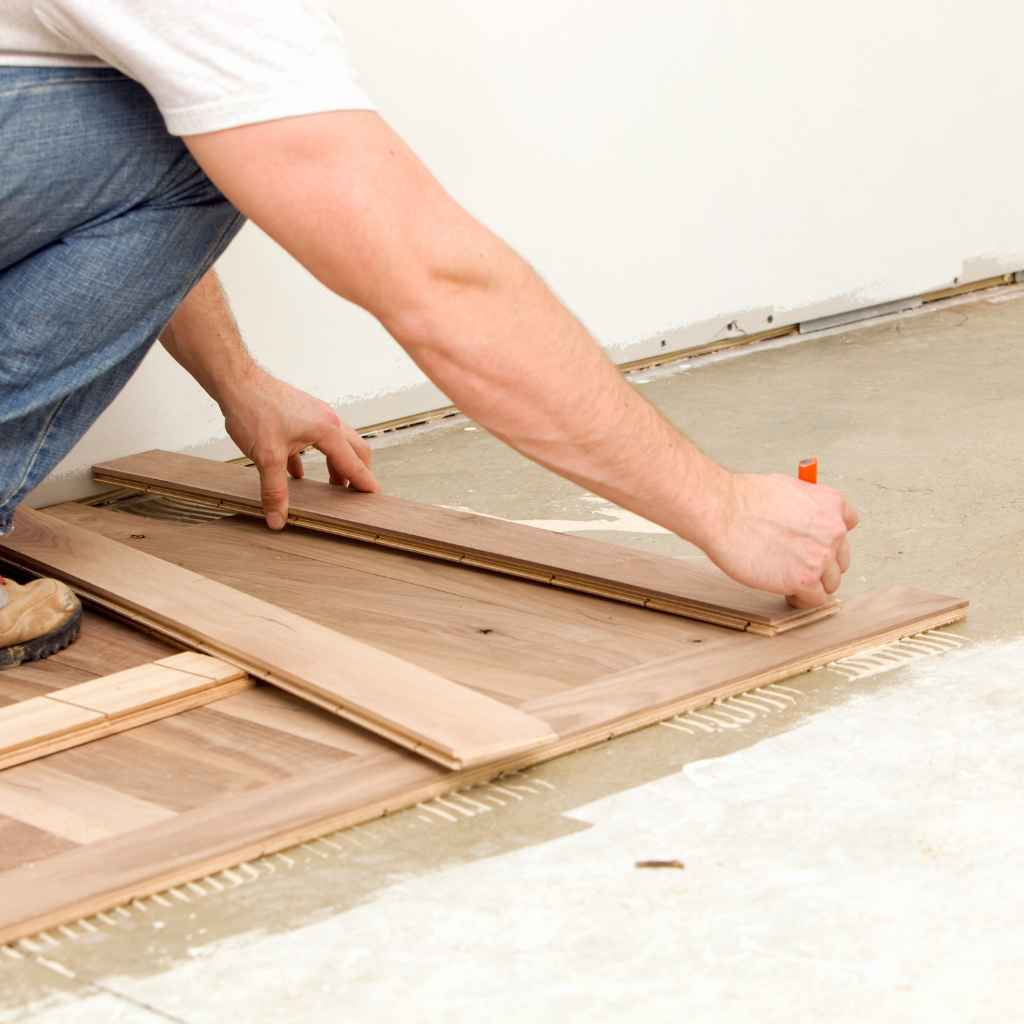
- For glue-down installations, apply the recommended adhesive to a small section of the subfloor at a time, following the manufacturer’s instructions for spread rate and working time. Then, lay the plank into the adhesive.
- For floating floors, connect the second plank to the first by angling its tongue into the groove of the first plank and pressing down. Continue adding planks until the first row is complete.
Use spacers to maintain the expansion gap along the walls. These are small blocks that fit between the plank and the wall to ensure consistent spacing.
Laying Subsequent Rows
As you move to subsequent rows, you’ll continue connecting planks and working across the room. Staggering the end joints of the planks is important for strength and appearance.
- For glue-down floors, apply adhesive to the subfloor for the next section and lay the planks, ensuring the end joints are staggered. A general rule of thumb is to stagger end joints by at least 6 inches.
- For floating floors, connect the planks end-to-end and then connect the new row to the previously laid row by angling the long edge tongue into the groove and lowering it. You might need a tapping block and a rubber mallet to gently tap the planks into place and ensure a tight fit.
- Periodically check your work with a level to ensure rows are staying straight and planks are fitting snugly together.
A common mistake when Installing Hardwood Over Concrete: A Complete Guide is not staggering the joints enough. This can create a “step” effect that looks unnatural and can weaken the floor. Aim for random staggering.
Cutting and Fitting Around Obstacles
You’ll inevitably encounter obstacles like doorways, cabinets, and vents. Careful cutting is needed to make these areas look neat.
- Measure and mark your cuts precisely. For doorways, you may want to undercut the door casing so the plank can slide underneath, creating a clean transition.
- For vents or pipes, you’ll need to cut curved or irregular shapes. A jigsaw is useful for these more intricate cuts. Always measure twice and cut once.
- For glue-down installations, you might need to apply adhesive to the edges of the planks as well as the subfloor in tighter areas.
When Installing Hardwood Over Concrete: A Complete Guide, consider the aesthetic. Cutting around a vent can be tricky, but a well-fitted piece will look much better than a gap.
Finishing Touches and Transitions
Once the main floor is laid, you’ll need to address the edges and transitions to other flooring types.
- Install quarter-round or base shoe molding along the walls to cover the expansion gap. This molding is attached to the baseboard, not the floor, so it doesn’t restrict movement.
- Use transition strips at doorways where the hardwood meets another type of flooring (like tile or carpet). These strips ensure a smooth and safe passage between floor types.
- Clean up any excess adhesive immediately according to the product’s instructions.
The final look of your floor when Installing Hardwood Over Concrete: A Complete Guide really comes down to these finishing touches. A clean transition and well-applied molding make a huge difference.
Common Challenges and How to Solve Them
Even with the best preparation, you might run into a few snags when Installing Hardwood Over Concrete: A Complete Guide. Knowing these common problems and their solutions can save you a lot of frustration.
Dealing with Damp Concrete
As mentioned, moisture is a big concern. If your initial tests show high moisture, you need to address it before installing.
- Ensure proper drainage around your home’s foundation to prevent water from seeping into the slab.
- Apply a high-quality concrete sealer or a specialized moisture barrier system. These are designed to block moisture from passing through the concrete.
- Consider installing a subfloor system designed for concrete. These systems create an air gap between the concrete and the hardwood, allowing for ventilation and moisture management.
If you are Installing Hardwood Over Concrete: A Complete Guide in a basement, the risk of dampness is higher. Investing in a robust moisture solution is key.
Uneven Subfloor Issues
Even after attempting to level the concrete, some minor dips or humps might remain.
- For glue-down applications, a thicker adhesive can sometimes compensate for minor unevenness. However, this is not a substitute for proper leveling.
- Some underlayments are designed to help bridge small gaps or smooth out minor imperfections. Always choose an underlayment that is rated for use with hardwood over concrete.
- If the unevenness is significant, it’s best to go back and properly level the concrete. Trying to cover up major issues will likely lead to problems down the road.
When Installing Hardwood Over Concrete: A Complete Guide, remember that a perfectly flat subfloor is the foundation for a perfect floor.
Gaps Between Planks
Gaps can appear if planks aren’t seated properly or if they’re not being tapped into place correctly.
- For floating floors, use a tapping block and rubber mallet to gently tap planks together, ensuring a tight seam. Work your way along the row, tapping each plank into the next.
- Ensure you are maintaining the correct expansion gap around the perimeter of the room. If the floor is too tight against the walls, the entire floor can push itself apart.
- Check for debris or foreign material in the grooves or on the tongues of the planks. This can prevent a snug fit.
A common issue during Installing Hardwood Over Concrete: A Complete Guide is impatience. Rushing the process often leads to gaps.
Squeaking Floors
Squeaks often happen when the hardwood isn’t securely attached to the subfloor, or if it’s rubbing against something.
- In glue-down installations, ensure you’re using the correct type and amount of adhesive. If the glue hasn’t fully cured, or if there are missed spots, planks can move.
- For floating floors, ensure the underlayment is properly installed and flat. A shifting underlayment can cause the floor to move and squeak.
- Make sure there’s adequate space around pipes or other fixed objects that pass through the floor.
When Installing Hardwood Over Concrete: A Complete Guide, soundproofing underlayment can also help reduce the likelihood of squeaks and improve the overall acoustics of your room.
Comparing Installation Methods
Choosing the right installation method is a key part of Installing Hardwood Over Concrete: A Complete Guide. Here’s a look at the pros and cons of gluing down versus floating.
| Feature | Glue-Down Installation | Floating Installation |
|---|---|---|
| Stability | Very high; planks are directly adhered to the subfloor. | Good; planks are locked together, providing stability. |
| Feel Underfoot | Solid and secure; feels like a permanent part of the house. | Slightly softer; can offer more comfort. |
| DIY Friendliness | More challenging; requires precise adhesive application. | Generally easier; faster to install for beginners. |
| Cost | Can be slightly more expensive due to adhesive and labor. | Often more cost-effective for DIYers. |
| Moisture Resistance | Depends on adhesive; can offer good protection if done correctly. | Relies on underlayment and vapor barrier; good protection. |
| Repairability | Can be difficult to replace individual planks. | Easier to replace individual planks if needed. |
When Installing Hardwood Over Concrete: A Complete Guide, consider your comfort level with tools and your budget. Both methods can yield excellent results.
Frequently Asked Questions
Question: Can I install solid hardwood directly over concrete?
Answer: It is generally not recommended to install solid hardwood directly over concrete because solid wood is very sensitive to moisture and temperature fluctuations that can occur in concrete. Engineered hardwood is the preferred choice for concrete subfloors.
Question: Do I need a vapor barrier when installing hardwood over concrete?
Answer: Yes, a vapor barrier is almost always recommended and often required when Installing Hardwood Over Concrete: A Complete Guide to protect the flooring from moisture migrating from the concrete slab.
Question: How long does it take to install hardwood over concrete?
Answer: The time can vary widely depending on the size of the room, the installation method, and your experience level. A moderately sized room might take 2-3 days for preparation and installation.
Question: What is the best type of hardwood for a basement?
Answer: Engineered hardwood is the best choice for basements because it is more stable and resistant to moisture and humidity changes than solid hardwood. Always ensure a proper vapor barrier is used.
Question: Can I install hardwood over painted concrete?
Answer: If the paint is well adhered and the concrete is clean, it might be possible. However, it’s best to test the adhesion of the paint. Often, it’s recommended to remove the paint for a better bond, especially if you are glue-down installing.
Final Thoughts
Installing Hardwood Over Concrete: A Complete Guide is achievable for most homeowners. By carefully preparing your concrete subfloor, selecting the right engineered hardwood, and using the appropriate installation method, you can create a beautiful and durable floor. Pay close attention to moisture testing and leveling the subfloor for the best results.