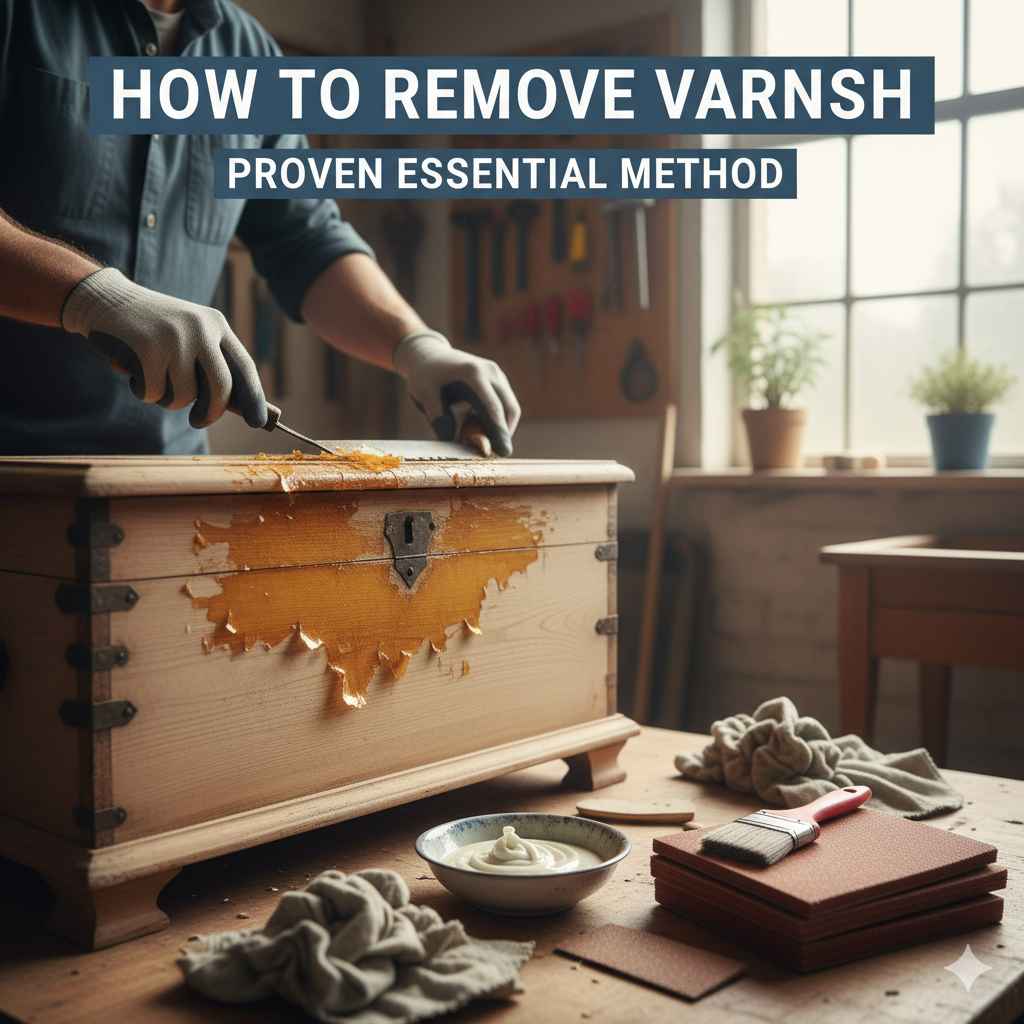
How To Remove Varnish: Proven Essential Method
Ready to refresh your wood surfaces? This guide shows you the essential, proven method for removing old varnish easily and safely, preparing your wood for a beautiful new finish. We’ll walk you through each simple step!
So, you’ve got a wooden treasure, maybe a table, a chair, or even a cabinet, but its varnish is looking tired, chipped, or just not your style anymore. Don’t worry! Giving old wood a fresh start is totally achievable, and I’m here to show you the best way to remove that old varnish without a fuss. It might seem like a big job, but with the right steps and tools, you’ll be amazed at how simple it can be. We’ll cover everything you need to know, from picking the right remover to safely cleaning up. Get ready to see your wood pieces look brand new!
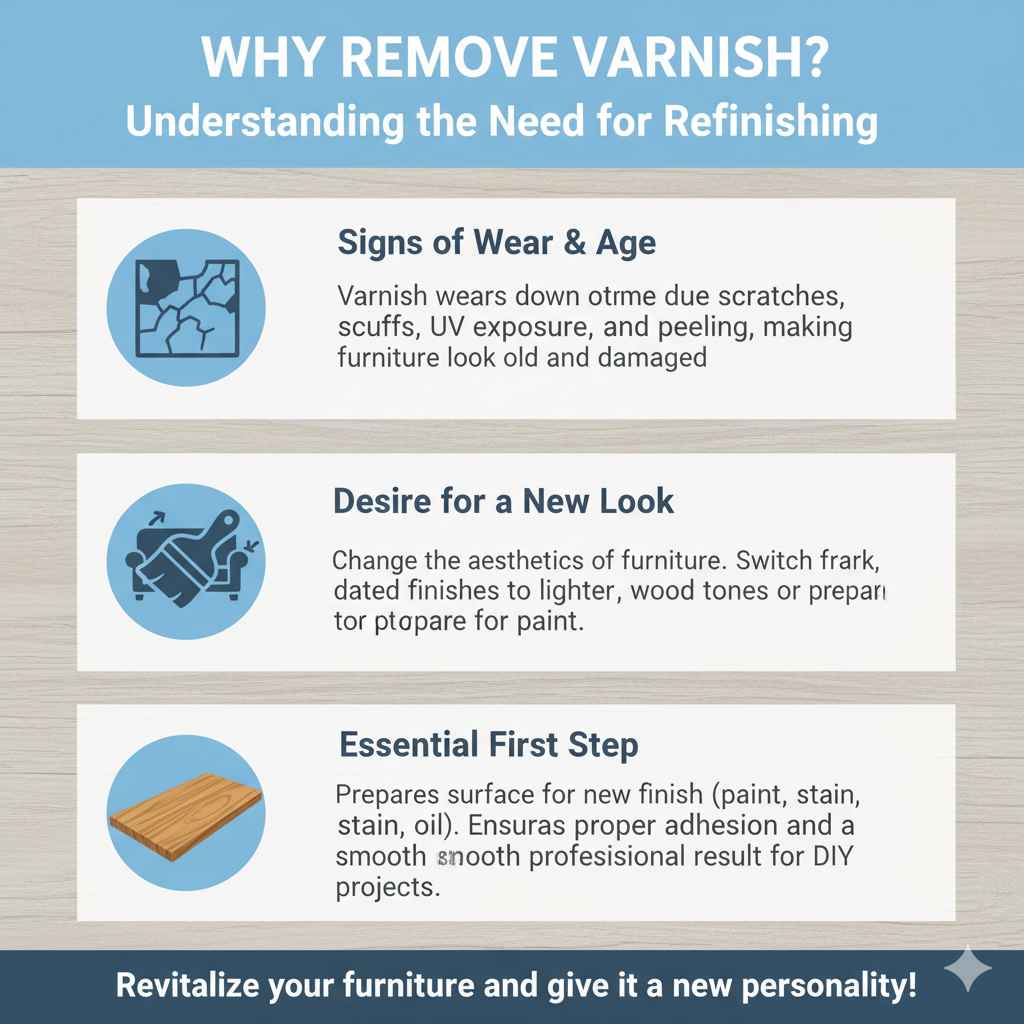
Why Remove Varnish? Understanding the Need for Refinishing
Sometimes, varnish just doesn’t last forever. Over time, it can wear down, get scuffed, or start peeling. Other times, you might simply want to change the look of your furniture. Maybe you’ve inherited a piece with a dark, dated varnish and you’d prefer a lighter, more natural wood tone. Whatever the reason, removing the old varnish is often the first, and most important, step to bringing that piece back to life or giving it a completely new personality. This process ensures a smooth, even surface for a fresh coat of paint, stain, or new protective finish, making your DIY project a success.
Essential Tools and Materials for Varnish Removal
Before we dive into the how-to, let’s gather our supplies. Having everything ready makes the job much smoother and safer.
Safety Gear: This is non-negotiable!
Chemical-resistant gloves: Protect your skin from the remover. Nitrile or neoprene are good choices.
Safety glasses or goggles: Essential to keep splashes out of your eyes.
Respirator mask: Look for one rated for organic vapors, especially if you’re working indoors or with strong chemical strippers.
Old clothing or apron: Varnish removers can be harsh and might stain.
Varnish Remover:
Chemical Stripper: These are potent and work quickly but require good ventilation and careful handling. Gel or paste forms are easier to control.
Scraping Tools:
Putty knife (plastic or metal): A must-have for scraping away softened varnish. Have a few sizes handy.
Card scraper: Excellent for a final smooth scrape.
Old credit card or plastic scraper: Good for intricate areas or when you want to be gentle.
Abrasive Materials:
Steel wool (grades #0000 or #000): For wiping away residue and lightly smoothing.
Sandpaper (various grits, e.g., 100, 150, 220): For sanding after the bulk of the varnish is removed.
Cleaning Supplies:
Mineral spirits or denatured alcohol: To neutralize the stripper and clean the wood surface.
Clean rags (lint-free cotton rags are best): For applying cleaners and wiping away residue.
Stiff brush or old toothbrush: To get into grooves and details.
Waste box or container: For scraping off the old varnish. A cardboard box lined with newspaper works well.
Optional:
Heat gun: Can be used to soften varnish before scraping, especially on flat surfaces. Be cautious not to scorch the wood.
Paint tray: Useful for holding stripper if you’re using a brush-on type.
Drop cloths or old newspaper: To protect your work area from drips and mess.
The Proven Essential Method: Step-by-Step Varnish Removal
This method focuses on using a chemical stripper, which is generally the most effective for stubborn or thick varnish layers. We’ll go through each step clearly.
Step 1: Prepare Your Workspace and Yourself
Safety first! Always work in a well-ventilated area. Open windows and doors. If you can’t get enough fresh air, consider working outdoors. Lay down drop cloths to protect your floor or surrounding areas. Make sure your workspace is clear of any flammable materials.
Put on your safety gear: gloves, eye protection, and your respirator mask. This shields you from fumes and direct contact with the stripper. Wear old clothes you don’t mind getting stained.
Step 2: Apply the Varnish Remover
Choose a quality chemical varnish remover. Gels or pastes are often easier to control and stay put on vertical surfaces.
Read the product instructions carefully. Different removers have slightly different application methods.
Apply a generous, even layer of the stripper to a small section of the wood. Don’t brush it out too thin. You want enough to soften the varnish effectively.
Use a natural bristle brush for application. Synthetic bristles can sometimes be dissolved by the stripper. Avoid getting stripper on any hardware like hinges or knobs unless you plan to remove them.
Step 3: Let the Remover Do the Work
This is where patience comes in! The stripper needs time to break down the varnish.
Allow the stripper to dwell for the time recommended on the product label. This can range from 15 minutes to over an hour, depending on the product and the thickness of the varnish.
Watch for the varnish to soften and bubble. This is a sign that the stripper is working.
Don’t let the stripper dry out. If it starts to dry, you may need to apply a bit more.
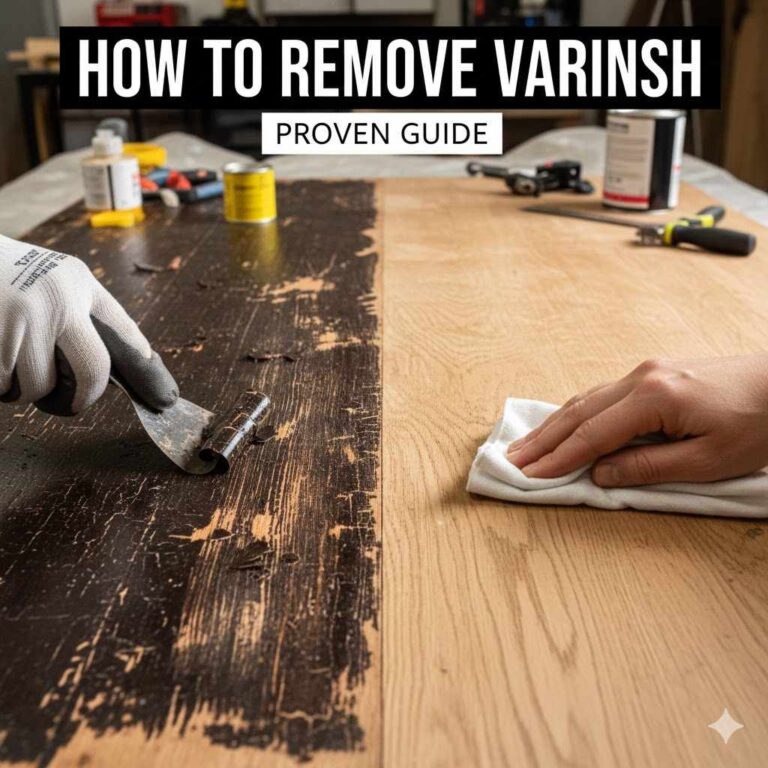
Step 4: Scrape Away the Softened Varnish
Once the varnish looks soft and wrinkled, it’s time to scrape.
Start with your putty knife. Hold it at a shallow angle relative to the wood surface.
Gently scrape in the direction of the wood grain. Work in small sections and try to lift off the dissolved varnish in large pieces.
Be careful not to gouge the wood. If you’re using a metal putty knife, a duller edge or even a plastic one might be safer to avoid damaging the wood.
Scrape the residue into your waste container.
For intricate areas like carvings or edges, use a stiff brush or an old toothbrush to scrub away loosened varnish.
Step 5: Repeat on Remaining Sections
Varnish removal is often a process done in stages.
Move to the next section of the wood surface and repeat steps 2 through 4.
Continue working until all visible layers of varnish are removed from the entire piece.
Don’t worry about minor traces of old finish at this stage. Sanding will take care of those.
Step 6: Clean and Neutralize the Surface
After scraping, there will be leftover stripper residue. Neutralizing the wood is crucial to stop the stripping action and prepare it for the next step.
Follow the varnish remover manufacturer’s instructions for cleanup. This usually involves wiping the surface down with a specific solvent. Mineral spirits or denatured alcohol are commonly recommended.
Dip a clean rag into the solvent and wipe down the entire surface. You’ll see more gunk come off.
Use clean sections of the rag as you go to avoid spreading the residue around. Change rags frequently.
Allow the wood to dry completely. Drying time can vary, but give it at least a few hours, or overnight if possible.
Step 7: Sand for a Smooth Finish
Sanding is key to achieving a professional-looking result.
Start with a medium-grit sandpaper (like 100 or 150 grit) to remove any stubborn bits of varnish and smooth out the surface. Sand in the direction of the wood grain.
Progress to finer grits (like 180 or 220 grit). This removes the scratches left by the coarser sandpaper and creates a smooth surface.
For detailed areas, you can wrap sandpaper around a pencil or use a sanding sponge.
Wipe away all dust between grits using a tack cloth or a slightly damp rag. This is critical for a clean finish.
Step 8: Final Inspection
Give your newly stripped wood a thorough look-over.
Check for any missed spots of varnish. If you find any, you might need to reapply a bit of stripper in that area or carefully sand it away.
Feel the surface. It should feel smooth and ready for a new finish.
Great job! You’ve successfully removed the old varnish and are ready for the next stage of refinishing.
Alternative Methods: When to Consider Them
While chemical stripping is often the go-to, other methods can work depending on the situation.
Heat Gun Method
This method uses heat to soften the varnish, making it easier to scrape. It’s best for flat surfaces and can be effective on thick layers.
Pros:
Less messy than some chemical strippers.
Can work quickly on some finishes.
Cons:
Risk of scorching the wood if not used carefully.
Fumes can still be an issue, requiring ventilation.
Not ideal for intricate carvings or delicate veneers.
Requires a specialized tool (heat gun).
How it works:
Hold the heat gun a few inches from the surface and move it constantly. As the varnish softens and bubbles, immediately scrape it away with a putty knife. Always scrape in the direction of the grain.
Sanding Only Method
Sometimes, if the varnish is thin and intact, you might be able to go straight to sanding.
Pros:
Avoids chemicals entirely.
Can be quick for simple jobs.
Cons:
Can clog sandpaper quickly if the varnish is thick or gummy.
May push varnish into the wood grain, leading to a blotchy finish if stained later.
Requires thorough sanding with progressively finer grits.
How it works:
Start with a medium-grit sandpaper (around 100-120 grit) and a power sander or by hand, sanding in the direction of the grain. Gradually move to 150, then 220 grit, ensuring all varnish is removed and the surface is smooth. Always clean dust between grits. For more on sanding techniques, check out resources on proper wood sanding practices from institutions like The Forest Products Laboratory, part of the U.S. Forest Service.
A Note on Older Finishes: Be aware that very old furniture might have finishes containing lead. If you suspect your piece is from before 1978, take extra precautions. Test for lead paint before you start and consider hiring a professional if lead is present. The Environmental Protection Agency (EPA) provides extensive guidance on safely dealing with lead-based paint.
Pros and Cons Table: Choosing Your Method
To help you decide, here’s a quick comparison of the main methods.
| Method | Pros | Cons | Best For |
|---|---|---|---|
| Chemical Stripper | Effective on thick or stubborn varnish; works on curves. | Requires safety gear and good ventilation; can be messy; residue requires careful cleanup. | Most situations, especially thick/chipped varnish, curved surfaces. |
| Heat Gun | Less messy than some chemicals; can be fast. | Risk of scorching wood; fumes; not ideal for detailed work; requires specialized tool. | Thick varnish on flat, stable surfaces. |
| Sanding Only | No chemicals; can be fast for thin finishes. | Can clog sandpaper; might push finish into grain; not effective on thick or damaged varnish. | Thin, intact varnish layers on simple pieces. |
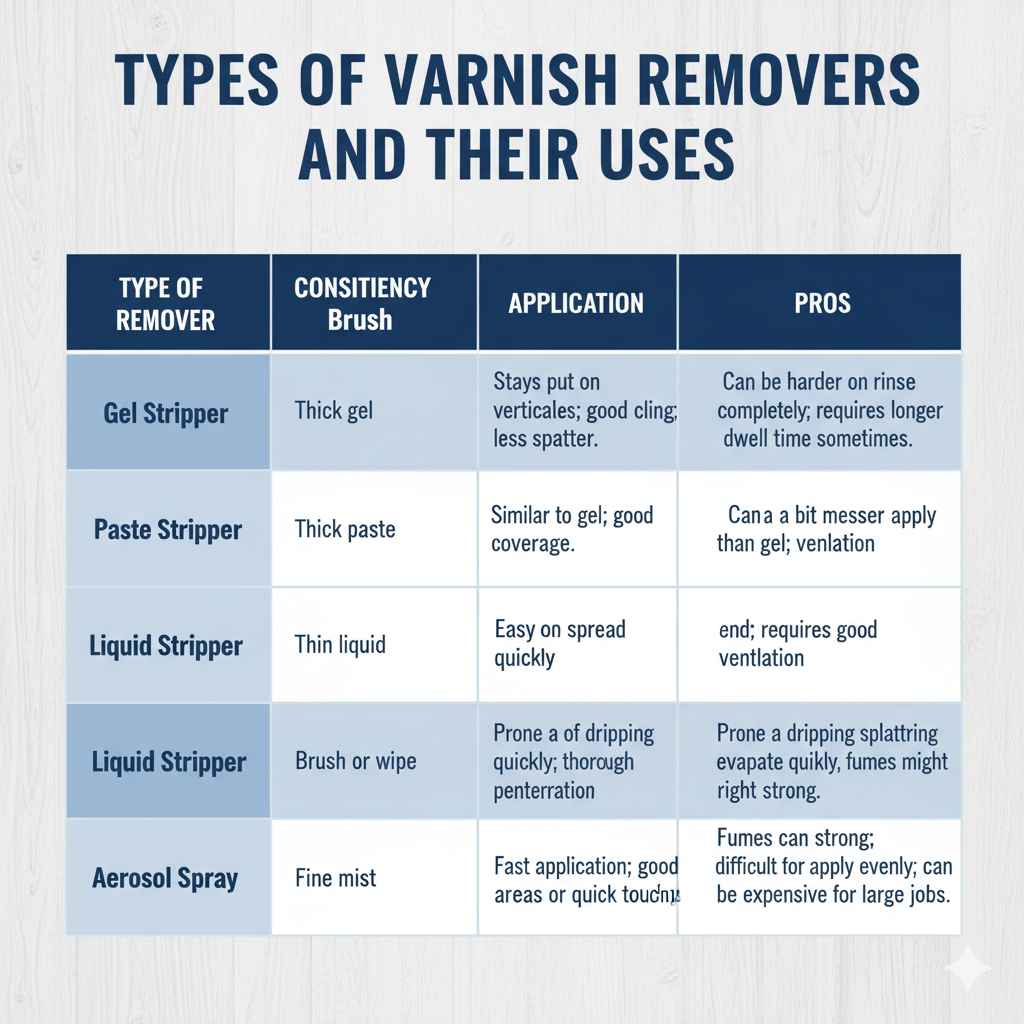
Table: Types of Varnish Removers and Their Uses
Different types of chemical removers offer varying advantages.
| Type of Remover | Consistency | Application | Pros | Cons |
|---|---|---|---|---|
| Gel Stripper | Thick gel | Brush | Stays put on vertical surfaces; good cling; less splatter. | Can be harder to rinse completely; requires longer dwell time sometimes. |
| Paste Stripper | Thick paste | Brush | Similar to gel; good coverage and cling. | Can be a bit messier to apply than gel; requires good ventilation. |
| Liquid Stripper | Thin liquid | Brush or wipe | Easy to spread quickly; thorough penetration. | Prone to dripping and splattering; can evaporate quickly; fumes might be strong. |
| Aerosol Spray | Fine mist | Spray can | Fast application; good for small areas or quick touch-ups. | Fumes can be strong; difficult to apply evenly; can be expensive for large jobs. |
FAQs About Removing Varnish
Q1: What is the easiest way to remove varnish?
The easiest way usually involves a good quality chemical varnish stripper. Apply it, let it work, and then scrape off the gooey mess. Always follow safety instructions!
Q2: Can I remove varnish with just sandpaper?
Yes, you can, but it’s usually only effective for very thin or damaged varnish coats. For thicker or tougher varnish, it can take a lot of time and effort, clog your sandpaper quickly, and might not remove it all cleanly.
Q3: How do I remove varnish from detailed or carved areas?
For detailed areas, use a stiff brush (like a brass brush or stiff nylon brush) or an old toothbrush along with the stripper. After scraping the bulk off flat areas, use these tools to scrub the softened varnish out of carvings and grooves.
Q4: What should I use to clean the wood after using stripper?
Most varnish removers recommend cleaning with mineral spirits or denatured alcohol. Always check the product label for specific instructions. This step neutralizes the stripper and removes residue.
Q5: How long does it take to remove varnish?
The time can vary a lot. It depends on the type of stripper, how thick the varnish is, and how old it is. Expect to spend anywhere from 30 minutes to several hours per piece, not including drying and sanding time.
Q6: My wood looks dull and rough after stripper. What’s wrong?
It’s likely not completely clean or it needs sanding. After stripping and cleaning, it’s normal for the wood to look a bit rough before you sand it smooth. Make sure you’ve removed all stripper residue and then proceed with fine-grit sanding.
Q7: Is it safe to remove varnish indoors?
You can, but only if you have excellent ventilation. Open all windows and doors. Wear a respirator mask rated for organic vapors. If ventilation is poor, it’s much safer to work outdoors or in a garage with the door open.
Conclusion: Your Refinishing Journey Begins!
You’ve learned the proven, essential method for removing varnish, from gathering your safety gear to the final sanding. Tackling old varnish might seem daunting, but by following these clear, step-by-step instructions, you can confidently prepare your wood for a stunning new finish. Remember to prioritize safety, work methodically, and take your time. Each piece of wood you restore is a testament to your growing DIY skills and a chance to create something beautiful that will last for years to come. So, gather your supplies, prepare your space, and get ready to reveal the beauty hidden beneath that old varnish. Happy woodworking!