How to Sand Wood Flat
To sand wood flat, use a flat sanding block or a power sander. Always sand in the direction of the grain for the best finish.
Sanding wood flat is essential for achieving a smooth, even surface. Whether you’re preparing a tabletop or refinishing furniture, proper sanding techniques can make a significant difference in the final appearance. Start with coarse grit sandpaper to remove imperfections, then gradually transition to finer grits for a polished look.
Tools like sanding blocks and power sanders help maintain an even surface. Pay attention to the wood grain to avoid scratches. Mastering this skill not only enhances aesthetics but also prepares the wood for finishing treatments. With patience and the right techniques, you can achieve a professional-quality finish on any wood project.
Introduction To Sanding Wood
Sanding wood flat is essential for a smooth finish. A flat surface helps with better joints and looks nicer. Uneven wood can cause problems during painting or staining.
To achieve a flat surface, use the right tools. Here’s a list of tools you’ll need:
- Sanding block: Helps maintain even pressure.
- Orbital sander: Great for larger areas.
- Sandpaper: Use different grits for best results.
- Straightedge: Checks for flatness.
- Dust mask: Protects your lungs from dust.
Choosing The Right Sandpaper
Choosing the right sandpaper is essential for a smooth finish. Grit numbers indicate how rough or fine the sandpaper is. Lower numbers mean coarser grit, while higher numbers indicate finer grit.
Here are the common types of sandpaper:
| Grit Number | Use |
|---|---|
| 40-60 | Heavy sanding and removing old finishes |
| 80-120 | Initial sanding and shaping |
| 150-220 | Finishing and smoothing |
| 320+ | Final polishing and ultra-fine sanding |
Using the correct grit helps achieve the best results. Always start with a coarser grit and move to finer grits.

Preparing The Wood For Sanding
Start by cleaning the surface of the wood. Remove dust and dirt using a damp cloth. Let the wood dry completely before sanding. This helps prevent scratches.
Next, secure the wood in place. Use clamps to hold it firmly on a stable surface. This makes sanding easier and safer. Check that the wood does not move while you work.
Sanding Techniques For A Flawless Finish
Hand sanding helps achieve a smooth surface. Use fine-grit sandpaper for the best results. Start with a coarse grit to remove rough areas. Move to a finer grit for a polished finish. Always sand in the direction of the grain to avoid scratches.
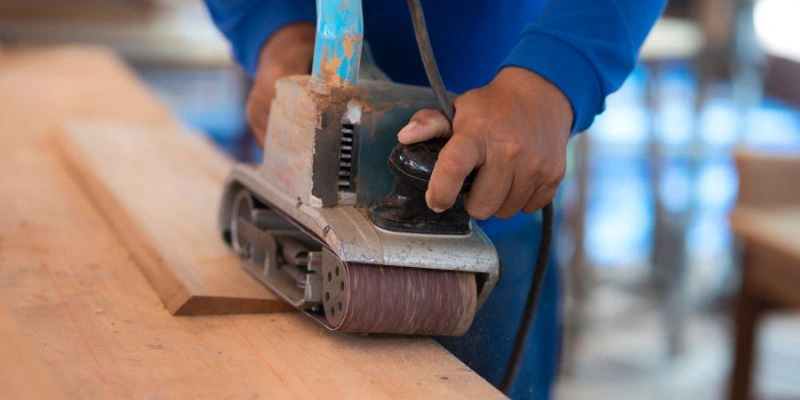
For power sanding, select the right tool. Orbital sanders are great for large areas. Detail sanders work well for tight spots. Always wear safety gear like masks and goggles. Keep the sander moving to prevent grooves. Check the surface often for smoothness.
Working With The Grain
Working with the grain is essential for achieving a smooth finish. Sanding against the grain can cause scratches. These scratches will be visible after applying any finish.
Understanding the wood’s grain helps in selecting the right sanding technique. Always start with a coarser grit and progress to finer grits.
Using the right tools makes a big difference. A sanding block or an orbital sander can help. Keep the sander flat to avoid uneven surfaces.
Regularly check your progress. Wipe away dust to see the wood’s surface clearly. This ensures you do not miss any spots.
Dealing With Common Sanding Challenges
Over-sanding can ruin your wood project. Focus on smooth, even strokes. Use a finer grit paper to avoid removing too much material. Check the surface often to ensure it stays flat.
For uneven areas, start with coarse sandpaper. Sand down high spots carefully. Gradually switch to finer grit for a smooth finish. Always sand in the direction of the grain. This helps to hide imperfections.
Take your time during sanding. Rushing can lead to mistakes. Using a sanding block can help maintain even pressure. A flat surface is key for great results.
Finishing Touches After Sanding
After sanding, the wood surface needs a good finish. Applying a wood finish protects the surface and enhances its beauty. Choose from options like stains, varnishes, or oils. Each finish has its unique look and feel.
Before applying any finish, ensure the surface is clean and smooth. Dust can ruin the final look. Use a damp cloth to wipe away any debris. Allow the wood to dry completely.
Apply the finish with a brush or cloth. Follow the grain of the wood for the best results. Let each coat dry before adding more. This helps create a beautiful, lasting finish.
Maintaining the surface is crucial for longevity. Regularly clean with a soft cloth. Avoid harsh chemicals to keep the wood safe.
Safety Tips And Best Practices
Always wear safety goggles to protect your eyes from dust. A dust mask helps filter harmful particles. Ear protection is essential to guard against loud noises.
Wear gloves to protect your hands from splinters and rough surfaces. Long sleeves can also shield your arms during sanding. Make sure to work in a well-ventilated area to avoid inhaling dust.
| Do’s | Don’ts |
|---|---|
| Keep your workspace clean. | Don’t ignore safety gear. |
| Use the right sandpaper grit. | Don’t rush the sanding process. |
| Check for loose objects. | Don’t sand wet wood. |
Frequently Asked Questions
How Do I Prepare Wood For Sanding?
Preparing wood for sanding involves cleaning the surface first. Remove any dust, dirt, or old finishes. Use a damp cloth to wipe it down. Ensure the wood is dry before sanding. This step helps achieve a smoother finish and prevents clogging the sandpaper.
What Grit Sandpaper Should I Use First?
Start with a coarse grit sandpaper, such as 80 or 100. This helps remove any rough spots or imperfections. Gradually progress to finer grits, like 120 or 220. This process will result in a smooth and even surface, perfect for finishing.
How Do I Know When To Change Sandpaper?
Change sandpaper when it feels dull or clogged. A good indication is when it stops cutting effectively. Inspect the sandpaper regularly during your project. Fresh sandpaper enhances the efficiency of your work and ensures a better finish.
Can I Sand Wood By Hand?
Yes, sanding wood by hand is entirely possible. It allows for more control, especially in detailed areas. Use a sanding block for better grip and even pressure. This technique is ideal for small projects or intricate designs.
Conclusion
Sanding wood flat is an essential skill for any DIY enthusiast. Mastering the techniques ensures a smooth finish and enhances your projects. Remember to choose the right tools and grit levels for the best results. With practice, you’ll achieve professional-looking surfaces that elevate your woodworking creations.
Happy sanding!