How to Sharpen a Wood Scraper: The Burnishing Method Explained
A wood scraper isn’t sharpened like a chisel or plane iron. There’s no bevel to grind and no fixed angle to hit on a stone. Instead, the edge is jointed flat and square, then a hardened steel rod called a burnisher is drawn along that edge to roll a microscopic hook-shaped burr — and that burr, not a ground bevel, is the actual cutting edge that shaves fine curls off the wood.
This trips up a lot of beginners, because every other edge tool in the shop is sharpened by grinding a bevel. Try that on a scraper and you’ll end up with an edge that scratches instead of shaves, no matter how fine the stone. Below is the real two-step process — jointing, then burnishing — along with the mistakes that cause a scraper to stop cutting within a few strokes.
Why You Can’t Sharpen a Scraper Like a Chisel
Best Burnisher for Cabinet Scrapers
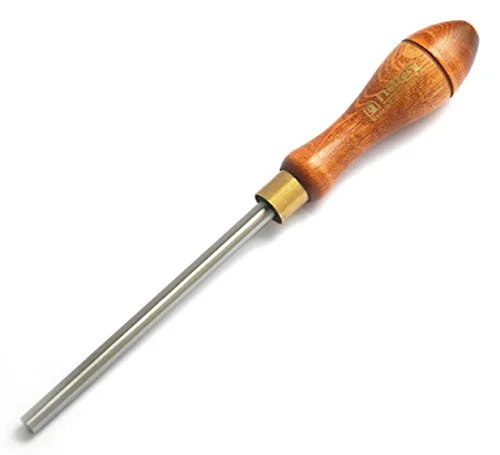 |
Narex Cabinet Scraper Burnisher – $33.67 A dedicated burnisher does the one job a screwdriver shank or drill bit can’t: its rod is hardened harder than the scraper steel, so it rolls a clean burr instead of just polishing the edge.
|
A chisel or plane iron cuts with a wedge-shaped bevel ground to a fine angle — the sharper that angle, the cleaner it slices. A scraper works on a completely different principle. Its edge is left square (90 degrees to the face), and the cutting happens on a tiny hook of steel bent over that square edge. Grind a bevel onto a scraper and you remove the exact geometry the burr needs to form on — which is why “what angle do I sharpen a scraper at” is the wrong question to be asking in the first place.
The Two-Step Real Technique: Joint, Then Burnish
Preparing a scraper is always two separate operations, done in order. First you joint the edge — filing it flat, straight, and exactly square to the faces. Second you burnish it — drawing the hardened rod along that square edge to roll a fine burr on one or both corners. Skip the jointing step and burnishing just polishes whatever unevenness was already there. Skip the burnishing step and a perfectly jointed edge still won’t cut — it’s dull.
Step 1: Joint the Edge Flat and Square
Clamp the scraper upright in a vise with a couple millimeters proud of the jaws. Using a single-cut mill file held dead level, draw it across the edge in one direction only — lifting on the return stroke, the same way you’d file a saw. Check the edge against a square every few strokes; the goal is a flat, 90-degree edge with no rounding at the corners and no old burr left from the last sharpening.
If the edge has nicks or is noticeably out of square, follow the file with a fine-grit stone (600-800 grit is plenty) to remove the file marks and true it up further. You’re not trying to polish it to a mirror — you’re trying to make it flat and square. That geometry is what the burnisher will roll into a burr in the next step.
Step 2: Draw the Burr With a Burnisher
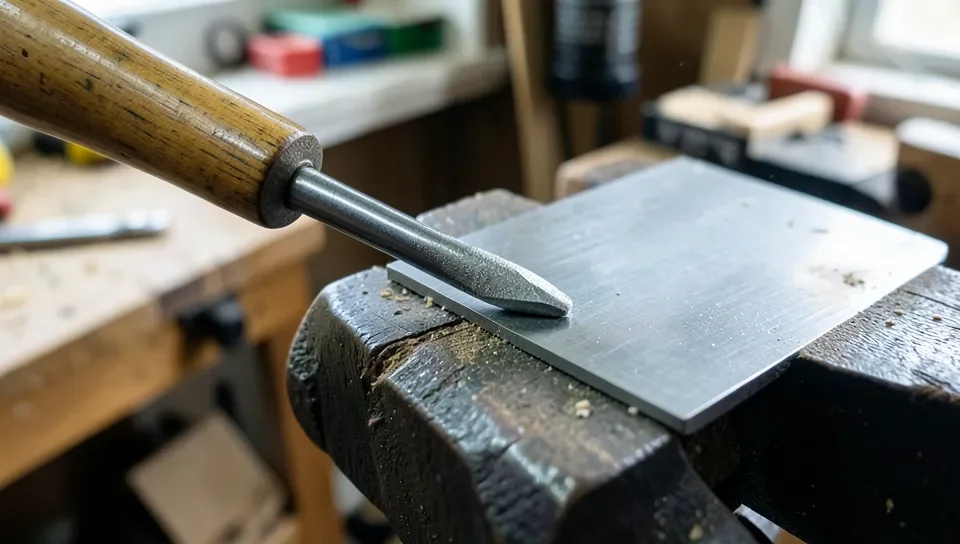
With the scraper still clamped in the vise, lay the burnisher flat against one face and make two or three firm passes along the full length of the edge, applying light downward pressure. This work-hardens the steel slightly and prepares it for the burr.
Now tip the burnisher up 5 to 10 degrees from the face and make several more passes along the edge, keeping that same low angle consistent from end to end. You’re not scrubbing back and forth — each pass runs the full length of the edge in one direction, and you should feel the steel start to “give” slightly as the burr forms. Do this on both corners of the same edge and you get a burr you can use on either push or pull strokes.
What Angle to Hold the Burnisher (and Why “Sharpening Angle” Is the Wrong Question)
The 5-to-10-degree figure isn’t a sharpening angle in the chisel-and-plane-iron sense — it’s how far you tip the burnisher off the face to roll the burr over, not an edge geometry you’re grinding toward. Too shallow (close to flat against the face) and you just polish the edge without rolling a hook. Too steep and you fold the burr over too far, which produces a coarse, aggressive shaving that tears rather than slices. Most woodworkers find their own sweet spot within that 5-to-10-degree window after a few tries, and it can vary slightly with the hardness of the specific scraper steel.
How to Tell the Burr Is Actually Cutting
Run a fingernail lightly across the edge from face to face — a properly burnished edge catches your nail with a distinct, tiny hook; a dull or missing burr feels smooth. The real test is on wood: flex the scraper into a slight bow with your thumbs, tilt it 60 to 70 degrees from the wood surface, and push or pull it across the grain. A working burr peels off thin, fine shavings and leaves dust in almost equal amounts to shavings if it’s dull, or nothing but fine curls and a polished surface if it’s sharp.
Re-Burnishing vs. Starting Over With a File
A burr dulls faster than most people expect — often after just a few minutes of steady use, since it’s a much finer, more fragile structure than a ground bevel. The good news is you usually don’t need to rejoint the edge every time. If the underlying edge is still flat and square, you can often just re-burnish: two or three fresh burnishing passes will roll a new burr right on top of the old geometry, and that takes under a minute.
Go back to filing only when re-burnishing stops producing a good edge, or when you can see or feel nicks, or after you’ve re-burnished the same edge several times and it’s started rounding over. As a rule of thumb, plan on one full joint-and-burnish cycle for every four or five re-burnishings.
Why Scrapers Handle Figured and Curly Grain Better Than a Hand Plane
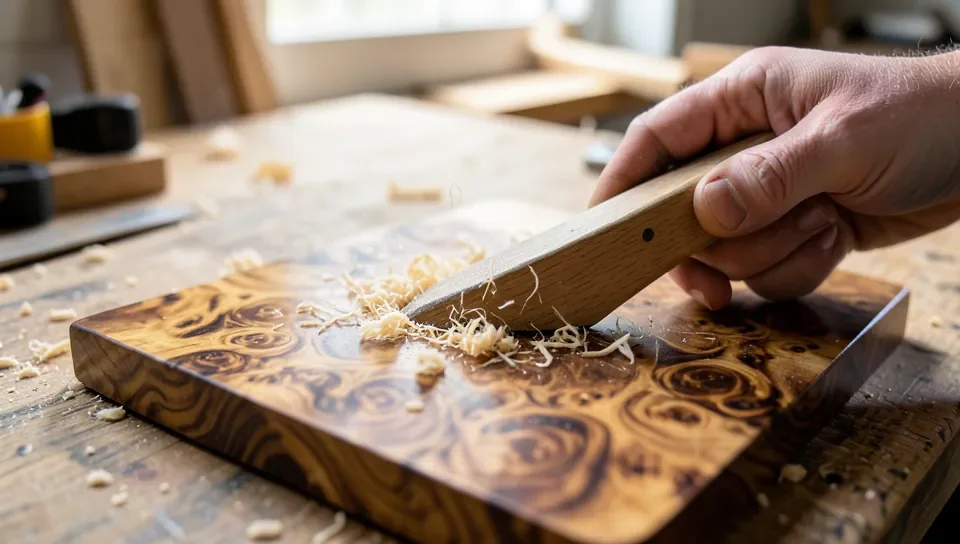
A hand plane iron shears into the wood at a low angle, which works fine on straight grain but tends to lift and tear the fibers wherever curly, birdseye, or highly figured grain keeps changing direction. A scraper’s steep attack angle and tiny burr take a much lighter, more controlled cut — closer to shaving than slicing — so it follows the grain direction changes without lifting fibers ahead of the edge. That’s why scrapers are a standard finishing step on figured hardwoods even in shops that plane everything else.
Scrapers are hand tools, not power tools — there’s no motor or blade guard involved. You flex the thin steel into a slight curve with your thumbs and either push or pull it across the surface, which is part of why they give you finer control on small, tricky areas than sanding or planing does.
Common Mistakes When Prepping a Scraper
Trying to grind a bevel. If you’ve tried sharpening a scraper on a stone the way you’d sharpen a chisel, the edge will scratch the wood instead of shaving it — there’s no burr for it to cut with. That’s the single most common reason a “sharpened” scraper doesn’t work.
Burnishing an edge that isn’t square. A rounded-over or out-of-square edge won’t hold a consistent burr no matter how carefully you burnish it. Always joint first.
Using a burnisher softer than the scraper steel. The rod has to be harder than the scraper (typically Rockwell 62 or higher) or it won’t roll a burr — it’ll just skid across the edge. A screwdriver shank or an ordinary nail is usually too soft; a dedicated burnisher is hardened specifically for this.
Frequently Asked Questions
Is a wood scraper sharpened the same way as a chisel?
No. A chisel is sharpened by grinding a bevel to a fine angle. A wood scraper is prepared by jointing the edge flat and square, then burnishing it with a hardened steel rod to roll a tiny hook-shaped burr — that burr, not a bevel, is what actually cuts.
What tools do I need to sharpen a wood scraper?
You need a single-cut mill file (or a fine sharpening stone) to joint the edge flat and square, a machinist’s square to check that edge, and a burnisher — a hardened steel rod, harder than the scraper itself — to roll the cutting burr. A vise to hold the scraper steady makes both steps much easier.
Can I use a file instead of a burnisher?
A file is for jointing the edge flat and square, not for raising the burr — a standard file isn’t hard enough to roll steel over without just cutting it. You still need a dedicated burnisher (or another tool hardened past the scraper’s own steel, like the shank of a hardened screwdriver) for the actual burnishing step.
What angle should I hold the burnisher at?
Start with the burnisher flat against the face for a couple of passes, then tip it up 5 to 10 degrees for the passes that actually roll the burr. This isn’t a fixed sharpening angle like on a chisel — it’s just how far you tip the rod to fold the burr over, and most woodworkers settle into their own preference within that range.
Conclusion
The reason so many scrapers end up in a drawer unused isn’t the tool — it’s that they were sharpened like a chisel and never actually got an edge. Joint the edge flat and square first, then burnish a proper burr onto it, and a $10 piece of steel will out-perform sandpaper on figured grain every time. Re-burnish often, rejoint only when you have to, and keep a hardened burnisher in the same drawer as the scraper so touching it up takes thirty seconds instead of a trip back to the file.
Sponsored / affiliate links. As an Amazon Associate I earn from qualifying purchases. I may earn additional commission from eligible campaigns.