How To Master Wood Carving: Expert Tips and Techniques
To start wood carving, gather the necessary tools and choose a design. Then, carve away the excess wood, refining the shape and adding details as desired.
Choosing The Right Tools
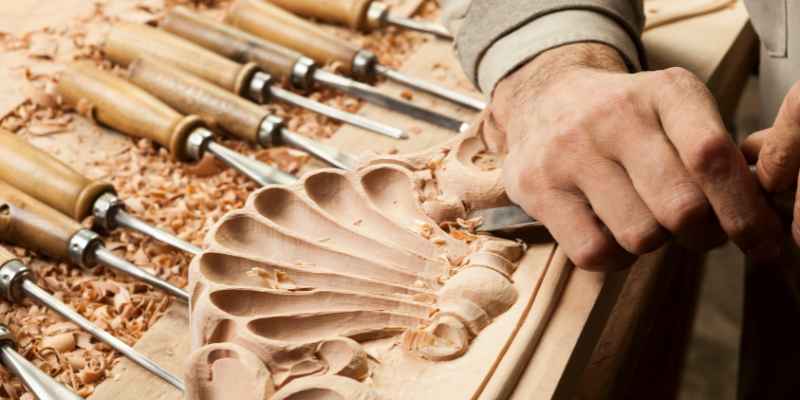
When it comes to wood carving, choosing the right tools is crucial for a successful and enjoyable carving experience. The right tools not only make your carving process easier but also ensure that you achieve the desired results. In this section, we will discuss the various types of carving tools available and provide tips for selecting the right tools for beginners.
Types Of Carving Tools
Wood carving involves the use of different types of tools, each serving a specific purpose. Familiarizing yourself with these tools is essential in order to make an informed decision.
| Types of Carving Tools | Description |
|---|---|
| 1. Carving Knives | A carving knife is a basic tool that is used for shaping and detailing wood. It usually has a sharp pointed blade with a slender handle for precise control. |
| 2. Gouges | Gouges have a curved blade that is designed to remove larger amounts of wood. They come in different sizes and shapes, allowing you to create various textures and patterns. |
| 3. Chisels | Chisels are flat-bladed tools that are used for cutting and shaping wood. They are available in different widths, allowing you to create straight, angular, or beveled cuts. |
Selecting The Right Tools For Beginners
If you are just starting out in wood carving, it’s important to choose beginner-friendly tools that are easy to handle and control. Here are some tips to help you select the right tools:
- Start with a basic carving knife: A carving knife is a versatile tool that allows you to perform various carving techniques. Look for a knife with a comfortable handle and a durable blade.
- Invest in a set of gouges: Gouges are essential for carving deeper recesses and creating intricate designs. Consider purchasing a set that includes different sizes and shapes to provide you with more flexibility.
- Add a few chisels to your toolkit: Chisels are great for making straight cuts and smoothing the surfaces. Begin with a couple of different sizes that will enable you to achieve different effects.
- Consider a sharpening tool: Keeping your carving tools sharp is crucial for maintaining their performance. Invest in a sharpening stone or a honing guide to ensure your tools are always sharp and ready to use.
By selecting the right tools for your wood carving journey, you can set yourself up for success and make the most out of your carving experience. Remember to practice proper safety precautions and keep your tools well-maintained for optimal results.
Preparing The Wood
Preparing the wood is a crucial step in starting wood carving. Ensure the wood is clean, dry, and properly sized before diving into your carving project. Follow these tips to get your wood ready for a successful carving experience.
Choosing The Right Wood
Before you can start wood carving, it’s crucial to choose the right type of wood. Different types of wood have different qualities, which can greatly affect the outcome of your carving project. It’s important to select a wood that is both sturdy and easy to work with.
One popular option for beginners is basswood, also known as lime or linden wood. Basswood is soft, fine-grained, and easy to carve, making it ideal for those just starting out. It’s also readily available and affordable, making it a popular choice among wood carvers.
Other suitable options include butternut, pine, cedar, and cherry wood. These woods also have a moderate hardness and a fine texture, allowing for smooth and precise carving. Experiment with different types of wood to find the one that you feel most comfortable working with.
Preparing The Wood For Carving
Once you have chosen the right wood for your carving project, it’s essential to properly prepare the wood before you start carving. This will ensure that your carving process goes smoothly and that the finished piece turns out exactly how you envision it.
1. Removing the Bark: The first step in preparing the wood is to remove any bark that may be on the surface. Using a knife or chisel, carefully scrape away the outer bark until you reach the clean, smooth wood underneath.
2. Roughing Out the Shape: To make the carving process easier, it’s helpful to roughly shape the wood before diving into the details. Use a saw or carving knife to remove excess wood and create a rough outline of the final shape you have in mind. This step will provide a solid foundation for your carving and allow you to focus on refining the details later on.
3. Smoothing the Surface: Once the rough shape is established, it’s time to smooth the surface of the wood. Use sandpaper or a wood rasp to remove any rough patches, scratches, or imperfections. This will create a clean and even surface for your carving tools to glide over, resulting in a more polished final product.
4. Sealing the Wood: To prevent the wood from cracking or warping, it’s important to seal it before you start carving. Apply a coat of sealer, such as shellac or wood conditioner, to protect the wood’s moisture content. This will help maintain stability and prevent any potential damage during the carving process.
5. Creating a Plan: Before diving into the carving itself, take the time to create a detailed plan or sketch of your design. This will serve as a roadmap for your carving process and help you stay organized and focused. Think about the dimensions, proportions, and intricate details you want to include in your carving, and refer to your plan throughout the carving process to ensure accuracy.
By following these steps to prepare your wood for carving, you’ll set yourself up for success and create a finished piece that you can be proud of. Remember to take your time, practice patience, and enjoy the process of bringing your artistic vision to life.
Mastering Basic Techniques
Mastering basic techniques is key to becoming a skilled woodcarver. Whether you’re a beginner or have some experience, understanding grain direction, practicing basic cuts, and creating texture and depth are fundamental skills that will enhance your woodcarving journey. In this section, we’ll delve into each of these techniques in detail.
Understanding Grain Direction
One of the first things you need to learn in woodcarving is the importance of understanding grain direction. Grain direction refers to the alignment and orientation of the wood fibers. It influences the ease of carving and the appearance of your finished piece. Working against the grain can lead to splintering or the wood fib
Learning Advanced Techniques
Once you have mastered the basics of wood carving, it’s time to take your skills to the next level by learning advanced techniques. These techniques can help you create intricate designs and add depth and dimension to your carvings. In this section, we will explore three different advanced wood carving techniques: Carving in the Round, Relief Carving, and Chip Carving.
Carving In The Round
Carving in the round is a technique that allows you to create three-dimensional sculptures out of a block of wood. Unlike relief carving, which only requires carving on the surface, carving in the round involves carving all sides of the wood. This technique is often used to create figurines, animals, and other intricate designs that require a full view from all angles.
To get started with carving in the round, begin by choosing a design or pattern that you want to bring to life. Then, using a carving knife or gouge, carefully remove small pieces of wood to shape your design. Remember to take your time and work slowly, as carving in the round can be more challenging and time-consuming compared to other techniques.
Relief Carving
Relief carving is a technique that involves carving designs into the surface of a piece of wood, creating a raised pattern or image. This technique allows for intricate details and a sense of depth in your carvings. Relief carving can be done on various types of wood, and the depth of the design can be controlled by how much wood is removed.
To begin relief carving, start by selecting a design or pattern that you want to carve. Then, using a carving knife or chisel, carefully remove wood from the surface, following the contours of your design. Remember to work slowly and carefully, making small incisions to achieve the desired level of detail. Once you have finished carving, you can further enhance your relief carving by adding shading or staining to give it a more realistic appearance.
Chip Carving
Chip carving is a technique that involves removing small chips of wood from the surface to create intricate patterns. It is a popular technique for creating geometric designs, lettering, and decorative elements on furniture and other wooden objects. Chip carving requires precision and attention to detail, as the chips need to be removed cleanly and accurately.
To start chip carving, you will need a chip carving knife and a pattern to follow. Begin by tracing the pattern onto the wood and then use the chip carving knife to carefully remove small triangular or rectangular chips of wood. Work slowly and steadily, ensuring that the chips are removed cleanly and evenly. With practice, you can create intricate and beautiful designs using chip carving.
Finishing And Polishing
When it comes to wood carving, finishing and polishing are crucial steps that can elevate the quality and appearance of your work. With the right techniques and tools, you can transform a rough wooden sculpture into a smooth, polished masterpiece that showcases your skills and creativity. In this section, we will discuss three essential aspects of finishing and polishing: sanding and smoothing, applying finishes, and adding details and fine-tuning. Let’s dive in!
Sanding And Smoothing
Sanding and smoothing the wood surface is the foundation for achieving a professional finish. It not only removes any rough patches or imperfections but also enhances the wood’s natural beauty. To get started:
- Begin with a coarse grit sandpaper and gradually move to finer grits for a smoother finish.
- Use long, even strokes, going with the grain of the wood, to avoid scratches.
- Pay attention to the difficult-to-reach areas, using sanding blocks or small tools to ensure uniformity.
- After sanding, dust off the wood and wipe it clean to prepare for the next step.
Applying Finishes
Applying finishes not only protects the wood but also brings out its natural colors and grain patterns. Here’s how you can achieve a stunning finish:
- Choose the appropriate finish based on the desired appearance and level of protection.
- Apply the finish using a brush, cloth, or spray, following the manufacturer’s instructions.
- Make sure to apply thin, even coats and allow each coat to dry before applying the next one.
- Sand lightly between coats to remove any imperfections and promote adhesion.
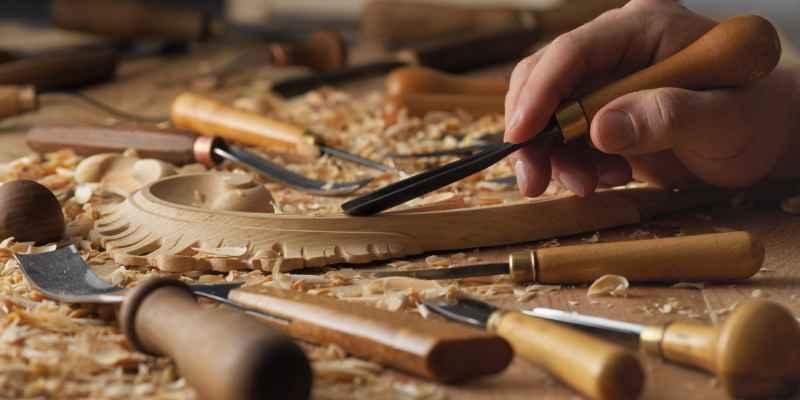
Adding Details And Fine-tuning
Once the surface is smooth and the finish is applied, it’s time to focus on adding intricate details and fine-tuning your wood carving. Here are some essential tips:
- Use specialized carving tools to add fine details such as texture, lines, or intricate patterns.
- Work slowly and patiently, making small adjustments to avoid making irreversible mistakes.
- Regularly step back and assess your progress to ensure the overall balance and harmony of the carving.
- Polish the details using fine grit sandpaper or polishing compounds for a glossy, professional look.
Remember, practice makes perfect when it comes to wood carving. So don’t be afraid to experiment, refine your skills, and develop your unique style. With time and dedication, you will create beautiful wood carvings that are sure to impress. Happy carving!
Conclusion
To conclude, starting wood carving is an exciting journey that requires practice, patience, and creativity. By following the tips shared in this post, such as selecting the right tools, choosing the appropriate wood, and developing essential carving techniques, beginners can embark on their wood carving adventure with confidence.
Remember, practice makes perfect, so keep honing your skills and exploring your creative side through this timeless craft. Happy carving!