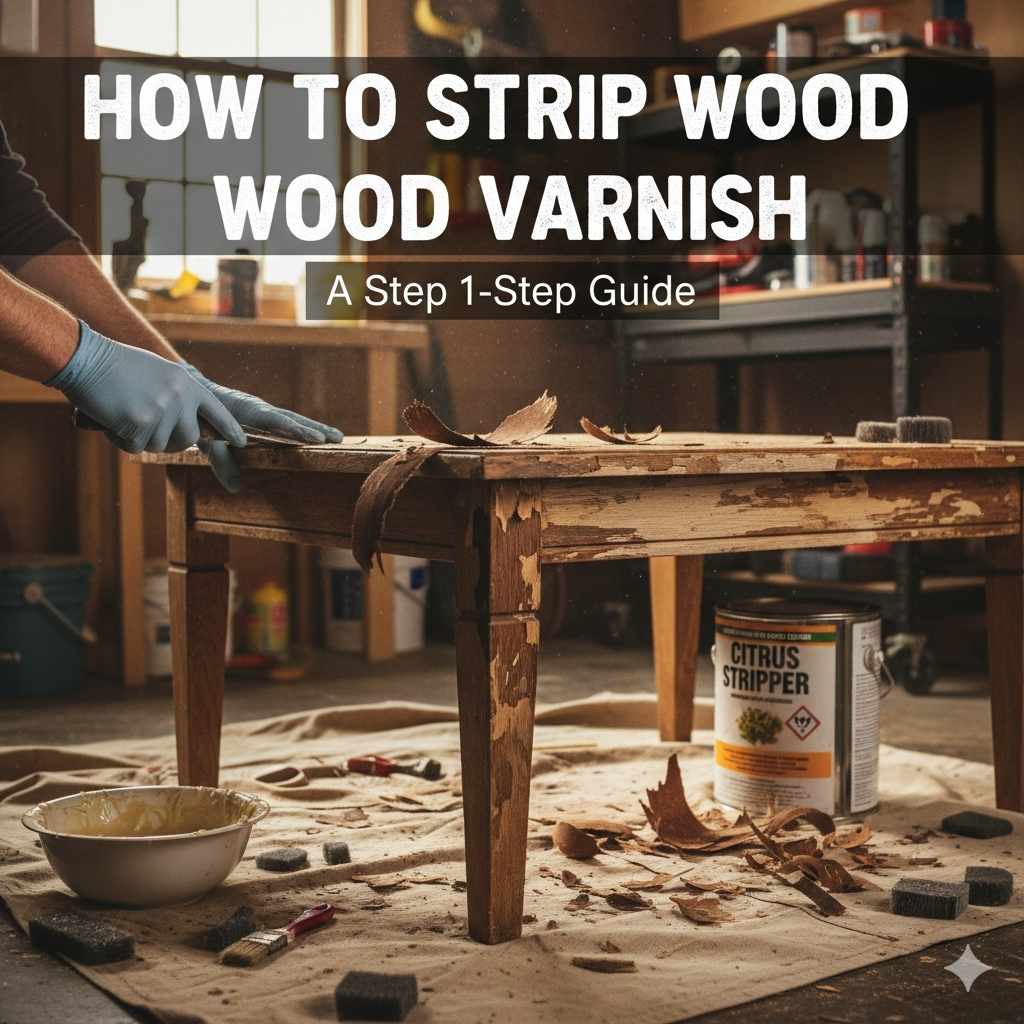
How To Strip Wood Varnish: Proven Best Guides
Stripping varnish is very manageable when broken down. This guide teaches beginners how to safely remove stubborn Varnish using chemical strippers or heat, followed by gentle sanding an object. We cover materials, step-by-step methods, clean-up, ensuring a smooth, beautiful wood surface for refinishing.
A stubborn coat of old varnish can feel set in stone. Maybe an old table looks tired, or a thrift store find desperately needs a fresh look. Deciding how to strip wood varnish often leads beginners to worry about strong chemicals or accidental sanding damage. Don’t stress! With the right approach, this necessary step becomes easy—even fun. We will walk through this process together, making sure the wood underneath looks perfect and ready for its next chapter. Get mentally prepared to trade frustrating coatings for beautiful raw wood; let’s dive into the proven best guides!
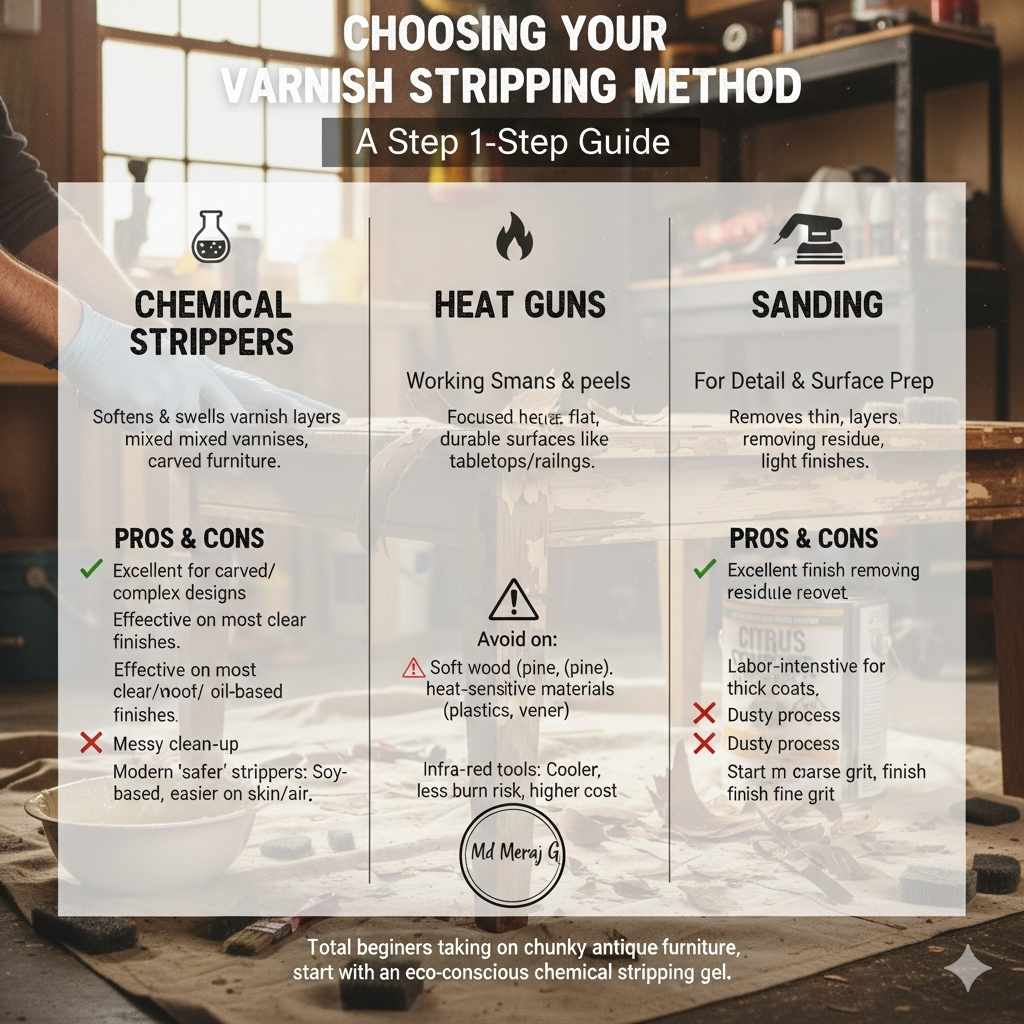
Choosing Your Varnish Stripping Method: Chemical vs. Heat VS. Sanding
Before we grab any tools, the first big decision is choosing your main approach. We mostly rely on two powerful, primary methods to melt and lift deep varnish, followed often by sanding detail work. Each has its best fit depending on the wood piece, budget, and surface complexity.
#1: Chemical Strippers – The Workhorse for Deep Coats
Chemical strippers are incredibly effective chemical cocktails designed to soften and swell varnish layers, often raising them off the surface so scraping is much easier. This is the best route when you have many coats or varnishes mixed (like aged oil-based coatings).
Pros and Cons of Chemical Stripping
| Pros | Cons |
|---|---|
| Excellent for carved or complex vintage furniture designs. | Requires careful handling and excellent ventilation due to fumes. |
| Few required tools (scrapers, brushes). | Can cause discoloration on very soft woods if left on too long. |
| Effective on almost all clear-coat and oil-based finishes. | Requires messy clean-up post-application (residue removal). |
Modern strippers labeled “safer” often rely on less harsh components like Soy Derivatives, which work slower but are easier on skin and air quality, good for small beginner projects. If your trip leads you anywhere near construction resources, general advice leans toward checking the recommendations from trusted bodies that discuss safety for paint removal products.
#2: Heat Guns or Infra-Red Paint Removers – Working Smart, Not Chemical-Heavy
The heat method uses focused heat to soften the finish just before it scorches or changes color, allowing the varnish essentially to puff up and peel away in sheets.
When To Use Heat
- Because these generate scorching temperatures, heat guns are best suited for large, relatively flat, durable surfaces like solid wood dining tables or wooden decking railings.
- Generally, avoid on very soft wood (like perhaps pine shelves) or materials adjacent to heat-sensitive items (plastics, veneer) not already built perfectly onto wood! Specialized tools like infra-red stripping tools work slightly cooler, dramatically reducing burn risk but costing more.
My Takeaway: For total beginners taking on something chunky like an antique dresser, start with an environmentally conscious, non-flammable chemical stripping gel. Confidence grows fastest with effective, simplified actions! – Md Meraj G.
Assembling Your Essential Arsenal (Tools & Materials)
Preparation is 90% of your success when learning how to strip wood varnish. Safety comes before scrapers! Do not skip prepping your space.
Essential Safety Gear (Non-Negotiable!)
- Respirator/Ventilator: An NIOSH-approved organic vapor respirator is a lifesaver if using chemical strippers. Do not treat this like “just an apron”—it protects your lungs. Find great resources from National Personal Safety Councils (CDC/NIOSH for safety standards specifics).
- Chemical-Resistant Gloves (Nitrile): Many chemical strippers eat right through regular latex gloves; nitrile is crucial.
- Safety Goggles: Splash protection is critical; side shields or fog-free goggles are best.
- Working Clothes: Long sleeves and possibly disposable suits for major chemical use.
Required Tools Breakdown by Method
For Chemical Stripping Projects:
- Varnish Stripping Chemical (Gel type encouraged for easy application).
- Cheap, acid brushes for spreading generously.
- Plastic and metal putty knives, cabinet scrapers (rounded edges preferred).
- Steel wool (Grade #2 or #3 and super-fine #0000 grade for clean-up).
- Rags and mineral spirits or appropriate solvent mix for the stripper’s neutralization (read the can!).
For Heat Stripping Projects:
- Heat Gun (1000W+) or Infra-Red Stripper.
- Robust metal putty knife (sturdy construction).
- Wire brush (for deep texture penetration if required—use with caution).
- Thick leather work gloves (shielding fingers from heat).
Method 1: Chemical Stripping – A Beginner’s Walkthrough
This approach reliably conquers tricky corners old pieces often have. Remember: be liberal with application; the chemical does the heavy lifting, not brute force.
Step 1: Master Your Workspace Ventilation
Set up outdoors if possible. If forced to work indoors (e.g., garage or basement), open all windows, use fans pointed outward to exhaust air, AND wear your respirator. Better safety beats rushing today.
Step 2: Apply the Stripper Generously
Read the can for ideal temperature—most work fine between 60-80 degrees Fahrenheit. Using your brush, brush on the stripper thick. Seriously, cake it on! Thin coats just start the soaking reaction without getting deep enough into that varnish base.
Step 3: Wait for the Magic to Happen
Keep an eye on the container’s suggested waiting time (often between 20 and 60 minutes for commercial thick movers). Watch the surface turn soft, rubbery, or bubble up. This means the chemical ate through the barrier. This waiting period demands patience; let physics do the work!
Step 4: Gentle Scraping for Softened Layers
Once the varnish looks dramatically unlike its starting position, firmly hold your plastic scraper. Apply light, constant pressure, running the scraper parallel to the wood grain, NEVER diving into the wood grain perpendicularly. Scrape carefully into moldings and cut-outs; often, the thick mush just scrapes away surprisingly easily now.
Tip for Heavily Curved Areas:
For those areas the scraper misses—lots of curves or intricate carvings—dab on fresh stripper, rub vigorously in circles with #3 or #2 steel wool grade loaded with active stripper, or work it within contours with an old kitchen scrub pad. Reapply stripper immediately atop bare spots, letting it work again before scraping gently.
Step 5: Cleaning the Chemical Residue
Once the visible gunk is gone, a sticky, raw residue remains. This layer MUST be removed, or your new finish (stain, topcoat) won’t adhere correctly—it poisons the stain/glue bond next time!
- Apply the recommended neutralizing solvent (often mineral spirits, naphtha, or hot soapy water as suggested!).
- Wipe fiercely but gently across the surface with fresh clean rag until the rag looks reasonably clean and sticky residue disappears against your touch.
- Allow the piece to completely dry overnight in a dust-free area–this smell usually tells you the chemical has evacuated.
Method 2: Heat Application – Gentle Lifting Over Large Areas
If you are only dealing with a surface varnish (not five layers of history), this is significantly faster and less smelly if applied correctly.
Step 1: Surface Preparation and Setting Control Shield
Wipe the wood clean. If you must work around nearby finished wood trim, use metallic sheeting (like aluminum flashing) held adjacent to the work area to protect that piece from stray heat. Crucially, use your respirator even if heat generating varnish vapors aren’t chemical heavy, as curing binders generate nasty particulate smoke.
Step 2: Apply Heat Slowly and Deliberately
Hold the heat gun nozzle several inches away from the surface (check manufacturer recommendations—we aim for 800–C, not 1200+). Move the heat gun consistently along strips matching the length of your metal scraper tool.
Step 3: Watch for Lifting
Listen closely, the finish will change texture. Once deep creases appear or small bubbles form across the strip you just heated, immediately—and gently—press that scraper blade underneath the soft edge and push along the grain away from you. The varnish sheeting should lift right up. Replenish heat as frequently as needed on persistent spots.
Step 4: Managing Stick Backs and Detail
Areas where only a thin coat refuses to peel will hold varnish like a stubborn shadow. It’s usually best to touch these with the lowest fine grades of sanding (like grit discussion links on appropriate sanding choice, like mention of 150 grit for final clean). Otherwise, reestablish a touch of controlled heat and work the edge of the scraper carefully.
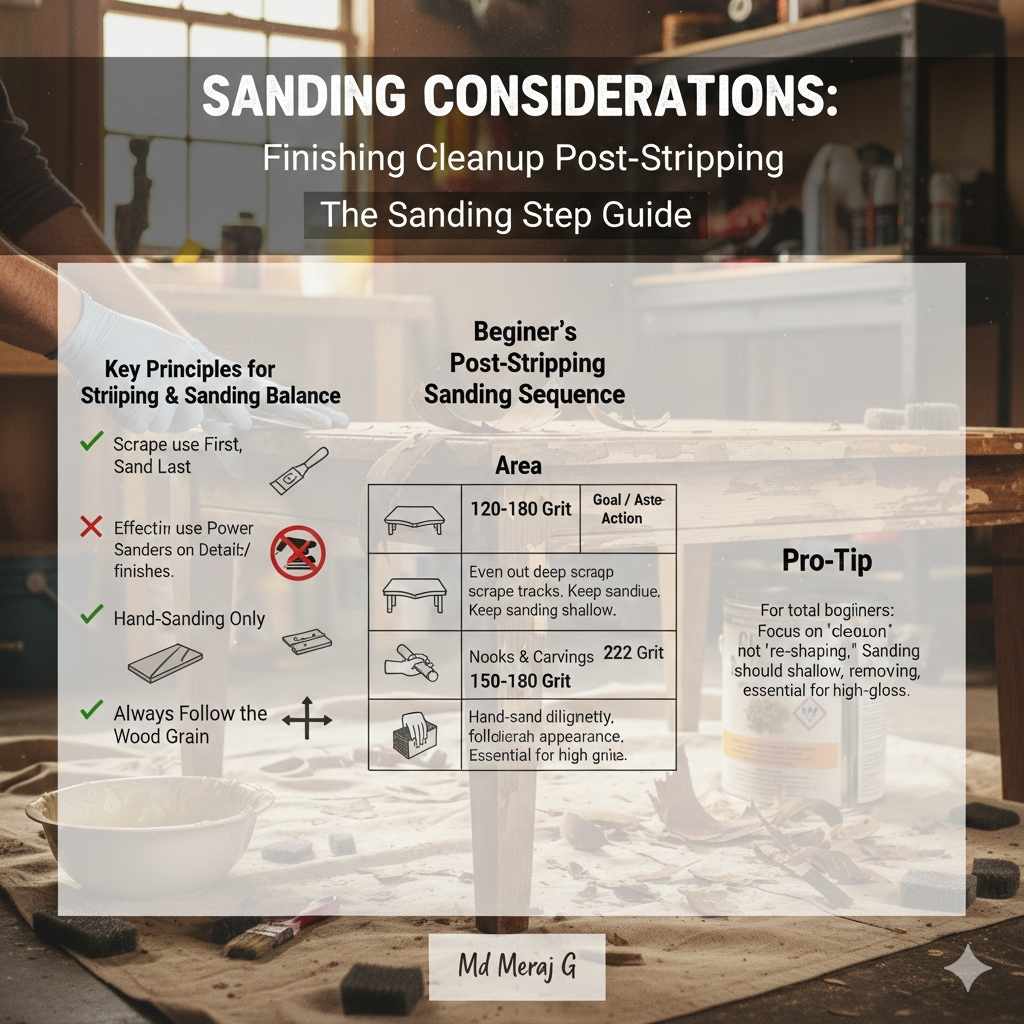
Sanding Considerations: Finishing Cleanup Post-Stripping
After successfully using brute force (chemical) or aggressive heat, you will always be left with minor patchiness when light hits just right, sometimes especially heavy in crevices or detail work that the tools could not satisfy fully. Sanding finishes the cleanup but care keeps the bare wood pristine.
Key Principles for Stripping & Sanding Balance
- Prioritize scraping removal until you see minimal change during light application of abrasive.
- Never use power sanders/rotary tools on details or edges when the wood is rough from the stripper residue—you risk quickly rounding edges sharp profiles too badly—hand blocking only is best immediately post-stripping.
A Beginner’s Post-Stripping Sanding Sequence
| Starting Area | Sanding Grit Recommended | Goal / Action |
|---|---|---|
| Most Exposed Flat Surfaces (General Cleanup) | 120 Grit (Hard Surface Floors/Tabletops) to 180 Grit (Furniture) | Even out deep scrape tracks left by solvent-softened removal. Keep sanding shallow. |
| Areas Missed by Chemical (Nooks, Carvings) | 150 or 180 Grit Wrapped around a Dowel Rod Segment | Hand-sand diligently by following the grain contour exactly. |
| Final Touch Polish (Pre-Stain ONLY If Desired) | 220 Grit Micro-Mesh Sanding Sponge | Eliminates any noticeable 180 scratch appearance. Essential if aiming for high-gloss clarity on application. |
FAQ Corners: Answering Your Top How To Strip Wood Varnish Worries
For beginners, small questions delay big projects. Here are quick, reassuring answers for your journey.
Q1: How long does it require a chemical stripper to work under standard circumstances?
A: Usually between 20 minutes to one hour for standard coats. Very old or marine spar varnishes can demand multiple reapplications over several hours. Be more patient than fast when applying remover chemical.
Q2: I don’t want to buy a large jar. What is a safer, minimal homemade stripper option?
A: For removing minor shellac or old lacquer, a mixture created by dissolving laundry Borax powder into very hot water, plus adding high-strength ammonia can work slowly. Warning: Fumes are harsh; proper ventilation overrides the convenience benefit slightly!
Q3: My heat gun or stirrer is leaving dark marks—can I fix this without drastic restripping?
A: Dark marks mean carbon (actual charring) has occurred. Usually, marks that haven’t embedded deeply can usually pull back with a gentle, very final sanding pass using at minimum 180 or ideally 220 grit, heavily focusing pressure mainly to eliminate the localized blackened area. A light scrub with white/mild abrasive detergent during this final sanding can help lift soot.
– Do I need new stripper if I use heat first?
A: Normally, no. Heat stripping generally removes the majority, leaving only difficult-backed remnants perfect for targeted reapplication of chemical agent only on missed areas—saving time and products across the bulk piece.
Q5: Are finishes going deeper? If the project seems complicated, must I Strip Everything Immediately?
A: Great question: Work piece contextually! If stripping the main tabletop yields success, move immediately inward towards details/bannisters WHILE the general piece stays covered to stay humid/re-activated by residual chemical agents trapped underneath. If a chemical has finished its reaction timer and dried (even messy dried gook remnants), you absolutely need dedicated water/mineral sprite rinse (Step 5). Don’t sand anything stuck.
Q6: How can I tell if the residue is gone so my new stain absorbs widely correctly?
A: Trust the ‘Feel and Smell/Wait’ Rule. First, the area must feel dry and smooth with most major gummy texture completely gone. Secondly, on stripping jobs primarily using strong synthetic removers: allow the piece four days completely untouched drying time where you won’t see it, so complex evaporating agents have off-gassed—then test stain adhesion. Dryness confirmation saves heartache!
Final Checklist: Congratulations, You’ve Reached Raw Wood Status!
Seeing that wood grain exposed is a reward earned through elbow grease and following crucial safety precautions. Reaching this point successfully means mastering the hardest step: varnish removal. Before you even think of applying that fresh wood conditioner or beautiful new stain pigment, pause. The secret to gorgeous future finishes is meticulous prep of that blank slate. Ensure the stripped surface is now beautifully clean.
Check all edges created during scraping sessions. Do they sound flat or dull when tapped lighty, or are there remnants clinging on too thickly still anywhere? Re-address those spots with fresh application, minimal chemical stay, or a light rub down with a rag soaked in denatured alcohol or simple mineral spirit flush rinse. Wait 24 hours to feel utterly sure nothing else is chemically binding your project, especially important regarding glues embedded nearby.
Tack Cloth Every Single Part: Sanding disperses micro dust particles universally. After every finishing process move (or right before conditioning/staining), gently vacuum large debris, and finish with a quality sticky tack cloth pulled lazily across all planes to lift up all microscopic dust sitting dormant on the wood cell pathways.
Moisture Test: High-alkali strippers can trap hydration deep in the wood. Give the bare surface good air circulation for several warm days, or humidity control below 55% R.H., before applying any oil-bound product or watery stain coat. Uneven surface saturation will translate spotty results later on. Check a corner patch!
If you can complete the stripping process confidently, the hardest part of refinishing is behind you! That slightly rough, freshly revealed plank deserves your patience now. Take a moment, respect the wood’s readiness, and move forward with selecting your desired final look—whether that’s natural Danish Oil showcasing character or glossy Polyurethane protection shielding generations. You’ve got your beautiful foundation ready for crafting that wonderful final piece you envisioned.