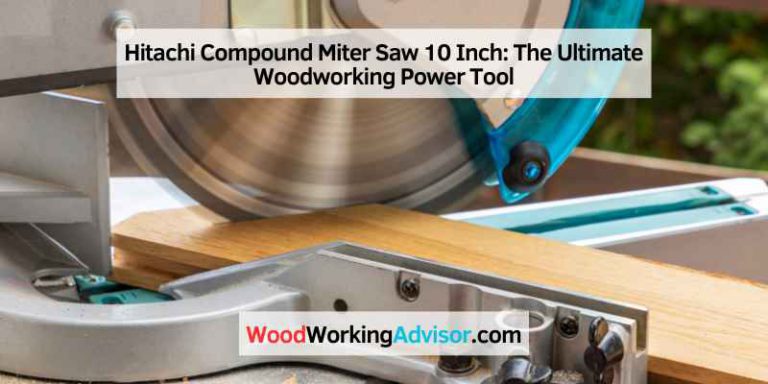
How to Unlock Mitre Saw: Essential Tips for Easy Blade Adjustment
To unlock a mitre saw, locate the locking lever or knob and release it. Then, raise the saw arm to unlock it.
Unlocking a mitre saw is a simple process that can be completed in just a few steps. By locating the locking lever or knob, you can release the saw and prepare it for use. Once the locking mechanism is released, you can raise the saw arm, allowing it to move freely and adjust to the desired angle.
This will give you the flexibility needed to make accurate and precise cuts. Whether you are a professional carpenter or a DIY enthusiast, knowing how to unlock a mitre saw is essential for any woodworking project. In the following sections, we will provide detailed instructions on how to unlock a mitre saw safely and efficiently.
Choosing The Right Mitre Saw
When it comes to power tools, choosing the right mitre saw is crucial for achieving precision and efficiency in your woodworking projects. The perfect fit for one woodworker may not be the best choice for another, so understanding your specific needs is key to unlocking the full potential of your mitre saw. Let’s dive into the essential factors to consider when selecting the ideal mitre saw for your projects.
Consider Your Project Needs
Before diving into the myriad options available, consider your specific project needs. Are you a hobbyist working on small DIY projects, or a professional tackling large-scale construction tasks? What types of materials will you be cutting? Understanding the scope and materials of your projects will help narrow down the right type of mitre saw for you. Be clear on whether you require basic 90-degree cuts or more complex bevel and compound cuts.
Check The Power And Blade Size
Assess the power and blade size of the mitre saws available in the market. Match the power of the saw to the demands of your projects. A higher horsepower saw is ideal for heavy-duty cutting, while a lower horsepower saw may suffice for lighter projects. Consider the size of the blade as well. A larger blade offers a wider cutting capacity, making it suitable for larger materials.
Understanding The Blade Adjustment
Unlocking the mitre saw requires a thorough understanding of blade adjustment. Follow these easy steps for a seamless unlocking process.
When it comes to using a miter saw, one of the most important aspects to consider is the blade adjustment. Properly adjusting the blade not only ensures accurate and precise cuts but also contributes to the overall safety of the tool. In this section, we will delve into the different types of blade adjustment systems and highlight the importance of getting the blade adjustment right.
Types of Blade Adjustment Systems
There are various types of blade adjustment systems available in miter saws. Understanding these systems will help you choose the right one for your needs. Let’s take a look at some of the common types of blade adjustment systems:
1. Wing Nut Adjustment: This type of adjustment system uses wing nuts that allow you to easily tilt the blade to the desired angle. It is a simple and straightforward mechanism commonly found in older models of miter saws.
2. Lever Adjustment: Lever adjustment systems are more common in modern miter saws. This system uses a lever that enables you to adjust the blade quickly and efficiently. With just a simple flick of the lever, you can change the bevel or miter angles.
3. Rack and Pinion Adjustment: The rack and pinion adjustment system is considered the most advanced and accurate. It uses a gear mechanism to adjust the blade, ensuring smooth and precise movements. This system is commonly found in high-end miter saws.
Importance of Proper Blade Adjustment
Proper blade adjustment is crucial for several reasons. Here are some key reasons why getting the blade adjustment right matters:
1. Accuracy: A correctly adjusted blade ensures accurate cuts every time. When the blade is properly aligned, you can achieve precise angles and bevel cuts, which is essential for professional-grade woodworking projects.
2. Safety: The blade adjustment directly affects the safety of using a miter saw. A misaligned blade can increase the chances of kickback, leading to accidents. Aligning the blade correctly helps prevent kickback and ensures a secure and safer cutting experience.
3. Longevity of the Blade: When the blade is adjusted correctly, it wears evenly and lasts longer. Improper adjustment can lead to premature blade wear, resulting in reduced cutting performance and the need for frequent replacements.
Remember, whether you are a beginner or a seasoned professional, understanding and correctly adjusting the blade of your miter saw is crucial for achieving accurate cuts and ensuring your safety. Invest time in learning about the blade adjustment system in your specific miter saw model and follow the manufacturer’s instructions for optimal results.
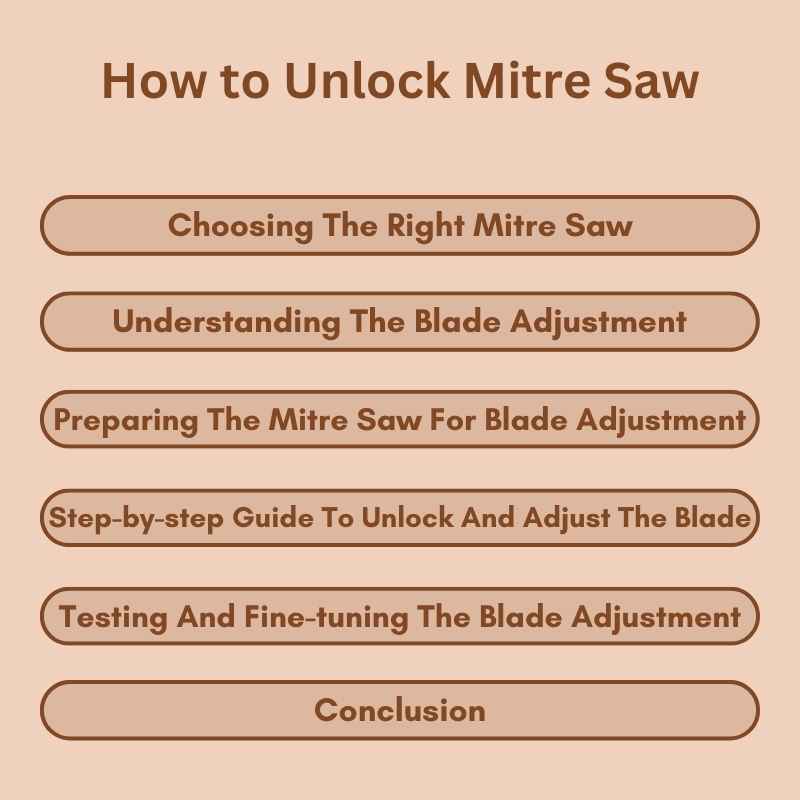
Preparing The Mitre Saw For Blade Adjustment
To unlock the mitre saw blade, start by unplugging the saw and retracting the blade guard. Next, use the provided wrench to loosen the arbor nut, and then remove the outer washer, blade, and inner washer. Inspect the blade for damage and ensure it’s clean before reassembly and testing.
Safety Precautions
Before beginning the blade adjustment process on your mitre saw, it is crucial to take some safety precautions to protect yourself and others in your workspace. By following these safety guidelines, you can minimize the risk of accidents or injuries during this task.
First, ensure that the power supply to the mitre saw is completely disconnected. This step is essential to avoid any accidental startup of the saw while you are working on it. To disconnect the power supply:
1. Turn off the power switch of the mitre saw, usually located on the side or front of the machine.
2. Unplug the power cord from the electrical outlet or extension cord.
Additionally, you should always wear appropriate personal protective equipment (PPE), including safety glasses, ear protection, and gloves, to protect yourself from flying debris and loud noise. This equipment will help safeguard your eyes, ears, and hands from any potential hazards. Remember, your safety should never be compromised.
Step-by-step Guide To Unlock And Adjust The Blade
Are you struggling with unlocking and adjusting the blade of your mitre saw? Don’t worry, we’ve got you covered with a simple step-by-step guide to help you get the job done with ease. In this post, we’ll walk you through the process of positioning the saw, unlocking the blade, and adjusting the bevel and mitre angles. Let’s dive in and get your mitre saw ready for action!
Positioning The Saw
Before we begin, it’s crucial to ensure that your mitre saw is positioned on a stable and flat surface. This will provide a secure base for making adjustments and prevent any accidents during the process.
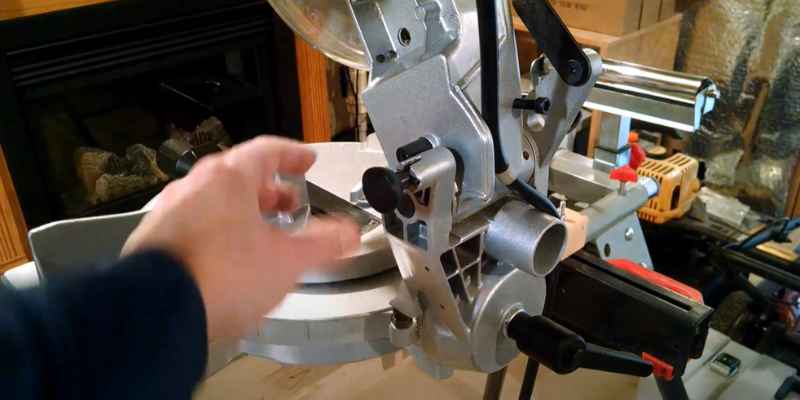
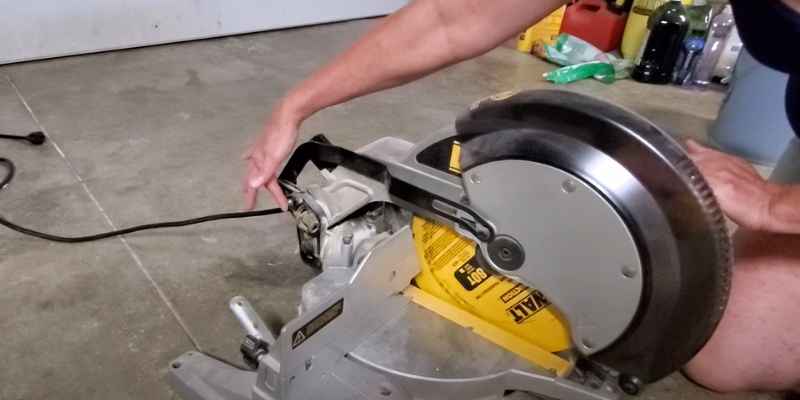
Unlocking The Blade
First, ensure that the power cord is unplugged to avoid any accidental starts. Then, locate the blade lock button or lever, which is usually situated near the blade guard. Press or release the blade lock to unlock the blade, allowing you to make adjustments and changes as needed.
Adjusting The Bevel And Mitre Angles
- Begin by loosening the bevel and mitre angle locks using the appropriate adjustment handles or knobs.
- Next, carefully pivot the saw blade to the desired angle for bevel and mitre cuts. Use the angle markings on the saw to ensure accuracy.
- Once you’ve set the angles, secure the bevel and mitre angle locks to hold the blade in place. Double-check the angles to ensure they are locked in correctly before use.
Testing And Fine-tuning The Blade Adjustment
Unlocking the mitre saw is made easy with the process of testing and fine-tuning the blade adjustment. This ensures precise cuts and optimal performance for your projects.
Unlocking a mitre saw is just the first step towards achieving accurate and precise cuts. Once the saw is unlocked, it’s important to test and fine-tune the blade adjustment to ensure optimal performance. This involves checking blade alignment and making small adjustments for precision cuts. Let’s dive into each of these steps in detail.
Checking Blade Alignment
Blade alignment is crucial for the mitre saw to function properly and deliver accurate cuts. To check the blade alignment, follow these simple steps:
1. Start by unplugging the saw to ensure your safety.
2. Inspect the blade from different angles to identify any visible misalignment. Look for any wobbling or deflection.
3. Use a straight edge, such as a carpenter’s square or a ruler, to check the alignment of the blade against the saw’s base. Place the straight edge against the blade and the base, ensuring it’s perfectly perpendicular to the base.
4. Observe if there are any gaps or inconsistencies between the blade and the straight edge. If the blade is perfectly aligned, there should be no visible gaps.
Making Small Adjustments For Precision Cuts
To achieve precision cuts with your mitre saw, it’s important to make small adjustments as needed. Here’s how you can fine-tune the blade adjustment:
1. Refer to the manufacturer’s instructions to locate the blade adjustment screws or knobs. These are typically found near the blade housing.
2. Loosen the adjustment screws or knobs slightly to allow for adjustments. Avoid loosening them too much, as it may cause the blade to become loose.
3. Use a combination square or an angle guide to check the squareness of the blade. Place the square or guide against the blade and the base to ensure they are perfectly perpendicular.
4. If the blade is not square, make small adjustments using the adjustment screws or knobs. Tighten or loosen them accordingly to align the blade properly.
5. After each adjustment, recheck the blade alignment using the straight edge mentioned earlier.
6. Repeat this process until the blade is perfectly aligned and square.
By carefully testing and fine-tuning the blade adjustment, you can optimize your mitre saw for accurate and precise cuts. Taking the time to ensure proper blade alignment and making small adjustments when necessary will significantly improve the overall performance of your saw. Remember, accuracy is key when it comes to woodworking, and a well-tuned mitre saw will certainly help you achieve it.
Conclusion
Unlocking a mitre saw can be a simple yet essential task for woodworking enthusiasts and professionals. By following the steps outlined you can ensure safe and efficient operation of your tool. Remember, proper maintenance and understanding of your equipment are the keys to success in any project.
Unlock your potential with the knowledge gained here.