Refinish Wood Floors Yourself: A Step-by-Step Guide
Refinishing wood floors yourself is an achievable task with the right tools and techniques. Follow a systematic process to ensure a professional finish.
Refinishing wood floors can breathe new life into your home. This DIY project not only saves you money but also allows for customization to match your style. With the right tools, a bit of patience, and a willingness to learn, you can transform dull, worn-out floors into stunning features.
Start by assessing the condition of your floors, as this will guide your refinishing approach. Gather essential supplies like sanders, stains, and sealants. Proper preparation and attention to detail will yield impressive results. Embrace the process, and enjoy the satisfaction of completing this rewarding home improvement project. Your floors will shine, and your space will feel revitalized.
Getting Started With Wood Floor Refinishing
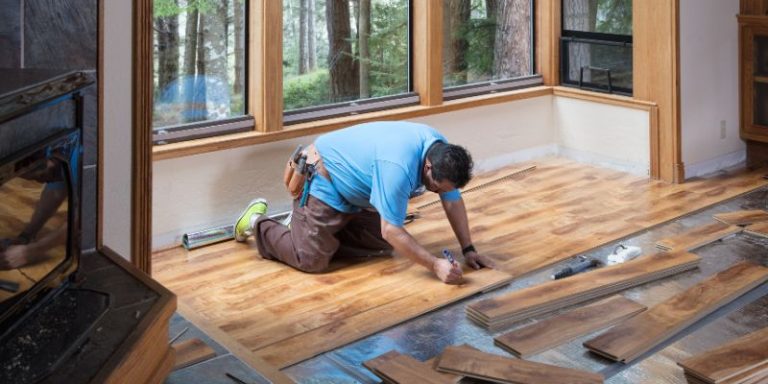
To start, check the condition of your wood floors. Look for scratches, dents, or discoloration. Identify areas that need special attention. This will help you plan your refinishing project.
Gather the right tools and materials for the job. You will need:
| Tool/Material | Purpose |
|---|---|
| Orbital Sander | To smooth out the surface |
| Floor Finish | To protect and enhance the wood |
| Sandpaper | To prepare the wood for finishing |
| Vacuum | To clean dust and debris |
| Safety Gear | To protect yourself during the process |
Preparation Steps For Refinishing
Begin by clearing the room of all furniture and items. This makes the process easier. Remove any rugs or curtains that might get damaged. Dust and debris can affect the finish, so clean thoroughly.
Next, clean the surface of the wood floor. Use a vacuum to remove dust and dirt. A damp mop can help remove sticky spots. Ensure the floor is completely dry before starting the next step.
Sanding is crucial for a smooth finish. Start with coarse sandpaper to remove old finish. Follow with finer sandpaper for a polished look. Always sand in the direction of the grain to avoid scratches.
The Sanding Process
Choosing the right grit is crucial for sanding wood floors. Start with a coarse grit like 36 or 40 for heavy wear. This helps remove old finishes and scratches. Then, switch to a medium grit like 60 or 80 for smoothing. Finally, finish with a fine grit like 120 for a smooth surface.
Use effective sanding techniques for the best results. Keep the sander moving steadily to avoid uneven spots. Sand in the direction of the wood grain. Overlap each pass slightly for even coverage. Always keep the sander flat on the floor.
Dealing with edges and corners requires special attention. Use a hand sander or detail sander for these areas. This helps reach spots that a large sander can’t. Take your time to ensure a smooth finish throughout the entire floor.
Wood Floor Repairs Before Refinishing
Fill gaps and cracks in your wood floors for a smooth finish. Use a good wood filler that matches your floor color. Apply it carefully and let it dry completely. Sand the area until it’s level with the rest of the floor.
Damaged planks need to be replaced. First, remove the old plank by prying it up gently. Make sure to clean the area well before installing a new one. Cut the new plank to size and fit it in place. Secure it with nails or adhesive.
Check for any remaining gaps after repairs. Fill them in as needed to ensure a flawless appearance. Proper preparation makes refinishing easier and more successful.
Staining Your Wood Floors
Selecting the right stain is crucial for wood floors. Choose a color that matches your home. Test a small area first to see how it looks. Consider water-based stains for easy cleanup.
Applying stain evenly is key. Use a brush or roller for smooth coverage. Work in small sections to avoid streaks. Always follow the wood grain for the best results.
Drying time is important. Allow adequate time for the stain to dry before walking on it. Ensure good ventilation in the room. Open windows and use fans to speed up the process.
Applying The Finish
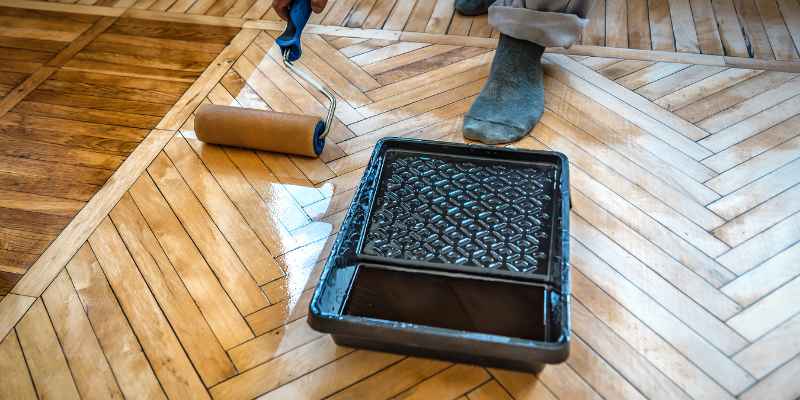
Choosing the right finish is crucial for your wood floors. Water-based finishes dry quickly and have less odor. Oil-based finishes offer a rich look but take longer to dry. Consider your room’s use and your preferences.
Best practices for application include preparing the floor well. Clean the surface to remove dust and debris. Use a high-quality applicator for even coverage. Apply the finish in thin layers for best results. Always follow the manufacturer’s instructions.
Curing time varies based on the finish type. Water-based finishes usually cure in 24-48 hours. Oil-based finishes can take several days to fully cure. Avoid heavy traffic during this time to protect your floors.
The Final Touches
Buffing the floors is essential for a smooth finish. Use a buffer to remove any imperfections. Start in a corner and work your way out. Move slowly for the best results. Make sure to follow the grain of the wood.
Cleaning up after refinishing is very important. Use a vacuum to remove dust and debris. A damp mop can help clean the surface. Avoid using harsh chemicals on the floor. Let the floors dry completely before walking on them.
Maintaining refinished floors keeps them looking great. Regular sweeping or vacuuming will help. Use a soft mop with mild soap for cleaning. Avoid wet mopping, as excess water can damage wood. Place mats at entrances to reduce dirt.
Common Mistakes To Avoid
Over-sanding the wood can damage its surface and make it look dull. Use the right grit sandpaper to avoid this mistake. Always sand lightly and check the wood’s condition.
Uneven stain application can ruin the look of your floors. Always apply stain evenly using a brush or cloth. Work in sections to ensure every area gets the same treatment.
Rushing the drying process can lead to sticky or uneven results. Allow each coat to dry completely before applying the next one. Patience is key for a beautiful finish.
DIY Vs. Professional Refinishing
Refinishing wood floors can be done by yourself or by a professional. Each option has its benefits.
| Factor | DIY | Professional |
|---|---|---|
| Cost | Lower costs for materials only. | Higher costs due to labor. |
| Time Investment | Requires more time and effort. | Faster with experienced workers. |
| Quality | Results depend on your skills. | Typically higher quality and longevity. |
Eco-friendly Refinishing Options
Choosing low-VOC products is great for the environment. These finishes help reduce harmful fumes. They are safer for your home and family.
Sustainable wood finishes offer an eco-friendly choice. Look for products made from renewable resources. These finishes protect the wood while being kind to nature.
| Benefits | Examples |
|---|---|
| Eco-friendly | Bamboo, Reclaimed wood |
| Durable | Plant-based oils, Water-based finishes |
Recycling dust and debris from your project is important. Collect sawdust and leftover materials. Use them in gardens or for crafts.
Every small action contributes to a healthier planet. Choose eco-friendly options for a better future.
Frequently Asked Questions
How Do I Start Refinishing Wood Floors?
Begin by gathering your materials, including sandpaper, a sander, stain, and finish. Clear the room of furniture and clean the floors thoroughly. Assess the wood’s condition and decide if sanding is necessary. Always work in a well-ventilated area for safety and optimal results.
What Tools Do I Need To Refinish Wood Floors?
Essential tools include a drum sander, edger, vacuum, and floor finish applicator. You’ll also need sandpaper in various grits, wood stain, and protective gear like goggles and masks. Investing in quality tools ensures a smooth refinishing process and a professional-looking finish.
How Long Does It Take To Refinish Wood Floors?
The entire process can take anywhere from a few days to a week. This timeline includes preparation, sanding, staining, and applying finish. Drying times between coats can vary, so plan for adequate time. Ensure proper ventilation to speed up the drying process.
Can I Refinish Wood Floors Without Sanding?
Yes, you can use a chemical refinishing product for minor touch-ups. This method is ideal for lightly worn floors. However, it may not remove deep scratches or stains. Always test a small area first to check compatibility with your wood type.
Conclusion
Refinishing wood floors yourself can be a rewarding project. It saves money and gives your space a fresh look. With the right tools and techniques, anyone can achieve professional results. Take your time and enjoy the process. Your newly refinished floors will enhance your home’s beauty for years to come.