Should Pressure-Treated Wood Dry Before Installing? No, But Wait to Stain It
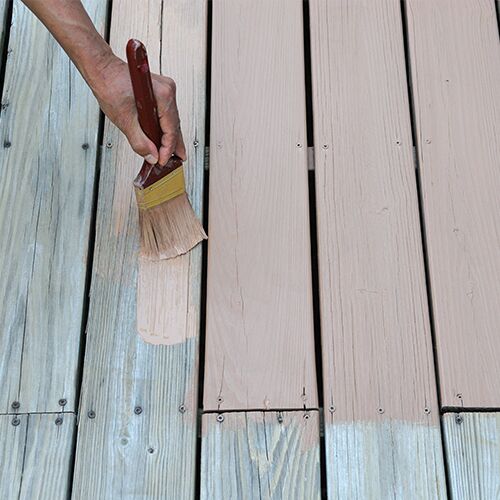
No, pressure-treated wood does not need to dry before you install it structurally — it’s designed to be installed wet and dry out in place over the following weeks. The one exception is staining or sealing: apply either one too soon and the finish won’t bond, because the wood is still pushing moisture out. Here’s how long that takes and how to tell it’s actually ready.
Benefits Of Letting Pressure Treated Wood Dry
Best Way to Check If It’s Dry
 |
Klein Tools ET140 Pinless Moisture Meter – $49.97 Instead of guessing by feel, this confirms the wood is actually dry enough to stain or seal.
|
Pressure-treated lumber comes off the treatment line saturated — the whole point of the process is forcing preservative (typically ACQ or MCA) deep into the wood under pressure, and that carrier fluid is mostly water. A lot of what a “wet” PT board is fighting isn’t rot risk, it’s just physics: wood that heavy with moisture will shrink slightly and can twist as it releases that water over the following weeks, whether it’s sitting in a lumberyard rack or already screwed into your deck frame. Framing lumber standards actually assume this — treated joists and posts are rated to be installed at their as-delivered moisture content and dry in place without losing structural capacity.
Where drying time genuinely matters is anything you’re about to coat: stain, paint, or a water-repellent sealer. Every one of those needs the wood’s surface moisture content down to roughly 15-19% before it will actually bond instead of sitting on top of trapped water and peeling within a season. That’s the real reason behind “let it dry first” — it was never really about the framing holding together.
What Actually Happens If You Install It Wet
Structurally, not much goes wrong — this is the standard, code-accepted way most decks and fences get built. What does happen is cosmetic and dimensional: as a wet 2×6 deck board dries, it can lose up to 1/4 inch of width and will often cup or twist slightly, especially boards cut from nearer the outside of the log where grain runs less straight. That’s why deck builders leave a consistent 1/8-3/16 inch gap between boards when installing wet PT lumber — tight-fitted wet boards look great on install day and then open into uneven, oversized gaps a month later as everything shrinks.
Fasteners matter more with wet PT lumber, too. The copper-based preservatives in modern ACQ and MCA treatment are corrosive to standard steel and even some aluminum, which is why hot-dip galvanized or stainless fasteners are specified for treated lumber regardless of moisture — but a board that’s still actively shrinking around a screw will also work that screw slightly loose over the following weeks, so a check-and-retighten pass a month or two after building is worth doing on any wet-installed deck.
Signs the Wood Is Dry Enough to Stain or Seal
The water-bead test is the simplest field check: splash a few drops of water onto the wood’s surface. If it beads up and sits there, the wood is still shedding moisture and isn’t ready. If it soaks in within a minute or two, that’s a decent sign it’s close. It’s not precise, though — a moisture meter is the only way to get an actual number, and 19% or lower is the general threshold most stain and sealer manufacturers specify on their own labels (check the specific product, since some semi-transparent stains want it even lower).
Color is a rough secondary cue — freshly treated lumber often has a greenish or yellowish cast from the preservative that fades to a more neutral tan as it dries and weathers, but this isn’t reliable on its own since it varies by treatment chemical and brand. Weight is similarly rough: a truly soaked 2×6 can be noticeably heavier than the same board once dry, but “feels lighter than it did” isn’t a number you can act on with confidence — that’s what the moisture meter is for.
How Long Drying Actually Takes
For lumber installed wet, expect somewhere between 2-4 weeks in a warm, dry, sunny climate and up to 2-3 months in a humid one before it’s dry enough to stain — this is one of the widest ranges in outdoor building because ambient humidity, sun exposure, and airflow around the boards all swing it dramatically. A deck built in Arizona in July can be stain-ready inside three weeks; the same lumber on a shaded, humid Gulf Coast deck can take the better part of a season.
“Kiln-dried after treatment” (KDAT) lumber is the shortcut around this entire wait — it’s treated, then kiln-dried back down to a stable moisture content before it ever leaves the mill, and it’s ready to stain right away without the multi-week waiting period standard treated lumber needs. It costs more per board foot and isn’t stocked everywhere, but it’s worth asking for by name if your project timeline doesn’t have room for a month-long drying wait.
Speeding Up the Drying Process
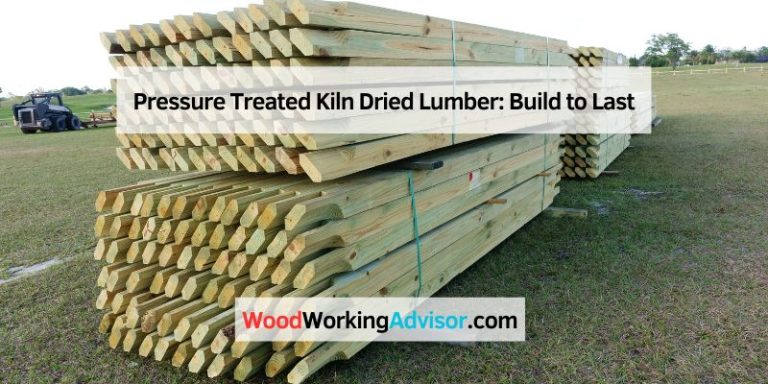
If the lumber is staged before installation rather than already built into a structure, stack it with 1×1 spacer strips (“stickers”) between each layer so air can move on every face, not just the top and bottom of the pile — solid-stacked lumber traps moisture between boards and dries unevenly, which is a common cause of warping that gets blamed on the wood itself rather than how it was stored. Keep the stack off bare ground on blocks or a pallet, and cover just the top with a tarp (loosely, not wrapped tight) to shed rain without trapping humidity underneath.
Once it’s already installed as a deck or fence, you can’t really speed drying up beyond making sure nothing is blocking airflow underneath — keep mulch, soil, and dense plantings from piling up against ledger boards and joists, which is more about preventing rot long-term than speeding up the initial dry-out. Direct sun exposure does the most natural work; a shaded north-facing deck will simply take longer no matter what you do.
Weather’s Effect on Drying Time
Relative humidity matters more than temperature alone — a hot, humid day doesn’t dry wood nearly as fast as a milder, drier one, since the air itself is already close to saturated and can’t absorb much more moisture from the board’s surface. Wind speeds up evaporation meaningfully, which is part of why open, exposed decks dry faster than ones tucked against a house wall or under a covered porch roof.
Because of this variability, don’t trust a fixed number of days or weeks as your final answer — a moisture meter reading is worth more than any calendar estimate, especially right after a rain event has temporarily pushed surface moisture back up even on lumber that was nearly ready to stain the week before.
Common Mistakes to Avoid
The most expensive mistake is staining or sealing too early — a coating applied over wood that’s still pushing moisture out will fail to bond properly and often peels or flakes within a single season, forcing a full strip-and-redo that costs more than the wait would have. The second most common: using standard steel fasteners instead of hot-dip galvanized or stainless with ACQ/MCA-treated lumber, which corrodes ordinary steel screws and nails from the inside out over a year or two, leaving black staining around every fastener head.
Installing boards edge-to-edge with zero gap is the third — it looks tidiest on day one, but wet PT lumber that shrinks as it dries will pull those tight joints into uneven, sometimes crooked gaps within a month or two. A consistent 1/8-3/16 inch gap set with a spacer (a 16-penny nail works as an quick, cheap spacer for standard deck board gaps) accounts for that shrinkage ahead of time instead of fighting it after the fact.
What Deck Builders Actually Do
Most professional deck and fence builders install standard treated lumber wet, as delivered, rather than waiting weeks for it to dry first — waiting that long before framing simply isn’t practical on a job with a schedule. They compensate with the practices above: corrosion-resistant fasteners from day one, consistent board-gap spacing that accounts for shrinkage, and a plan to come back for staining once the wood’s actually dry, usually noted on the client’s calendar for 6-8 weeks out rather than left open-ended.
The exception is anyone using kiln-dried-after-treatment lumber specifically to skip the wait, or a builder in a climate humid enough that a multi-month dry-out would otherwise delay a client’s finish coat past a full season — in those cases, paying the KDAT premium up front is often cheaper than the callback to redo a peeling stain job later.
Frequently Asked Questions
How long should pressure treated wood dry?
For structural installation, it doesn’t need to dry at all — it’s rated to be installed wet and dry in place. For staining or sealing, plan on 2-4 weeks in a warm, dry climate and up to 2-3 months somewhere humid, confirmed with a moisture meter reading of 19% or lower rather than a fixed calendar date.
Can I paint wet pressure treated wood?
No. Paint and stain both need the wood’s moisture content down to roughly 15-19% to bond properly. Applied over wet wood, the coating sits on trapped moisture instead of soaking in, and it typically peels or flakes within a season — the wait is worth it here even though it isn’t needed for framing.
Why does pressure treated wood need to dry before finishing?
Stain and sealer are designed to soak into wood fiber. Wood that’s still saturated from the treatment process has no capacity left to absorb a coating, so it beads on the surface or bonds weakly and fails early. Drying first isn’t about the wood’s structural strength — it’s purely about giving the finish something to actually bond to.
What happens if wood is installed wet?
Nothing structural — this is the standard, code-accepted way most treated decks and fences are built. Expect the boards to shrink slightly and possibly cup or twist a bit as they dry over the following weeks, which is why builders leave gap spacing between boards and plan to retighten fasteners after the initial dry-out period.
Conclusion
Skip the drying wait for framing — install pressure-treated lumber as delivered, use corrosion-resistant fasteners, and space boards to allow for shrinkage. Save the patience for the finish: check moisture content with a meter before you stain or seal, and expect anywhere from a few weeks to a couple of months depending on your climate. Getting that order backwards — waiting to build, or rushing to stain — is where most of the real problems with treated lumber projects actually come from.
Sponsored / affiliate links. As an Amazon Associate I earn from qualifying purchases. I may earn additional commission from eligible campaigns.