Simple Wood Carving Designs: Easy and Creative Ideas
Wood carving is a timeless art. It transforms simple pieces of wood into beautiful designs.
For beginners, simple wood carving designs are the perfect way to start. These designs are easy to follow and require minimal tools. They help you understand the basics while creating beautiful pieces. Wood carving can be a relaxing hobby, offering a sense of accomplishment with each finished piece.
Whether you want to make gifts, decorations, or just enjoy a new craft, simple wood carving designs are the way to go. In this blog, we will explore some easy designs that you can try. Get ready to dive into the world of wood carving and create something wonderful with your hands.
Introduction To Wood Carving
Wood carving is an ancient art form. It has been practiced for centuries. Many find it both relaxing and rewarding. Simple wood carving designs are perfect for beginners. They offer a way to start small and gradually improve skills. This blog post will introduce you to the basics of wood carving. Learn about the benefits and how to get started.
Benefits Of Wood Carving
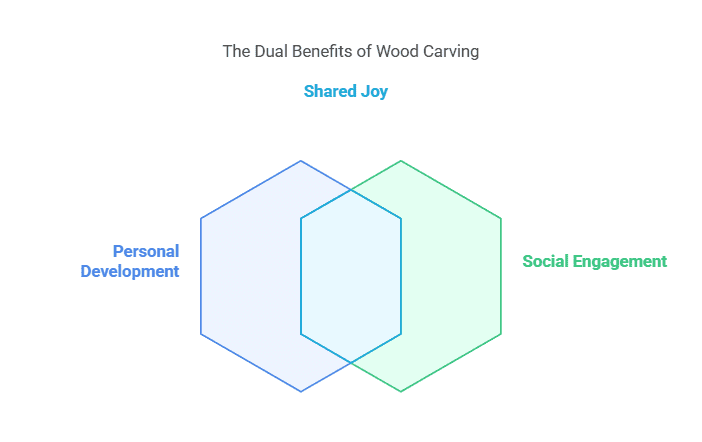
Wood carving offers many benefits. It improves hand-eye coordination. It also enhances creativity. Creating something from wood is satisfying. It is a great stress reliever. Carving can be done alone or with others. It can be a social activity. Many find joy in the tactile experience of working with wood. It connects you with nature.
Getting Started With Wood Carving
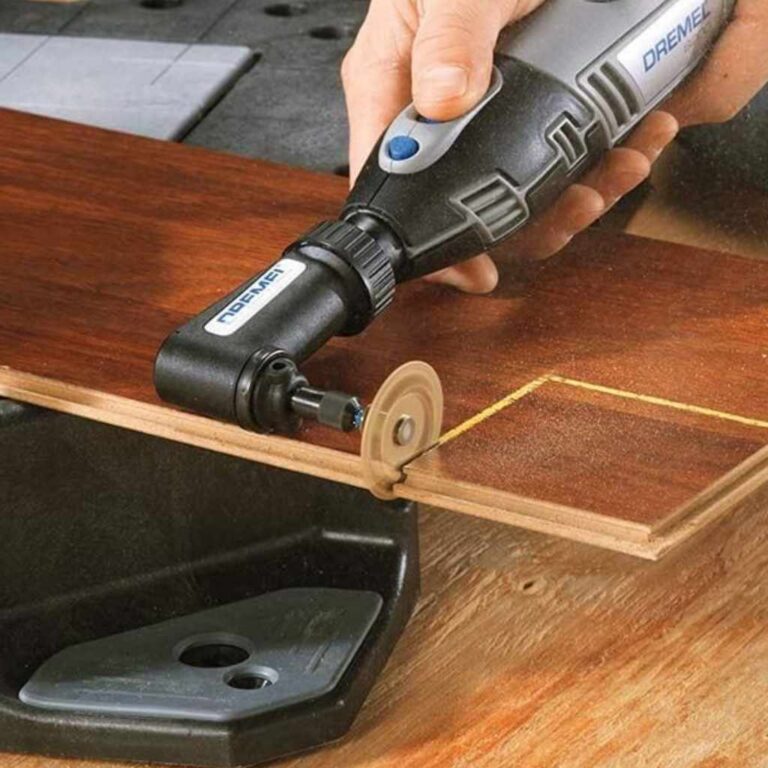
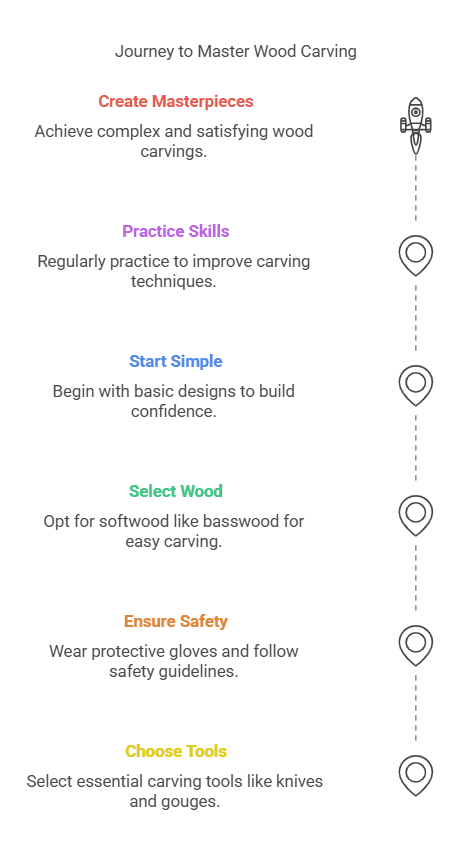
Starting wood carving is simple. First, choose the right tools. Basic tools include a carving knife and gouges. Safety is important. Always wear protective gloves. Choose softwood like basswood for your first project. It’s easy to carve. Begin with simple designs. Practice makes perfect. Follow patterns or create your own. Enjoy the process and learn as you go.
Essential Tools For Beginners
Starting with wood carving can be exciting. But, having the right tools is crucial. Beginners need some essential tools to get started. Let’s explore these tools that will make your carving journey enjoyable and safe.
Basic Carving Tools
First, you need a good set of carving knives. These are the most important tools. They come in different shapes and sizes. A straight-edged knife works well for most tasks. A detail knife is great for fine work. Chip carving knives help create patterns and designs.
Next, consider getting some gouges. Gouges have curved blades. They can scoop out wood easily. There are different types of gouges. Some have U-shaped blades. Others have V-shaped blades. Both are useful for different tasks.
Another essential tool is the chisel. Chisels are flat and straight. They help shape and smooth the wood. Mallets are also important. They are used to tap chisels and gouges. This helps control the force you apply. With these basic tools, you can start carving simple designs.
Safety Gear
Safety is very important in wood carving. Always wear gloves to protect your hands. Carving gloves are cut-resistant. They help prevent injuries from sharp tools.
Eye protection is also necessary. Wood chips can fly into your eyes. Safety glasses keep your eyes safe. Dust masks are useful too. They protect you from inhaling wood dust.
Having a first-aid kit nearby is a good idea. Accidents can happen. It’s best to be prepared. With proper safety gear, you can carve safely and enjoy the process.
Choosing The Right Wood
Choosing the right wood is crucial for successful wood carving. The wood you select can affect the ease of carving and the final look of your piece. Each type of wood has unique qualities. Some woods are easier to carve than others, especially for beginners.
Types Of Wood
There are many types of wood suitable for carving. Common types include basswood, pine, and cedar. Basswood is soft and easy to carve. It is a favorite for beginners. Pine is also soft, but it has more grain. Cedar is aromatic and has a beautiful color.
Hardwoods like oak, walnut, and cherry are tougher to carve. They have a beautiful finish but require more effort. Oak is heavy and strong. Walnut has a rich, dark color. Cherry is smooth and has a fine grain.
Best Wood For Beginners
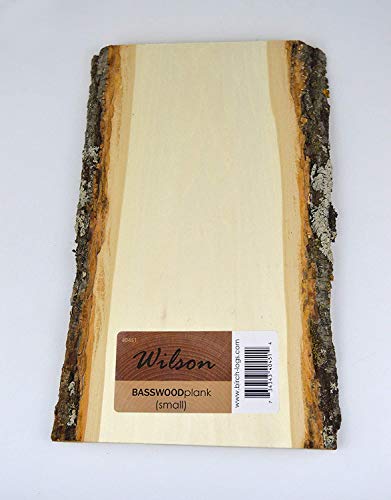
Basswood is the best choice for beginners. It is soft and forgiving. Mistakes are easy to fix. It is also affordable and widely available. Another good option is butternut. It is soft like basswood but has a beautiful grain.
Linden wood is also a good choice. It is soft and has a fine texture. It is easy to carve and holds detail well. Beginners should avoid hardwoods. They are tough and can be frustrating. Start with softwoods to build confidence and skill.
Simple Carving Techniques
Simple carving techniques are perfect for beginners in wood carving. These techniques help create beautiful designs without the need for advanced skills. By learning basic cuts and shapes, you can start your wood carving journey with confidence. Detailing techniques will further enhance your designs, making them look professional.
Basic Cuts And Shapes
The first step in wood carving is learning basic cuts. These cuts form the foundation of your carving. The three main cuts are the push cut, pull cut, and stop cut. Each cut serves a different purpose in shaping the wood.
The push cut involves pushing the knife away from you. This cut is useful for removing large pieces of wood. The pull cut, on the other hand, involves pulling the knife towards you. This cut is great for more controlled and precise shaping.
The stop cut is used to create depth and definition. It involves cutting straight down into the wood. This cut helps in making sharp edges and clear borders. Practicing these basic cuts will help you create various shapes and forms in your wood carving projects.
Detailing Techniques
Once you have mastered the basic cuts, you can move on to detailing techniques. These techniques add fine details and textures to your designs. One common technique is the use of a gouge. A gouge is a curved tool that helps in creating smooth curves and hollows.
Another detailing technique is chip carving. This involves removing small chips of wood to create intricate patterns. Chip carving requires precision and patience but results in beautiful designs.
Adding texture to your carvings can also enhance their appearance. You can use a veining tool to create fine lines and patterns. Experimenting with different tools and techniques will help you find your unique style in wood carving.
Easy Carving Projects
Wood carving can be a rewarding hobby for beginners. Simple designs offer a great starting point. These projects are easy and fun. They also enhance your skills gradually. Let’s explore some easy carving projects.
Carving Simple Animals
Start with carving small animals. Choose familiar shapes like birds or fish. These designs are easy to manage. You don’t need many tools. A basic knife set will do. Draw your design on the wood first. This helps guide your cuts. Make shallow cuts and go slow. Patience is key. As you practice, your carvings will improve. Small animals make great gifts. They also add charm to any space.
Creating Decorative Patterns
Decorative patterns can be simple yet beautiful. Start with basic shapes. Try circles, lines, or swirls. Use these shapes to create a repeating pattern. This technique is called chip carving. It involves removing small chips of wood. A chisel is useful for this. Keep your design symmetrical. This gives a balanced look. You can carve patterns on boxes, frames, or panels. These projects are quick and satisfying. They also make perfect handmade gifts.
Creative Design Ideas
Wood carving is an art that allows you to create unique and beautiful designs. Simple wood carving designs can add a personal touch to your home or make thoughtful gifts. Let’s explore some creative design ideas that can inspire your next wood carving project.
Personalized Gifts
Handmade gifts show you care. Carve a loved one’s name into a piece of wood. A small heart or star next to the name adds a special touch. Another idea is to carve small animals or symbols that have personal meaning. Your friends and family will treasure these personalized gifts.
Home Decor Items
Wood carvings can add charm to any room. Try carving simple shapes like leaves or flowers. These can be used as wall hangings or table centerpieces. Carved wooden coasters also make great additions to your home. If you want a bigger project, carve a wooden sign with a warm message. A welcome sign for your front door or a sweet message for the kitchen can make your home feel even more inviting.
Finishing And Polishing
One of the most crucial steps in creating simple wood carving designs is the finishing and polishing. This process not only enhances the beauty of your artwork but also protects it from damage and aging. Whether you are a beginner or an expert, knowing the right techniques can make a huge difference in the final look of your piece. Let’s dive into some key steps for achieving a flawless finish.
Sanding Techniques
Sanding is the first step in the finishing process. It smooths out the rough edges and prepares the wood for applying finishes. Here are some basic techniques:
- Start with a coarse grit: Begin with a coarse grit sandpaper (60-80 grit) to remove large imperfections.
- Progress to finer grits: Gradually move to finer grits (120, 220, and up to 400) to achieve a smooth surface.
- Sanding blocks: Use sanding blocks to keep the sandpaper flat and even.
- Go with the grain: Always sand in the direction of the wood grain to avoid scratches.
Applying Finishes
Once your carving is smooth, it’s time to apply a finish. The finish not only adds shine but also protects the wood. Here’s how you can do it:
- Choose your finish: There are various finishes available like varnish, lacquer, oil, and wax. Each has its own look and feel. Pick one that suits your design.
- Apply thin coats: Apply the finish in thin, even coats to avoid drips and runs. Use a brush or cloth, depending on the type of finish.
- Sanding between coats: Lightly sand with fine-grit sandpaper between coats to ensure a smooth finish.
- Let it dry: Allow each coat to dry completely before applying the next. This could take a few hours to a day, depending on the product used.
By mastering these simple sanding and finishing techniques, your wood carvings will look stunning and last for years. So, grab your sandpaper and finishing materials, and let your creativity shine!
Common Mistakes To Avoid
Wood carving is a delightful hobby, but it can be tricky for beginners. It’s easy to make mistakes that can spoil your project. In this section, we will discuss some common mistakes and how to avoid them. With a bit of patience and practice, you can create beautiful wood carvings.
Handling Tools Correctly
One of the most common mistakes beginners make is not handling their tools properly. Have you ever tried to carve with a dull knife? It’s like trying to cut butter with a spoon—frustrating and ineffective. Always keep your tools sharp. A sharp tool is safer and makes cleaner cuts.
- Grip – Hold your tools firmly but not too tight. A relaxed grip allows for better control.
- Angle – Pay attention to the angle of your tool. Cutting at the wrong angle can damage the wood or your design.
- Pressure – Apply even pressure. Pressing too hard can cause deep cuts and ruin your work.
Choosing The Right Design
Another common mistake is choosing a design that is too complex for your skill level. Start simple! Have you ever bitten off more than you could chew? It’s the same with wood carving. Beginners should start with easy designs.
- Simple Shapes – Begin with basic shapes like circles, squares, and triangles.
- Easy Patterns – Try out simple patterns such as leaves or geometric designs.
- Small Projects – Work on small projects like a spoon or a small animal figure before attempting larger pieces.
Remember, everyone makes mistakes. The key is to learn from them and keep improving. Happy carving!
Inspiration And Resources
Starting with simple wood carving designs can be exciting and fulfilling. Finding the right inspiration and resources makes the journey even more enjoyable. Below are some ways to get inspired and find the best resources for your wood carving projects.
Online Tutorials
Online tutorials are a great way to learn wood carving. Many websites and YouTube channels offer step-by-step guides. These tutorials often cover basic techniques and simple designs. You can pause and replay videos to understand each step better. Search for tutorials that match your skill level. Start with beginner-friendly projects to build confidence.
Wood Carving Communities
Wood carving communities provide support and inspiration. Join online forums and social media groups. These communities share tips, advice, and project ideas. You can post your work and get feedback from experienced carvers. Participate in challenges and group projects to improve your skills. Engage with others who share your passion for wood carving.
Frequently Asked Questions
What Is The Easiest Thing To Carve Out Of Wood?
Simple shapes like spoons, animals, or hearts are the easiest to carve out of wood. Beginners often start with these.
What Is The Rule Of Three In Wood Carving?
The rule of three in wood carving involves focusing on three key elements: design, technique, and finishing. This approach ensures balanced, detailed, and high-quality carvings.
What Is The Best Thing To Whittle For Beginners?
Beginner whittlers should start with simple projects like a wooden spoon or small animal figures. These are easy and fun.
What Is The Best Wood For Beginner Carving?
Basswood is the best wood for beginner carving. It’s soft, easy to carve, and affordable. This wood has fine grains, making it ideal for detailed work. Basswood is widely available and forgiving for new carvers.
Conclusion
Wood carving offers endless possibilities for creativity. Simple designs are perfect for beginners. Practice and patience lead to beautiful results. Start with easy patterns and gradually improve your skills. Enjoy the process and let your creativity shine. Carving brings relaxation and a sense of accomplishment.
Share your creations with friends and family. Inspire others to try wood carving too. Happy carving and may your designs bring joy!