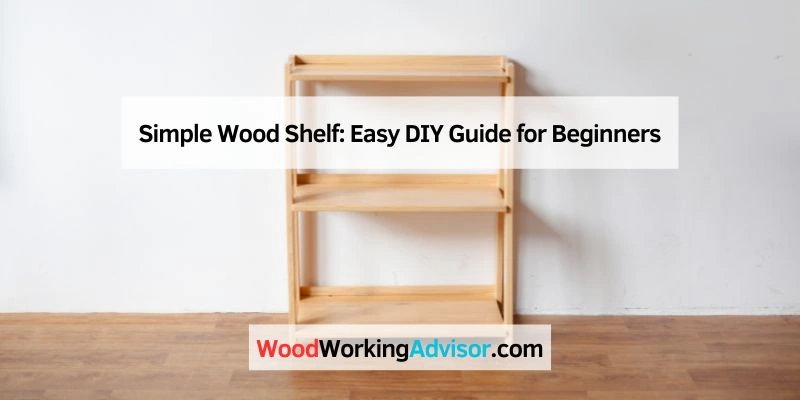
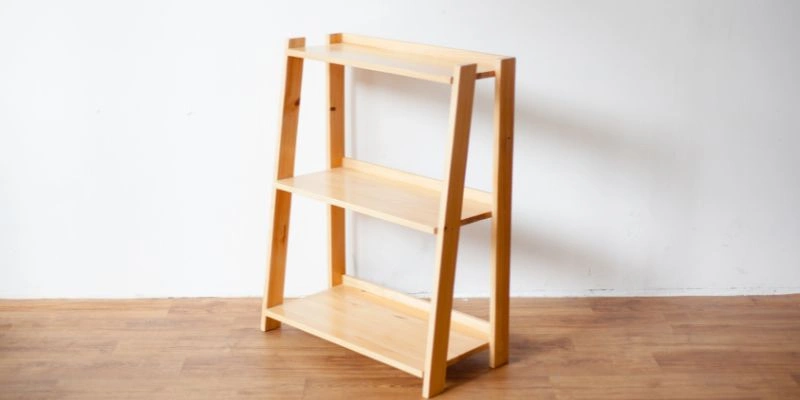
Simple Wood Shelf: Easy DIY Guide for Beginners
A simple wood shelf adds both beauty and function to your space. It’s a versatile piece for any room.
Whether you need extra storage in your kitchen, living room, or office, a wooden shelf can be the perfect solution. It offers a practical way to organize your belongings while enhancing the look of your home. Wood shelves are durable, easy to install, and can fit any decor style.
Plus, you can customize them to suit your needs. From rustic charm to modern minimalism, the possibilities are endless. In this blog post, we’ll explore the benefits of having a simple wood shelf and how it can transform your space. Get ready to discover the perfect blend of style and functionality.
Materials Needed
Creating a simple wood shelf can be a fun and rewarding project. Knowing the right materials needed is essential. In this section, we will cover the materials you need to get started. This includes the type of wood and the tools required.
Wood Selection
Choosing the right wood is crucial. Pine is a good choice for beginners. It’s affordable and easy to work with. Oak and walnut are more durable but cost more. Consider the shelf’s purpose and location. If it will hold heavy items, opt for a stronger wood. Ensure the wood is straight and free from knots.
Tools Required
Having the right tools will make your project easier. A tape measure is essential for accurate cuts. A saw is needed to cut the wood to size. A drill will help create holes for screws. Sandpaper will smooth the wood’s surface. Screws and brackets are necessary for assembly. A level ensures your shelf hangs straight. Lastly, safety gear like goggles and gloves is important. These tools will help you build a sturdy and attractive shelf.
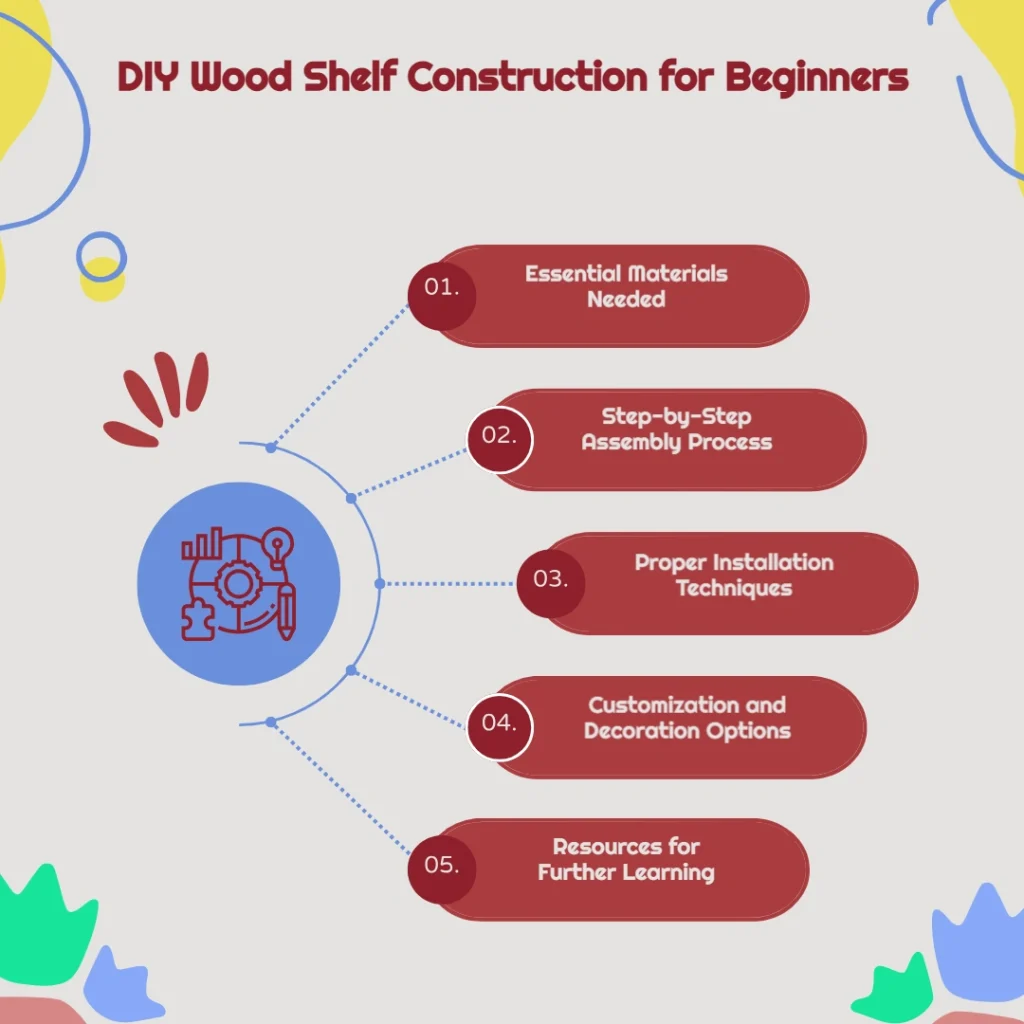
Measurements And Planning
Creating a simple wood shelf involves careful measurements and planning. Proper planning ensures that your shelf will fit perfectly in its intended space. It also helps in avoiding mistakes during the cutting and assembly process.
Determining Shelf Dimensions
First, measure the space where you plan to install the shelf. Note the height, width, and depth. Ensure there is enough clearance for the shelf and items you plan to store.
Think about the weight the shelf needs to support. Thicker shelves can hold more weight. Decide on the number of shelves and the spacing between them. This helps in utilizing the space effectively.
Creating A Cut List
Once you have the dimensions, create a cut list. This list includes all the pieces you need to cut. Note the lengths and widths of each piece.
Using a cut list helps in organizing your work. It also minimizes wood wastage. Mark each piece on the wood before cutting. Double-check measurements to ensure accuracy.
Accurate measurements and planning are key to building a sturdy and functional shelf. Take your time to plan well, and the project will be more enjoyable and successful.
Cutting The Wood
Creating your own simple wood shelf can be incredibly satisfying. One of the most important steps in this DIY project is cutting the wood. This step might seem daunting, but with the right preparation and a bit of patience, you can achieve clean and precise cuts. Let’s dive into the essentials of cutting the wood for your shelf, ensuring you do it safely and accurately.
Safety Tips For Cutting
Before you start cutting, it’s crucial to prioritize safety. Here are some key tips to keep you safe while working with tools:
- Wear Safety Gear: Always use safety glasses to protect your eyes from wood chips. Ear protection is also important if you’re using loud power tools.
- Secure the Wood: Ensure your wood is clamped securely to a stable surface. This prevents slipping and ensures a clean cut.
- Check Your Tools: Inspect your saw for any damage and ensure the blade is sharp. A dull blade can be dangerous and make cutting more difficult.
- Work in a Safe Area: Clear your workspace of any obstacles that could trip you up or interfere with your cutting.
Step-by-step Cutting Guide
With safety in mind, let’s move on to the actual cutting process. Follow these steps to cut your wood accurately:
- Measure and Mark: Use a tape measure to measure the length you need. Mark the cutting line clearly with a pencil and a straight edge.
- Set Up Your Saw: Choose the right saw for the job. A circular saw or a miter saw works well for straight cuts. Adjust the blade depth to slightly more than the thickness of the wood.
- Position the Wood: Place the wood on a stable surface. Ensure the cutting line is accessible and the wood is securely clamped down.
- Make the Cut: Align the saw blade with the marked line. Turn on the saw and guide it slowly along the line. Let the saw do the work; don’t force it.
- Check the Cut: After cutting, inspect the edge. If it’s rough, you can smooth it with a piece of sandpaper or a sanding block.
That’s it! You’ve successfully cut your wood, and you’re one step closer to assembling your simple wood shelf. Remember, practice makes perfect. The more you work with wood, the more confident you’ll become. So, are you ready to transform those wood pieces into a beautiful shelf?
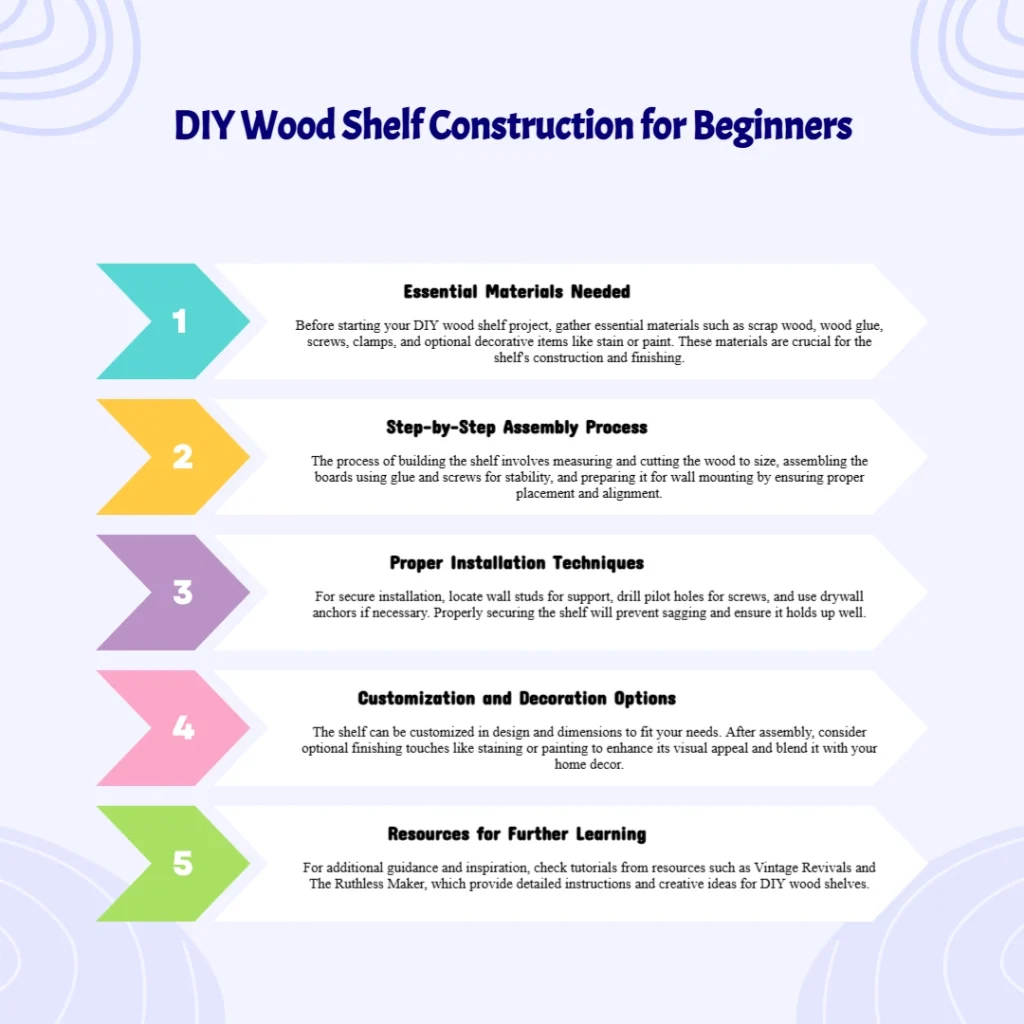
Assembling The Shelf
When it comes to assembling a simple wood shelf, the process can be straightforward yet incredibly satisfying. Whether you’re a novice or a seasoned DIY enthusiast, putting together your shelf can be a rewarding experience. In this section, we’ll walk you through the steps to ensure your shelf is sturdy and stylish, making the most out of your new piece of furniture.
Joining The Pieces
The first step in assembling your wood shelf is to join the pieces. Think of it as fitting together a puzzle – each piece has its place. Begin by laying out all the components on a flat surface. This way, you can see what you’re working with.
Next, refer to the instruction manual. Yes, that little booklet is your best friend here! It will guide you through which pieces fit together. Typically, you’ll start by connecting the side panels to the base. Ensure you’re using the correct screws or nails. A gentle reminder: don’t over-tighten as this could split the wood.
Feeling a bit lost? Don’t worry. Most kits come with pre-drilled holes, making it easier to align everything perfectly. A pro-tip: Use a small amount of wood glue in addition to screws for added strength.
Ensuring Stability
Now that the pieces are joined, the next crucial step is ensuring stability. No one wants a wobbly shelf, right? Stability is key to both functionality and safety.
Start by checking all connections. Ensure that all screws are tight, but remember, not too tight! An easy way to test stability is by giving the shelf a gentle shake. If it feels secure, you’re on the right track.
For added stability, consider using wall anchors. These small but mighty tools can anchor your shelf to the wall, preventing any accidental tipping. Here’s a quick step-by-step guide:
- Mark the spots on the wall where the shelf will be anchored.
- Drill pilot holes at those marks.
- Insert the wall anchors into the holes.
- Secure the shelf to the anchors with screws.
Another tip: Use a level to make sure your shelf is perfectly horizontal. A tilted shelf not only looks off but can cause items to slide off.
As a final touch, give your shelf a once-over. Check for any loose components and tighten as necessary. And there you have it – your simple wood shelf is now assembled and stable, ready to display your favorite items with pride!
| Tools Needed | Materials Needed |
|---|---|
| Screwdriver | Wood glue |
| Drill | Screws/Nails |
| Level | Wall anchors |
Remember, assembling a wood shelf isn’t just about putting pieces together. It’s about creating something functional and beautiful. Take your time, follow these steps, and enjoy the process. Happy building!
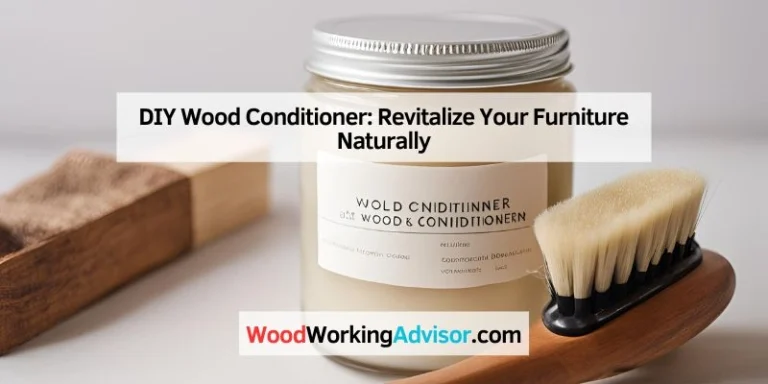
Sanding And Finishing
When it comes to building a simple wood shelf, the final touches can make a big difference. Sanding and finishing are the steps that transform your raw wood into a smooth, polished piece of furniture. These steps ensure your shelf not only looks good but lasts longer too. Let’s dive into the details.
Sanding Techniques
Sanding is the process of smoothing the wood surface. You want to remove any rough spots, splinters, or uneven areas. Here’s a simple way to get started:
- Start with Coarse Grit: Use a coarse sandpaper (60-80 grit) to remove large imperfections. This is your initial pass.
- Move to Medium Grit: Switch to medium grit sandpaper (120-150 grit) to smooth out the surface. This step reduces scratches left by the coarse grit.
- Finish with Fine Grit: Finally, use a fine grit sandpaper (220 grit) for a silky finish. This makes the wood ready for finishing.
Remember, always sand in the direction of the wood grain. Sanding against the grain can leave scratches that are hard to remove. And don’t forget to wipe off the dust with a damp cloth before moving to the next step.
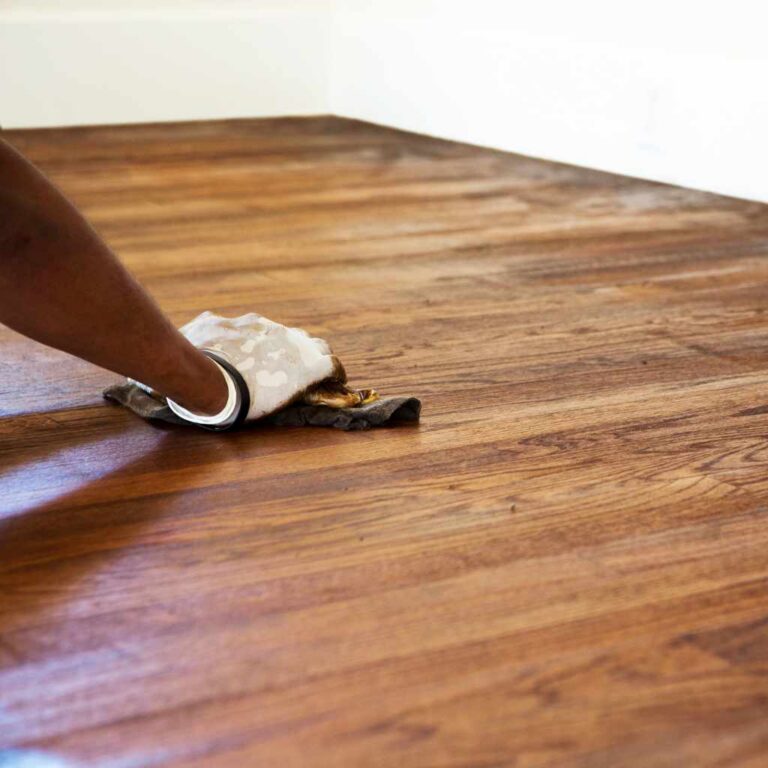
Applying Wood Finish
Now that your wood is smooth, it’s time to apply the finish. The finish protects the wood and adds to its beauty. Here are the basic steps:
- Choose Your Finish: There are different types of finishes – oil, varnish, shellac, and polyurethane. Each has its pros and cons. For beginners, a simple oil finish can be easiest to apply.
- Apply the Finish: Using a clean cloth or brush, apply a thin coat of finish. Work in small sections and follow the grain of the wood.
- Let It Dry: Allow the finish to dry completely. This can take anywhere from a few hours to overnight, depending on the product.
- Sand Lightly Between Coats: For a smooth finish, lightly sand with fine grit sandpaper (320 grit) between coats. Wipe off the dust before applying the next coat.
- Apply Additional Coats: Most finishes require 2-3 coats. Repeat the process until you achieve the desired look.
Finishing can be as simple or as detailed as you want. But even a basic finish can make your wood shelf look professional and polished.
And there you have it! With these simple steps, your wood shelf will not only look great but will also stand the test of time. Happy building!
Mounting The Shelf
Mounting your simple wood shelf might seem like a daunting task, but with the right steps, it’s a breeze. Whether you’re a DIY enthusiast or a beginner, this guide will walk you through the process. From picking the perfect spot to choosing the best method, you’ll have your shelf up in no time!
Choosing The Right Location
First things first, where should your new shelf go? The location is key. Think about what you want to put on the shelf. Heavy books? Cute plants? The items you plan to display will help you decide.
- Eye level: For items you want to show off, place the shelf at eye level.
- Practicality: Make sure the shelf is within reach if you need to grab things often.
- Support: Look for wall studs. They offer the best support for heavy items.
Use a stud finder to locate the wall studs. If there are no studs where you want to hang the shelf, don’t worry! You can still install it using anchors.
Mounting Methods
There are several ways to mount your shelf. Let’s explore the most popular methods:
- Brackets: These are the most common. They come in various styles and can add a decorative touch. Here’s how to use them:
- Mark the spots for the brackets on the wall.
- Drill pilot holes.
- Attach the brackets with screws.
- Place the shelf on the brackets and secure it.
- Floating Shelf Brackets: These give a sleek, modern look as they hide the supports.
- Mark the spots for the brackets.
- Drill holes for the anchors if needed.
- Insert the anchors.
- Screw the brackets into the wall.
- Slide the shelf onto the brackets.
- Anchors: If you can’t find a stud, use wall anchors. They come in handy for drywall.
- Mark the holes for the shelf.
- Drill holes for the anchors.
- Insert the anchors into the wall.
- Screw the shelf into the anchors.
Remember, take your time and make sure everything is level. A crooked shelf can be a real eyesore!
Mounting your shelf can be a fun project. With the right tools and a bit of patience, you’ll create a perfect spot for your favorite items. Ready to get started?
Maintenance Tips
Maintaining your simple wood shelf is key to its longevity. Proper care keeps it looking fresh and extends its lifespan. Here are some tips on how to keep your shelf in top condition.
Cleaning The Shelf
Dust the shelf weekly to prevent buildup. Use a soft, dry cloth. For deeper cleaning, use a damp cloth with mild soap. Avoid harsh chemicals. They can damage the wood. Dry the shelf immediately to prevent water stains.
Repairing Minor Damages
Small scratches can be fixed easily. Use a wood filler or a matching crayon. Sand the area gently. Apply a small amount of filler. Let it dry and then sand it smooth. For deeper scratches, you may need a wood touch-up marker. Match the color of your shelf. Apply carefully and let it dry.
Frequently Asked Questions
What Is The Best Wood For Simple Shelves?
Pine and plywood are the best woods for simple shelves. They are affordable, sturdy, and easy to work with.
Is It Cheaper To Build Your Own Shelves?
Yes, building your own shelves is often cheaper. DIY shelves save money on labor and materials, making it cost-effective.
Are Floating Shelves Out Of Style In 2024?
No, floating shelves are not out of style in 2024. They remain popular for their versatility and modern look.
How Do You Make A Simple Wall Shelf?
To make a simple wall shelf, gather wood, brackets, screws, and a drill. Measure and cut the wood. Attach brackets to the wall, then secure the wood on top. Ensure it’s level and sturdy.
Conclusion
Building a simple wood shelf is a rewarding DIY project. It enhances your space, adds storage, and displays your items. With basic tools and materials, you can create a functional piece. Personalize it with paint or stain for a unique touch.
This project is perfect for beginners and offers great results. Enjoy the satisfaction of crafting something useful with your own hands. Start your wood shelf project today and transform your room.