Table Saw Guide Bar: Essential Tips for Precision Cutting
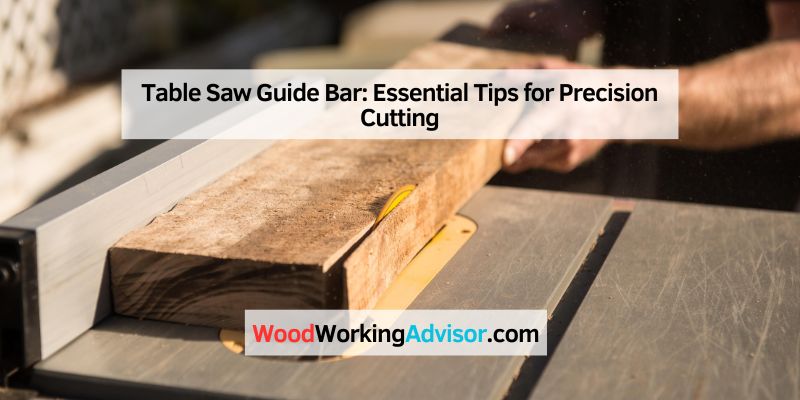
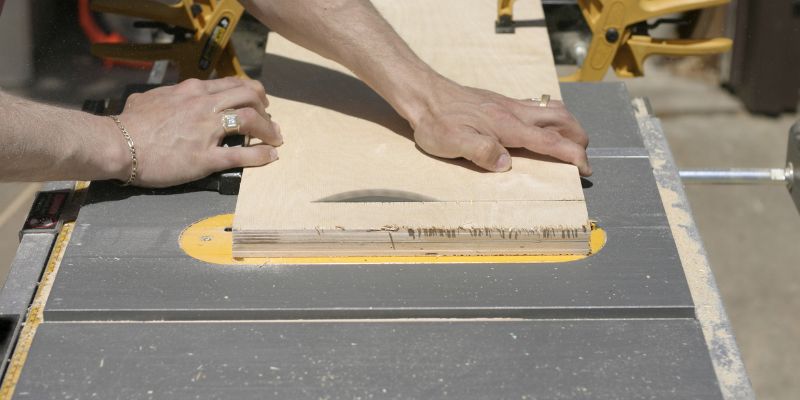
A table saw guide bar is a crucial component that helps ensure precise cuts. It stabilizes the material being cut, enhancing accuracy and safety.
Table saws are essential tools for woodworkers, providing efficiency and precision in cutting various materials. The guide bar is vital for maintaining straight, accurate cuts, allowing users to work confidently. Whether you’re a seasoned professional or a DIY enthusiast, understanding the guide bar’s function can significantly impact your projects.
It helps in aligning the material, preventing errors that could lead to wasted resources. Choosing the right guide bar can enhance your table saw’s performance, making your woodworking tasks smoother and more enjoyable. Investing in quality tools, including guide bars, pays off in the long run, ensuring superior results in all your woodworking endeavors.
Introduction To Table Saw Guide Bars
A table saw guide bar is essential for precise cutting. It helps keep your workpiece aligned during the cutting process. This ensures straight and accurate cuts every time. Understanding guide bars is important for both beginners and seasoned woodworkers.
The Role Of A Guide Bar
The guide bar serves several key functions:
- Alignment: Keeps the wood in place.
- Stability: Reduces the risk of kickback.
- Precision: Ensures straight cuts.
- Versatility: Allows for various cutting techniques.
Using a guide bar enhances safety and efficiency. It helps create clean edges and smooth finishes. With the right guide bar, cutting becomes easier and more enjoyable.
Types Of Guide Bars
There are several types of guide bars available. Each type has unique features. Here’s a quick overview:
| Type | Description | Best For |
|---|---|---|
| Standard Guide Bar | Basic guide for straight cuts. | Beginners and general use. |
| T-Square Guide Bar | Offers precise measurements with a T-square design. | Detailed woodworking projects. |
| Crosscut Guide Bar | Designed for crosscutting at various angles. | Angled cuts and mitering. |
| Rip Guide Bar | Perfect for ripping lumber into narrower pieces. | Ripping tasks and larger boards. |
Choosing the right guide bar can improve your woodworking projects. Each type enhances specific cutting techniques. Selecting a guide bar that suits your needs is vital for success.

Selecting The Right Guide Bar
Choosing the right guide bar for your table saw is crucial. A suitable guide bar enhances accuracy and safety. This section explores key factors to consider.
Size And Compatibility
Size plays a vital role in selecting a guide bar. Ensure it fits your specific table saw model. Here are some points to consider:
- Length: Measure the length of your existing guide bar.
- Width: Check the width to match your saw’s groove.
- Compatibility: Verify compatibility with your saw brand.
Use the following table to match sizes:
| Table Saw Brand | Recommended Guide Bar Length |
|---|---|
| Brand A | 24 inches |
| Brand B | 30 inches |
| Brand C | 36 inches |
Material Considerations
The material of the guide bar affects durability and performance. Common materials include:
- Aluminum: Lightweight and rust-resistant.
- Steel: Heavy-duty and highly durable.
- Plastic: Affordable but less durable.
Choose a material based on your cutting needs:
- For heavy use, opt for steel.
- For portable setups, aluminum is ideal.
- For occasional use, plastic may suffice.
Consider the environment where you work. Humidity and dust can impact material choice.
Installation Process
Installing a Table Saw Guide Bar can enhance your woodworking precision. Follow this guide for a smooth setup.
Step-by-step Setup
- Gather Tools: Collect all necessary tools. You will need:
- Screwdriver
- Wrench
- Measuring tape
- Level
- Prepare the Saw: Unplug the table saw. Ensure it is clean and free of debris.
- Align the Guide Bar: Place the guide bar on the table. Use a level to check alignment.
- Attach the Guide Bar: Secure it with screws. Ensure it is tight but not over-tightened.
- Test the Setup: Plug in the saw. Make a test cut to check accuracy.
Common Installation Mistakes
| Mistake | Impact | Solution |
|---|---|---|
| Incorrect alignment | Poor cut accuracy | Use a level before securing. |
| Loose screws | Guide bar may shift | Check tightness after installation. |
| Not testing | Unforeseen issues | Always perform a test cut. |
Stay focused during installation. Follow steps carefully. This ensures a successful setup.
Adjusting Your Guide Bar
Adjusting your table saw guide bar is essential for accurate cuts. A well-aligned guide bar ensures the blade cuts where you want it. This section covers how to fine-tune your guide bar and when adjustments are necessary.
Fine-tuning For Precision
Fine-tuning your guide bar improves cutting accuracy significantly. Follow these steps to make precise adjustments:
- Ensure the saw is turned off and unplugged.
- Loosen the guide bar locking screws.
- Align the guide bar with the blade.
- Use a square to check the alignment.
- Tighten the locking screws to secure the guide bar.
Check the alignment regularly. A misaligned guide bar can cause inaccurate cuts. Minor adjustments can lead to major improvements in your projects.
When To Adjust Your Guide Bar
Knowing when to adjust your guide bar is crucial. Here are some common signs:
- Your cuts are not straight.
- You notice uneven edges on your workpiece.
- The saw produces excessive noise during cutting.
- Regular use of the saw over time.
Consider checking your guide bar alignment:
| Situation | Action |
|---|---|
| After each major project | Inspect and adjust |
| When cutting feels off | Realign immediately |
| Before starting a new project | Check alignment |
Maintaining the guide bar leads to better results. Regular adjustments ensure your projects are precise and professional.
Maintenance Tips
Proper maintenance keeps your Table Saw Guide Bar in top shape. Regular care improves performance and extends its lifespan. Here are key maintenance tips to follow.
Cleaning Routines
Cleaning your guide bar is essential for smooth operation. Dust and debris can affect performance. Follow these simple steps for effective cleaning:
- Unplug the table saw before cleaning.
- Use a soft brush to remove dust.
- Wipe the guide bar with a damp cloth.
- Apply a light coat of lubricant.
Establish a cleaning schedule. Clean the guide bar after every use. This prevents buildup and keeps it functioning well.
Wear And Tear Inspection
Inspect your guide bar for wear and tear regularly. Early detection prevents major issues. Check for:
- Scratches or dents on the surface
- Rust or corrosion
- Loose fittings or screws
Use the following table for inspection frequency:
| Inspection Item | Frequency |
|---|---|
| Surface Condition | Every Use |
| Rust Check | Weekly |
| Loose Fittings | Monthly |
Address any issues immediately. This ensures safe and efficient operation.
Safety First
Using a table saw requires attention to safety. A guide bar enhances precision. It also plays a crucial role in protecting users. Understanding safety features is vital. Always prioritize safety in every project.
Guide Bar Safety Features
Guide bars come with several important safety features:
- Anti-Kickback Pawls: These prevent the wood from being pushed back towards the user.
- Blade Guards: Protect fingers from accidental contact with the blade.
- Riving Knife: Reduces the risk of kickback and keeps the cut straight.
- Push Sticks: Help keep hands away from the blade.
- Adjustable Fence: Ensures accurate cuts and minimizes errors.
Personal Protective Equipment
Wearing the right protective equipment is essential. Here’s a list of must-have gear:
| Equipment | Purpose |
|---|---|
| Safety Glasses | Protect eyes from flying debris. |
| Hearing Protection | Reduce noise from the saw. |
| Dust Masks | Prevent inhalation of wood dust. |
| Cut-Resistant Gloves | Protect hands from cuts. |
| Steel-Toed Boots | Protect feet from heavy items. |
Stay safe while using a table saw. Always check equipment before use. Make sure to follow safety guidelines.
Troubleshooting Common Issues
Table saws are essential for precise cuts. Issues with the guide bar can affect your projects. Here are common problems and solutions.
Alignment Problems
Alignment issues can lead to inaccurate cuts. Check these steps to fix them:
- Inspect the blade: Ensure it is parallel to the guide bar.
- Adjust the trunnion: It may need realignment.
- Use a square: Measure the distance from the blade to the miter slot.
Follow this simple table for quick alignment checks:
| Check | Action |
|---|---|
| Blade Alignment | Use a square to verify alignment. |
| Trunnion Adjustment | Loosen screws and align as needed. |
Guide Bar Slippage
Slippage can cause unsafe operation. Follow these steps to secure the guide bar:
- Check the clamps: Ensure they are tight.
- Inspect for wear: Replace any worn parts.
- Use anti-slip tape: This can help grip the bar better.
Regular maintenance prevents slippage. Keep your tools in top condition.
Advanced Techniques
Mastering advanced techniques with your Table Saw Guide Bar can elevate your woodworking skills. These techniques help achieve precision and efficiency in your projects.
Making Angled Cuts
Making angled cuts can enhance your designs significantly. Use the following steps for accurate angled cuts:
- Set the Angle: Adjust the blade to your desired angle.
- Use a Protractor: Ensure the angle is accurate.
- Secure the Workpiece: Use clamps to hold it in place.
- Guide the Cut: Use the guide bar for a straight cut.
Common angles include:
- 45 degrees: Perfect for corners.
- 30 degrees: Great for decorative edges.
- 60 degrees: Useful for unique shapes.
Handling Long Workpieces
Long workpieces can be tricky. Follow these tips to manage them safely:
| Technique | Description |
|---|---|
| Use Outfeed Tables | Support the end of long pieces. |
| Employ Roller Stands | Assist in moving heavy materials. |
| Work in Pairs | Have someone help guide the piece. |
Always ensure your workspace is clear. This reduces the risk of accidents.
With these advanced techniques, your woodworking will reach new heights. Enjoy creating with confidence!
Accessorizing Your Guide Bar
Enhancing your table saw guide bar can greatly improve your woodworking experience. Upgrades and add-ons can boost precision and versatility. Simple DIY modifications can make your work easier and safer.
Upgrades And Add-ons
Upgrading your guide bar with the right accessories can transform your projects. Here are some popular options:
- Digital Readout: Adds accuracy to measurements.
- Extended Rails: Allows for larger cuts.
- Feather Boards: Keeps wood steady during cuts.
- Crosscut Sled: Improves safety and precision.
| Accessory | Benefits |
|---|---|
| Digital Readout | Improves measurement accuracy |
| Extended Rails | Enables larger cuts |
| Feather Boards | Enhances safety and stability |
| Crosscut Sled | Boosts precision and safety |
DIY Modifications
Creating your own modifications can personalize your guide bar. Here are some easy ideas:
- Adding a Stop Block: This helps make repeat cuts easier.
- Installing a T-track: Allows for flexible accessory placement.
- Creating a Custom Fence: Perfectly fits your needs.
- Using Magnets: Hold tools and accessories in place.
These modifications not only improve functionality but also enhance safety.
Expert Advice
Mastering the use of a table saw guide bar can greatly enhance your woodworking projects. Here are some expert tips to improve your efficiency and avoid common pitfalls.
Pro Tips For Efficiency
- Use a Quality Guide Bar: Invest in a durable guide bar. It ensures precise cuts.
- Regular Maintenance: Clean the guide bar often. Check for debris and rust.
- Adjust for Accuracy: Always calibrate your guide bar before each use.
- Set Proper Blade Height: Adjust the blade height according to your material thickness.
- Use Push Sticks: Keep your hands safe with push sticks while cutting.
Learning From Mistakes
Even experienced woodworkers make mistakes. Here are common errors and how to avoid them:
| Error | Solution |
|---|---|
| Misalignment of the guide bar | Double-check alignment before cutting. |
| Incorrect blade selection | Choose the right blade for your material type. |
| Forgetting safety gear | Always wear goggles and ear protection. |
| Cutting too quickly | Take your time for better accuracy. |
Learning from these mistakes can improve your skills. Stay patient and practice regularly.
Frequently Asked Questions
What Is A Table Saw Guide Bar?
A table saw guide bar is a crucial accessory. It helps in guiding the material for accurate cuts. This tool enhances precision and safety while operating a table saw. Using a guide bar reduces the risk of kickback and ensures straight, uniform cuts every time.
How Do I Install A Table Saw Guide Bar?
To install a table saw guide bar, first, ensure the saw is unplugged. Then, follow the manufacturer’s instructions for mounting the guide bar. Typically, you align the bar with the table and secure it with screws. Proper installation is vital for optimal performance and safety.
What Materials Can I Cut With A Guide Bar?
You can cut various materials using a table saw guide bar. Common materials include plywood, hardwood, and softwood. It’s also suitable for cutting MDF and particle board. Ensure your blade is appropriate for the material for best results and safety.
How Do I Maintain My Table Saw Guide Bar?
Maintaining your table saw guide bar is simple. Regularly check for dirt and debris, and clean it with a cloth. Lubricate any moving parts to ensure smooth operation. Inspect for any signs of wear or damage, and replace as necessary to maintain precision.
Conclusion
Choosing the right table saw guide bar enhances your woodworking experience. It ensures precision and safety for every cut. Investing in a quality guide bar can elevate your projects. Remember to consider compatibility and features that suit your needs. A reliable guide bar is essential for achieving professional results in your workshop.