1/2 vs 3/4 Pipe Clamps: Essential Differences
The main difference between 1/2 inch and 3/4 inch pipe clamps lies in their nominal pipe size compatibility, affecting the maximum wood surface area they can clamp and the pressure they apply. 1/2 inch clamps are best for smaller projects and thinner boards, while 3/4 inch clamps handle larger boards and wider surfaces.
Ever found yourself staring at a bundle of pipes and clamp heads, wondering which ones are right for your woodworking project? It’s a common question for beginners, and honestly, it can be a little confusing at first. Those numbers, “1/2 inch” and “3/4 inch,” seem straightforward, but they refer to the pipe size, not the clamp’s jaw opening directly. This can lead to frustration when you end up with clamps that are too big or too small for the wood you’re trying to join.
But don’t you worry! As your woodworking mentor, I’m here to clear things up. Understanding the essential differences between 1/2 inch and 3/4 inch pipe clamps will save you time, money, and a whole lot of headaches. We’ll break down exactly what these sizes mean, where each is best used, and how to pick the perfect clamp for your needs. Get ready to become a pipe clamp expert!
Understanding Pipe Clamp Basics
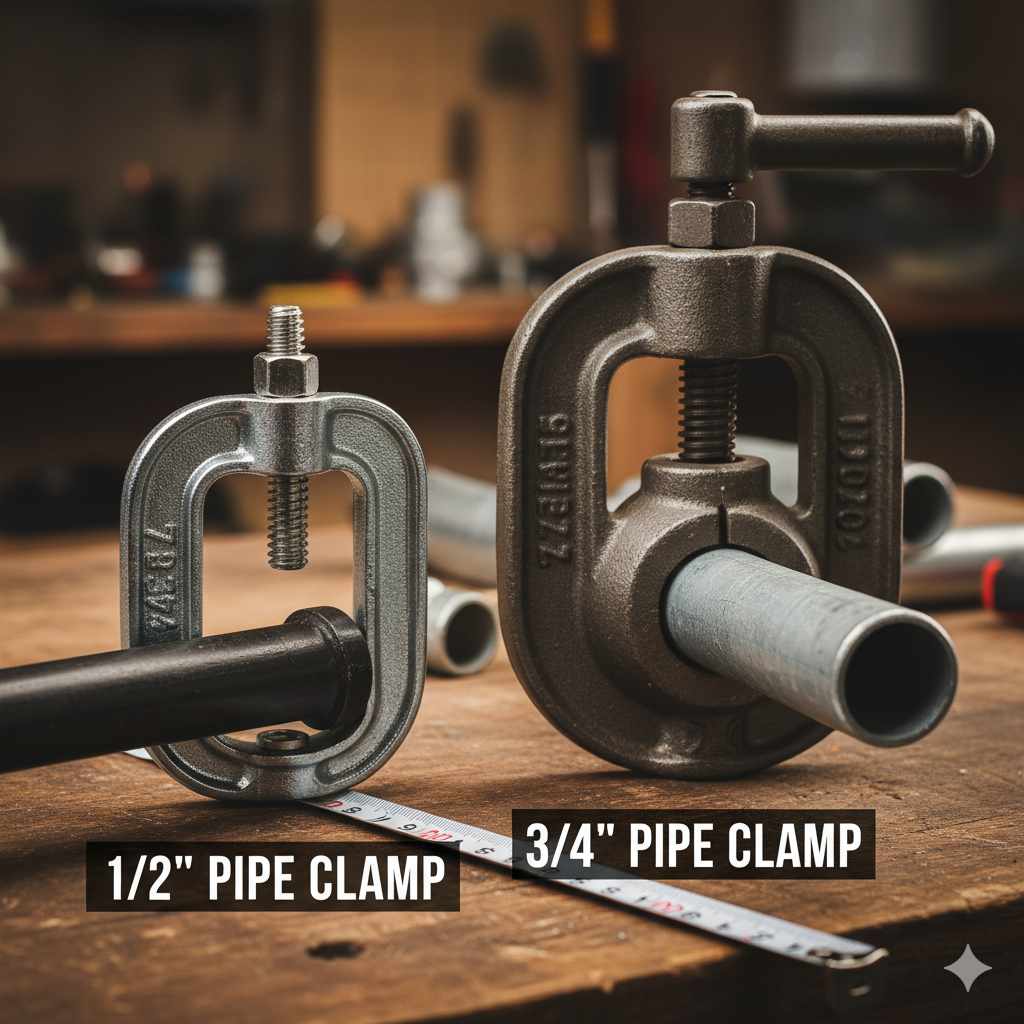
Before we dive into the nitty-gritty of 1/2 vs 3/4, let’s quickly recap what pipe clamps are and how they work. At their core, pipe clamps are incredibly simple yet powerfully effective tools for holding pieces of wood together while glue dries or for holding projects steady for other woodworking tasks. They consist of two main parts: a clamp head that slides onto a pipe, and a threaded rod with a handle and a shoe that fit into the ends of the pipe.
You thread a standard length of pipe (like galvanized steel pipe) into the clamp heads, slide them to the desired distance, and then tighten the handle. This pushes the shoe on one end against your workpiece, while the other clamp head acts as a secure abutment. The magic is in the long reach provided by the pipe, allowing you to clamp wide panels, long boards, or even full-sized doors and tabletops.
The Meaning Behind the Numbers: Nominal Pipe Size
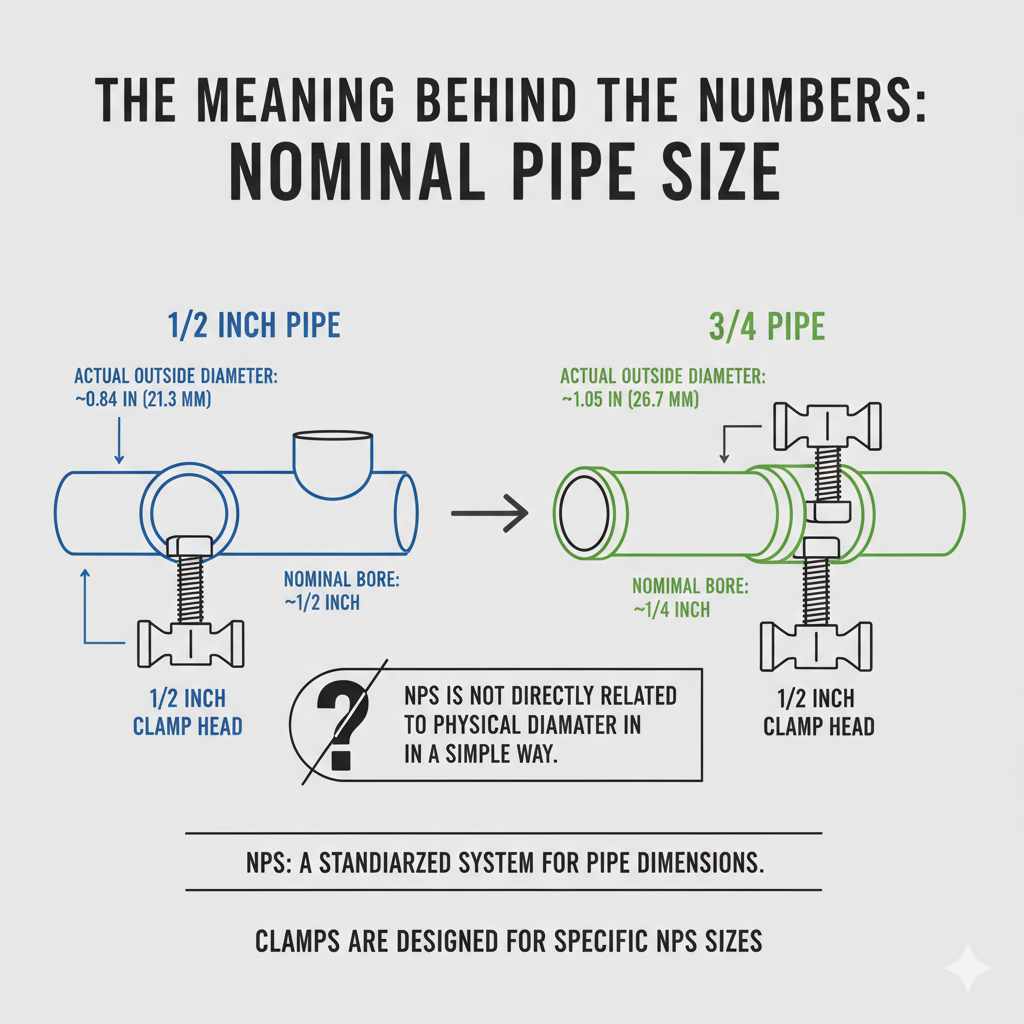
This is where the confusion often starts. When we talk about 1/2 inch or 3/4 inch pipe clamps, we aren’t talking about the actual physical outside diameter of the pipe itself, or even the inside diameter. We are referring to the nominal pipe size (NPS).
NPS is a standardized system for designating pipe dimensions. For smaller pipes, the NPS is not directly related to the physical dimensions in a simple way. Instead, NPS is a series of standardized sizes that have been established over time.
1/2 Inch Pipe: This typically uses a pipe with an actual outside diameter of about 0.84 inches (around 21.3 mm) and a wall thickness that makes its nominal bore (inner open space) close to 1/2 inch.
3/4 Inch Pipe: This usually employs a pipe with an actual outside diameter of about 1.05 inches (around 26.7 mm) and a larger nominal bore close to 3/4 inch.
The clamp heads are designed to thread onto these specific nominal pipe sizes. So, a 1/2 inch pipe clamp head will screw onto a 1/2 inch NPS pipe, and a 3/4 inch clamp head will screw onto a 3/4 inch NPS pipe.
Key Differences: 1/2 Inch vs. 3/4 Inch Pipe Clamps
The nominal pipe size directly influences several critical aspects of how the clamps perform. Here’s a breakdown of the essential differences:
1. Strength and Rigidity
3/4 Inch Pipe Clamps: Because they use a larger diameter pipe with a thicker wall, the 3/4 inch system is inherently stronger and more rigid. This means it will flex less under pressure, which is crucial for larger projects where even small amounts of flex can lead to misaligned joints or uneven glue-ups. A stiffer clamp applies more consistent pressure across the workpiece.
1/2 Inch Pipe Clamps: While perfectly adequate for many tasks, the thinner-walled, smaller diameter pipe of the 1/2 inch system is more prone to flexing. For very long spans or when applying significant clamping pressure, this flex can become noticeable.
2. Clamping Pressure
3/4 Inch Pipe Clamps: The sturdier pipe and often more robustly built clamp heads and handles allow for higher clamping pressures. This is important for projects requiring very tight joints, such as furniture making or cabinet doors, where squeezing out excess glue is essential for a strong bond.
1/2 Inch Pipe Clamps: These clamps are generally designed for moderate clamping pressures. While sufficient for quick repairs or smaller assemblies, they might not withstand the same extreme pressure as their 3/4 inch counterparts without showing signs of strain or flexing.
3. Maximum Width and Surface Area
3/4 Inch Pipe Clamps: The greater strength and rigidity mean 3/4 inch pipe clamps can effectively span wider workpieces. You can use longer pipes (often up to 6 feet or more) to clamp large tabletops, panels, or cabinet backs without excessive sagging or bowing of the pipe. This makes them ideal for bigger projects.
1/2 Inch Pipe Clamps: These are better suited for smaller projects. While you can still use longer pipes, the tendency for the pipe to flex or bend increases significantly with length. They are excellent for clamping narrower boards, smaller boxes, or projects that don’t require a vast clamping surface.
4. Weight and Portability
3/4 Inch Pipe Clamps: The heavier gauge pipe and often larger clamp heads make 3/4 inch systems heavier. While this adds to their stability, it can make them less portable if you need to move them around frequently.
1/2 Inch Pipe Clamps: These tend to be lighter overall. If you have limited storage space, a small workshop, or need to transport your clamps often, the lighter weight of the 1/2 inch system can be an advantage.
5. Cost
3/4 Inch Pipe Clamps: Generally, 3/4 inch pipe clamps command a higher price. This is due to the thicker material used for the pipes and often more substantial construction of the clamp heads themselves.
1/2 Inch Pipe Clamps: They are typically more budget-friendly, making them an attractive option for beginners or those on a tighter budget. The pipes themselves are also usually less expensive.
When to Use 1/2 Inch Pipe Clamps
Think of your 1/2 inch pipe clamps as your go-to for smaller, everyday woodworking tasks. They are perfect for:
Small Craft Projects: Building birdhouses, bookshelves, or decorative items.
Box and Carcass Assembly: Assembling drawers, small cabinets, or keepsake boxes where the width of the pieces isn’t excessive.
Picture Frames: Clamping mitred corners for picture frames.
Repairs: Quick fixes on furniture or wooden items where significant width isn’t a concern.
Working with Thinner Wood: When your project involves boards that are 3/4 inch thick or less.
Budget-Conscious Beginners: If you’re just starting out and want to build a versatile set of clamps without a huge initial investment.
Let’s visualize this with a common scenario. Imagine you’re building a simple wooden crate for storage. The sides might be 10 inches wide, and the overall length of the joined pieces for the sides could be around 24 inches. For this, a 1/2 inch pipe clamp with a 30-inch pipe would work wonderfully. The pipe won’t sag much, and the clamping force will be more than enough to create a strong bond.
When to Use 3/4 Inch Pipe Clamps
The 3/4 inch pipe clamps are your heavy-duty champions. They step in when the project demands more muscle and stability. You’ll want to use them for:
Large Panel Glue-Ups: Joining boards together to create tabletops for dining tables, desks, or large shelving units.
Cabinet Doors and Face Frames: Where precise alignment and strong, flat joints are critical.
Stair Treads and Risers: Projects that often involve long, wide pieces of wood.
Full-Size Furniture: Building the main carcases of dressers, cabinets, or bed frames.
Working with Wider Wood: When your boards are wider than 6 inches or your overall clamping span exceeds 3 feet.
When Maximum Clamping Pressure is Needed: For joints that require a very strong, tight bond.
Consider building a large dining table. You might be joining several 8-foot long boards, each 6 inches wide, to create a 4-foot wide tabletop. In this scenario, you’ll need multiple long pipes (perhaps 5 or 6 feet each) to clamp across the entire width. The 3/4 inch pipe clamps are essential here because their robust construction will prevent the pipe from bowing significantly under the immense pressure required to keep all those boards perfectly flush. Without them, the pipe could sag in the middle, leading to an uneven tabletop.
A Comparative Look: Tables for Clarity
To help you digest these differences quickly, let’s put them into a table.
Table 1: Key Differences: 1/2 Inch vs. 3/4 Inch Pipe Clamps
| Feature | 1/2 Inch Pipe Clamps | 3/4 Inch Pipe Clamps |
| :—————- | :————————————————— | :——————————————————- |
| Nominal Size | Designed for 1/2 inch NPS threaded pipe | Designed for 3/4 inch NPS threaded pipe |
| Pipe Diameter | Smaller O.D. (approx. 0.84 inches) | Larger O.D. (approx. 1.05 inches) |
| Strength | Good for moderate use, prone to flexing on long spans | Excellent, very rigid, less prone to flexing |
| Clamping Force| Moderate | High |
| Best For | Smaller projects, narrower boards, less width | Larger projects, wider boards, long spans, high pressure |
| Weight | Lighter | Heavier |
| Cost | More affordable | More expensive |
| Pipe Length | Recommended up to 4-6 feet | Recommended up to 6+ feet |
Another way to think about it is in terms of the types of projects they are best suited for.
Table 2: Project Suitability: 1/2 Inch vs. 3/4 Inch Pipe Clamps
| Project Type | Recommended Clamp Size | Why? |
| :—————- | :——————— | :—————————————————————————- |
| Small Jewelry Box | 1/2 Inch | Small dimensions, minimal width, doesn’t require extreme clamping force. |
| Picture Frames | 1/2 Inch | Narrow pieces, usually short lengths, easy to handle. |
| Bread Boards | 1/2 Inch | Typically narrower than dining tables, 1/2 inch pipe is usually sufficient. |
| Basic Shelving | 1/2 Inch or 3/4 Inch | Depends on shelf width and length. Up to 8-10 inches wide, 1/2 inch might do. |
| Large Tabletops | 3/4 Inch | Wide panels, long spans require rigidity to prevent bowing and ensure flushness. |
| Cabinet Carcases | 3/4 Inch | Larger glue surfaces and longer clamping distances demand stronger clamps. |
| Dollhouse Parts | 1/2 Inch | Miniaturized projects benefit from smaller, lighter, and less powerful clamps. |
| Workbench Top | 3/4 Inch | Usually very wide and long, requiring maximum strength and stability. |
Beyond the Size: Other Factors to Consider
While the 1/2 inch vs. 3/4 inch distinction is primary, there are other elements of pipe clamps that can influence your choice and satisfaction:
Clamp Head Style and Quality
Common Styles: You’ll often see “casting” clamp heads (heavy cast iron) and “stamped steel” clamp heads (thinner, stamped metal). Cast iron heads are generally more durable and stable. Some clamp heads have multiple “teeth” for gripping the pipe, offering more secure positioning.
Jaws: Look for clamp jaws that are wide and flat to distribute pressure evenly across your wood. Some come with rubber pads to protect your workpiece, which is a nice bonus.
Handle: A comfortable, ergonomic handle is key, especially when tightening multiple clamps.
Pipe Material and Threading
Galvanized Steel Pipe: This is the most common and recommended material for pipe clamps. It’s durable, rust-resistant, and readily available at hardware stores. Always ensure the pipe is threaded on both ends.
Pipe Length: You’ll need to cut your pipes to the required length for each project. Standard pipe lengths can be cut down easily by any hardware store, or you can do it yourself with a pipe cutter and threader. Always allow a few inches of pipe for the clamp heads to thread onto.
Thread Condition: Ensure the threads on both the pipe and the clamp heads are clean and free of damage. This is crucial for smooth operation and proper clamping force. Refer to resources like OSHA regulations on hand and power tools, which, while not specific to clamps, underscore the importance of well-maintained equipment for safety.
Quantity of Clamps
Whether you choose 1/2 inch or 3/4 inch, you’ll likely need multiple clamps for most projects. For panel glue-ups, it’s often recommended to have clamps spaced every 8 to 12 inches along the joint. For smaller boxes, two or four clamps might suffice. It’s wise to build your clamp collection gradually as you undertake more projects.
Protecting Your Investment and Your Work
Regardless of the size you choose, taking care of your pipe clamps will ensure they serve you for years.
1. Cleanliness is Key: After each use, wipe down the pipe and clamp heads to remove glue residue. Dried glue can make them stiff and difficult to operate.
2. Lubrication: A light coating of paste wax or a spray lubricant on the threaded rod can help them move smoothly. Avoid over-lubricating, which can attract dust and dirt.
3. Storage: Store your clamps so the pipes aren’t leaning, which can cause them to bend over time. Hanging them or storing them on shelves is ideal.
4. Protect Your Wood: Always use scrap wood or clamping pads between the clamp jaws and your project to prevent marring the surface.
For more on tool maintenance specific to woodworking, the Wood Magazine website offers excellent advice on keeping your tools in top shape.
Is It Worth Having Both?
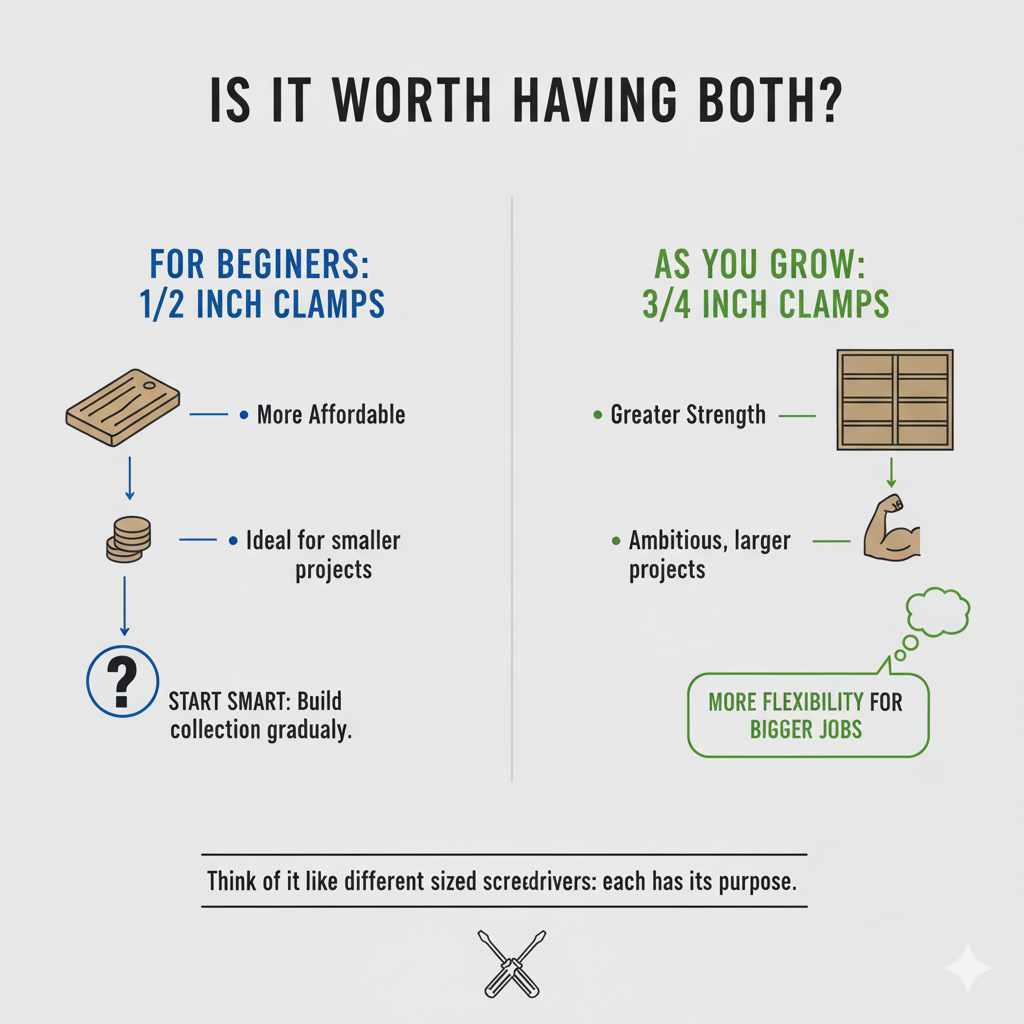
Absolutely! Many seasoned woodworkers have a collection of both 1/2 inch and 3/4 inch pipe clamps. This allows them to choose the right tool for every job, big or small.
Starting with a few pairs of 1/2 inch pipe clamps is a smart move for beginners. They are more affordable and cover a wide range of smaller projects that you’ll likely tackle early on. As your skills grow and your projects become more ambitious, you can gradually add 3/4 inch clamps to your workshop arsenal. This staged approach makes building your tool collection manageable and cost-effective.
Think of it like having different sizes of screwdrivers or measuring tapes; each has its purpose, and having both provides greater flexibility and better results.
Frequently Asked Questions (FAQ)
Q1: What is the difference between a 1/2 inch pipe clamp and a 3/4 inch pipe clamp?
A1: These numbers refer to the nominal pipe size the clamp is designed to thread onto. 1/2 inch clamps use smaller, less rigid pipes, ideal for smaller projects. 3/4 inch clamps use larger, more rigid pipes, suited for wider boards, longer spans, and higher clamping pressure on larger projects.
Q2: Can I use a 1/2 inch clamp with a 3/4 inch pipe, or vice versa?
A2: No, you cannot. The threads on the clamp heads are specifically designed for the corresponding nominal pipe size. A 1/2 inch clamp will not thread onto a 3/4 inch pipe, and a 3/4 inch clamp will not thread onto a 1/2 inch pipe. Using the wrong size will result in a loose or unusable connection.
Q3: How long can the pipe be for 1/2 inch and 3/4 inch pipe clamps?
A3: For 1/2 inch clamps, pipes up to about 4-6 feet are generally recommended. Longer pipes can flex significantly. For 3/4 inch clamps, you can safely use pipes of 6 feet or even longer due to their increased rigidity. Always consider the potential sag of the pipe over longer distances for your specific project needs.
Q4: Are 3/4 inch pipe clamps always stronger than 1/2 inch pipe clamps?
A4: Yes, in terms of the clamping system itself. The 3/4 inch pipe is thicker-walled and has a larger diameter, making it much more rigid and less prone to bending or flexing under pressure. The clamp heads are also often built to handle higher forces.