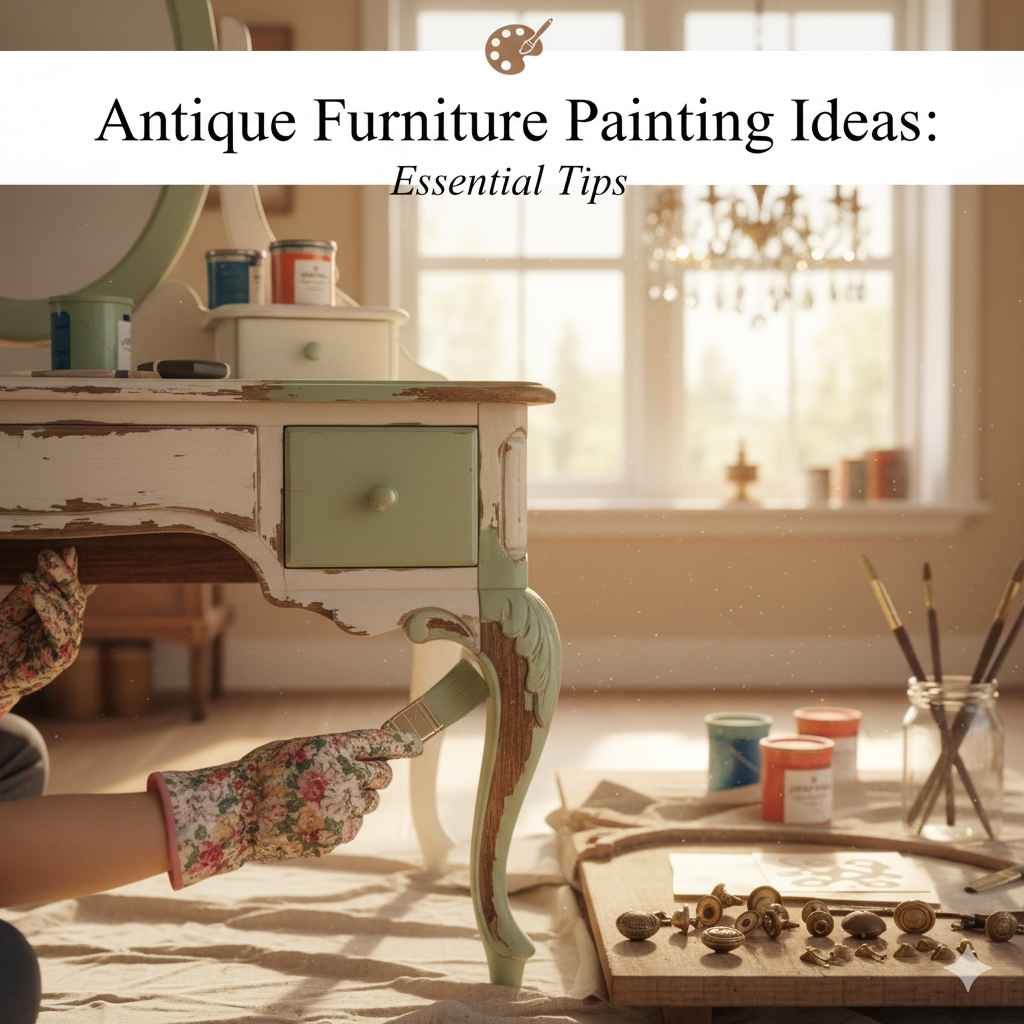
Antique Furniture Painting Ideas: Essential Tips
Painting antique furniture is a rewarding DIY project! With the right prep and tips, you can transform old pieces into stunning, modern accents. This guide offers essential advice, from choosing paints to achieving a flawless finish, making it easy even for beginners to create beautiful, lasting results.
Turning an old piece of furniture into something new and exciting is a fantastic way to add personal style to your home. If you’ve ever looked at a vintage dresser or a worn-out table and thought, “I wish this looked more modern,” then painting antique furniture might be the perfect DIY adventure for you! It can feel a little daunting at first, especially with older, beautiful pieces. But don’t worry! With a few simple steps and some helpful tips, you can transform these treasures into show-stopping additions to your decor. We’ll walk you through everything you need to know to achieve a professional-looking finish that you’ll be proud of. Let’s discover how to bring new life to forgotten furniture!
Why Paint Antique Furniture?
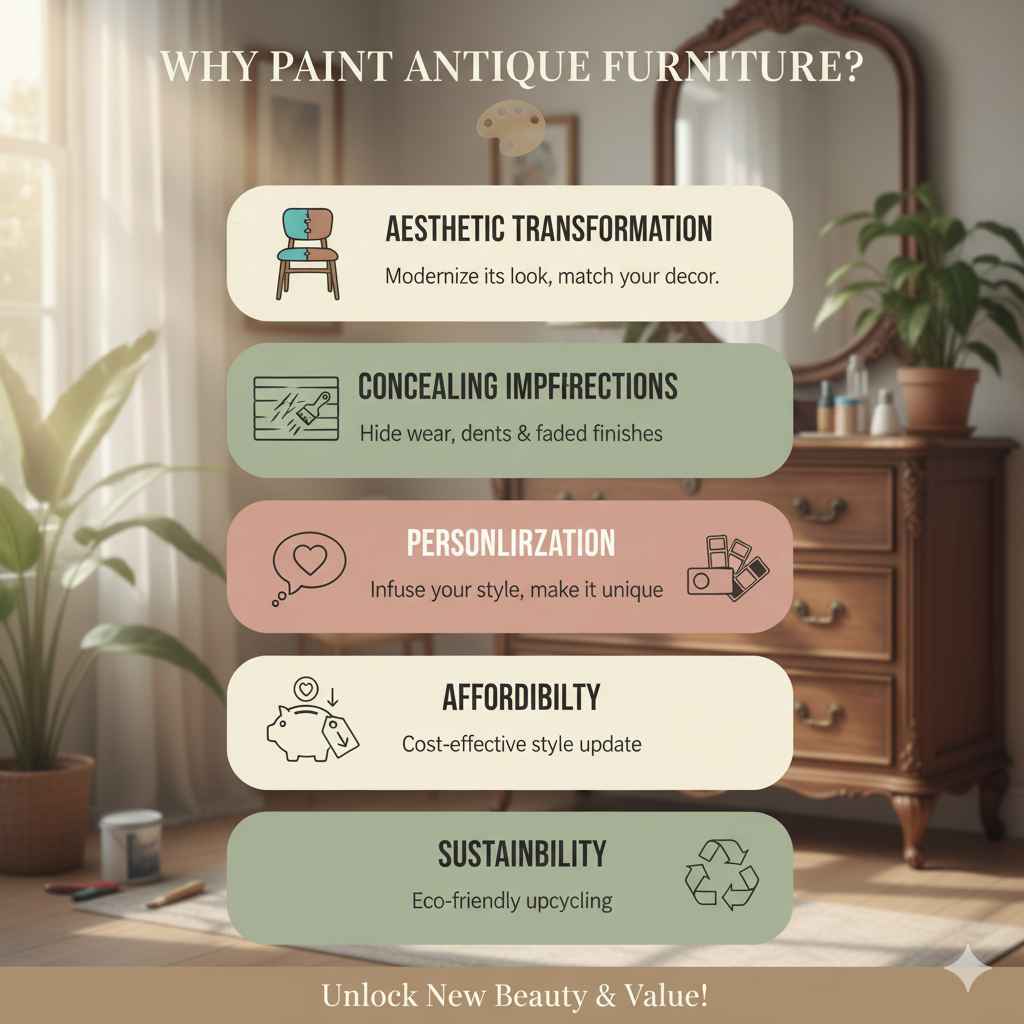
Giving antique furniture a fresh coat of paint is a popular choice for many homeowners and DIYers. But why is it such a sought-after project? There are several compelling reasons:
- Aesthetic Transformation: Sometimes, the original finish of an antique piece just doesn’t fit with your current home decor. Painting allows you to completely change its look, from a dark, traditional wood to a bright, modern color, or even a distressed, rustic charm.
- Concealing Imperfections: Older furniture often comes with minor wear and tear – scratches, dents, or faded finishes. Paint is a brilliant way to cover these imperfections, giving the piece a new, uniform appearance without the need for extensive repairs.
- Personalization: Your home should reflect your personality. Painting allows you to infuse your own style into antique pieces, making them unique and perfectly suited to your taste and color palette.
- Affordability: Buying brand-new furniture that matches current trends can be expensive. Revamping an old piece with paint is a cost-effective way to achieve a similar style update. You can find amazing vintage items at thrift stores or flea markets for a fraction of the cost of new items.
- Sustainability: Upcycling and giving new life to old furniture is an eco-friendly way to furnish your home. It reduces waste and conserves the resources that would have been used to create new items.
Are You Ready to Paint? Essential Tips for Beginners
Before you even think about picking up a paintbrush, it’s crucial to understand that preparing your antique furniture is as important, if not more so, than the actual painting. Rushing this step can lead to chipping, peeling, or an uneven finish. Here’s a breakdown of essential tips for a successful paint job:
1. Inspect and Understand Your Piece
Not all antique furniture is created equal, and knowing what you’re working with is key. Some pieces are genuine heirlooms with significant historical or monetary value. Painting over a truly rare or valuable antique might decrease its worth. It’s wise to do a little research or consult an expert if you suspect you have a particularly valuable item before proceeding.
For most pieces that are simply old but not museum-worthy, understanding the type of wood and its existing finish will guide your preparation steps. Common finishes include varnish, lacquer, shellac, and oil-based stains.
2. The All-Important Cleaning Phase
This step cannot be skipped! Dust, grime, grease, and old polish can prevent paint from adhering properly. A clean surface is the foundation for a durable finish.
- Degreasing: Use a good quality degreaser or a mixture of warm water and a few drops of mild dish soap. Wipe down the entire piece thoroughly with a soft cloth. For stubborn grease or wax buildup, a dedicated furniture cleaner or a solution of mineral spirits (ensure good ventilation and wear gloves) might be necessary.
- Rinsing: After using any cleaning solution, wipe the furniture down with a clean cloth dampened with plain water to remove any residue.
- Drying: Allow the piece to dry completely. This might take several hours or even overnight, depending on humidity and how damp the cloth was.
3. Sanding: The Key to Adhesion
Sanding might sound intimidating, but it’s vital for creating a surface that paint can grab onto. You’re not trying to strip all the old finish off unless it’s peeling or in very bad condition. The goal is to scuff up the existing surface to promote adhesion.
- Type of Sanding: For most modern paints (like chalk paint or latex), a light scuff-sanding is enough. If you plan to use oil-based paints or a high-gloss finish, you might need to sand more thoroughly to remove the old finish.
- Grit Selection: Start with a medium-grit sandpaper (around 120-150 grit) to scuff the surface. If there are deeper scratches or you need to remove more of the old finish, you can start with an 80 or 100-grit paper. Finish with a finer grit (220-240 grit) for a smoother surface. Always sand in the direction of the wood grain.
- Power Tools vs. Hand Sanding: For large, flat surfaces, an orbital sander can save time. However, for intricate details, carved areas, or smaller pieces, hand sanding with sandpaper or sanding sponges is more effective.
- Dust Removal: After sanding, it’s critical to remove all dust. Vacuum the piece thoroughly, then wipe it down with a tack cloth. A tack cloth is a sticky cloth designed to pick up fine dust particles that vacuuming misses. This is a game-changer for a smooth finish.
External Resource: For more detailed guidance on sandpaper types and grits, the U.S. Forest Products Laboratory offers detailed wood finishing information that can be helpful: FPL Wood Finishing Guide
4. Priming: The Unsung Hero
Primer is like the glue that holds your paint job together. It creates a uniform surface, blocks stains from bleeding through (especially important for older wood which can have tannins that “bleed”), and helps your topcoat adhere better. For antique furniture, especially if you’re painting a dark piece a light color, primer is absolutely essential.
- Types of Primer:
- Oil-Based Primer: Excellent for blocking stains and providing a durable base, but can have strong fumes and long drying times.
- Water-Based (Latex) Primer: Dries faster, has less odor, and cleans up with water. A good all-around choice for many projects.
- Shellac-Based Primer: Fantastic for blocking stubborn stains and odors, dries very quickly, but is more expensive.
- Application: Apply 1-2 thin coats of primer, allowing it to dry completely between coats according to the manufacturer’s instructions. Lightly sand with fine-grit sandpaper (220-240) after the primer is dry to ensure a smooth surface for your paint. Clean off the dust with a tack cloth.
5. Choosing Your Paint Type
The type of paint you choose will significantly impact the final look and durability of your antique furniture. Here are some popular beginner-friendly options:
| Paint Type | Pros | Cons | Best For |
|---|---|---|---|
| Chalk Paint | Minimal prep (often no sanding/priming needed), ultra-matte finish, great for distressed looks, dries quickly. | Requires a topcoat (wax or polycrylic) for durability, finish can be easily damaged without it. Unique texture may not appeal to everyone. | Achieving a distressed, vintage, or matte modern look. Great for those who want to skip heavy prep. |
| Milk Paint | Achieves a very authentic vintage look, can chip and crack naturally for a true antique feel. Available in powder form for mixing. | Can be unpredictable (chipping/cracking), requires a bonding agent for smooth finishes on slick surfaces, needs a topcoat. | Creating natural-looking aged finishes. Best for experienced painters or for those specifically seeking an aged, chippy look. |
| Mineral Paint | Durable, self-leveling, often requires no primer or topcoat, low VOCs, good adhesion. | Can be more expensive, limited color palettes from some brands. | A smooth, durable, modern finish on various furniture types. Good for high-traffic items. |
| Latex Paint (Acrylic Latex) | Widely available, affordable, low VOC options, easy cleanup, durable when properly prepped and sealed. | Requires thorough prep (sanding/priming), can show brush strokes if not applied carefully, needs a good topcoat. | Versatile for achieving a smooth, painted finish. A good budget-friendly option for many projects. |
| All-in-One Paints | Combines primer, paint, and topcoat in one product. Saves time and steps. Very durable. | Can be more expensive, limited color selection compared to standard paints. | Beginners seeking a quick, durable, and foolproof finish with fewer products. |
For beginners, chalk paint or an all-in-one paint are often the easiest to start with due to their forgiving nature and reduced prep requirements. Always read the manufacturer’s recommendations for their specific product.
6. Application Techniques for a Smooth Finish
How you apply the paint makes a huge difference in the final look. It’s all about thin, even coats.
- Tools:
- High-Quality Brushes: Synthetic brushes are best for water-based paints (latex, chalk, mineral), while natural bristles are better for oil-based paints. Invest in a few good brushes – detailed brushes for corners and larger flat brushes for surfaces.
- Foam Rollers: Excellent for achieving a super smooth finish on flat surfaces. Opt for dense foam rollers for the best results with latex or chalk paint.
- Paint Sprayer: Offers the smoothest finish but requires practice and the right setup (ventilation, mask). Might be an advanced option for beginners.
- Thin Coats are Key: Resist the urge to apply thick, gloppy coats. This leads to drips, brush marks, and an uneven finish. Apply thin, even coats, painting in the direction of the wood grain.
- Brush Strokes: If using a brush, try to maintain a consistent direction with your strokes. For a very smooth finish, you can do a final “tip coat” where you lay the paint on with long, light strokes without adding more paint to the brush.
- Drying Time: Allow each coat to dry completely before applying the next. This is crucial for durability and preventing clumping. Check the paint can for recommended drying times between coats.
- Light Sanding Between Coats: This is a pro tip! After each coat of paint (except the final one), lightly sand the surface with very fine-grit sandpaper (220-320 grit) or sanding sponges. This knocks down any minor imperfections or raised grain and creates a smoother surface for the next coat. Always wipe with a tack cloth afterward.
7. Sealing for Durability: Topcoats
Most painted furniture, especially pieces that will be used regularly, needs a protective topcoat. This shields the paint from scratches, scuffs, and moisture. The type of topcoat depends on the paint you used and the desired finish.
- Polycrylic or Polyurethane: Water-based polycrylic is a popular choice because it dries clear and is very durable. Oil-based polyurethane dries to a slightly amber hue, which can be nice for certain looks but might alter the color of your paint. Both are excellent for high-traffic items like tabletops or dresser drawers. Apply 2-3 thin coats, sanding lightly with fine grit sandpaper between coats (and wiping with a tack cloth!).
- Wax: Often used over chalk paint. It provides a soft, matte sheen and some protection. However, wax is not as durable as polycrylic and can be prone to water spots or scuffs in high-use areas. It needs reapplication periodically.
- Varathane (e.g., Polyurethane Spray): Offers a convenient way to apply a protective clear coat, especially for smaller pieces or intricate areas. Ensure good ventilation and spray in thin, even coats.
Safety Note: Always work in a well-ventilated area when painting or applying topcoats. Wear a mask to avoid inhaling fumes, and consider wearing gloves to protect your skin. Refer to the OSHA Chemical Data website for information on safe chemical handling.
8. Creative Finishing Touches
Once the painting and sealing are done, you can elevate your piece further.
- Distressing: For a vintage look, you can lightly distress the edges and high-wear areas after the paint and topcoat have fully cured. Use fine-grit sandpaper or a sanding sponge to gently rub away small patches of paint, revealing the primer or wood underneath.
- Hardware Upgrade: Swapping out old knobs and pulls for new ones is a simple yet impactful way to modernize a piece and tie in your new paint color.
- Adding Stencils: Use stencils and a contrasting paint color to add patterns or decorative motifs to drawers, tabletops, or panels.
- Glazing: A furniture glaze can add depth and an aged look over painted surfaces, particularly effective for creating an antique patina.
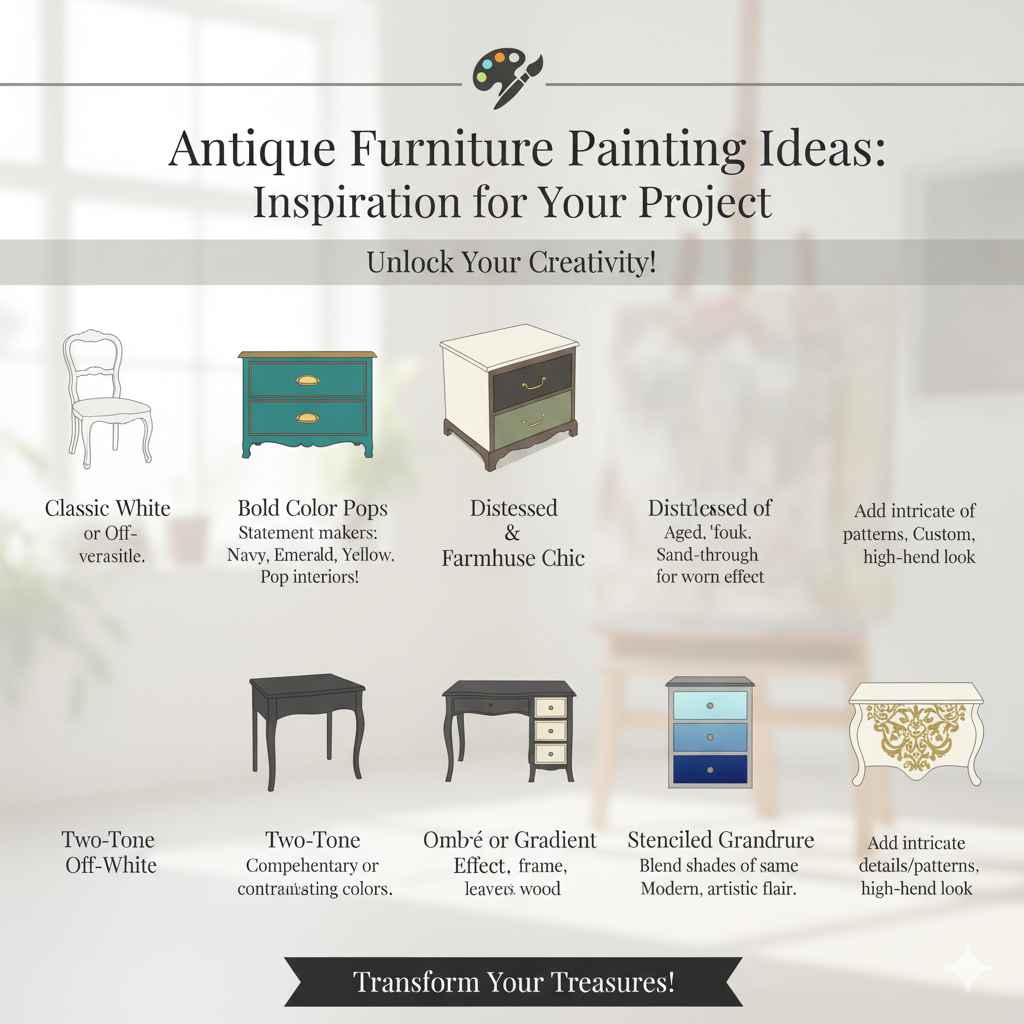
Antique Furniture Painting Ideas: Inspiration for Your Project
The possibilities are endless when it comes to painting antique furniture. Here are some popular ideas to spark your creativity:
Classic White or Off-White
A timeless choice that brightens any room. White or off-white is incredibly versatile and can make a dark, heavy piece feel light and airy. It works with almost any decor style, from farmhouse to modern. This is a fantastic starting point for beginners.
Bold Color Pops
Don’t shy away from vibrant colors! A deep teal, a rich navy, a sunny yellow, or a bold emerald green can transform a plain piece into a statement maker. Consider painting the exterior in a neutral color and the interior of drawers or shelves in a surprising pop of color for a fun reveal.
Distressed & Farmhouse Chic
This look is achieved by sanding through the painted layers (often over a contrasting color or primer) to reveal glimpses of what’s underneath, creating a worn, aged effect. It’s perfect for creating that cozy, “found” antique look.
Two-Tone Elegance
Combine two complementary or contrasting colors. For example, paint the frame of a dresser in a deep charcoal and the drawer fronts in a soft cream. Or, leave the wood elements (like drawer fronts) natural and paint the rest of the piece.
Ombré or Gradient Effect
This technique involves blending several shades of the same color from light to dark (or vice-versa) across a surface, such as the drawers of a dresser. It adds a modern, artistic flair and can be surprisingly achievable with patience and good blending.
Monochromatic Sophistication
Paint a piece in various shades of the same color. For instance, using a dark grey, a medium grey, and a light grey on different sections of a china cabinet can create subtle visual interest and make the piece feel very sophisticated.
Stenciled Grandeur
Add intricate details or patterns using stencils. This can be done on tabletops, drawer fronts, chair backs, or even the entire piece for a custom, high-end look. Look for pre-made stencils or even try creating your own.
Consider the Wood Type and its Natural Beauty
Sometimes, the best approach isn’t to cover the wood entirely. You can use paint techniques to enhance the wood’s natural grain or apply a stain over a painted base to create depth and highlight the texture.
FAQ: Your Antique Furniture Painting Questions Answered
Q1: Do I really need to sand antique furniture before painting?
A: Yes, you almost always need to at least scuff-sand the surface. Sanding creates a slightly rough texture that helps the primer and paint adhere properly. Skipping this step is a common reason for paint to peel or chip later on. For most modern paints like latex or chalk paint, light sanding with 120-150 grit is sufficient; heavier sanding to remove old finishes is only needed if the finish is damaged or you’re using specific paint types.