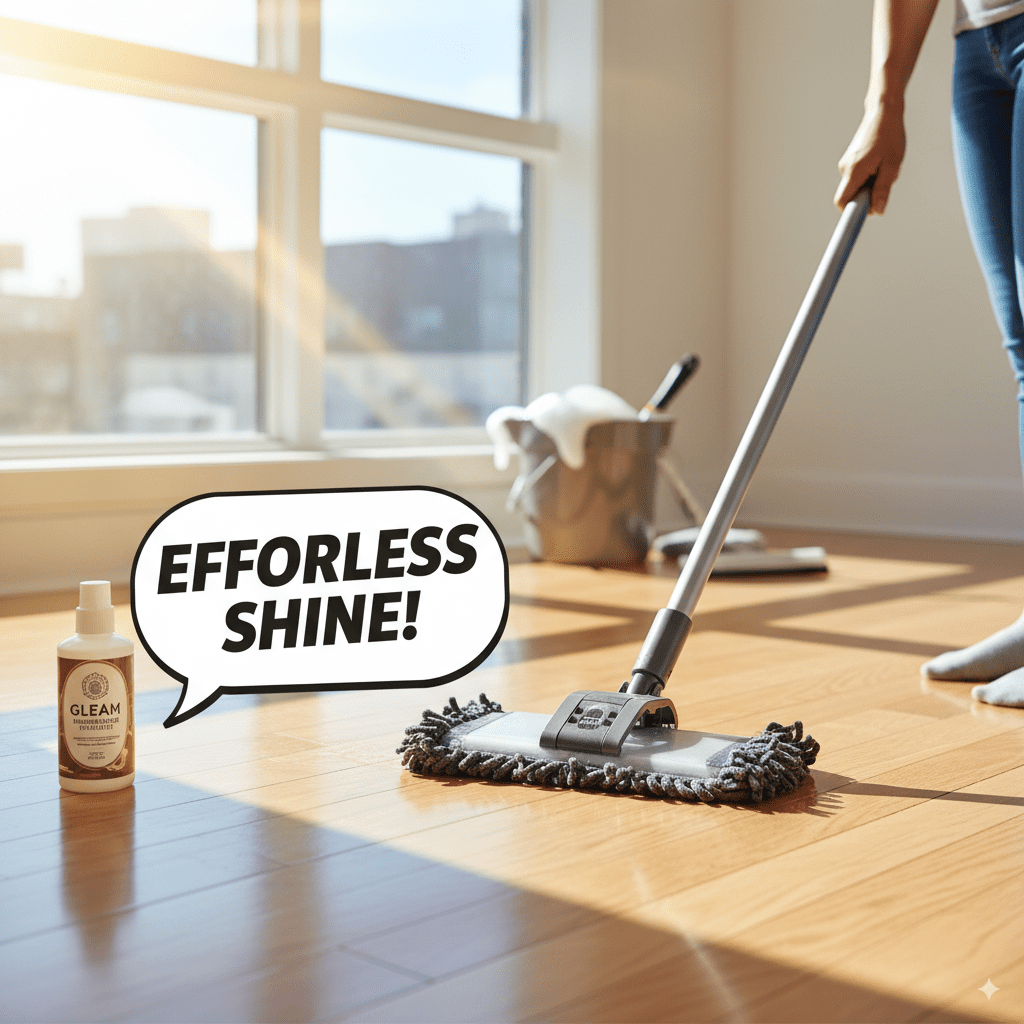
Best Way to Clean Hardwood: Effortless Shine
The best way to clean hardwood floors for an effortless shine involves regular dry dusting, followed by a damp mop with a pH-neutral cleaner specifically for wood. Avoid excess water and harsh chemicals to protect your floor’s finish and maintain its natural beauty.
Hey there, fellow wood lovers! Md Meraj here. Do you look at your hardwood floors and wish they gleamed like they did on day one? It’s a common woodworking wonder. Many of us worry about scratching them or using the wrong cleaner. It can feel a bit nerve-wracking, right? But I’m here to show you that making your hardwood floors shine is surprisingly simple and safe. We’ll walk through easy steps to get that beautiful, lasting glow your floors deserve. Ready to make them look amazing?
The Magic of a Clean Hardwood Floor
Hardwood floors add so much warmth and character to a home. They’re a beautiful investment! But over time, dust, dirt, and spills can dull their natural luster. Many homeowners shy away from cleaning them for fear of causing damage. You might have heard conflicting advice: some say use water, others warn against it. It’s easy to get confused! The truth is, with the right approach, you can keep your hardwood floors looking pristine without any fuss. This guide will demystify the process, giving you the confidence to tackle this easy task.
Understanding Your Hardwood Floor’s Finish
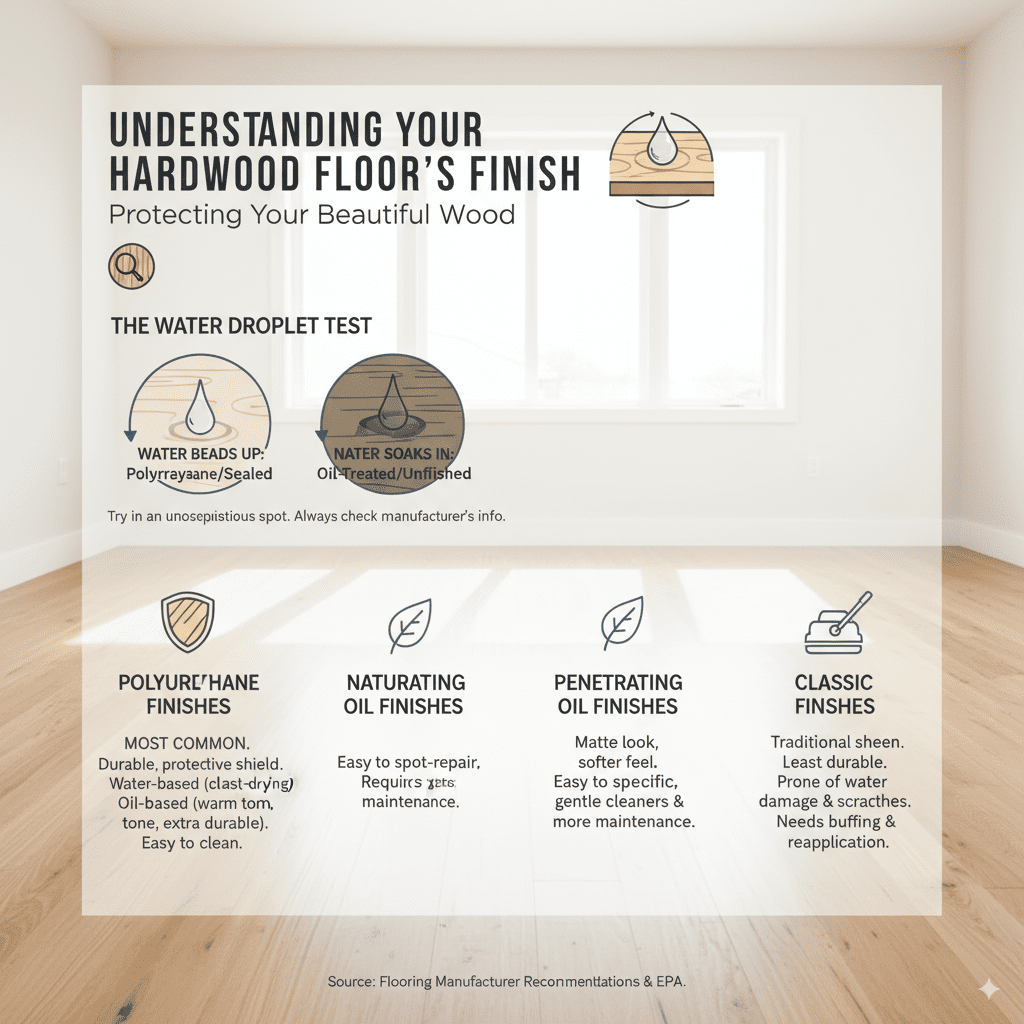
Before we grab our cleaning supplies, it’s important to understand what’s protecting your beautiful wood. Most modern hardwood floors have a surface finish. This finish is like a shield, guarding the wood from moisture, scratches, and dirt. Common finishes include polyurethane (which is very durable and common for residential floors), penetrating oils, or wax. Knowing your finish helps you choose the right cleaning products. A polyurethane finish is more forgiving and can handle mild cleaning solutions. Oil-finished floors or those with wax might need a gentler, specialized approach.
If you’re unsure about your floor’s finish, here’s a little test: try dousing a very small, inconspicuous spot (like in a closet) with a bit of water. If the water beads up, it’s likely sealed with polyurethane. If it soaks in and darkens the wood, it might be an unfinished or oil-treated surface. Always refer to your flooring manufacturer’s recommendations if you have them, as they know their product best.
Polyurethane Finishes: The Most Common Choice
Polyurethane is a synthetic liquid that hardens into a durable, protective layer on the surface of the wood. It’s often found in either oil-based or water-based formulas. Water-based polyurethane offers a clearer finish and dries faster, while oil-based provides a slightly warmer tone and is known for its exceptional durability. For most homeowners, this is the finish you’ll find on your floors. It’s tough, allowing for relatively straightforward cleaning.
Penetrating Oil Finishes: Natural Beauty
Oil finishes penetrate the wood grain, offering a more natural, matte look. They feel softer underfoot and are easier to spot-repair than polyurethane. However, they require more frequent maintenance and specific cleaning products to avoid stripping the oil. Harsh cleaners can easily damage this type of finish.
Wax Finishes: A Classic Look
Wax finishes offer a beautiful, traditional sheen but are the least durable and most maintenance-intensive. They are susceptible to water damage, scratching, and scuffing. Cleaning wax-finished floors typically involves buffing and occasional reapplication of wax.
Essential Tools and Supplies for Effortless Shine
Gathering the right tools is key to making this cleaning process smooth and effective. You don’t need a workshop full of gadgets! Here’s what you’ll want to have on hand:
- Microfiber Dust Mop: This is your best friend for daily or every-other-day dusting. Microfiber traps dust and dirt effectively without scratching.
- Vacuum Cleaner with a Hard Floor Attachment: If you prefer vacuuming, ensure it has a soft brush or felt attachment specifically designed for hard floors. Turn off any beater bars or rotating brushes.
- Soft Bristle Broom: For quick sweeps and getting into corners, a broom with soft bristles is handy.
- Two Buckets: One for your cleaning solution and one for rinsing your mop. This prevents spreading dirty water back onto the floor.
- pH-Neutral Hardwood Floor Cleaner: Look for cleaners specifically formulated for wood floors. Avoid ammonia, bleach, vinegar (in high concentrations), or oil soaps, as they can damage the finish.
- Well-Absorbent Microfiber Mop Pads: These attach to your mop and are machine washable.
- Water: Clean, fresh water is essential.
Why Microfiber is a Wood Floor’s Best Friend
Microfiber is amazing for cleaning hardwood. Its tiny fibers create a large surface area that’s incredibly effective at trapping dust, dirt, and allergens. Unlike traditional cotton rags or sponges, microfiber doesn’t just push dirt around. It grabs it! Plus, microfiber is gentle, meaning it won’t scratch or dull your wood’s finish, even with regular use. This makes it perfect for maintaining that effortless shine.
Step-by-Step Guide: Cleaning Your Hardwood Floors
Let’s get straight to it! Cleaning hardwood floors doesn’t have to be complicated. Follow these simple steps for a brilliant shine.
Step 1: Dry Dusting – Your First Line of Defense
This is the most important step for preventing scratches and keeping your floors looking good between deeper cleans. Dust, grit, and sand are like tiny sandpaper pieces – they can scratch your finish over time. So, before you even think about mopping, grab your microfiber dust mop or a soft-bristle broom.
How to dry dust:
- Work in sections, moving furniture where possible.
- Sweep or dust along the grain of the wood.
- Pay attention to corners, edges, and areas under furniture.
- If using a vacuum, ensure the beater bar is off and use the correct hard floor attachment.
Aim to do this daily or every other day, especially in high-traffic areas. This simple habit makes a huge difference in maintaining your floor’s longevity and shine.
Step 2: Prepare Your Cleaning Solution
Now, for the damp cleaning. The key here is the cleaner and, crucially, the amount of liquid. You want a solution that cleans effectively without leaving residue or soaking the wood.
What to use:
- Use a cleaner specifically designed for hardwood floors. These are typically pH-neutral, meaning they won’t strip or damage the protective finish. You can find excellent options from brands like Bona, Murphy Oil Soap (ensure it’s the wood floor version and use sparingly), or even a DIY mix of water with just a few drops of pH-neutral dish soap if a commercial cleaner isn’t available. While some sources suggest vinegar or ammonia, I strongly advise against them for regular cleaning as they can dull the finish or even damage it over time.
- If making your own, a good starting point is 1 gallon of warm water with 1 to 2 tablespoons of pH-neutral cleaner. Always follow the manufacturer’s dilution instructions for commercial cleaners.
Never pour cleaner directly onto the floor. Always mix it in your bucket.
Step 3: The Damp Mopping Technique – Less is More!
This is where many people go wrong. Excess water is the enemy of hardwood floors. It can seep into the seams, causing swelling, warping, and damage to the wood and finish. The goal is a damp, not wet, mop.
Here’s how to do it right:
- Dip your mop pad into the cleaning solution bucket.
- Wring it out thoroughly. You want it to be barely moist, not dripping. A good way to test this is to hold it over the sink; only a drop or two of water should come out.
- Mop in sections, following the grain of the wood.
- Work your way out of the room so you don’t have to walk on the wet floor.
- Rinse your mop pad frequently in the second (clean water) bucket, or rinse under running water, before dipping it back into the cleaning solution and wringing it out again. This keeps your cleaning solution clean and effective.
- For stubborn spots, you might need to go over them a couple of times, but avoid scrubbing aggressively, which can damage the finish.
Step 4: Drying and Buffing for That Final Shine
Hardwood floors dry relatively quickly, especially when you’ve used a damp mop. However, for an extra boost of shine and to ensure no moisture lingers, you can do a quick buffing step.
Buffing tips:
- While the floor is still slightly damp, or once it’s completely dry, use a clean, dry microfiber cloth or a dry microfiber mop pad.
- Lightly buff the floor in the direction of the wood grain. This helps to remove any faint streaks and brings out a beautiful sheen.
- For a truly effortless shine, you can also use a buffer machine designed for hardwood floors. However, for most homeowners, manual buffing with a microfiber cloth is perfectly sufficient.
Ensure the floor is completely dry before walking on it significantly or replacing furniture. This usually takes anywhere from 15 minutes to an hour, depending on humidity and how damp your mop was.
What to AVOID When Cleaning Hardwood Floors
Just as important as knowing what to do is knowing what not to do. Mistakes with hardwood floor cleaning can lead to costly repairs. Here’s a list of cleaning culprits to steer clear of:
| Product/Method to AVOID | Why it’s bad for hardwood | Recommended Alternative |
|---|---|---|
| Excess Water/Soaking Mops | Can cause swelling, warping, buckling, and damage to the wood and finish. | Damp mop only; wring out mop thoroughly. |
| Steam Mops | The hot moisture can penetrate finish, causing delamination or damage. | Damp mopping or dry dusting. |
| Ammonia-Based Cleaners | Can dull or strip the finish layer over time. | pH-neutral hardwood floor cleaner. |
| Vinegar (undiluted or high concentration) | Its acidity can dull and damage the polyurethane finish. | pH-neutral hardwood floor cleaner; use sparingly if diluted significantly (check manufacturer advice). |
| Oil Soaps/Mop & Glo-type Products | Can leave a dulling residue, making floors slippery and attracting more dirt. | pH-neutral cleaner that rinses clean. |
| Abrasive Cleaners or Scrub Pads | Will scratch and damage the floor’s finish. | Soft microfiber cloths or mops. |
| Wax or Polish (unless floor is specifically wax-finished) | Can build up and create a slippery, difficult-to-remove layer on polyurethane finishes. | Use only cleaners designed for your floor’s finish. |
Dealing with Spills and Stains: Quick Action is Key
Life happens! Spills and stains are inevitable. The secret to dealing with them on hardwood is to act fast. The longer a spill sits, the more likely it is to penetrate the wood or leave a stain.
Immediate Spill Cleanup
For fresh spills (water, juice, etc.):
- Blot up the spill immediately with a clean, absorbent cloth or paper towel.
- For sticky residues, slightly dampen a cloth with water or your pH-neutral cleaner and wipe the area.
- Dry the spot thoroughly with a clean, dry cloth.
Tackling Tougher Stains
For dried-on grime or minor spots:
- Try a damp microfiber cloth first.
- If that doesn’t work, use a cloth dampened with your recommended hardwood floor cleaner.
- For really stubborn marks like crayon or scuff marks, you might try a very fine grit (0000) steel wool very gently on a polyurethane finish, followed by a clean-up with your regular cleaner and then buffing. Always test in an inconspicuous area first!
- For grease or oil stains, you can try sprinkling baking soda or cornstarch on the stain to absorb the oil, let it sit for a few hours, then carefully vacuum or brush it up. Then, clean with your regular hardwood cleaner.
For deep-set or permanent stains, you might need professional refinishing or repair. It’s always best to tackle issues promptly to prevent them from becoming permanent.
Tips for Maintaining That Hardwood Shine Long-Term
Keeping your hardwood floors looking their best is an ongoing process that goes beyond just cleaning. A little preventative care can make a big difference.
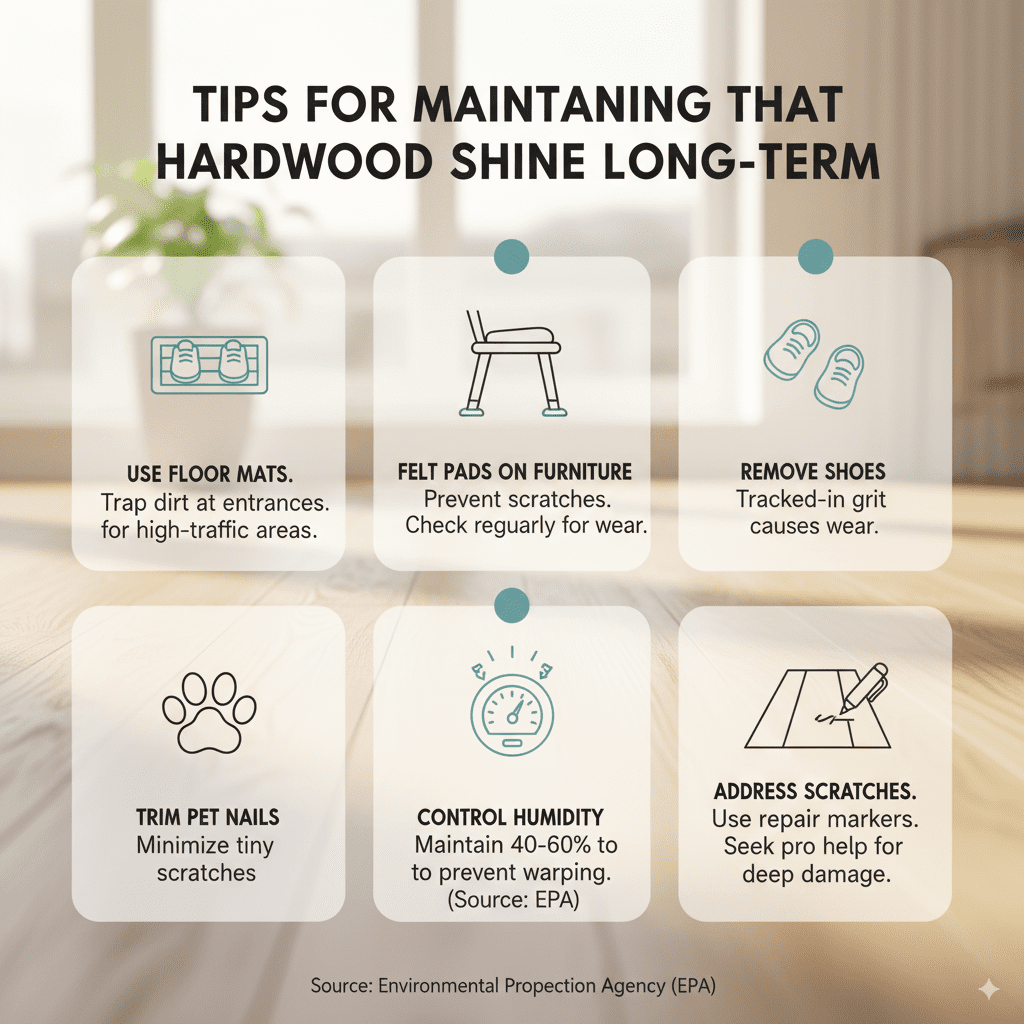
- Use Floor Mats: Place mats at all entrances to catch dirt and moisture before it’s tracked onto your floors. Consider a rug in high-traffic areas.
- Felt Pads on Furniture: Attach felt pads to the legs of all chairs, tables, and furniture. This is crucial to prevent scratches when moving items. Check them regularly, as they can wear down or collect debris.
- Remove Shoes: Encourage family members and guests to remove their shoes at the door. Shoes track in grit and moisture, which can accelerate wear and tear.
- Trim Pet Nails: Keep your pets’ nails trimmed! Even with regular filing, pet nails can cause tiny scratches over time.
- Control Humidity: Extreme fluctuations in humidity can cause wood to expand or contract, leading to gaps or cupping. Use a humidifier or dehumidifier as needed to maintain a stable environment. The Environmental Protection Agency (EPA) recommends maintaining indoor humidity levels between 40-60% for optimal conditions.
- Address Scratches and Dings Immediately: Small scratches can often be touched up with wood repair markers or stain pens designed for your floor color. For deeper damage, consider professional repair to prevent it from worsening.
Frequently Asked Questions About Cleaning Hardwood Floors
Q1: How often should I clean my hardwood floors?
You should dry dust your hardwood floors daily or every other day. Damp mop them when they look dull or dirty, typically once a week or every two weeks, depending on foot traffic and how much dirt accumulates.
Q2: Can I use a regular floor cleaner on my hardwood floors?
No, it’s best to use a cleaner specifically formulated for hardwood floors. Generic cleaners can contain harsh chemicals like ammonia or vinegar that can damage the finish, or they might leave a sticky residue.
Q3: Is it okay to use a steam mop on my hardwood floors?
Generally, no. The high heat and moisture from steam mops can penetrate the wood’s finish, causing the wood to warp, swell, or delaminate the finish over time. Always check your flooring manufacturer’s warranty and recommendations.
Q4: My floor looks dull. How can I restore its shine?
First, ensure you’ve thoroughly dry-dusted and then damp-mopped with a pH-neutral cleaner. Sometimes, residue from previous improper cleaning can cause dullness. A final buff with a dry microfiber cloth after cleaning can also enhance shine. For severely dull floors, you might consider a professional recoating.
Q5: What if I have a spill that has dried on my floor?
Try a damp microfiber cloth with water or your pH-neutral cleaner. For tougher dried-on spots or scuffs, you might need a slightly more concentrated cleaner solution or gentle buffing with a fine steel wool pad (0000 grit) on polyurethane finishes, always testing in an inconspicuous area first.
Q6: Can I use wood polish on my hardwood floors?
Only if your floors have a specific wax finish that requires it. Most modern hardwood floors have a polyurethane or similar surface coating, and wood polishes designed for furniture can build up, create a slippery film, and attract dirt, making the floor look worse over time.
Q7: How do I prevent water damage on my hardwood floors?
The best way to prevent water damage is to never let standing water sit on your floors. Clean up spills immediately, use only a damp mop (never wet), and ensure your floor has a good quality finish. Consider expanding boards in humid environments or sealing grout lines thoroughly if you have tile adjacent to hardwood in areas like bathrooms.
Conclusion: The Reward of Radiant Hardwood
There you have it! Cleaning hardwood floors doesn’t require a magic wand or a professional crew. With a few simple tools, the right cleaner, and a gentle touch, you can achieve that effortless, beautiful shine that makes your home feel so welcoming. Remember the key principles: