Best Way To Clean Wood Deck: Effortless Shine
The best way to clean a wood deck involves a simple, step-by-step process using the right tools and cleaning solutions to remove dirt, grime, and mildew, restoring its natural beauty and extending its lifespan. This guide makes it easy, even for beginners!
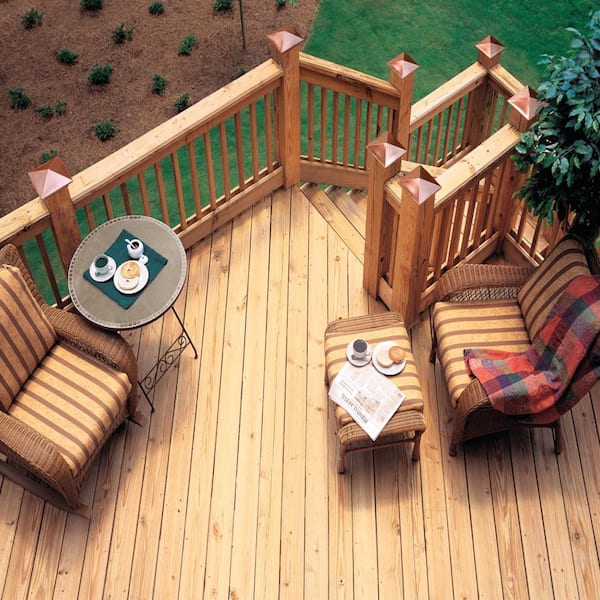
Is your beautiful wooden deck looking a little dull? Don’t worry, it happens to the best of us! Over time, dirt, dust, fallen leaves, and pesky mildew can cling to the wood, making it look tired and worn. You might be thinking it’s a huge, complicated job, but I’m here to tell you it’s simpler than you think. With a little guidance and the right approach, you can bring back that gorgeous, natural shine to your deck. Get ready to transform your outdoor space!
Your Step-by-Step Guide to a Sparkling Wood Deck
As your friendly woodworking mentor, I want to make this process as easy and safe as possible. Cleaning your deck isn’t just about looks; it’s also about protecting your investment. Regular cleaning prevents rot and prolongs the life of your deck, saving you money in the long run. Let’s get started on achieving that effortless shine!
Step 1: Preparation is Key – Clear and Protect
Before we grab any cleaning supplies, let’s get your deck ready. This step is super important for a smooth cleaning process and to protect your surrounding plants and home.
- Clear Everything Off: Remove all furniture, potted plants, grills, rugs, and any other items from the deck. This gives you a clear workspace and prevents cleaning solutions from damaging these items.
- Sweep Thoroughly: Use a stiff-bristle broom to sweep away loose debris like leaves, dirt, twigs, and cobwebs. Get into all the nooks and crannies between the deck boards.
- Protect Surrounding Areas: Cover any plants, shrubs, or delicate outdoor furniture that you couldn’t move with old tarps or plastic sheeting. You can also wet down surrounding vegetation with plain water; this helps dilute any cleaning solutions that might splash onto them.
- Check for Loose Boards or Nails: While you’re sweeping, take a quick moment to look for any loose deck boards, popped nails, or splinters. Address these minor repairs now to prevent tripping hazards and further damage. Tighten nails, hammer them down, or secure loose boards before you start washing.
Step 2: Choose Your Cleaning Weapon – Soaps and Solutions
The best cleaner for your deck depends on how dirty it is and what kind of finish you have. For most common dirt and grime, a simple, gentle approach is best.
Option A: Mild Detergent and Water (For Light Grime)
This is your go-to for regular maintenance and light dirt. It’s safe for most wood types and the environment.
- What You’ll Need:
- A bucket
- Warm water
- A mild dish soap or a dedicated wood deck cleaner (look for pH-neutral options)
- A stiff-bristle brush or a deck brush attachment for a garden hose sprayer
- How to Mix: A good starting point is about 1/4 cup of mild dish soap for every gallon of warm water. If you’re using a commercial deck cleaner, follow the manufacturer’s instructions precisely.
Option B: Oxygen Bleach Cleaners (For Tougher Stains and Mildew)
If you’re dealing with mildew, mold, or stubborn stains, an oxygen-based cleaner is a fantastic, eco-friendly choice. Unlike chlorine bleach, it’s gentler on wood and plants.
- What You’ll Need:
- A bucket
- Warm water
- Oxygen bleach powder (look for products containing sodium percarbonate)
- How to Mix: Typically, you’ll mix about 1 cup of oxygen bleach powder with a gallon of warm water. Always check the product label for specific ratios and safety instructions. You might need to let the mixture sit for a few minutes to activate.
Option C: Commercial Wood Deck Cleaners
There are many products specifically designed for cleaning wood decks. These can be effective but read labels carefully for suitability with your deck’s wood type and finish. Some may contain harsher chemicals, so always test in an inconspicuous area first.
What to AVOID:
It’s just as important to know what NOT to use. Harsh chemicals can damage your deck and the environment.
- Chlorine Bleach: While it whitens, it can damage wood fibers, strip natural oils, and harm surrounding plants.
- Ammonia-Based Cleaners: These can also damage wood and cause discoloration.
- Pressure Washers (at high settings): They can easily gouge wood, create splinters, and permanently etch the surface. More on this in the tools section!
Step 3: Gather Your Tools – What You’ll Need
Having the right tools makes the job much easier and more effective. You likely have many of these around the house already!
- Stiff-Bristle Deck Brush or Broom: Essential for scrubbing away dirt and grime. A brush with a long handle is ideal for comfort.
- Garden Hose with Adjustable Nozzle: For rinsing.
- Buckets: For mixing your cleaning solution.
- Gloves: To protect your hands from cleaning solutions and rough wood.
- Safety Glasses: Crucial for protecting your eyes from splashes and debris.
- Old Tarps or Plastic Sheeting: For protecting plants and furniture.
- Optional: Extension Pole for Brush: Makes scrubbing large areas more comfortable.
- Optional: Gentle Pressure Washer (Used with Extreme Caution): If you choose to use a pressure washer, set it to its lowest pressure setting (under 800 PSI) and use a wide fan tip (40-degree angle). Hold the nozzle at least 12-18 inches away from the wood. Practice on an inconspicuous area first! For beginners, a good old brush is often safer and just as effective. For more on safe pressure washing, check out resources from organizations like the USDA Forest Service, which provides valuable insights into wood care and maintenance.
Step 4: The Cleaning Process – Scrub-a-Dub!
Now for the fun part: making your deck shine! Work in manageable sections, especially on a warm day.
- Wet the Deck: Lightly dampen the section of the deck you’re about to clean with plain water from your hose. This helps the cleaning solution penetrate the dirt rather than immediately drying on the surface.
- Apply the Cleaning Solution: Pour your chosen cleaning solution into a bucket. Using your stiff-bristle brush or broom, scrub the solution onto the deck boards. Work with the grain of the wood. Don’t let the cleaner dry on the wood; if you’re working on a large deck or on a very warm day, you might want to work in smaller sections.
- Scrub Away the Grime: Apply moderate pressure and scrub the entire deck surface. Pay special attention to areas with heavy dirt, mold, or mildew. The texture of the brush will help lift away the gunk.
- Let it Sit (Briefly): For tougher jobs, especially with oxygen bleach, let the solution sit on the wood for about 10-15 minutes. This gives it time to break down the dirt and mildew. Keep the surface damp by misting it with water if it starts to dry.
- Rinse Thoroughly: This is a critical step. Using your garden hose on a medium spray setting (not a powerful jet!), rinse the deck thoroughly. Work from the high points of the deck down towards the lowest point to ensure all the soap and dirt wash away. Make sure to rinse between the boards. If you used a commercial cleaner or a stronger solution, rinse extra well to avoid residue.
- Repeat if Necessary: For very heavily soiled areas, you might need a second application. Go through the scrubbing and rinsing process again for those specific spots.
Step 5: Allow for Proper Drying
Once you’ve rinsed everything away, the most important thing is to let the deck dry completely before moving on to any protective treatments. This can take anywhere from 24 to 48 hours, depending on your climate, humidity, and amount of direct sunlight your deck receives.
- Air Circulation is Key: Ensure good airflow around the deck. Remove any tarps or covers that might trap moisture.
- Check for Dampness: You can check for dryness by touching the wood. It should feel dry and not cool or damp to the touch.
Step 6: Inspect and Repair
While your deck is drying, it’s a great time to do a final inspection. Look for any loose screws, popped nails, or rough spots.
- Hammer Down Nails: Use a hammer and nail set to sink any popped nails just below the surface of the wood. Be careful not to dent the wood.
- Tighten Loose Screws: Ensure all screws are snug but not so tight they strip the wood.
- Address Splinters and Rough Spots: Lightly sand any areas that feel rough or have splinters. A medium-grit sandpaper (around 80-grit) usually works well. Make sure to sand in the direction of the wood grain.
Step 7: Protect Your Deck – Sealing or Staining
Cleaning is just half the battle! Protecting your newly clean deck is what truly preserves its beauty and integrity for years to come. This step is crucial and often overlooked by beginners.
After your deck is completely dry (wait at least 24-48 hours after the final rinse), it’s time to apply a protective finish. This can be a clear water-repellent sealant or a semi-transparent or solid stain.
Why Seal or Stain?
- UV Protection: Sun’s UV rays can break down wood fibers and cause graying.
- Moisture Resistance: Sealants help repel water, preventing warping, cracking, and rot.
- Stain Prevention: A good finish can make it harder for dirt and stains to penetrate the wood.
- Aesthetics: Stains can enhance the natural color of the wood or offer a new look.
Choosing Your Finish:
- Water-Repellent Sealant: This is the simplest option. It penetrates the wood to repel water without changing the color significantly, though it might add a slight sheen. It offers good protection against moisture.
- Toner or Semi-Transparent Stain: These add a hint of color and UV protection while still allowing the wood grain to show through. They offer a good balance of protection and natural appearance.
- Solid Stain: These look more like paint and completely cover the wood grain. They offer the most UV protection and durability but can hide the natural beauty of the wood.
Application Tips:
- Read the Manufacturer’s Instructions: Always follow the specific product’s guidelines.
- Use a Quality Brush or Pad Applicator: A good quality brush or a staining pad designed for decks will give you the best results. Some people use rollers, but be cautious of over-saturation.
- Apply Thin, Even Coats: It’s better to apply two thin coats than one thick one.
- Work in Sections: Apply the finish to a few boards at a time, working from one end to the other, maintaining a “wet edge” to avoid lap marks.
- Follow Drying Times: Allow adequate drying time between coats as recommended by the product.
For more in-depth guidance on choosing and applying deck finishes, the This Old House website offers excellent, practical advice for homeowners.
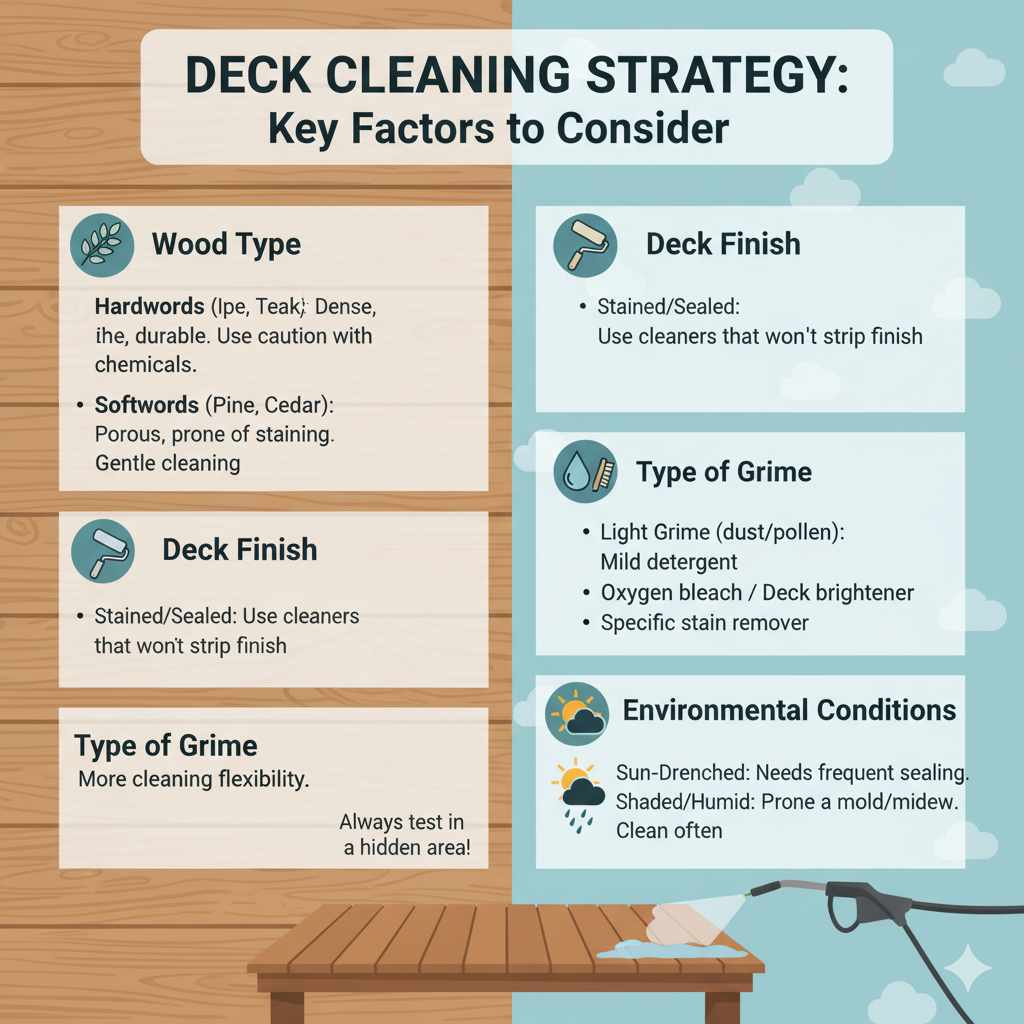
Factors Influencing Your Deck Cleaning Strategy
Not all decks are created equal, and the best cleaning approach can vary. Here’s a quick look at what to consider:
| Factor | Consideration | Recommended Approach |
|---|---|---|
| Wood Type | Hardwoods (like Ipe or Teak) are dense and durable but can be sensitive to harsh chemicals. Softwoods (like pine or cedar) are more porous and prone to staining. Exotic hardwoods may require specific cleaners. | Always test cleaners on an inconspicuous area. For softwoods, gentle cleaning is key. For hardwoods, you might need slightly more scrubbing power but always with caution. |
| Deck Finish (Stain/Sealer) | Does the deck have a current stain, sealant, or is it bare wood? Some cleaners can strip existing finishes. | If you have a stain, consider a cleaner that won’t remove it unless you plan to re-stain immediately. For bare wood, you have more flexibility. |
| Type of Grime | Is it just dust and pollen, or are there significant patches of mold, mildew, algae, or tough stains (like grease from a grill)? | Light grime: Mild detergent. Mold/Mildew: Oxygen bleach or a dedicated deck brightener. Tough stains: May require a specific stain remover for that type of stain. |
| Environmental Conditions | Does your deck get a lot of sun (drying it out) or is it shaded (prone to mildew)? What’s your climate like – humid, dry, lots of rain? | Sun-drenched decks might need more frequent sealing. Shaded decks require vigilance against mold and mildew. Adjust cleaning frequency based on local conditions. |
Common Deck Cleaning Mistakes to Avoid
Even with the best intentions, beginners can sometimes make mistakes that can hinder their deck cleaning efforts or even cause damage. Here are a few common pitfalls to watch out for.
- Using the Wrong Cleaner: As discussed, chlorine bleach or harsh chemicals can damage the wood and surrounding plants. Stick to milder, eco-friendly options whenever possible.
- Over-Washing or Scrubbing Too Hard: Forcing the cleaning solution or scrubbing with excessive pressure can damage the wood fibers, leading to a rougher surface and more potential for splinters.
- Not Rinsing Thoroughly: Leaving cleaning residue on the deck can lead to sticky surfaces, accelerated re-soiling, and can interfere with the adhesion of new sealants or stains.
- Cleaning in Direct Sunlight on a Hot Day: This causes cleaning solutions to dry too quickly, leaving streaks and making it harder to get an even clean. It can also cause new finishes to dry too fast, leading to poor adhesion and finish failure.
- Skipping the Protection Step: Cleaning without sealing or staining leaves your wood vulnerable to the elements, essentially undoing much of your hard work over time.
- Using a Pressure Washer Incorrectly: This is probably the most damaging mistake. High pressure can permanently mar your deck’s surface. If you must use one, use the lowest setting and keep it moving at a safe distance.
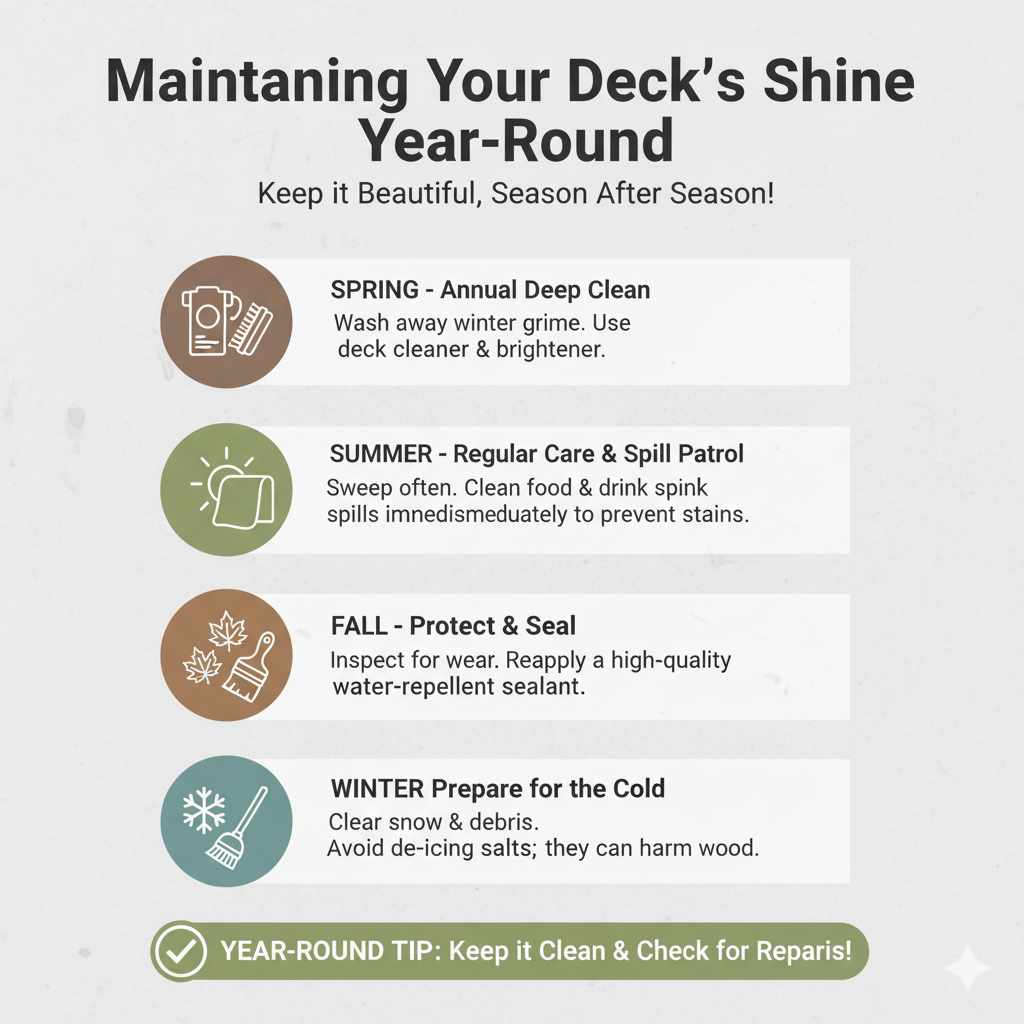
Maintaining Your Deck’s Shine Year-Round
Keeping your deck looking its best isn’t a one-time job. A little ongoing care goes a long way.
- Regular Sweeping: A quick sweep a few times a month will prevent the buildup of debris that can trap moisture and promote mold growth.
- Address Spills Immediately: Clean up spills from food, drinks, or grease as soon as they happen to prevent them from setting into the wood.
- Annual Cleaning: Plan for a good deep clean at least once a year, typically in the spring, to prepare your deck for the warmer months.
- Mid-Year Check-up: In the middle of summer or fall, do a quick visual inspection. Reapply sealant if you notice water soaking into the wood instead of beading up.
- Winter Preparation: Before winter, clear and clean your deck thoroughly. Applying a good quality water-repellent sealant in the fall can help protect it from harsh winter weather. Avoid using de-icing salts, as they can damage the wood.
By following these maintenance steps, you’ll significantly extend the beauty and lifespan of your wood deck, ensuring it remains a welcoming outdoor space for years to come.
Frequently Asked Questions About Cleaning Wood Decks
Q1: How often should I clean my wood deck?
For most decks, a thorough cleaning once a year (spring is ideal) is sufficient. However, if your deck is in a heavily shaded area, prone to mildew, or experiences a lot of foot traffic and spills, you might need to clean it twice a year, or at least do a spot clean more frequently.