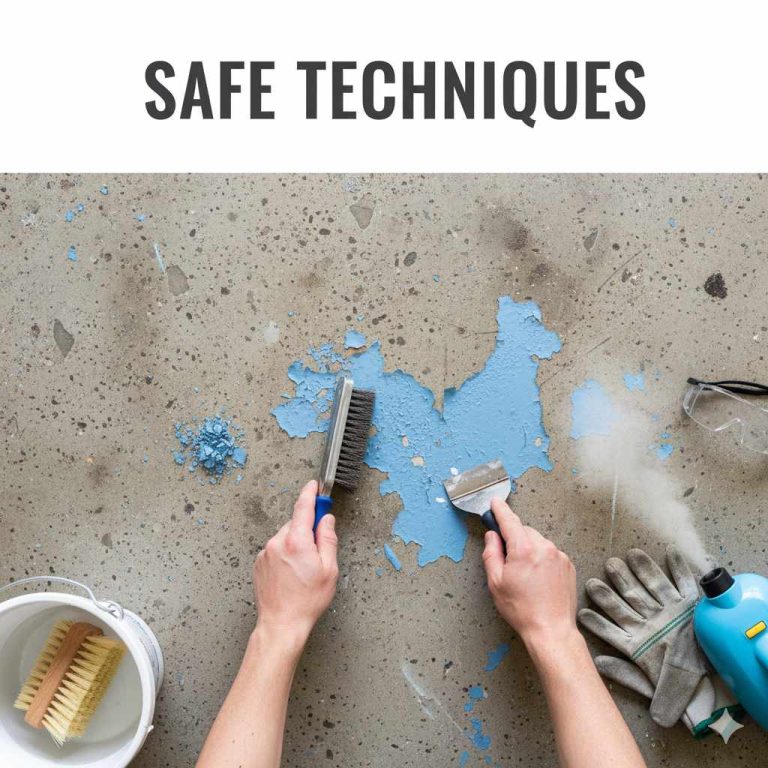
Best Way to Scrape Paint: An Essential Proven Method
The best way to scrape paint, especially on wood, is by using a heat gun combined with a sharp paint scraper. This method softens multiple layers of paint, making them easy to remove with minimal effort and less risk of damaging the surface underneath. Always test for lead paint before you begin, especially in homes built before 1978.
Hello there! I’m Md Meraj, and I’ve spent years in my workshop figuring out the best ways to tackle common DIY challenges. One of the most frustrating jobs is removing old, stubborn paint. It can feel like a battle that never ends. If you’ve ever tried to scrape chipping, cracking, or multiple layers of paint, you know exactly what I mean. But don’t worry, it doesn’t have to be a nightmare.
The secret to a beautiful new paint job isn’t just in the application; it’s in the preparation. Getting a clean, smooth surface is the most important step. Today, I’m going to walk you through my go-to, proven method for scraping paint. It’s safe, effective, and will give you the perfect canvas for your next project. We’ll cover everything from the right tools to the step-by-step process. Let’s get started!
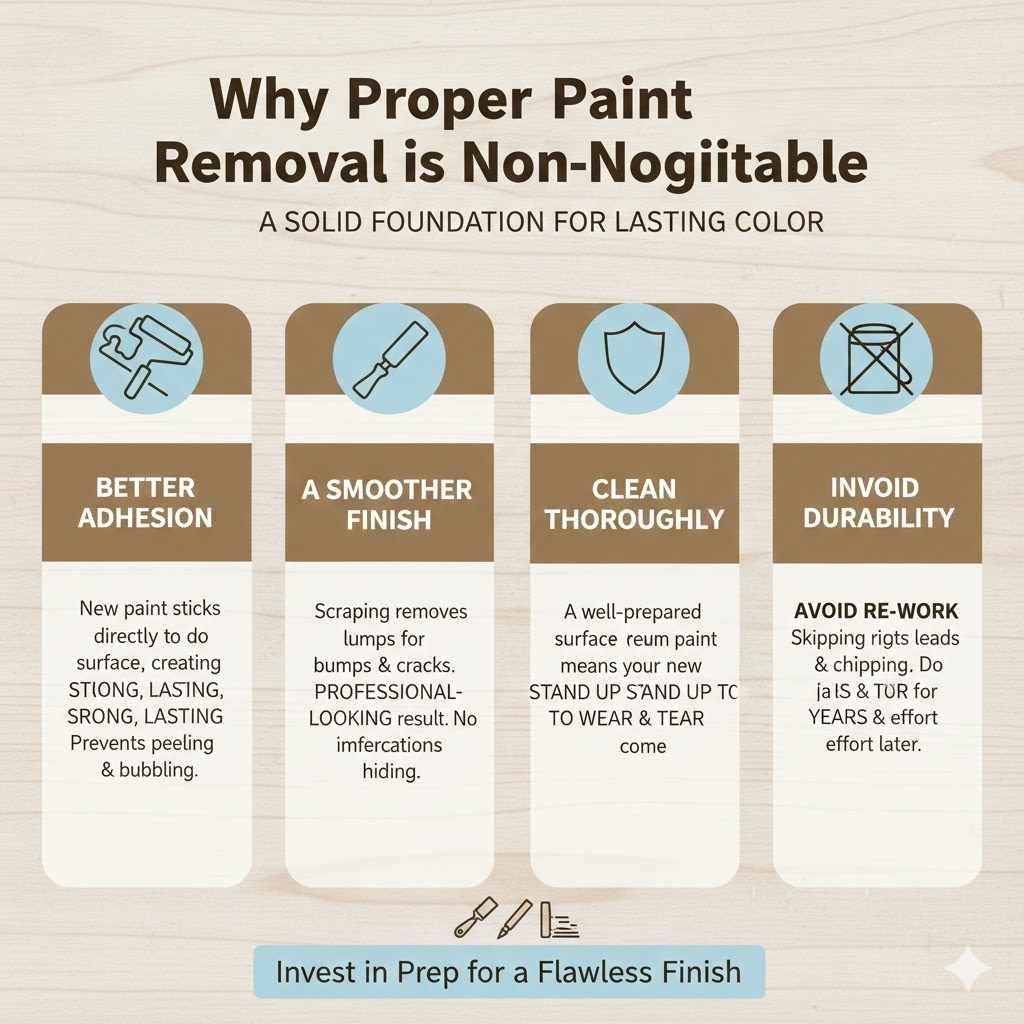
Why Proper Paint Removal is Non-Negotiable
You might be tempted to just paint over that old, flaky surface. I get it; you want to get to the exciting part! But taking a shortcut here will only lead to trouble down the road. A new coat of paint needs a stable, clean surface to grip onto. Without it, your fresh paint will start to peel, bubble, and chip in no time, wasting all your hard work.
Properly removing old paint ensures:
- Better Adhesion: New paint sticks directly to the surface, creating a strong, lasting bond.
- A Smoother Finish: You can’t hide lumps, bumps, and cracks with a new coat of paint. Scraping removes these imperfections for a professional-looking result.
- Increased Durability: A well-prepared surface means your new paint job will stand up to wear and tear for years to come.
Think of it like building a house. You wouldn’t build on a shaky foundation, right? The same goes for painting. A clean, scraped surface is the solid foundation your new paint needs to look its best and last the longest.
A Crucial First Step: Check for Lead Paint
Before you touch a single paint chip, we need to talk about safety. This is the most important step in the entire process. If your home was built before 1978, there is a very good chance the paint contains lead. Lead is extremely hazardous, especially when it becomes dust from scraping or sanding.
Inhaling or ingesting lead dust can cause serious health problems for adults, children, and pets. It’s simply not worth the risk. So, how do you know if you have lead paint? You test for it. You can buy a lead paint test kit at any hardware store. They are affordable and easy to use.
Here’s what to do:
- Buy an EPA-recognized lead test kit.
- Follow the instructions carefully to test a small, hidden area.
- If the test comes back positive for lead, STOP. Do not scrape, sand, or use a heat gun on it.
Dealing with lead paint is a job for certified professionals. They have the training and specialized equipment to remove it safely. You can find more information on lead safety from the U.S. Environmental Protection Agency (EPA). Please, take this step seriously—your health depends on it.
Gather Your Gear: The Right Tools for the Job
Assuming your paint is lead-free, it’s time to get your tools ready. Having everything on hand before you start makes the process so much smoother. Here’s a checklist of what you’ll need.
Safety First! (Always)
- Respirator: A N95-rated respirator is a must to protect your lungs from dust and fumes.
- Safety Goggles: Protect your eyes from flying paint chips and debris.
- Heat-Resistant Gloves: A good pair of leather or other heat-resistant gloves will protect your hands from the heat gun and sharp scraper.
- Long-Sleeved Shirt: To protect your arms from heat and debris.
The Main Tools
- Heat Gun: Look for one with adjustable temperature settings. This gives you more control and helps prevent scorching the wood.
- Paint Scrapers: It’s good to have a few different types.
- A 5-in-1 Tool: This is the Swiss Army knife for painters. It scrapes, cleans rollers, spreads putty, and more.
- A Pull Scraper (or Carbide Scraper): These are fantastic for flat surfaces and can remove a lot of paint quickly. The carbide blades stay sharp for a long time.
- A Detail Scraper: This smaller scraper is perfect for getting into tight corners, around trim, and on detailed moldings.
Prep and Cleanup Crew
- Drop Cloths: Canvas or plastic drop cloths to protect your floors and furniture.
- Painter’s Tape: To hold down drop cloths and protect adjacent surfaces you don’t want to scrape.
- Metal Bucket or Can: A safe place to put hot, scraped paint chips as you work.
- Shop Vacuum with a HEPA Filter: Essential for cleaning up fine dust particles safely.
- Heavy-Duty Trash Bags: For disposing of the paint chips and other debris.
- Tack Cloth: For the final wipe-down to remove any remaining dust before priming.
Choosing the Perfect Scraper for Your Project
With so many scrapers on the shelf, which one should you choose? Using the right tool for the specific area you’re working on makes all the difference. Here’s a simple breakdown to help you decide.
| Scraper Type | Best For | My Pro Tip |
|---|---|---|
| 5-in-1 or 6-in-1 Tool | General purpose, flat areas, cleaning cracks, setting nails. | This is the first scraper you should buy. It’s incredibly versatile and you’ll use it on almost every project. Keep the edge sharp with a file. |
| Pull Scraper / Carbide Scraper | Large, flat surfaces like doors, walls, and siding. Removing thick layers quickly. | These tools work by pulling toward you. Let the tool do the work; you don’t need to apply massive pressure. The carbide blades are worth the extra cost because they last much longer. |
| Detail Scraper | Intricate moldings, window frames, tight corners, and detailed woodwork. | Get a set with interchangeable heads in different shapes (triangle, teardrop, circle). This will help you match the profile of the trim you’re working on. |
| Putty Knife | Delicate surfaces and light scraping. Also great for applying wood filler later. | A flexible putty knife is less likely to gouge the wood than a stiff one, but a stiff one is better for stubborn spots. It’s helpful to have both. |
The Essential Method: Scraping Paint with a Heat Gun Step-by-Step
Alright, you’ve done your lead test and gathered your tools. Now it’s time for the fun part! This heat gun and scraper method is my absolute favorite because it works wonders on stubborn, layered paint. Let’s do this together, one step at a time.
Prepare Your Workspace
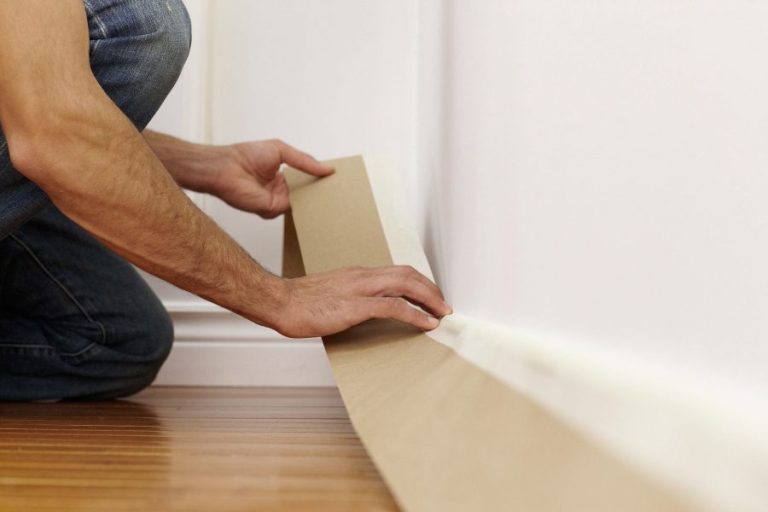
A little prep work saves a lot of cleanup later. Remove any furniture from the area. Lay down your drop cloths and tape them to the baseboards to make sure they don’t slip. If you’re working indoors, turn off smoke detectors temporarily and open windows for ventilation. Cover any vents or outlets with painter’s tape.
Gear Up for Safety
This isn’t a step to skip. Put on your respirator, safety goggles, and heat-resistant gloves. A comfortable setup means you can focus on the task at hand without any worries. Make sure your respirator fits snugly on your face.
Find the Right Heat Setting
Plug in your heat gun and start on its lowest temperature setting. You don’t need a blowtorch here; you just need enough heat to soften the paint. Test it on a small, out-of-the-way spot first. You’re looking for the sweet spot where the paint starts to bubble and wrinkle but the wood underneath doesn’t get scorched or blackened.
Heat the Paint Gently
Hold the heat gun about 6 to 8 inches away from the surface. Keep the gun moving in a slow, continuous sweeping motion, just like you’re spray-painting. Don’t hold it in one spot for too long! After a few seconds, you’ll see the paint begin to bubble up. That’s your signal that it’s ready to be scraped.
Scrape While the Paint Is Warm
As you heat a small section with one hand, follow right behind it with your scraper in the other hand. The paint should come off in long, soft ribbons. Use smooth, steady strokes. Try to keep the scraper as flat as possible against the surface to avoid gouging the wood. If you’re working on wood, always scrape in the direction of the wood grain.
Work in Small Sections
Don’t try to heat a whole door at once. Work in manageable sections, about one square foot at a time. Heat, scrape, and then move on to the next section. This keeps the process under control and gives you better results. Patience is key here. Let the tool do the work for you.
Handle the Tricky Spots
For corners, curves, and detailed moldings, switch to your detail scraper. Its small, shaped head will allow you to get into those tight areas without damaging the intricate details. This is where your patience will really pay off with a clean, professional finish.
Clean Up As You Go
The hot paint chips will be soft and sticky. Scrape them directly into your metal can or bucket. Don’t let them pile up on your drop cloth, as they can be a fire hazard and a messy pain to clean up later. A clean workspace is a safe workspace.
Final Cleanup
Once you’ve scraped the entire area, it’s time for a thorough cleanup. Turn off and unplug your heat gun and let it cool down completely. Carefully roll up your drop cloths, containing all the dust and chips. Use your shop vacuum with the HEPA filter to suck up any remaining dust from the surface and the surrounding area. A HEPA filter is important because it traps the tiny particles that regular vacuums would just blow back into the air.
Other Ways to Scrape Paint (And When to Use Them)
The heat gun method is my top choice for most projects, but it’s not the only way to get the job done. Depending on your situation, one of these other methods might be a good fit.
| Method | Pros | Cons | Best For |
|---|---|---|---|
| Manual Scraping (No Heat) | Inexpensive, no fumes, good for small touch-ups. | Very labor-intensive, slow, can easily gouge the surface if not careful. | Paint that is already extensively peeling or flaking off on its own. |
| Chemical Strippers | Very effective on multiple layers and detailed surfaces. Requires less physical effort. | Messy, smelly fumes require excellent ventilation. Chemicals can be harsh on skin and wood. | Furniture with intricate carvings or metal surfaces where heat could cause warping. For safety tips, consult resources like the Canadian Centre for Occupational Health and Safety. |
| Sanding | Good for smoothing a surface after scraping. Can remove thin layers of paint. | Creates a massive amount of dust (extremely dangerous with lead paint). Can quickly damage wood if you’re not careful. | Removing very thin paint finishes or feathering the edges of scraped areas before priming. Not recommended as a primary removal method. |
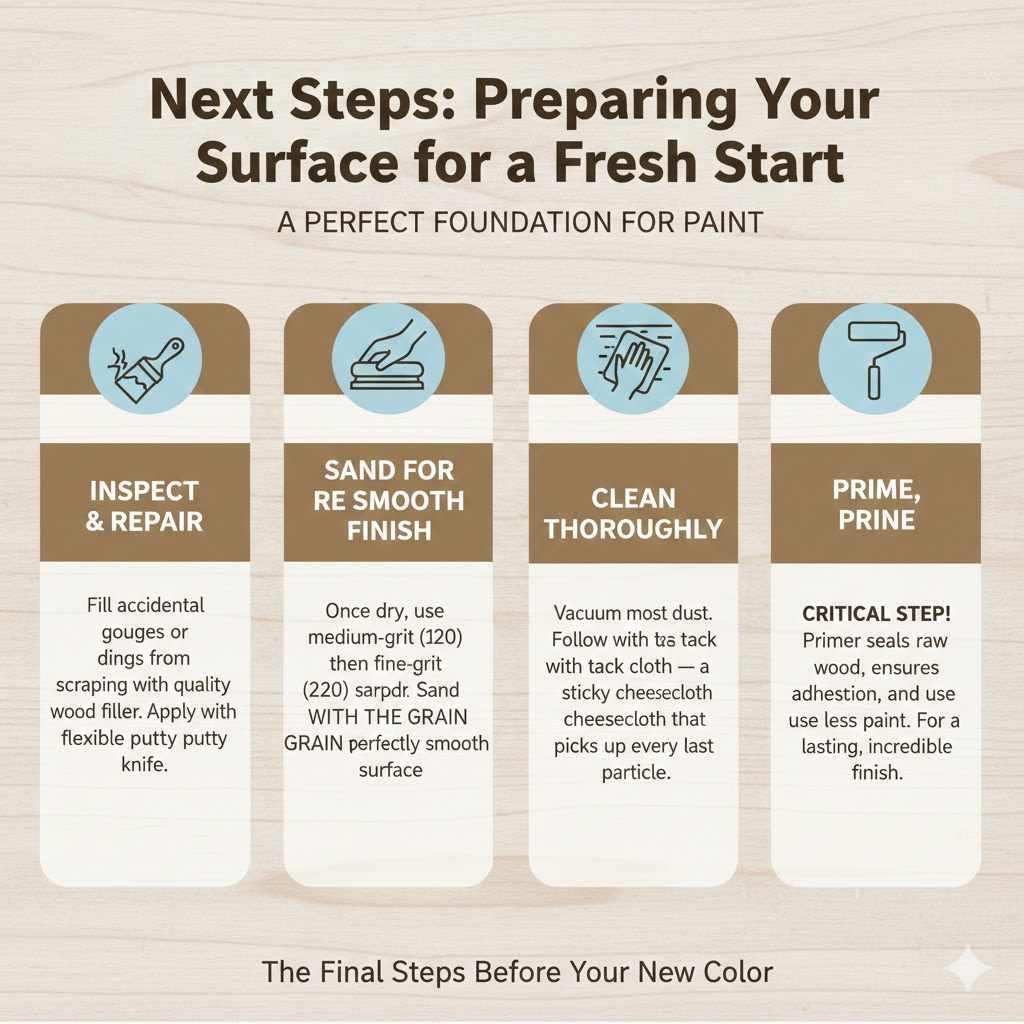
Next Steps: Preparing Your Surface for a Fresh Start
Great job! The old paint is gone. But you’re not quite ready for that new can of paint yet. This is where you turn a good scraping job into a perfect foundation.
- Inspect and Repair: Look over the surface for any accidental gouges or dings from the scraper. Fill these imperfections with a quality wood filler, applying it with a flexible putty knife.
- Sand for a Smooth Finish: Once the filler is dry, it’s time to sand. Start with medium-grit sandpaper (around 120-grit) to smooth out the filler and any rough spots. Then, go over the entire surface with fine-grit sandpaper (around 220-grit) to get it perfectly smooth to the touch. Remember to sand with the grain!
- Clean Thoroughly: Sanding creates fine dust. Use your shop vacuum one last time to get rid of most of it. Then, follow up with a tack cloth. A tack cloth is a sticky piece of cheesecloth that picks up every last particle of dust, leaving you with a perfectly clean surface.
- Prime, Prime, Prime: Do not skip the primer! Primer seals the raw wood, ensures your new paint will stick properly, and helps you use less paint for the final coats. It’s the final, critical step to ensuring your new paint job looks incredible and lasts for years.
Frequently Asked Questions (FAQ)
What is the easiest way to remove peeling paint?
For paint that is already loose and peeling, the easiest method is manual scraping with a 5-in-1 tool or putty knife. Simply get the edge of the tool under the loose flakes and lift them off. For more stubborn areas, the heat gun method is the most effective with the least amount of effort.
Is it better to scrape or sand off old paint?
It is almost always better to scrape paint first. Sanding is not an effective method for removing thick layers of paint and creates a huge amount of fine dust, which is a major health hazard (especially with lead paint). Sanding should be reserved for the final step to smooth the surface after the bulk of the paint has been scraped off.
Can I just paint over chipping paint?
No, you should never paint over chipping or peeling paint. The new paint will not adhere properly to the unstable surface underneath and will soon begin to peel and chip itself, wasting your time and money. You must scrape away all the loose paint first for a lasting finish.
How do I know if I have lead paint?
The only way to know for sure is to test for it. You can purchase a lead test kit from a hardware or paint store. These kits are inexpensive and simple to use. It is especially critical to test in any home built before 1978, as lead was a common ingredient in paint before then.
What temperature should my heat gun be for scraping paint?
Start with the lowest setting, typically around 250-500°F (120-260°C). Increase the temperature gradually until you see the paint start to bubble and soften. You want just enough heat to make the paint pliable, not so much that you scorch the wood or create dangerous fumes.
How can I avoid damaging the wood when I scrape?
To avoid damaging the wood, always scrape in the direction of the wood grain. Hold your scraper at a low angle to the surface rather than digging in with the corners. Apply steady, even pressure and let the heat do most of the work for you. Using a sharp scraper is also key, as a dull one requires more force and is more likely to gouge the wood.
Do I need to prime the surface after scraping?
Yes, absolutely. Priming is an essential step after scraping and sanding. A good quality primer seals the bare wood, prevents stains from bleeding through, helps the new paint adhere better, and provides a uniform surface for an even final color. Skipping primer is a shortcut you will regret.
Conclusion: Your Path to a Perfect Finish
Scraping paint might not be the most glamorous part of a DIY project, but it is one of the most rewarding. By following this proven method, you are setting yourself up for a beautiful, durable, and professional-looking finish that you can be proud of for years to come. Remember to always prioritize safety, especially when it comes to checking for lead paint.
Take your time, use the right tools, and work step-by-step. The patience you invest in preparing the surface will pay off tenfold in the final result. You’ve learned how to turn a dreaded chore into a manageable process that gives you complete control over your project. Now you have the skills to tackle that peeling door, window trim, or piece of furniture and give it a brand new life. Happy building!