Best Way to Sharpen Chisels: Proven Effortless
The best way to sharpen chisels involves using a simple two-stage flattening and honing process on water stones, moving from a coarse grit to a fine grit. This proven, effortless method ensures a razor-sharp edge that cuts cleanly and saves you time in the workshop.
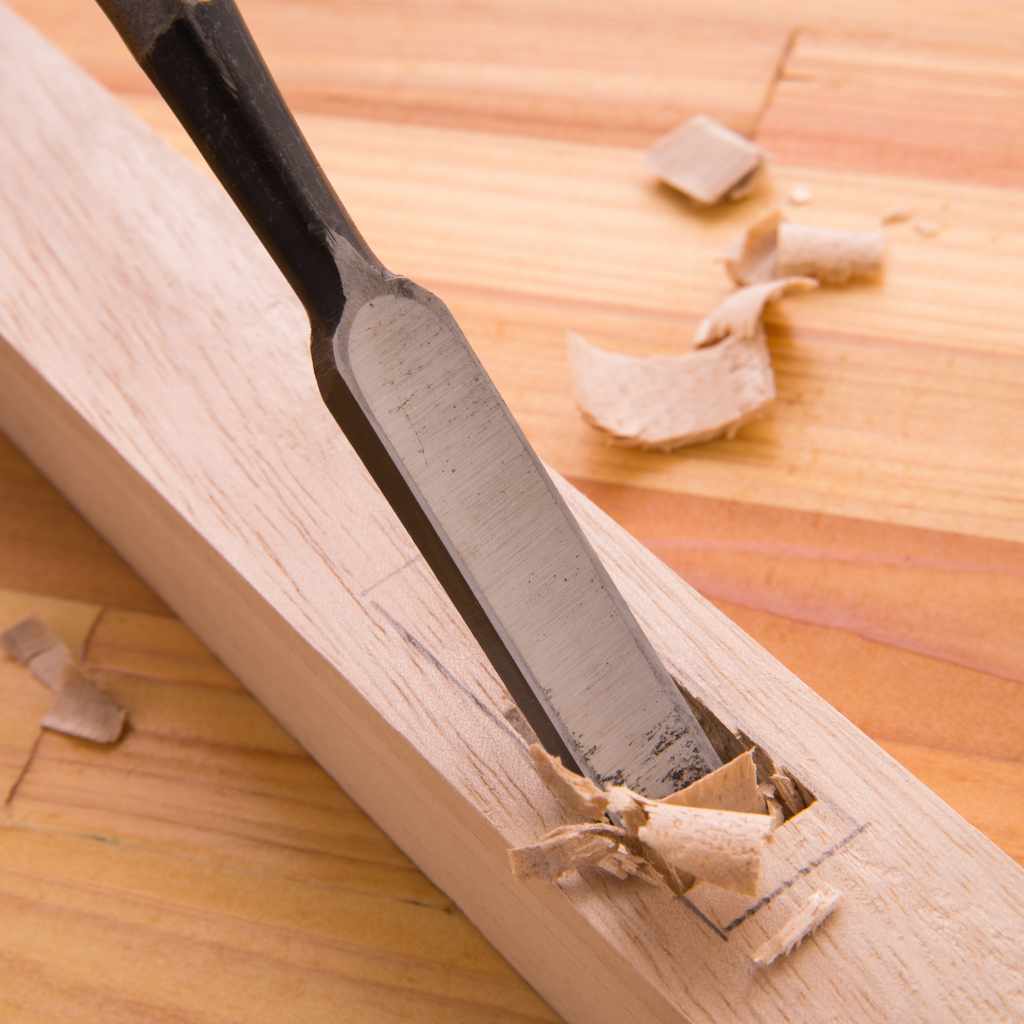
Dull chisels are the nemesis of every woodworker, making even simple tasks like cleaning out a mortise feel like an uphill battle. They tear out the wood, bruise your projects, and frankly, they are frustrating! But sharpening doesn’t need to be an intimidating chore reserved for tool fanatics. I’m Meraj, and I promise you that mastering the edge is simpler than you think. We are going to walk through a proven, reliable system that will get your chisels screaming sharp without needing expensive machinery. Get ready to transform your frustrating tools into precision instruments!
Why a Sharp Chisel is Non-Negotiable
A truly sharp chisel is not just about making a clean cut; it’s about safety, efficiency, and protecting your valuable lumber. Think of it this way: a sharp tool requires less force. Less force means less chance of slipping and injuring yourself. Furthermore, the wood fibers are sliced cleanly, rather than crushed or torn. This immediate difference drastically improves the look and longevity of your finished pieces.
When you invest time in learning the correct sharpening technique, you are investing in the quality of every project you touch. It builds craftsmanship from the ground up.
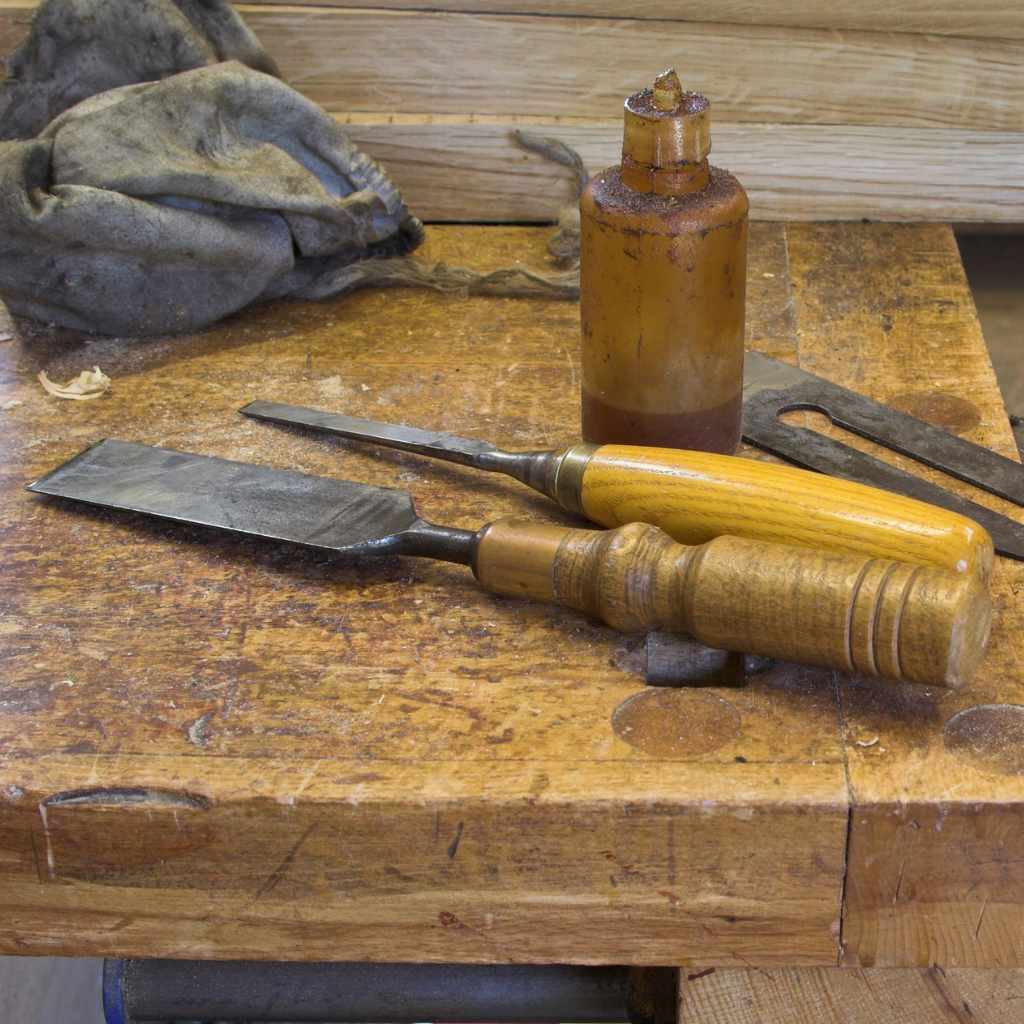
Gathering Your Effortless Sharpening Arsenal
You don’t need a full professional setup to achieve incredible results. For the most effective and low-stress sharpening, we focus on water stones. They cut quickly and require less maintenance than traditional oil stones.
Essential Tools for the Beginner
- Water Stones (or Combination Stone): This is our main event. You need at least two grits: a coarse grit for flattening and initial shaping (around 400–1000) and a fine grit for refining the edge (around 3000–6000).
- Water Source: Keep a small spray bottle or shallow dish of water handy to keep the stones wet.
- Stone Holder or Damp Towel: Stones can slide, which is dangerous. Secure them firmly to your workbench.
- Sharpening Guide (Optional but Highly Recommended): These small clamps hold your chisel at a consistent angle, which is key for beginners.
- Strop and Polishing Compound: For that final, glass-like edge (often called the “leather strop”).
- Safety Gear: Always wear appropriate shop glasses.
| Tool | Grit Range | Primary Purpose |
|---|---|---|
| Coarse Stone | 400 – 1000 | Repairing chips, flattening the back, establishing the primary bevel angle. |
| Fine Stone | 3000 – 6000 | Refining the edge and removing scratches left by the coarse stone. |
| Strop | N/A (Leather/Canvas) | Polishing the final edge to maximum sharpness. |
Step One: Flattening the Back (The Secret to a Great Edge)
This is the step most beginners skip, and it’s why their chisels never get truly sharp! The back of the chisel—the flat side—must be perfectly flat. If it’s rounded, only the very tip of the bevel will make contact, preventing a proper edge from forming. This process is called flattening or lapping.
Checking for Flatness
Place your completely dull chisel face down on your coarse stone (or a flat piece of glass with some wet/dry sandpaper glued to it). Press down gently. If you feel the stone only touching the heel and the toe, you have a concave, or rounded, back. We need to fix that.
The Flattening Process
- Soak Your Stone: Ensure your water stone is fully saturated according to the manufacturer’s instructions (usually 5–15 minutes). Keep it wet throughout the entire process.
- Establish the Angle: For the back, you want a 0-degree angle (perfectly flat). You are just rubbing the back of the chisel across the stone’s surface.
- Grind Until Flat: Push and pull the chisel heel-to-toe across the stone. You are aiming to grind until you see a uniform, polished scratch pattern across the entire width of the back face.
- Check for Burr: Once the back is flat, swipe a finger gently along the very edge of the bevel side. You should feel a tiny, rough lip of metal curling over onto the bevel side. This is called a burr. The burr confirms you have ground through the entire thickness of the metal.
- Clean Up: Once the burr appears, wipe the back clean. You are done with flattening.
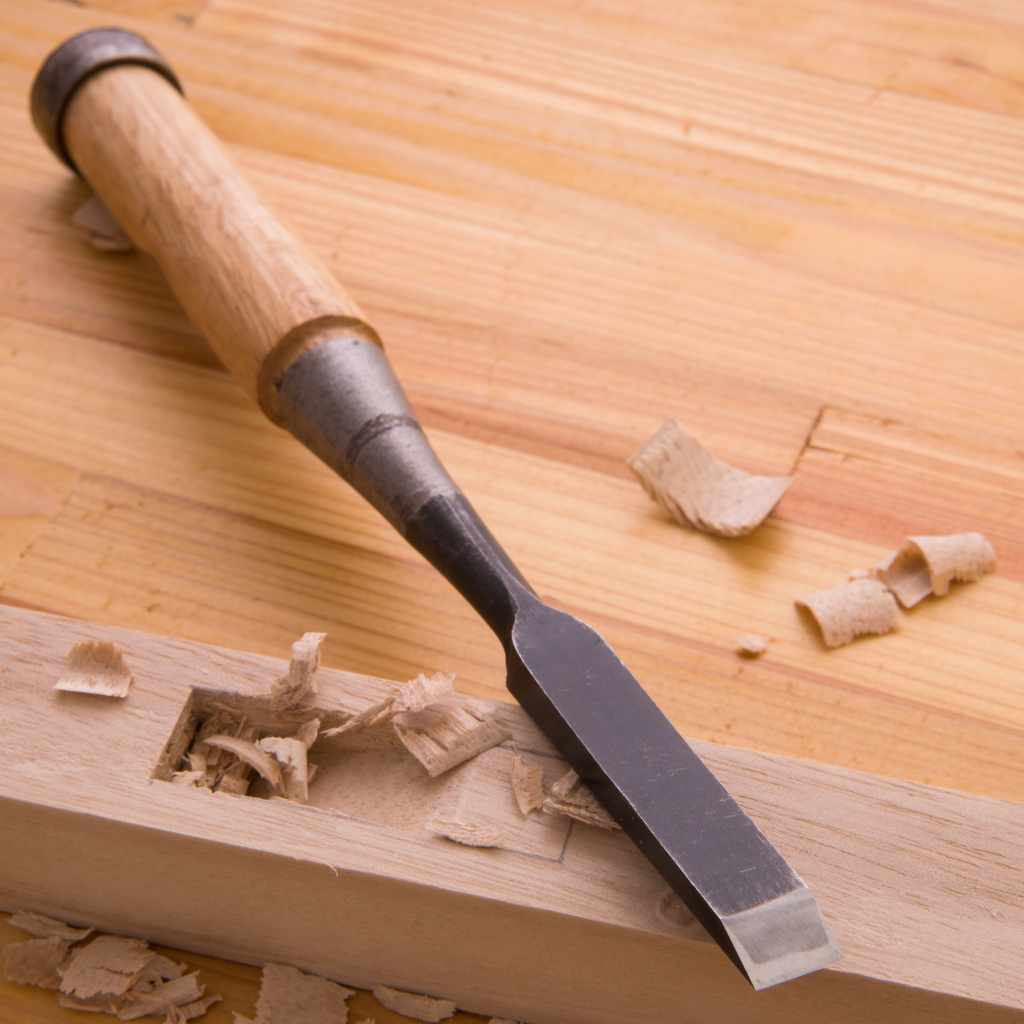
Step Two: Setting the Primary Bevel Angle
The bevel is the angled part leading up to the edge. Most factory chisels come with a standard 25-degree angle, which works well for general woodworking. For woodworking that requires more delicate work, like paring dovetails, you might choose 20 degrees, but 25 degrees is a safe, durable starting point.
Finding Your Angle with Guides
If you are using a honing guide (which I strongly recommend):
- Set the Guide: Most guides have an angle setting, or you use a small wedge block to help align the chisel. Set your guide clamp to 25 degrees.
- Secure the Chisel: Clamp the chisel into the guide. Make sure the entire cutting edge is fully touching the guide holder.
- Grinding on the Coarse Stone: Place the chisel (held by the guide) onto your coarse water stone (1000 grit). Apply steady, firm pressure. Push the chisel forward across the stone, focusing on keeping the guide firmly seated on the stone’s surface.
- Count Strokes: Perform about 15–20 strokes in one direction (e.g., pushing away from you).
- Flip and Repeat: Flip the chisel over and perform the same number of strokes on the other side of the bevel.
- Check for Burr: Again, feel for that tiny metal burr forming on the opposite side of the chisel face. When the burr is present across the entire width of the edge, you have successfully established a new primary bevel.
If you are freehand sharpening, visualize this: if 90 degrees is flat, a 45-degree angle is halfway. 25 degrees is slightly steeper than half of that. Practice on an old, dull chisel first to get a feel for maintaining that consistent angle.
Step Three: Refining the Edge on the Fine Stone
Now that the angle is set and the edge is established, it is time to polish away the scratches left by the coarse stone. This is where the true sharpness begins to emerge.
Transitioning to Finer Grit
Move your whetstone holder setup over to your finer stone (3000 or 4000 grit). Keep this stone wet, just like the coarse one.
- Use Lighter Pressure: You are no longer trying to remove large amounts of steel. Use just enough pressure to keep contact.
- Alternate Sides: Work the bevel side for 5–8 strokes, then flip and work the plain back side for 5–8 strokes. Keep alternating. The goal here is to slowly work the burr down and eventually eliminate it.
- Gradual Stroke Reduction: As you go along, naturally reduce the number of strokes. For example, do 5/5, then 3/3, then 2/2. This helps the final, incredibly sharp portion of the edge form right at the cutting line.
We are aiming for a mirror-like finish on both the bevel and the back. A highly polished surface reduces friction when cutting, making the chisel feel unbelievably keen.
Step Four: The Final Polish Using Strop and Compound
This is the magic step that takes a “sharp” chisel and makes it “effortlessly sharp.” The strop removes the micro-burr left by the finest stone and polishes the last few micrometers of steel to perfection. You can purchase leather strops or use a piece of scrap leather or even heavy canvas mounted to wood.
Stropping Technique
Apply a small amount of polishing compound (often green chromium oxide paste) onto your strop. You only need a tiny amount to start.
- Angle Adjustment: When stropping, you must angle the chisel backwards relative to the direction of the stroke. If you were pushing the chisel into the wood when sharpening, you now need to pull it back over the strop so the bevel edge leads the movement.
- The Angle Differs: The angle used for stropping should be slightly higher than your sharpening angle, perhaps 30 degrees, to ensure you are only working the very apex of the edge.
- Light Strokes: Use very light pressure—almost just the tool’s weight—to avoid rolling the edge over.
- Alternate Strokes: Perform 10 strokes on the bevel side, then flip and perform 10 strokes on the back (again, bevel edge trailing). Keep alternating, lightly reducing the strokes (e.g., 5/5, 3/3, 1/1).
- Test the Edge: Once complete, a well-sharpened chisel should easily slice through a hanging thread or shave hair off your arm.
Maintaining Your Edge Between Sharpening Sessions
The key to making this process “effortless” is reducing how often you have to do the full four steps. Most of the time, your chisel just needs a quick refresh, not a full grind.
Honing vs. Sharpening
Sharpening (Steps 1–3) removes metal and reshapes the edge. Honing (quick touch-ups) just realigns a slightly dulled edge.
- When to Hone: If your chisel starts to hesitate or tear wood slightly, it’s time for a quick hone.
- Honing Procedure: Skip Step 1 (Flattening) and Step 2 (Setting the Bevel). Immediately jump to Step 3 (Fine Stone) using very few strokes (3–5 per side), followed by a few light strokes on the strop (Step 4). This takes less than 60 seconds per chisel.
Troubleshooting Common Beginner Issues
Don’t worry if your first attempt isn’t perfect. Every woodworker faces these hurdles. Here is quick guidance:
| Problem | Likely Cause | Meraj’s Quick Fix |
|---|---|---|
| Chisel feels sharp but folds/dulls instantly. | You have a weak micro-burr that wasn’t removed during polishing, or the edge rolled on the strop. | Scrub the edge vigorously on your finest stone (3000 grit) for 10 strokes per side to remove any remaining weak steel, then strop very lightly. |
| I can’t feel the burr after grinding the bevel. | The back of the chisel is not perfectly flat, so the angle isn’t meeting the back edge evenly. | Go back to Step 1. You must flatten the back until you see the scratch pattern all the way to the edge before proceeding. |
| The edge is wavy or uneven. | Your hand pressure was inconsistent, or you were rocking the chisel while grinding freehand. | Use a honing guide for consistency until your hand develops muscle memory, or use lighter pressure on the fine stone. |
Remember what the experts at organizations like the National Institute of Standards and Technology (NIST) discuss regarding material science—tool materials are complex, and how you treat the edge determines its lifespan. Consistent methodology is everything!
Choosing the Right Grit Progression
While a 1000/4000 progression is excellent for general use, your grit choice depends on the starting condition of your chisel. Use this guide to select your stones:
- Very Dull or Damaged/Nicked Chisels: Start with a 320 or 400 grit stone to repair the damage quickly, then move to 1000, 3000, and strop.
- Standard Maintenance (Most Common): Use a 1000 grit stone for setting the bevel, then proceed directly to a 6000 grit stone, followed by the strop. This gives you an excellent edge without unnecessary fine grit work.
- Mirror Polish for Fine Veneer Work: If you are cutting delicate veneers or intricate joinery where absolute perfection is needed, step through the grits: 1000 -> 4000 -> 8000, then strop.
Don’t feel pressured to buy eight different stones. The 1000/6000 combination works wonderfully for 95% of home woodworking tasks.
Safety First While Sharpening
Sharpening moves metal particles and involves sharp edges. Always respect the process.
- Keep Stones Wet: Dry stones can overheat the steel, possibly softening the edge (losing its temper). Water keeps the steel cool.
- Secure Your Setup: A stone slipping on the bench is dangerous. Use a dedicated holder or a sturdy, damp towel underneath.
- Handle with Care: The newly sharpened edge is incredibly sharp. Only handle the chisel by the handle or the blunt, thick sides when checking the edge. Always store chisels in a safe place, preferably in a dedicated carrier or rack.
Frequently Asked Questions (FAQ)
Q1: How often should I sharpen my chisels?
A: It depends on use. If you are using them lightly every weekend, you might only need a full sharpening session monthly. For quick touch-ups (honing), do this every 1–2 hours of active cutting or anytime you notice the chisel dragging.
Q2: Do I really need a honing guide?
A: For beginners, yes, absolutely. Hand-eye coordination is difficult to maintain consistently. A guide locks in your angle (e.g., 25 degrees) so you can focus purely on pushing and pulling, guaranteeing a flat, even bevel.
Q3: What grit is considered truly “sharp”?
A: True sharpness is achieved by the polishing step. While a 1000 grit stone creates a functional edge, the microscopic scratches are still visible. An edge polished on a 4000 to 8000 grit stone is what most craftsmen consider functionally razor-sharp.
Q4: My chisel back is too concave—how do I fix it?
A: You need to aggressively flatten it on your coarse stone (400 or 600 grit). You will need to spend significant time grinding until all the previous rounding is gone and you see a uniform scratch pattern across the entire back surface.