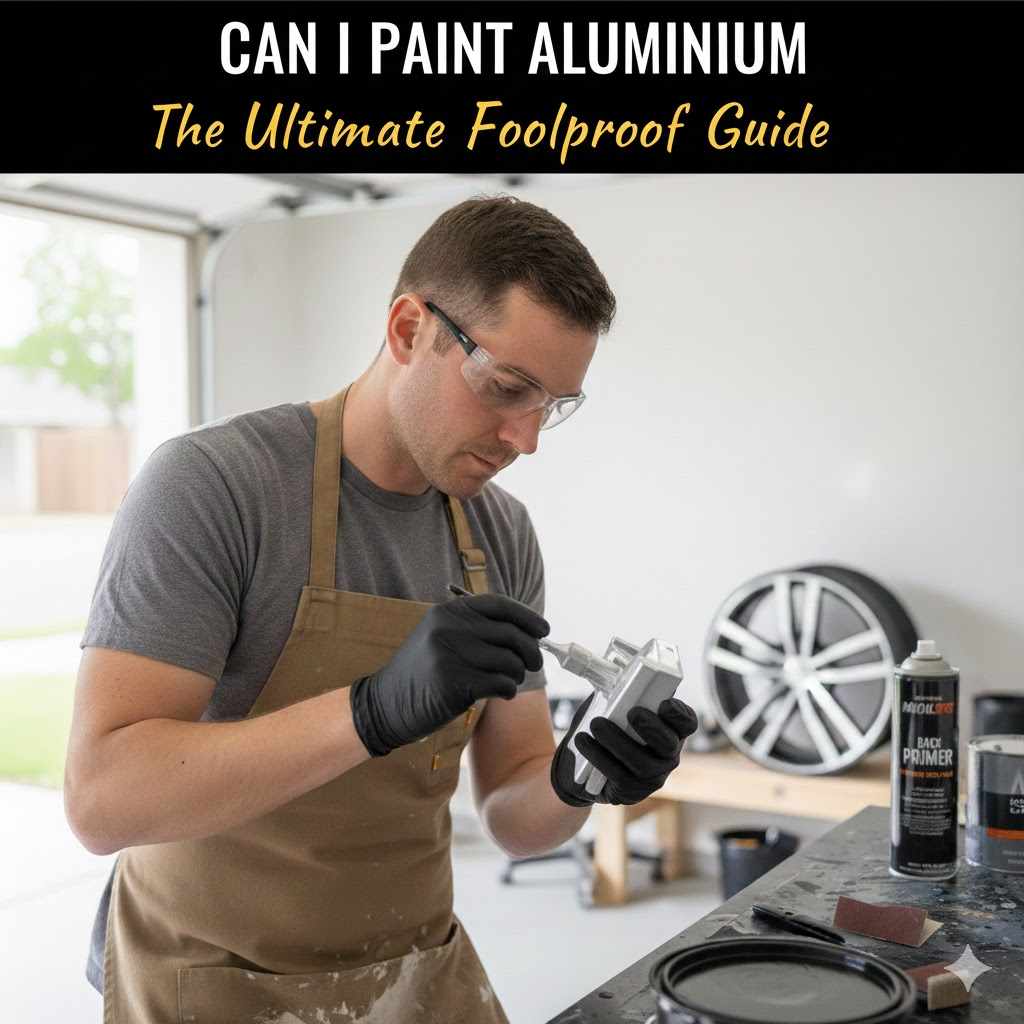
Can I Paint Aluminum The Ultimate Foolproof Guide
Yes, you can absolutely paint aluminum and achieve a durable, professional-looking finish. The key is proper preparation. You must thoroughly clean, sand, and apply a special self-etching primer designed to bond with the metal. Skipping these steps will cause the paint to peel or chip off easily.
Hello there! Md Meraj here, your friendly guide in the workshop. Have you ever tried to paint an aluminum chair or window frame, only to watch the paint peel off a few weeks later? It’s a common frustration. Unlike wood, aluminum has a slick, non-porous surface that paint just doesn’t want to stick to. It can make you feel like you wasted a whole weekend and a can of perfectly good paint.
But don’t worry, you’re not alone in this struggle. The good news is there’s a simple, foolproof method to get a beautiful, long-lasting finish on any aluminum surface. It’s all about the preparation. In this guide, I’ll walk you through every step, from cleaning to the final coat. Let’s turn that frustrating project into a stunning success!
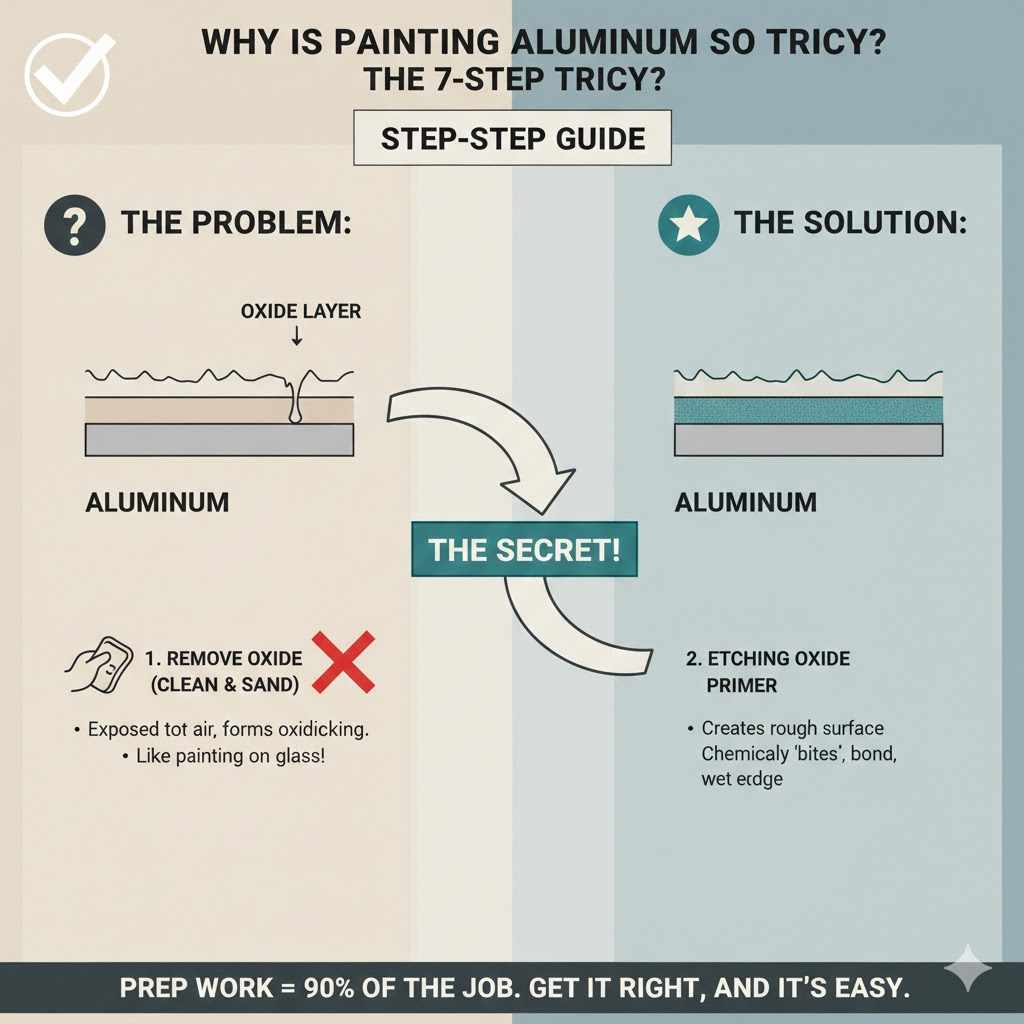
Why Is Painting Aluminum So Tricky?
Before we grab our brushes, it’s helpful to know why aluminum is a bit stubborn. When aluminum is exposed to air, it instantly forms a thin, hard layer of oxide on its surface. This is great for preventing rust, but it’s terrible for paint adhesion. Think of it like trying to paint a piece of glass—the paint has nothing to grab onto.
Our goal is to remove that oxide layer and create a surface that the primer can chemically bite into. That’s where a special type of primer comes in, but we’ll get to that in a moment. The main takeaway is this: preparation is 90% of the job. If you do the prep work right, the painting part is easy.
Your Essential Toolkit: Supplies for Painting Aluminum
Gathering your tools before you start makes the whole process smooth and stress-free. You don’t need anything too fancy, just the right materials for the job. Here’s a checklist to get you ready:
Safety Gear (Non-Negotiable!)
- Safety Glasses: Protect your eyes from dust and paint splashes.
- Respirator Mask: Especially important when sanding and using spray paints or primers to avoid breathing in harmful particles and fumes.
- Gloves: Nitrile or latex gloves will keep your hands clean and protect them from solvents.
Cleaning and Prep Supplies
- Degreaser or All-Purpose Cleaner: A simple solution of soap and water works, but a dedicated degreaser is better for cutting through oil and grime.
- Clean Rags or Lint-Free Cloths: You’ll need several for cleaning and wiping down the surface.
- Scrub Brush or Sponge: To help remove stubborn dirt.
- Sandpaper or Scuffing Pad: A medium grit (around 180 to 220-grit) is perfect. Don’t go too coarse, or you’ll create deep scratches.
- Mineral Spirits or Acetone: For the final wipe-down before priming.
Priming and Painting Supplies
- Self-Etching Primer: This is the secret weapon! It contains an acid that lightly etches the aluminum, creating a super-strong bond. Do not skip this.
- Your Choice of Paint: Look for paints labeled for use on metal. Acrylic or oil-based enamel paints work well. Spray paint is great for an even finish on complex shapes.
- Paint Brushes, Rollers, or a Paint Sprayer: Depending on your project and paint choice.
- Optional Clear Coat: A clear enamel or polyurethane topcoat adds an extra layer of protection against scratches and UV rays, especially for outdoor items.
The Foolproof 7-Step Guide to Painting Aluminum
Alright, let’s get to work! Follow these steps carefully, and I promise you’ll get a fantastic result that lasts for years. Remember, don’t rush the prep work.
Step 1: Get Your Workspace and Safety Gear Ready
First things first, set up in a well-ventilated area, like an open garage or outdoors on a calm day. Lay down drop cloths to protect the floor or ground. Put on your safety glasses, respirator mask, and gloves. Safety is always the top priority in any DIY project.
Step 2: Clean the Aluminum Surface Thoroughly
Your aluminum piece needs to be completely free of dirt, grease, and grime. Any contaminants left on the surface will prevent the primer from sticking properly.
- Mix your cleaner with warm water according to the directions. If you’re using dish soap, a few drops in a bucket of water is plenty.
- Using a scrub brush or sponge, wash the entire aluminum surface. Get into all the nooks and crannies.
- Rinse the piece completely with clean water. You don’t want any soap residue left behind.
- Let the aluminum dry completely. You can speed this up with a clean, lint-free cloth or let it air dry in the sun.
Step 3: Scuff the Surface with Sandpaper
This step creates a “tooth” for the primer to grip onto. We aren’t trying to remove metal, just roughing up that smooth, shiny surface.
- Take your 180 to 220-grit sandpaper or a scuffing pad.
- Lightly sand the entire surface in a circular motion. You’re looking for a uniform, dull finish.
- Make sure you scuff every part that you plan to paint. Don’t press too hard—a light, even pressure is all you need.
When you’re done, the shiny aluminum should look matte and slightly hazy. That’s the sign of a job well done!
Step 4: Clean It Again (This Is Crucial!)
Sanding creates a lot of fine metal dust. This dust is the enemy of a smooth paint job. You must remove every last particle.
- Wipe the surface down with a clean, dry rag to remove the bulk of the dust.
- Next, dampen a separate lint-free cloth with mineral spirits or acetone. This will pick up any remaining dust and remove any oils from your hands.
- Wipe down the entire piece one last time.
- Allow the solvent to evaporate completely, which usually only takes a few minutes. Your surface is now perfectly prepped for primer.
Step 5: Apply a Self-Etching Primer
This is the most important step for long-lasting results. A self-etching primer is specifically designed for non-ferrous metals like aluminum. It chemically bonds to the surface, creating the perfect foundation for your paint.
- Shake the spray can of self-etching primer vigorously for at least a minute, or stir it well if you’re using a brush-on version.
- Hold the can about 10-12 inches away from the surface.
- Apply a light, thin, even coat. Use long, sweeping motions. It’s much better to apply two thin coats than one thick, heavy coat. A thick coat can run and take forever to dry.
- Let the first coat dry according to the manufacturer’s instructions (usually 15-30 minutes).
- Apply a second thin coat if needed to ensure full coverage.
- Let the primer cure completely. This can take anywhere from an hour to 24 hours—check the directions on the can. Don’t rush this part!
Step 6: Let’s Paint! Apply Your Topcoat
Now for the fun part! With your primer fully cured, you’re ready to add some color. Whether you’re using spray paint or a brush, the same principles apply: thin coats are best.
| Application Method | Best For | Pro Tip |
|---|---|---|
| Spray Paint | Complex shapes, furniture with spindles, achieving a super-smooth finish. | Keep the can moving in steady passes to avoid drips. Overlap each pass by about 50%. |
| Brush or Roller | Large, flat surfaces like aluminum siding, doors, or sheets. | Use a high-quality brush designed for smooth surfaces to minimize brush marks. Apply thin, even coats. |
No matter which method you choose:
- Apply your first thin coat of paint. Don’t worry if the primer shows through a bit—that’s normal.
- Let it dry to the touch as recommended on the paint can. This is called the “recoat window.”
- Apply a second coat for full, rich color. You might even need a third light coat for some colors.
- Let the final coat of paint cure fully. This is different from being dry to the touch. Full curing can take several days, so be gentle with the item during this time. For more information on paint curing, the U.S. Environmental Protection Agency (EPA) provides useful guidelines on safe painting practices.
Step 7: Add a Protective Clear Coat (Optional)
For projects that will be outdoors or see a lot of wear and tear (like patio furniture or handrails), a clear coat is a fantastic idea. It adds a durable, protective layer that guards against scratches, chips, and sun damage.
- Make sure your color coat is fully dry (check the can for instructions, but it’s usually best to wait 24 hours).
- Apply one or two thin, even coats of a clear enamel or polyurethane spray, just like you did with the paint.
- Let it cure completely before putting your beautifully painted aluminum item to use.
Choosing the Right Paint for Your Aluminum Project
The type of paint you choose can make a big difference in the final look and durability. Here’s a quick breakdown of good options for aluminum, assuming you’ve used a self-etching primer first.
| Paint Type | Pros | Cons | Best For |
|---|---|---|---|
| Acrylic Latex Paint (Exterior Grade) | Easy cleanup (water-based), flexible, UV resistant. | Not as tough as oil-based paints against physical abrasion. | Siding, window frames, gutters, outdoor structures. |
| Oil-Based Enamel | Extremely durable, hard-wearing finish, excellent adhesion. | Strong fumes, requires mineral spirits for cleanup, can yellow over time. | Handrails, machinery, furniture, high-traffic areas. |
| Epoxy Paint (Two-Part) | The most durable option; resistant to chemicals, water, and abrasion. | More expensive, must be mixed and used within a short time frame. | Boat parts, garage floors, industrial applications. |
Common Mistakes to Avoid
Even seasoned DIYers can make slips. Here are a few common mistakes to watch out for to ensure your project is a success from the start:
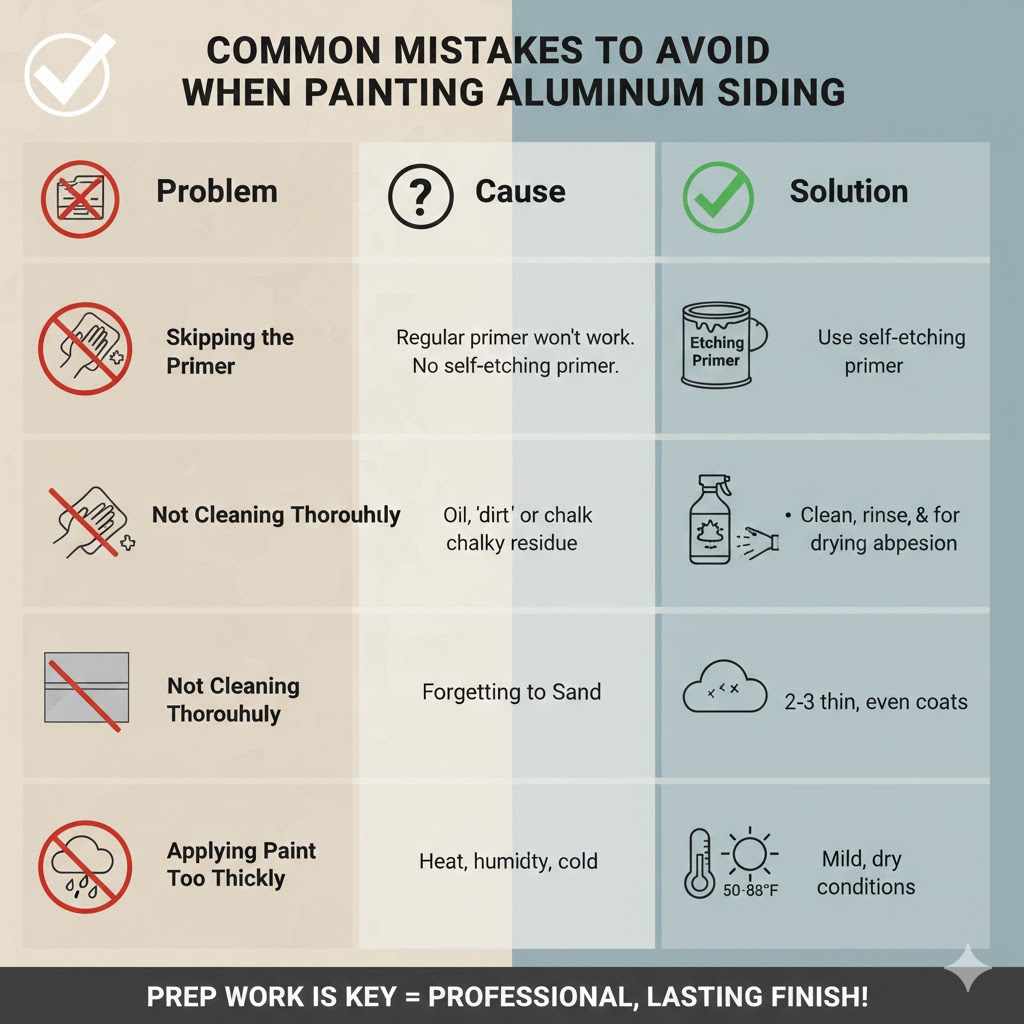
- Skipping the Primer: This is the #1 mistake. Regular primer won’t work. You absolutely need a self-etching primer for aluminum.
- Not Cleaning Thoroughly: Painting over even a tiny bit of oil or dirt will cause the paint to fail in that spot. Clean, rinse, and dry completely.
- Forgetting to Sand: If you don’t scuff the surface, the primer has nothing to grip. Your smooth aluminum needs that “tooth” for a strong bond.
- Applying Paint Too Thickly: It’s tempting to try and get it done in one coat, but this leads to drips, runs, and a very long drying time. Two or three thin coats are always better than one thick one.
- Painting in Bad Weather: Avoid painting in direct sunlight, high humidity, or when it’s very cold. Ideal conditions are typically between 50-85°F (10-29°C) with low humidity.
Frequently Asked Questions (FAQ)
Do I really need to use a primer on aluminum?
Yes, absolutely. This is the most critical step. Aluminum’s slick, oxidized surface prevents normal paint from sticking. You must use a self-etching primer, which is specifically formulated to bond chemically with the metal and create a stable base for your paint.
What happens if I paint aluminum without primer?
If you paint directly onto aluminum without a self-etching primer, the paint will not adhere properly. It may look fine at first, but it will quickly begin to peel, bubble, or chip off with very little effort, especially if the object is handled or exposed to the elements.
Can I paint anodized aluminum?
Yes, you can paint anodized aluminum, but the prep work is the same. Anodizing is a very durable finish, so you’ll need to thoroughly scuff the surface with sandpaper to break that hard outer layer. Then, proceed with cleaning and applying a self-etching primer as usual.
What is the best paint for outdoor aluminum furniture?
For outdoor furniture, you need a durable, weather-resistant paint. After applying a self-etching primer, use an exterior-grade acrylic or oil-based enamel paint. For maximum protection against rust, scratches, and fading, finish with a UV-resistant clear coat.
Can I use a regular spray paint primer on aluminum?
No, a regular “all-purpose” or “plastic-bonding” primer will not work well on bare aluminum. You must use a product specifically labeled as a “self-etching” or “metal” primer designed for non-ferrous metals. These contain special ingredients that ensure a strong bond.
How long does painted aluminum last?
When prepared and painted correctly using the steps above, a painted aluminum finish can last for many years, often 5-10 years or more, even outdoors. The key factors are thorough prep work and using high-quality primer and paint.
Wrapping It All Up
And there you have it! The mystery of painting aluminum is solved. It isn’t nearly as difficult as it seems; it just requires a bit more patience and preparation than painting wood or other materials. By focusing on cleaning, scuffing, and using the all-important self-etching primer, you are creating the perfect canvas for a durable and beautiful paint job.
So, go ahead and tackle that project you’ve been putting off. Whether it’s giving your patio furniture a fresh look, updating your window frames, or customizing a piece of metal for a project, you now have the knowledge to do it right. You’ll be amazed at the professional-quality results you can achieve. Happy painting!