Can MDF Be Repaired? Expert Tips and Techniques
Yes, MDF can be repaired. The process involves a few simple steps.
You can fix chips, cracks, and scratches effectively. Medium-Density Fiberboard (MDF) is a popular choice for furniture and cabinets. It is cost-effective and easy to work with. However, like any material, MDF can get damaged over time. Knowing how to repair MDF can save you money and extend the life of your furniture.
In this blog post, we will explore practical ways to fix common MDF issues. From filling cracks to smoothing surfaces, you will learn all you need to know. Let’s get started on making your MDF look as good as new.
MDF Basics
If you’ve ever wandered through a furniture store or dabbled in a bit of DIY, you’ve likely encountered MDF. But what exactly is MDF, and why is it such a popular choice for so many projects? Let’s dive into the basics to understand more.
What Is MDF?
MDF stands for Medium Density Fiberboard. It’s a type of engineered wood made by breaking down hardwood or softwood residuals into wood fibers, combining it with wax and a resin binder, and forming panels by applying high temperature and pressure. Sounds fancy, right? But really, it’s just a lot of wood bits squished together to make a strong, smooth board.
Here’s a quick fact: MDF is denser than plywood. This density makes it very durable and resistant to warping, which is why it’s a favorite among woodworkers and furniture makers.
Common Uses Of MDF
MDF is like the chameleon of the wood world – it can be used in so many different ways! Here are some common uses:
- Furniture: Think of that sleek, modern desk or those sturdy bookshelves. Many of these are made from MDF.
- Cabinetry: Due to its smooth surface, MDF is often used for cabinet doors and panels.
- Decorative Projects: MDF is great for intricate designs, so it’s often used for things like picture frames and molding.
- Speaker Boxes: Its density provides excellent acoustics, making it a go-to for speaker enclosures.
One of my favorite uses for MDF is in crafting. I once made a beautiful, custom headboard for my bed using MDF – it was a weekend project that turned out stunning!
So, why do people love MDF so much? It’s because it’s affordable, easy to work with, and incredibly versatile. But like anything, it’s not perfect. MDF can get damaged, and that’s where the question of repair comes in. But don’t worry, we’ll cover that in another section.
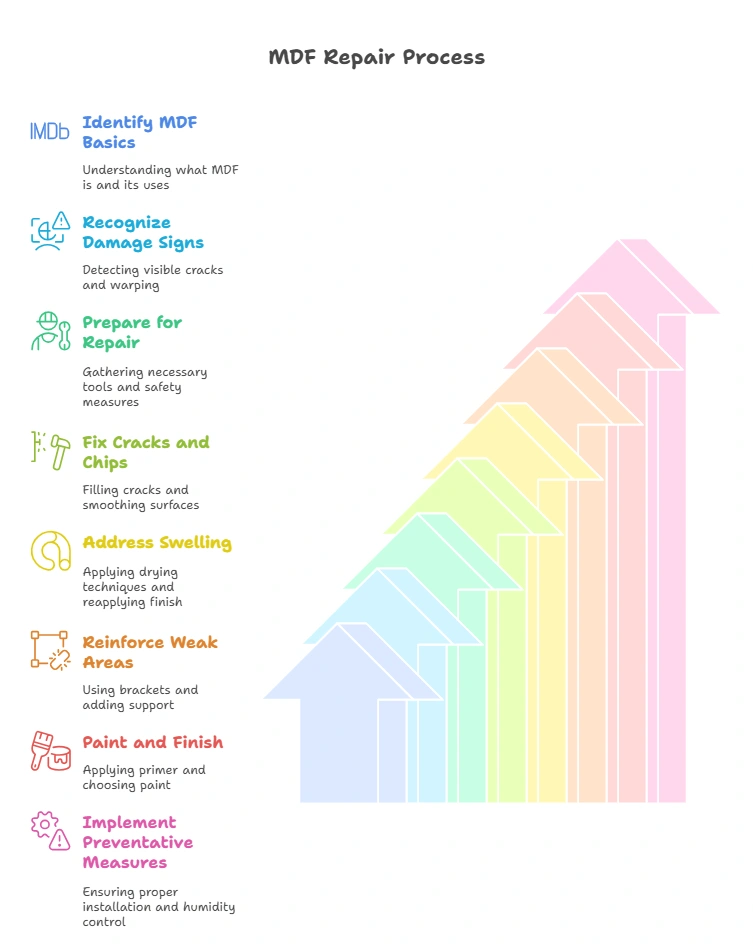
Signs Of Damage
Medium Density Fiberboard, or MDF, is a common material used in furniture and construction. But just like any other material, it can get damaged. Recognizing the signs of damage early can save you a lot of trouble and expense. Let’s explore some of the key indicators that your MDF might need a bit of TLC.
Visible Cracks
One of the most obvious signs of damage in MDF is visible cracks. Have you ever noticed those thin lines snaking their way across your furniture? They’re not just an eyesore – they’re a cry for help! Cracks can appear due to various reasons:
- Heavy impact or pressure
- Temperature changes
- Improper handling or installation
If you spot cracks, don’t ignore them. They can worsen over time, leading to more significant damage. A quick fix with wood filler can sometimes do the trick, but more extensive damage might require professional repair.
Swelling And Warping
MDF has a notorious enemy: moisture. When MDF gets wet, it can swell and warp. This is because MDF is made of wood fibers glued together, and water can weaken those bonds. Here are some signs that your MDF is suffering from water damage:
- Edges are puffed up
- Surface feels uneven
- Panels look distorted
Imagine trying to sit on a chair that’s warped! Not fun, right? To prevent this, keep your MDF furniture away from damp areas. If water damage has already occurred, the best course of action is to replace the affected parts. However, for minor swelling, sanding down and repainting might suffice.
In summary, catching the signs of damage early can make all the difference. Whether it’s a visible crack or swelling, addressing these issues promptly will help extend the life of your MDF furniture. Keep an eye out and give your MDF the care it deserves!
Preparation For Repair
Have you ever wondered if you could fix that damaged MDF shelf or table? The good news is that repairing MDF (Medium Density Fiberboard) is possible! But, like any DIY project, preparation is key. Before diving into the repair, you need to gather the right tools and take some safety precautions. Let’s break it down step-by-step, ensuring you’re ready for a smooth and effective repair process.
Tools Needed
First things first, you need to have the right tools on hand. Here’s a list of essentials:
- Putty Knife: For applying filler and smoothing it out.
- Wood Filler: To fill any cracks or holes in the MDF.
- Sandpaper (120 and 220 grit): For smoothing the surface before and after repair.
- Primer: To ensure the paint adheres well to the MDF.
- Paint: Choose a color that matches your existing MDF piece.
Having these tools ready will make the repair process much easier and more efficient. Remember, a well-prepared toolbox is half the battle won!
Safety Precautions
Safety should always come first, even for simple DIY projects. Here are some safety tips to keep in mind:
- Wear Safety Goggles: Protect your eyes from dust and debris.
- Use a Dust Mask: MDF dust can be harmful if inhaled. Always wear a mask.
- Work in a Well-Ventilated Area: Ensure there is good airflow to avoid inhaling fumes from the primer or paint.
- Gloves: Use gloves to protect your hands from splinters and chemicals.
These precautions are simple but crucial. They help ensure that your repair job is not only successful but also safe. After all, nobody wants to end up with more problems than they started with!
So, are you feeling ready to tackle that MDF repair? With the right tools and safety measures, you’re set for success. Stay tuned for the next steps where we’ll dive into the actual repair process. Ready, set, repair!
Fixing Cracks And Chips
Medium-density fiberboard (MDF) is a common material in furniture and cabinetry. Its smooth surface and affordability make it a popular choice. But, MDF can crack or chip over time. Fixing these issues can extend the life of your furniture. This section will guide you through fixing cracks and chips in MDF.
Filling Cracks
Start by cleaning the crack to remove dust or debris. Use a vacuum or a soft brush. Next, choose a wood filler that matches the MDF color. Apply the filler with a putty knife, pressing it into the crack. Make sure to overfill slightly. This ensures the filler will shrink as it dries. Let it dry according to the product’s instructions.
Sanding And Smoothing
Once the filler is dry, it’s time to sand. Use fine-grit sandpaper, around 220-grit. Sand the filled area until smooth and level with the MDF surface. Always sand in the direction of the grain for best results. Wipe away any dust with a damp cloth. Now, the MDF is ready for painting or finishing.
Dealing With Swelling
Dealing with swelling in MDF can be a frustrating issue. MDF, or Medium Density Fiberboard, can swell when exposed to moisture. This can ruin its appearance and functionality. Addressing the problem promptly can save your furniture or project. Here are some effective ways to deal with swelling MDF.
Drying Techniques
First, you need to dry the swollen MDF. Place the affected piece in a dry, well-ventilated area. Use fans to speed up the process. If possible, place the MDF in the sun. Heat lamps can also help if the sun isn’t an option. Avoid using a hairdryer, as it can cause more damage.
Once the MDF is dry, assess the damage. Swelling may subside, but the surface might remain rough. You may need to sand it down. Use fine-grit sandpaper for this purpose. Sand gently to avoid removing too much material.
Reapplying Finish
After drying and sanding, you need to reapply the finish. This step restores the MDF’s appearance and protects it from future damage. Start by applying a primer. Choose a primer suitable for MDF. Apply it evenly with a brush or roller. Allow the primer to dry completely.
Next, apply a coat of paint or varnish. Use a high-quality product for best results. Apply multiple thin coats rather than one thick coat. This ensures a smooth, even finish. Allow each coat to dry before applying the next.
Finally, seal the edges of the MDF. Edges are more prone to moisture absorption. Use edge banding or a sealant to protect them. This step is crucial for long-term durability.
Reinforcing Weak Areas
Reinforcing weak areas in MDF (Medium Density Fiberboard) can be a game-changer when it comes to extending the life of your furniture or cabinetry. MDF is known for its versatility and smooth finish, but it can sometimes fall short in durability, especially in high-stress areas. This section will guide you through simple yet effective methods to bolster these weak spots. Whether you’re dealing with a sagging shelf or a wobbly cabinet, these tips will help you strengthen your MDF projects. Let’s dive into some hands-on techniques!
Using Brackets
Brackets are a fantastic way to reinforce weak areas in MDF. They come in various shapes and sizes, making them suitable for different applications. To start, identify the weak spot that needs reinforcement. This could be a corner that’s showing signs of splitting or a shelf that’s beginning to sag.
Here’s a step-by-step guide to using brackets:
- Choose the Right Bracket: For corners, an L-bracket works well. For flat surfaces, a flat or T-bracket might be more appropriate.
- Mark and Drill: Position the bracket where you need reinforcement and mark the screw holes. Pre-drill these holes to avoid splitting the MDF.
- Secure the Bracket: Use screws to attach the bracket to the MDF. Ensure the screws are the right length to avoid poking through the other side.
Using brackets can significantly enhance the strength and stability of your MDF projects, giving them a longer life and better performance.
Adding Support
Sometimes, brackets alone may not be sufficient. In such cases, adding extra support can make a world of difference. Think of this as giving your MDF project a sturdy backbone.
Here are a few methods to add support:
- Install Support Strips: Attach wooden strips along the edges or beneath the surface of the MDF. This helps distribute weight more evenly and reduces stress on the weak areas.
- Use a Backing Board: For larger surfaces like shelves or tabletops, a backing board can provide additional stability. Simply glue and screw a piece of plywood or another MDF board to the back of the original piece.
Adding support not only fortifies the weak areas but also enhances the overall integrity of your MDF furniture or cabinetry. It’s like giving your project an extra layer of armor!
In conclusion, reinforcing weak areas in MDF is not as daunting as it may seem. With the right tools and techniques, you can easily extend the life of your projects. Whether you choose to use brackets or add additional support, these methods are straightforward and effective. So, next time you notice a weak spot, don’t worry—just reinforce and carry on!

Painting And Finishing
When it comes to repairing MDF (Medium-Density Fiberboard), painting and finishing play a crucial role in ensuring a polished and professional look. Whether you’re working on a DIY project or fixing up some old furniture, knowing the right techniques for painting and finishing MDF can make all the difference. Let’s dive into the details and explore how to get the best results.
Primer Application
Before you even think about applying paint, it’s essential to start with a primer. Primer not only helps the paint adhere better but also seals the MDF, preventing any moisture from getting in. Here’s a simple guide:
- Choose the right primer: Opt for a high-quality primer designed specifically for MDF. Look for one that’s stain-blocking and moisture-resistant.
- Preparation is key: Make sure the surface of the MDF is clean and free of dust. Use a damp cloth to wipe it down and let it dry completely.
- Application: Apply the primer using a brush or a roller. Ensure even coverage and avoid overloading the brush to prevent drips. Let the primer dry according to the manufacturer’s instructions.
Choosing The Right Paint
Now that your MDF is primed and ready, it’s time to pick the perfect paint. The type of paint you choose can significantly impact the final outcome. Here are some tips:
- Consider the finish: Decide whether you want a matte, satin, or glossy finish. Each has its unique appeal and suitability for different projects.
- Acrylic or latex: For MDF, acrylic or latex paints are usually the best choices. They’re easy to work with and dry quickly.
- Color selection: Choose a color that complements your space. If you’re unsure, test a small area first to see how it looks.
Once you have your paint, apply it in thin, even coats. Multiple thin coats are better than one thick coat, as they reduce the risk of drips and ensure a smoother finish. Allow each coat to dry thoroughly before applying the next.
And there you have it! With the right primer and paint, you can transform your MDF projects into stunning pieces that look professionally finished. So, grab your brush and get started on that MDF makeover today. Happy painting!
Preventative Measures
When it comes to maintaining the integrity of MDF (Medium Density Fiberboard), a stitch in time saves nine. By taking a few simple steps, you can prevent damage before it happens, making repairs unnecessary. Let’s dive into some key preventative measures that can extend the life of your MDF and keep it looking its best.
Proper Installation
Proper installation of MDF is crucial to prevent damage. Here are some tips to ensure a smooth installation:
- Use the right tools: Make sure to use sharp blades and bits to avoid chipping and splintering.
- Secure fastenings: Use screws and nails properly to prevent the MDF from cracking. Pilot holes can help to avoid splitting.
- Edge sealing: Seal the edges of the MDF to prevent moisture absorption which can cause swelling and warping.
Remember, a little extra effort during installation can save a lot of headaches down the road.
Humidity Control
Humidity can be a silent killer for MDF. Here’s how to keep it in check:
- Climate control: Maintain a stable indoor climate. Use dehumidifiers in damp areas to reduce moisture levels.
- Avoid water contact: Keep MDF away from direct water contact. For instance, MDF in kitchens and bathrooms should be well-sealed.
- Proper ventilation: Ensure proper ventilation in areas where MDF is installed to prevent moisture buildup.
By controlling humidity, you can protect your MDF from the damaging effects of moisture.
So there you have it! With these simple preventative measures, you can ensure that your MDF remains in top-notch condition. Proper installation and humidity control are key to avoiding costly repairs and extending the lifespan of your MDF. It’s all about being proactive and taking care of your materials from the start. Happy DIY-ing!
Frequently Asked Questions
How Do You Repair Damaged MDF?
To repair damaged MDF, clean the area and apply wood filler. Sand it smooth, then prime and paint.
Can Swollen MDF Be Repaired?
Yes, you can repair swollen MDF. Sand the damaged area, apply wood filler, and sand again for a smooth finish. Seal and paint to protect.
What Is The Biggest Drawback Of Using MDF?
The biggest drawback of using MDF is its susceptibility to water damage. MDF swells and breaks when exposed to moisture.
How To Fix MDF Together?
Use wood glue and clamps to fix MDF together. Ensure surfaces are clean. Pre-drill holes and use screws for extra strength.
Conclusion
Repairing MDF is possible with the right tools and techniques. Small dents and scratches can be fixed easily. Larger damages might need more effort. Use wood filler for best results. Sanding and painting can make repairs seamless. Always handle MDF carefully to prevent damage.
With practice, anyone can learn to repair MDF. Your furniture will look good as new. So, don’t worry about minor damages. Repairing MDF is a manageable task.