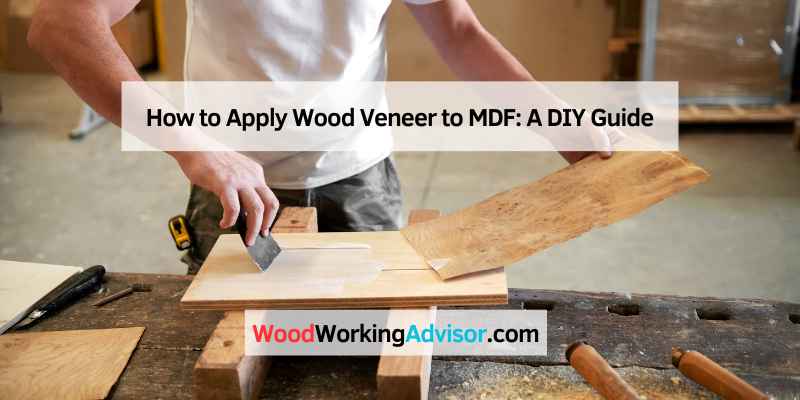
How to Apply Wood Veneer to MDF: Contact Cement or Iron-On
Wood veneer bonds to MDF with either contact cement or heat-activated (iron-on) adhesive — contact cement works with any raw veneer, but iron-on veneer only bonds if it already has a hot-melt glue backing. Skip the sanding step or trim too aggressively and the veneer telegraphs every seam or lifts at the edges within weeks. This guide covers surface prep, both bonding methods, fixing bubbles, and which tools actually matter.
Quick Answer
Sand the MDF to 220-grit, wipe it clean, then bond the veneer with contact cement (brush both surfaces, wait until tacky, press together) or an iron (highest cotton setting, no steam, slow overlapping passes on pre-glued veneer). Roll out air with a J-roller before it sets, then trim the overhang flush.
What You’ll Need
Best Contact Cement Pick
DAP Weldwood Original Contact Cement
The brand named by name in most veneer-supplier application guides — bonds instantly on contact with no clamping needed.
- Best for: raw (unbacked) veneer sheets on MDF
- Why we picked it: the standard reference adhesive for veneer work, wide tack-time window
- Main drawback: strong fumes — needs ventilation, and it’s a one-shot bond with no repositioning
Compare more veneering supplies
 Option 1 Maple Wood Veneer Sheet, 9ft x 9in
|
 Option 2 POWERTEC 12″ Long Handle J-Roller
|
 Option 3 DRAXZOR Edge Banding Trimmer
|
As an Amazon Associate we earn from qualifying purchases.
Wood veneer comes in two forms that determine which method you can use. Raw (unbacked) veneer is just a slice of real wood — it needs contact cement, PVA, or cold-press glue. Pre-glued veneer already has a hot-melt adhesive layer on the back and only responds to heat, so it’s the one to buy if you want the iron-on method below. Check the product listing before you buy — the two aren’t interchangeable. Either way, veneer is one of the more affordable ways to dress up an MDF project without switching to solid lumber.
- Wood veneer sheet, cut roughly 1/2″ oversized on each edge
- Contact cement (for raw veneer) or a household iron (for pre-glued veneer)
- MDF board, sanded and dust-free
- J-roller for pressing out air bubbles
- Sharp utility knife, veneer saw, or edge trimmer
- Sandpaper: 120-grit and 220-grit
- Straight edge or ruler
- Tack cloth or lint-free rag
Preparing the MDF Surface
Sand the MDF with 120-grit sandpaper first to knock down any raised fibers along the edges, then switch to 220-grit for the final pass. MDF has no grain direction, so sand in overlapping circular passes instead of chasing a straight line. Wipe the dust off with a tack cloth or a barely-damp rag — MDF drinks moisture fast, so let it dry fully (10–15 minutes) before any adhesive touches it. Any leftover dust or oil under the veneer telegraphs through as a bump or dull patch once the veneer is bonded, and it won’t sand out afterward.
Two Ways to Bond Veneer to MDF
Both methods start the same way — cut the veneer about 1/2″ oversized on every edge so you have room to trim, and dry-fit it on the MDF before any adhesive comes out.
Method 1: Contact Cement (Raw Veneer)
- Brush an even coat of contact cement on both the MDF surface and the back of the veneer — skipping either side is the most common reason for a weak bond.
- Wait for tack: most contact cements need 10–20 minutes to dry until tacky but no longer wet — touch it lightly with a knuckle; if it pulls a string, it needs more time.
- Align one edge first and lower it down — contact cement bonds the instant the two tacky surfaces touch, so there’s no sliding it into place afterward.
- Press flat with a J-roller, working from the center outward in both directions.
Method 2: Iron-On (Pre-Glued Veneer)
- Set a household iron to its highest cotton setting with the steam function switched off — steam adds moisture MDF doesn’t need.
- Position the veneer glue-side down on the MDF and iron in slow, overlapping passes, holding each spot for 3–5 seconds before moving on.
- Roll immediately behind the iron with a J-roller while the glue is still warm and workable — it grabs hard as it cools, so this is the only window to force out air.
- Re-heat any spot that didn’t seat the first time rather than forcing it — the hot-melt glue will re-flow and re-bond cleanly.
| Comparison | Contact Cement | Iron-On (Pre-Glued) |
|---|---|---|
| Veneer type needed | Raw (unbacked) | Factory pre-glued only |
| Working time | None once tacky surfaces touch | 3–5 sec per pass, reworkable with heat |
| Repositionable? | No | Yes — reheat and shift |
| Best for | Large panels, tabletops | Small panels, edges, quick repairs |
Trimming and Finishing
Once the veneer is bonded, run a sharp utility knife or an edge trimmer along the overhang at a slight outward angle — angling the blade away from the panel keeps it from undercutting and gouging the MDF underneath. Sand the veneer face with 220-grit paper in the direction of the wood grain (unlike the MDF itself, veneer does have a grain, and sanding across it leaves visible scratches). Finish or stain as you would solid wood, but test any stain on an offcut first — veneer often absorbs stain faster than solid lumber of the same species because it’s cut so thin.
Fixing Bubbles, Lifting Edges, and Warping
A small bubble usually means air got trapped before the adhesive set. On an iron-on panel, lay a cloth over the spot and reheat with the iron, then roll immediately — the glue re-melts and reseats. On a contact-cement panel, a bubble is harder to fix after the fact: slice it open along the grain with a sharp blade, work a small amount of fresh contact cement or wood glue under both flaps with a thin spatula, press flat, and clamp with a weight until it sets.
Lifting edges are almost always a trim or adhesive-coverage problem — re-glue the loose section rather than the whole sheet. And one detail most guides skip entirely: veneering only one face of an MDF panel changes how it absorbs moisture on that side versus the other, which is what causes a panel to bow or cup weeks later. On any panel that will be seen from both sides — a shelf, a tabletop, a cabinet door — veneer or seal the back with a balancing sheet too, even though nobody will see it.
Caring for a Veneered MDF Panel
Wipe veneer with a soft, dry or barely-damp cloth — avoid soaking it, since standing water can work through the seams and lift the bond from underneath. Skip ammonia-based or abrasive cleaners, which dull the finish. For small scratches, a color-matched wood filler blends in cleanly; for a gouge that goes through the veneer to the MDF, patch it as you would a bubble — lift, fill, and re-glue rather than trying to sand it flush.
Frequently Asked Questions
How Do You Prepare MDF for Wood Veneer Application?
Sand the MDF with 120-grit sandpaper, then 220-grit, working in overlapping circular passes since MDF has no grain direction. Wipe the dust off with a tack cloth or barely-damp rag and let it dry fully for 10–15 minutes before applying adhesive. Any dust or oil left behind will telegraph through the veneer as a bump once it’s bonded.
What Adhesive Is Best for Wood Veneer on MDF?
Contact cement is the standard choice for raw (unbacked) veneer — brush it on both surfaces, wait 10–20 minutes until tacky, then press together; it bonds instantly with no clamping. Pre-glued veneer needs a household iron on its highest cotton setting instead — contact cement won’t reactivate a hot-melt backing.
Can You Stain Wood Veneer on MDF?
Yes. Sand to 220-grit first and test the stain on an offcut, since veneer often absorbs stain faster and darker than solid lumber of the same species because it’s cut so thin. Apply evenly with a brush or cloth and wipe off the excess before it dries.
How Do You Cut Wood Veneer for MDF?
Use a sharp utility knife, veneer saw, or edge trimmer on a flat, supported surface. Cut the sheet roughly 1/2″ oversized on every edge so there’s room to trim flush after bonding, rather than cutting to the exact final size up front.
Do You Need to Veneer Both Sides of an MDF Panel?
On any panel exposed on both faces — a shelf, tabletop, or cabinet door — yes. Veneering only one side changes how that face absorbs moisture compared to the bare back, and the imbalance is what causes a panel to bow or cup weeks later. A balancing veneer or sealed back coat on the hidden side prevents it.
Can You Fix a Veneer Bubble After the Glue Has Dried?
Yes, in most cases. On iron-on veneer, lay a cloth over the bubble and reheat with an iron, then roll it flat immediately — the glue re-melts. On contact-cement veneer, slice the bubble open along the grain, work fresh glue under both flaps with a thin spatula, press flat, and clamp until it sets.
Conclusion
Contact cement and iron-on veneer both produce a durable bond on MDF — the right choice comes down to which veneer you bought, not personal preference. Sand to 220-grit, keep the surface dust-free, roll out air before the adhesive sets, and trim at a slight outward angle to protect the MDF underneath. Balance the back of any two-sided panel and it will stay flat for years.
Sponsored / affiliate links. As an Amazon Associate I earn from qualifying purchases. I may earn additional commission from eligible campaigns.