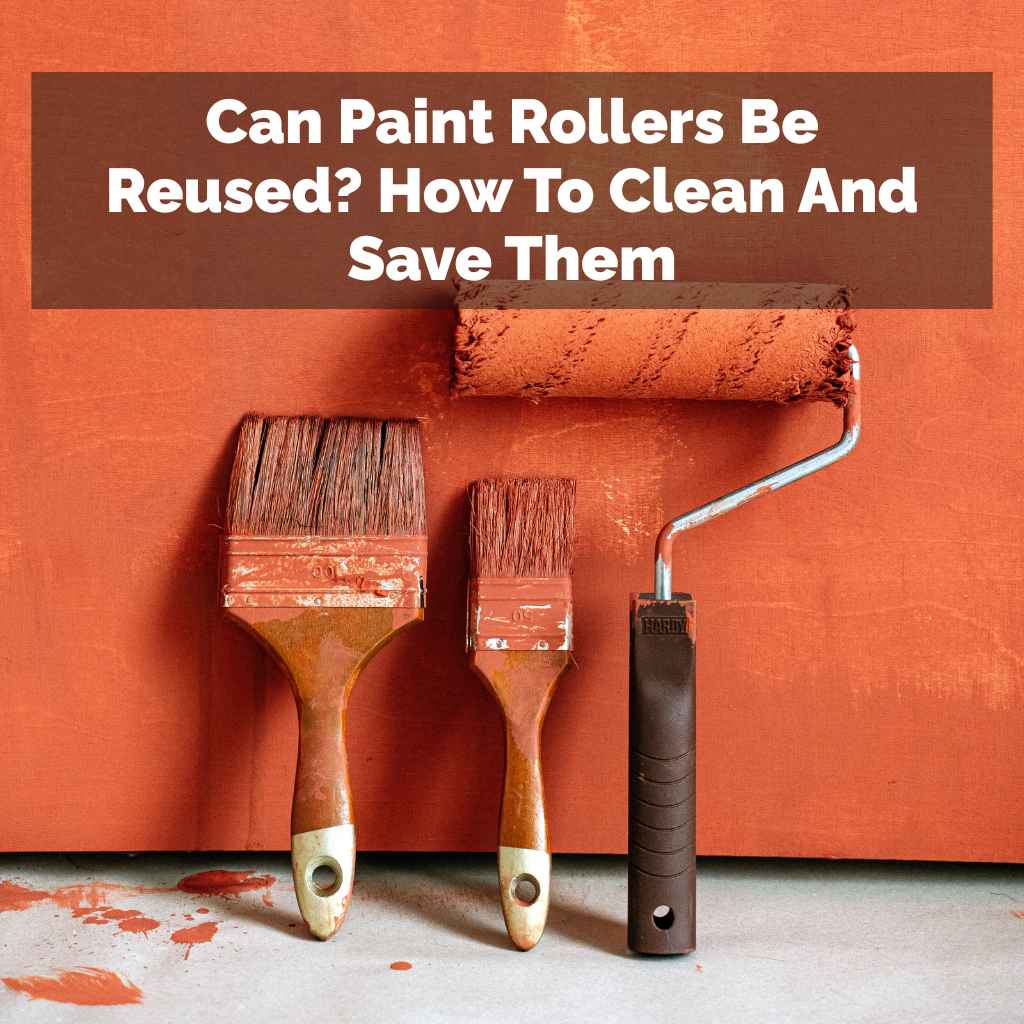
Can Paint Rollers Be Reused? How To Clean And Save Them
Paint rollers can absolutely be reused if cleaned properly. Proper cleaning extends their life, saves money, and ensures a better finish on future painting projects. The method depends on the type of paint used.
What Happens When You Don’t Clean Paint Rollers?
When you use a paint roller, it becomes coated with paint. If you don’t clean it right away, that paint starts to dry and harden. This hardened paint makes the roller stiff and rough.
It won’t absorb new paint well.
Dried paint can also leave bumps and streaks on your walls. This means your next painting job won’t look smooth or professional. It’s like trying to write with a pen that’s already out of ink.
It just doesn’t work right.
Types of Paint and How They Affect Roller Cleaning
The type of paint you used is the biggest clue. Different paints have different cleaning needs. Water-based paints are the easiest.
Oil-based paints need stronger solvents. Latex and acrylic paints are water-based.
Knowing your paint type helps you choose the right cleaning method. This makes sure you get the roller clean without ruining it. It’s a simple step that makes a big difference.
Personal Experience: The Day I Almost Ruined My Best Roller
I remember one Saturday afternoon. I was painting my daughter’s room a soft lavender. It was a beautiful color.
I got a bit too focused on getting the edges perfect. I finished the last wall and felt so tired.
My roller was caked in paint. I just wanted to sit down. So, I wrapped it in a plastic bag, thinking I’d clean it tomorrow.
Big mistake! The next day, when I pulled it out, it was stiff as a board. The paint had dried solid.
I tried to clean it, but it was a mess. I had to buy a new one. That taught me a valuable lesson about immediate cleaning.
Quick Roller Cleaning Guide by Paint Type
Latex/Acrylic (Water-Based): These are the easiest. Soap and water usually do the trick. Rinse well until the water runs clear.
Oil-Based/Enamel: These need mineral spirits or paint thinner. Work in a well-ventilated area. Dispose of solvents safely.
Stains/Varnishes: Often use mineral spirits. Check the product label for specific cleaner recommendations.
How to Clean Latex or Acrylic Paint Rollers (Water-Based)
This is the most common type of paint for home projects. Cleaning these rollers is quite simple. You’ll need a few basic items from your home.
First, get yourself a bucket or a sink. You’ll also need some dish soap. A hose or a faucet with good pressure helps a lot.
Let’s walk through the steps.
Step 1: Scrape Off Excess Paint
As soon as you finish painting, take your roller outside or to a spot where drips won’t matter. Use a putty knife or an old paint scraper. Gently scrape off as much wet paint as you can.
Don’t press too hard. You don’t want to damage the roller cover.
Try to get as much paint off as possible. This makes the rest of the cleaning much easier. Less paint means less soap and less rinsing later on.
It’s a good habit to get into.
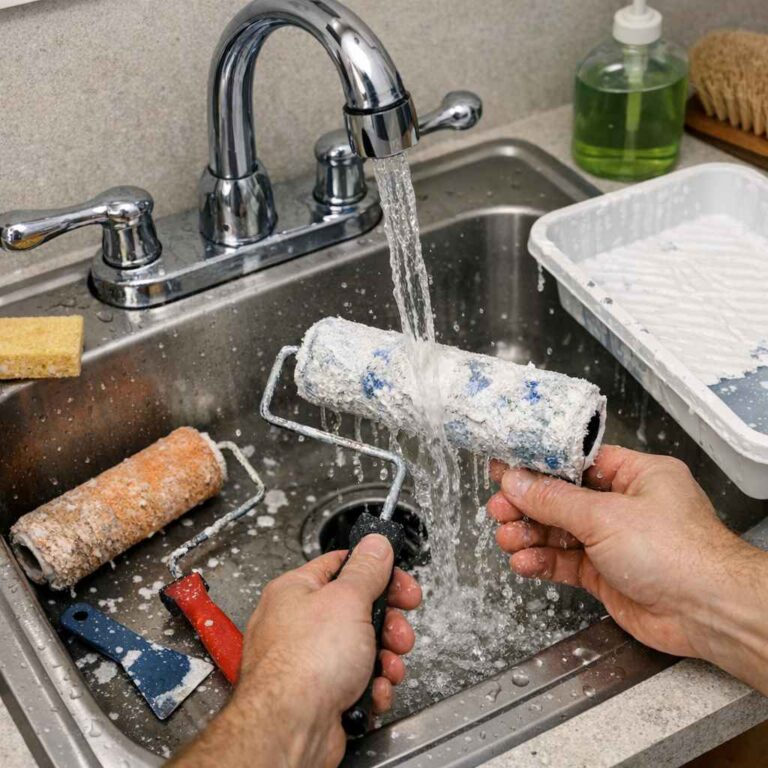
Step 2: Rinse Thoroughly
Now, take the roller to a hose or sink. Start rinsing it with cool or lukewarm water. Roll the roller back and forth under the stream of water.
You’ll see the paint start to wash away. Keep rinsing until the water runs mostly clear. This might take a few minutes.
Some people like to use a roller spinner tool. This tool attaches to a drill. It spins the roller very fast.
This flings out a lot of water and leftover paint. It’s a great time-saver and gets the roller really clean. You can find them at hardware stores.
Step 3: Wash with Soap
Once the paint is mostly out, add a little dish soap to the roller. You can do this right under the running water. Gently work the soap into the roller nap with your hands.
Make sure you get all sides.
The soap helps to break down any remaining paint particles. It also gets rid of grease or oils that might be on the roller. Rub it gently.
You’re not scrubbing a floor; you’re cleaning delicate fibers.
Step 4: Rinse Again Until Clear
Rinse the roller again very well. Keep going until there are absolutely no suds left. The water should run perfectly clear.
Feel the roller cover with your fingers. It should feel soft and clean, not stiff or gritty.
This is a crucial step. If you leave soap behind, it can affect how the new paint sticks later. It can also leave a residue.
So, rinse until you’re absolutely sure it’s all gone.
Step 5: Dry the Roller
After rinsing, squeeze out as much excess water as you can. Again, a roller spinner works wonders here. Then, you can let it air dry.
Hang it up so air can circulate around it. You can also lay it flat on a clean towel, but turning it often helps it dry evenly.
Make sure the roller is completely dry before storing it. Storing a wet roller can lead to mold or mildew. That’s definitely not what you want for your next project.
Quick Scan: Latex Roller Cleaning Success
- Scrape First: Remove wet paint before rinsing.
- Rinse Well: Use water until it runs clear.
- Add Soap: Gentle dish soap helps remove residue.
- Rinse Again: No suds should remain.
- Dry Completely: Air dry before storing.
How to Clean Oil-Based Paint or Stain Rollers
Oil-based paints and stains are tougher. They don’t mix with water. So, water alone won’t clean them.
You’ll need a special solvent.
The most common solvents are mineral spirits or paint thinner. Always work in a well-ventilated area. Open windows and doors.
Consider wearing gloves to protect your skin. Safety first!
Step 1: Scrape Off Excess
Just like with latex paint, scrape off as much wet paint as you can. Use a putty knife or scraper. This saves you from using as much solvent later.
This step is especially important for oil-based paints. They are thicker and harder to get off once dry. Getting the bulk off while wet is key.
Step 2: Use a Solvent
Pour some mineral spirits or paint thinner into a bucket or container. Don’t use too much at first. Dip the roller into the solvent.
Roll it around to saturate the nap.
Work the solvent into the roller cover with your hands. You’ll see the paint start to dissolve. It might look murky.
This is normal.
Step 3: Rinse and Repeat
Once the paint starts to break down, you need to rinse it. You can’t use water for this. You’ll need more solvent or a clean rag.
Wipe the roller down with a rag dipped in solvent. Keep wiping and wringing until most of the color is gone.
You might need to repeat the solvent soak and wipe-down process a few times. Keep going until the roller nap is mostly clean. It might not look brand new, but it should be free of heavy paint buildup.
Contrast: Solvent Safety
Normal: Using mineral spirits in a garage with open doors.
Concerning: Using paint thinner in a small, closed bathroom without ventilation.
Step 4: Final Wash (Optional but Recommended)
After you’ve removed most of the oil-based paint, you can wash the roller with soap and water. This helps to remove any leftover solvent residue. Use a little dish soap and warm water.
Rinse very thoroughly.
This step is important for two reasons. It gets rid of the strong smell of solvents. It also ensures that no solvent remains, which could affect the next paint job.
Step 5: Dry Thoroughly
Squeeze out excess water. Then, let the roller air dry completely. Hang it up or lay it on a clean surface.
Just like with water-based paint, complete dryness is essential before storing.
Oil-based paint rollers can sometimes feel a bit stiffer even after cleaning. This is normal. They are still usable if the nap is clear of dried paint.
What Kind of Roller Cover is Best for Reuse?
Not all roller covers are created equal when it comes to reusability. The material and thickness matter a lot.
Woven covers are generally the most durable. They hold up well to cleaning and repeated use. They are great for smooth to semi-smooth surfaces.
Knitted covers are also good. They can often be cleaned and reused multiple times.
Foam rollers are a bit trickier. They can be reused if cleaned immediately and gently. But they can also break down or lose their shape faster.
Disposable covers are designed for single use. While you can try to clean them, they often don’t hold up well. They are usually made from cheaper materials.
How to Store Clean Paint Rollers
Proper storage is just as important as proper cleaning. It keeps your rollers in good condition for the next time you need them.
Once your roller is completely dry, you need to protect it. The biggest enemy of a clean roller is dust and debris. It can stick to the nap and ruin your next paint job.
Option 1: Plastic Bags
The simplest way is to use a plastic bag. A simple grocery bag or a dedicated roller bag works. Slide the clean, dry roller into the bag.
Seal it tightly, perhaps with a twist tie or tape. This keeps dust out.
For oil-based paint rollers, it’s even better to wrap them in a plastic bag that has had a little solvent added to it. This helps to keep the nap from hardening too much.
Option 2: Roller Savers
You can buy special roller savers. These are typically plastic containers that hold the roller. They seal tightly.
Some even have a way to keep the roller suspended inside.
These are a bit more expensive. But they offer good protection. They are especially useful if you plan to store rollers for longer periods.
Option 3: Hang Them Up
If you have a dedicated space in your garage or shed, you can hang your clean rollers. Use a hook or a rack designed for rollers. Make sure they are protected from dust.
You might still want to use plastic bags.
When storing, try to avoid anything pressing down on the roller nap. This can flatten it or create permanent marks.
Storage Tips: Keep Them Ready
Keep Dry: Always store completely dry rollers.
Keep Covered: Protect from dust and debris.
Keep Shape: Avoid crushing or pressing down.
Label (Optional): If you have many, note the paint color or type used.
Extending the Life of Your Roller Handles
While we’re talking about rollers, don’t forget the handle! Most handles are made of metal or sturdy plastic. They can last for years, even decades, with a little care.
After you remove the roller cover, wipe down the metal rod. Make sure it’s clean and free of paint drips. If it’s a threaded handle, ensure the threads are clear so a new roller can attach easily.
A clean, well-maintained handle makes changing roller covers a breeze. It’s a small thing, but it adds to the overall pleasant painting experience.
When It Might Be Time to Let Go of a Roller
While the goal is to reuse, some rollers have truly seen their last day. It’s good to know when to replace one.
If the roller nap is heavily matted, torn, or has bald spots, it’s probably time. If you’ve cleaned it multiple times and it still feels stiff or rough, it won’t give you a smooth finish.
Also, if the roller cover is falling off the core, or if the core itself is damaged, you need a new one. Sometimes, a roller is just too far gone. Trying to save it will only lead to frustration and a poor paint job.
Myth vs. Reality: Roller Reuse
Myth: Once a roller is used, it’s trash.
Reality: With proper cleaning, many rollers can be reused many times.
Myth: Cleaning oil-based rollers is too difficult.
Reality: It requires a solvent, but it’s straightforward and effective.
Myth: All roller covers are made to be reused.
Reality: Disposable covers are designed for one-time use. Woven and knitted covers are best for reuse.
Recycling Used Paint and Supplies
When a roller cover is truly beyond saving, what do you do with it? Throwing old paint supplies in the trash isn’t always the best option.
Many local waste management services have programs for recycling household hazardous waste. This can include dried paint and old rollers. Check with your city or county’s recycling center.
Some paint stores also offer recycling drop-off points. It’s good to be mindful of how we dispose of our materials. Doing our part helps the environment.
What This Means for Your Next Painting Project
Knowing that you can reuse paint rollers changes how you might approach a painting task. It means less waste and more savings.
Instead of buying a new roller for every small touch-up, you can grab a clean, prepped one from your shelf. This saves you trips to the store and money. It also feels good to be more resourceful.
Think about it: if you paint a few rooms a year, those roller costs add up. Saving and reusing them can significantly cut down on your supply budget. It’s a practical step for any DIYer.
When Cleaning Might Not Be Worth It
While we champion reuse, there are times when cleaning just isn’t practical. If you used a very cheap roller that’s already falling apart, cleaning might take more effort than buying a new one.
Also, if you’re painting a very dark color and only need a small amount for a tiny touch-up, using a cheap, disposable roller might be quicker. The decision often comes down to the type of roller, the amount of paint, and the time you have.
For most medium-to-high quality rollers used with common paints, cleaning is almost always worth the effort. The cost of cleaning supplies (soap, water, maybe a little solvent) is tiny compared to the cost of a new roller.
Quick Fixes and Tips for Roller Reuse
Here are some quick tips to help you get the most out of your reusable rollers:
- Clean Immediately: The sooner you clean, the easier it is.
- Use the Right Tools: A putty knife and a roller spinner make a big difference.
- Ventilation is Key: Especially for oil-based paints and solvents.
- Store Properly: Protect from dust and damage.
- Have Spares: Keep a few clean, ready-to-go rollers for different colors or types.
Observational Flow: Reusing Your Roller
Start Project → Paint Wall → Finish Job → Scrape Roller Immediately → Clean Based on Paint Type → Dry Roller Completely → Store in Plastic Bag → Next Project: Unbag & Use!
Frequently Asked Questions about Reusing Paint Rollers
Can I reuse a roller if I used primer?
Yes, you can reuse a roller used for primer. The cleaning process is the same as for regular paint. If it was a water-based primer, use soap and water.
If it was an oil-based primer, use mineral spirits.
How do I know if a roller cover is too worn out to reuse?
If the nap is matted, torn, or has large bald spots, it’s likely too worn. If it feels stiff or rough even after cleaning, it won’t give a smooth finish.
Can I reuse a roller for a different color paint?
It’s best to avoid this if possible, especially if the colors are very different. If you must, clean the roller extremely well. For lighter colors, even a faint residue from a darker color can show through.
For best results, match roller color to paint color, or use a new roller for each color.
What happens if I don’t dry the roller completely before storing?
Storing a damp roller can lead to mold or mildew growth. This can ruin the roller and make it unusable for future projects. It can also create an unpleasant odor.
Are expensive roller covers worth reusing?
Generally, yes. Higher-quality roller covers are made from better materials that withstand cleaning and repeated use much better than cheaper ones. Investing in a good roller cover often means you can reuse it many times.
Can I clean a roller with bleach?
Bleach is not recommended for cleaning paint rollers. It can degrade the fibers of the roller nap, making it weaker and less effective. Stick to soap and water for latex paints and appropriate solvents for oil-based paints.
Conclusion: Your Roller’s Second Life
So, can paint rollers be reused? Absolutely! With a little effort and the right cleaning steps, your rollers can serve you well on many projects.
It saves you money and helps reduce waste. Happy painting!