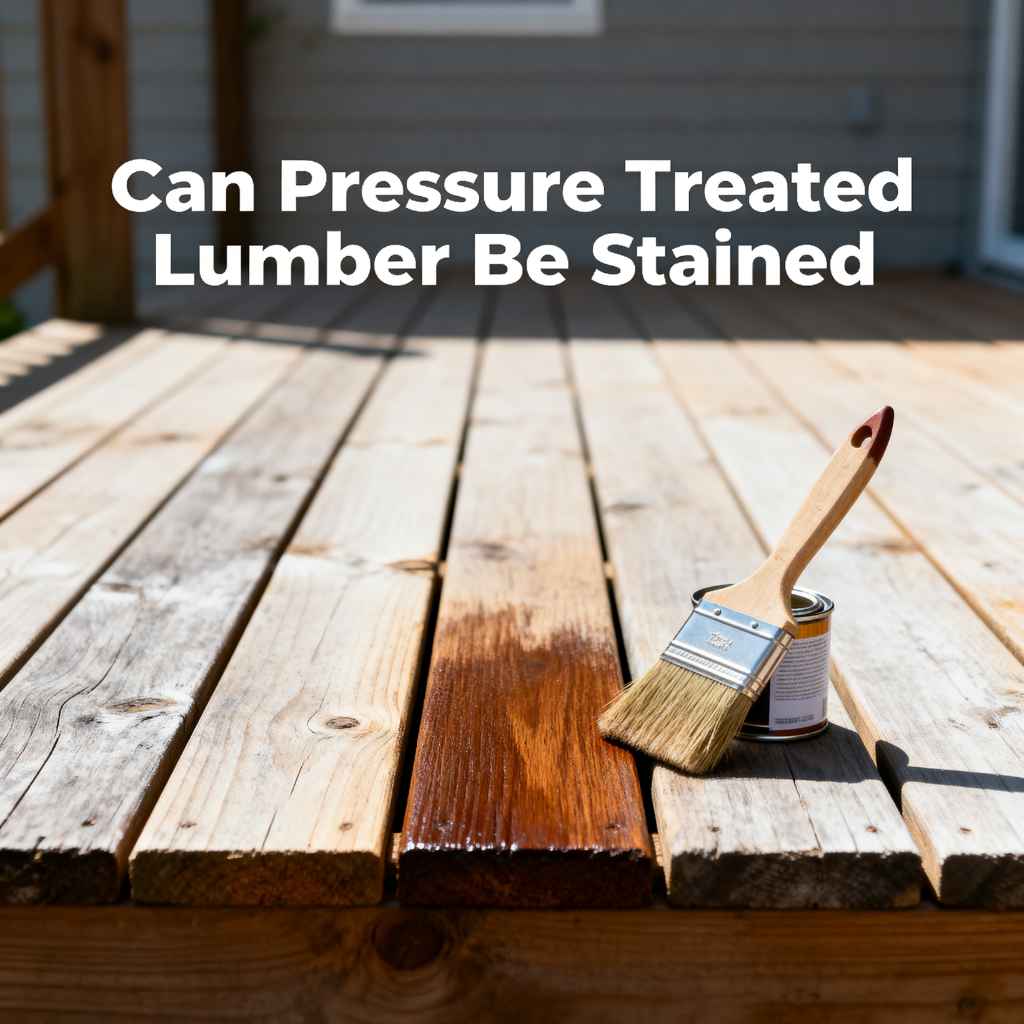
Can Pressure Treated Lumber Be Stained
Many people wonder, “Can Pressure Treated Lumber Be Stained?” It’s a common question, especially for DIYers starting outdoor projects. Pressure treated lumber is built to last, resisting rot and insects. But when it comes to making it look good with stain, things can get a bit tricky.
Don’t worry, though! We’ll walk you through it step-by-step, making it easy to get a beautiful finish. Get ready to learn how to transform your projects.
How To Stain Pressure Treated Lumber
Staining pressure treated lumber might seem straightforward, but there are specific steps to follow to ensure the stain adheres properly and lasts. This section will cover the fundamental aspects of preparing and staining this type of wood, explaining why certain methods work best. We’ll explore the common challenges and how to overcome them for a successful outcome.
Understanding Pressure Treated Lumber
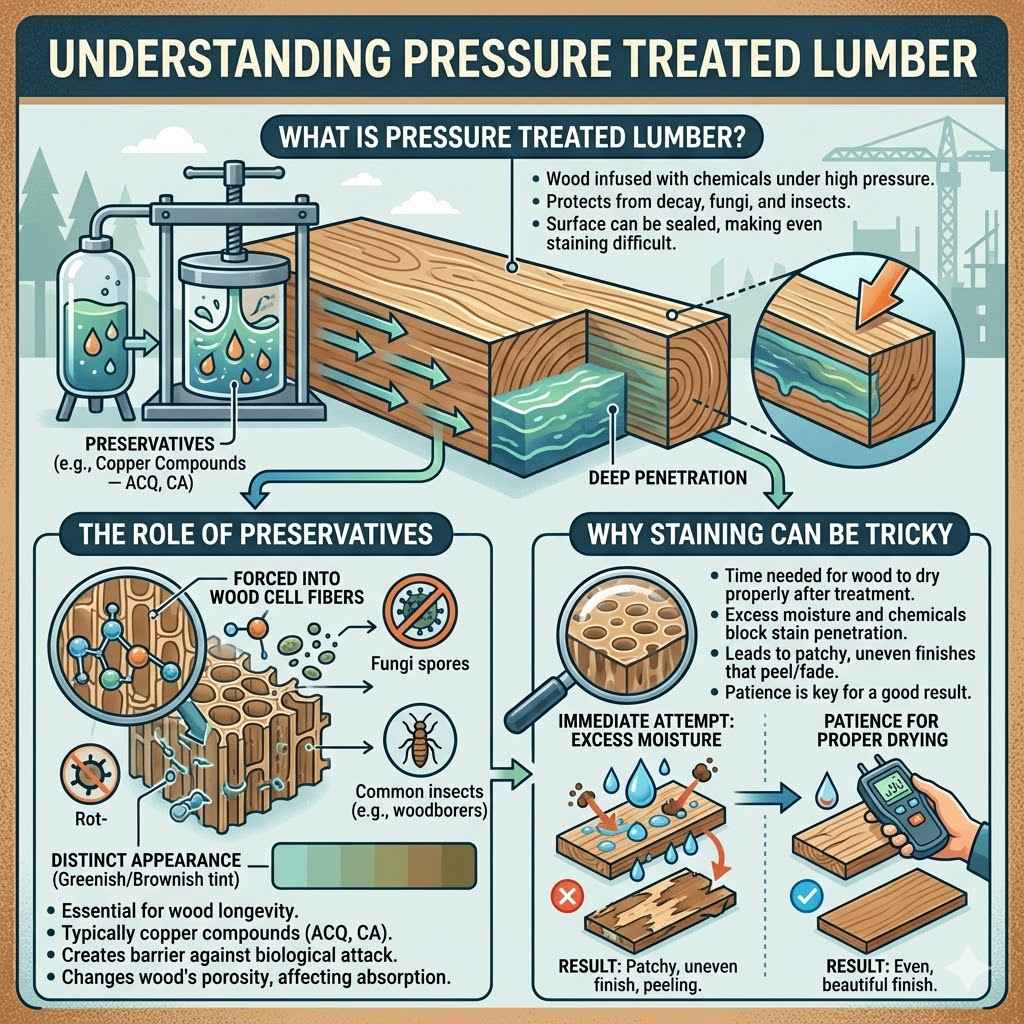
Pressure treated lumber is wood that has been infused with chemicals under high pressure. This process helps protect the wood from decay, fungi, and insects. The chemicals used, often copper-based, are designed to penetrate deep into the wood fibers.
Because of this deep penetration and the protective chemicals, the wood’s surface can be sealed in a way that makes it harder for stains to soak in evenly. This is a key reason why simply painting or staining it right away doesn’t always work as expected.
The Role of Preservatives
The preservatives in pressure treated lumber are essential for its longevity. They are typically copper compounds, like alkaline copper quaternary (ACQ) or copper azole (CA). These compounds are forced into the wood under pressure, creating a barrier against biological attack.
This treatment process leaves the wood with a distinct look, sometimes greenish or brownish. The chemicals, while protecting the wood, also change its porosity. This means that when you try to apply a stain, the wood might not absorb it like untreated lumber would.
Why Staining Can Be Tricky
The main challenge when staining pressure treated lumber is the time it takes for the wood to dry out properly after treatment. The treatment process itself adds moisture to the wood, and the chemicals can also affect how quickly it releases that moisture.
If you try to stain too soon, the excess moisture and the residual treatment chemicals can prevent the stain from penetrating the wood. This often results in a patchy, uneven finish that may peel or fade quickly. Patience is key to achieving a good result.
Preparing Pressure Treated Lumber for Staining
Proper preparation is the most crucial step for successfully staining pressure treated lumber. Skipping these steps can lead to a splotchy finish that doesn’t last. We will cover cleaning, drying, and sanding to get your wood ready.
Drying Time Is Essential
One of the most important factors is allowing the pressure treated lumber to dry out thoroughly. Freshly treated lumber is quite wet, and the chemicals are still present. Applying stain too soon will result in poor adhesion and an uneven look.
A good rule of thumb is to let the wood air dry for at least a few weeks, and up to a few months, depending on your climate and the specific product. You can test if the wood is dry enough by sprinkling a little water on it. If the water beads up, it’s still too wet.
If it soaks in, it’s likely ready.
A common statistic is that it can take up to 28 days per inch of thickness for pressure treated lumber to dry sufficiently for staining. This might seem like a long time, but it’s vital for the stain to bond correctly with the wood fibers.
Cleaning the Surface
Before you can stain, the surface of the lumber must be clean. Over time, outdoor wood accumulates dirt, mildew, mold, and even algae. These contaminants can prevent the stain from adhering properly and can also affect the final color.
You can clean the wood using a stiff brush and a solution of water and a mild detergent. For tougher grime or mildew, a dedicated wood cleaner or a solution of one part bleach to three parts water can be effective. Always rinse thoroughly with clean water afterward.
Be sure to wear protective gear like gloves and eye protection when using cleaning solutions. After cleaning, allow the wood to dry completely again before moving to the next step. This usually takes at least 24-48 hours of good weather.
Sanding for Adhesion
Once the wood is clean and dry, a light sanding can further prepare the surface. Sanding helps to open up the wood pores, allowing the stain to penetrate more evenly. It also smooths out any rough spots or splinters.
Use medium-grit sandpaper (around 80-100 grit) to avoid removing too much wood. Sand in the direction of the wood grain. After sanding, wipe away all the dust with a clean cloth or a vacuum attachment.
Some people skip sanding, but it can make a significant difference in the uniformity of the stain application. It creates a smoother canvas for the stain to work with, leading to a more professional and lasting finish.
Choosing the Right Stain for Pressure Treated Lumber
The type of stain you choose plays a vital role in how well it will adhere to pressure treated lumber and how long it will last. Not all stains are created equal, and some are better suited for this type of wood than others.
Types of Wood Stains
There are several types of wood stains available. The most common for outdoor use are oil-based stains and water-based (latex) stains. Both can be used on pressure treated lumber, but they have different properties.
Oil-based stains tend to penetrate the wood more deeply. This can be beneficial for pressure treated lumber, as it helps the color embed into the wood fibers. They are also known for their durability and resistance to fading.
Water-based stains are easier to clean up and have lower VOCs (volatile organic compounds), making them more environmentally friendly. They can also provide good protection, especially newer formulations designed for exterior use. Some water-based stains are specifically formulated for treated wood.
Semi-Transparent vs. Solid Stains
When deciding on a stain, you’ll likely encounter terms like “semi-transparent” and “solid.” Each offers a different look and level of protection.
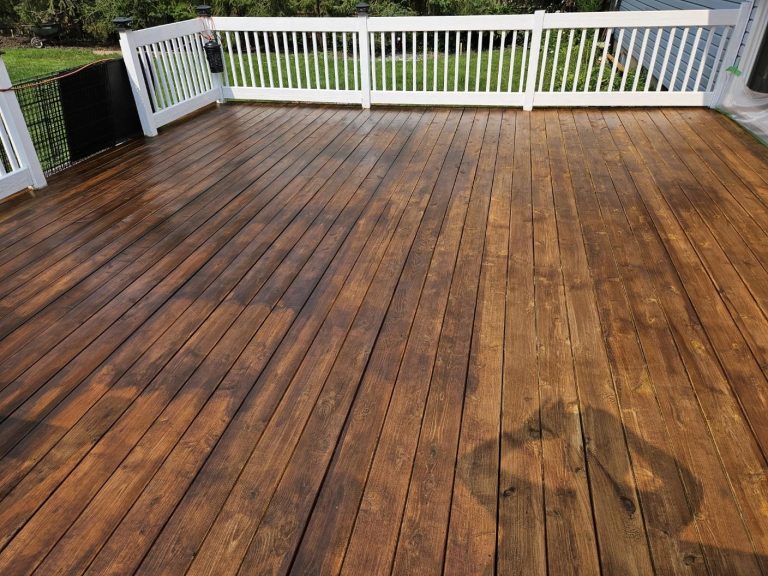
A semi-transparent stain allows some of the wood grain to show through. It provides color and UV protection while still letting the natural beauty of the wood be visible. This is often a good choice for decks and fences where you want a natural look with added color.
A solid stain, on the other hand, acts more like a paint. It completely covers the wood grain, offering maximum color saturation and protection. If your pressure treated lumber has imperfections or you want a bold new color, a solid stain is a good option.
It offers similar coverage to paint but with the ease of application of a stain.
Many manufacturers offer stains specifically designed for pressure treated wood. These products often have enhanced adhesion properties and are formulated to work with the chemicals present in treated lumber. Look for labels that indicate suitability for decks, fences, and treated wood.
Water Repellency Considerations
Many exterior wood stains include water repellents to further protect the wood from moisture damage. This is particularly important for outdoor structures like decks and fences that are exposed to rain and humidity.
A good water-repellent stain will help prevent water from soaking into the wood, which can lead to warping, cracking, and rot. This adds an extra layer of protection to your investment. Some stains also contain mildewcides to help prevent the growth of mold and mildew.
Applying Stain to Pressure Treated Lumber
Once your lumber is prepped and you have your chosen stain, it’s time to apply it. This process requires attention to detail to achieve a beautiful and long-lasting finish. We’ll cover application methods and tips for best results.
Application Methods
There are several ways to apply stain to your pressure treated lumber. The method you choose can depend on the size of your project and your personal preference.
Brushing is a classic method that offers excellent control. It allows you to work the stain into the wood grain and ensures even coverage. You can use a high-quality synthetic brush for water-based stains or a natural bristle brush for oil-based stains.
Rolling can be a faster method for larger surfaces like decks. Use a stain roller with a nap length appropriate for the texture of your wood. You may still need to use a brush to get into the edges and between boards.
Spraying is the quickest method for large areas. However, it requires a sprayer designed for stains and can be messy. It also often requires back-brushing to ensure the stain is worked into the wood.
If you spray, be sure to protect surrounding areas from overspray.
Working in Small Sections
To ensure a uniform finish, especially with semi-transparent stains, it’s best to work in small sections. This prevents the stain from drying out unevenly before you can blend it.
Apply the stain to one board or a small area at a time. Work from one end to the other, maintaining a wet edge. This means overlapping your strokes slightly with the previously applied stain to avoid lap marks.
This technique helps ensure that the stain is applied consistently across the entire surface, preventing a patchy or streaky appearance. It’s a simple but very effective way to improve the overall look of your project.
Coats and Drying Times
Most stains require one or two coats for optimal color and protection. Always follow the manufacturer’s instructions regarding the number of coats and drying times between them.
Typically, a second coat can be applied after the first coat has had time to dry to the touch, but always check the product’s specific recommendations. Overlapping the application of the second coat with the first while it’s still slightly wet helps in achieving a seamless finish.
Allow the final coat to dry completely before exposing the wood to heavy foot traffic or moisture. This curing period can vary, so it’s important to be patient to ensure the stain fully sets.
Maintaining Stained Pressure Treated Lumber
Once your pressure treated lumber is stained, regular maintenance will help keep it looking great and extend its lifespan. This involves cleaning and re-staining as needed.
Regular Cleaning
Keep your stained surfaces clean by sweeping away debris regularly. For more thorough cleaning, use a soft brush and a mild soap and water solution. Avoid using harsh chemicals or high-pressure washers, which can damage the stain and the wood.
Mildew and mold can be gently scrubbed away with a soft brush and a solution of water and white vinegar. Rinse well afterward. Keeping the surface clean prevents the buildup of dirt and grime that can degrade the stain over time.
When to Re-stain
The frequency of re-staining depends on the type of stain used, the amount of sun and weather exposure, and the quality of the initial application. Generally, you might need to re-stain every 1-3 years.
A good indicator that re-staining is needed is when water no longer beads up on the surface. If the color has faded significantly or the stain is starting to peel, it’s definitely time for a refresh. A simple test is to sprinkle water on the wood; if it soaks in rapidly, it’s time to reapply stain.
Before re-staining, you may need to clean the surface again. If the old stain is still in good condition, a light cleaning might be enough. If there’s significant wear, a light sanding might be necessary to ensure the new stain adheres properly.
Protecting Your Stain
Beyond regular cleaning and re-staining, consider protecting your stained surfaces. For decks, this might involve using furniture pads to prevent scratches from furniture legs.
Ensure good drainage around any structures made of pressure treated lumber. Standing water can accelerate wear and tear on the wood and the stain. Proper ventilation also helps the wood dry out more quickly after rain.
Common Issues When Staining Treated Wood
Even with careful preparation, some issues can arise when staining pressure treated lumber. Understanding these common problems and their solutions will help you achieve a better outcome. This section focuses on troubleshooting specific challenges.
Patchy or Uneven Color
One of the most frequent complaints is a patchy or uneven stain color. This often happens when the wood is not dry enough or when the stain is not applied evenly.
If the wood is too wet, the stain cannot penetrate uniformly. The areas that absorb more stain will appear darker, while those that absorb less will be lighter. This creates a blotchy appearance that is difficult to correct without redoing the entire project.
Another cause is inconsistent application. If you stop and start too often or don’t maintain a wet edge, you can create visible lines where one section of stain has dried before the next is applied. Always work in manageable sections and overlap your strokes.
Causes of Patchiness
The main culprit behind patchy staining is usually improper wood preparation. This includes:
- Applying stain to wood that hasn’t fully dried after treatment or cleaning. The excess moisture acts as a barrier.
- Not sanding the wood to open up the pores for better stain absorption.
- Using too much stain in one spot or not spreading it thinly enough.
- Environmental factors like wind or direct sunlight can cause the stain to dry too quickly, leading to unevenness.
Even treated wood can sometimes have variations in density from the treatment process itself, which can also affect stain absorption. This is why a consistent application is so important.
Solutions for Patchiness
If you notice patchiness while the stain is still wet, you might be able to fix it by blending the edges with a brush or rag. Work the stain into the drier areas or spread it out from the wetter spots.
If the stain has already dried, you may need to apply a second coat to even things out. Some stains are more forgiving than others. If the patchiness is severe, you might have to strip the existing stain and start over.
When applying a second coat, try to use a consistent application method across the entire surface to blend any existing unevenness. Using a semi-transparent stain can sometimes help hide minor inconsistencies better than a solid stain.
Peeling or Chipping Stain
Peeling or chipping stain is a sign that the stain did not bond properly with the wood. This is often due to moisture issues or applying stain over a dirty surface.
Pressure treated lumber, especially when new, can retain a lot of moisture. If you stain it before it’s completely dry, the moisture within the wood will push the stain layer off as it tries to escape. This is a very common reason for premature failure of the stain coating.
Additionally, if the wood surface was not cleaned properly before staining, dirt, sap, or even residue from the wood treatment process can prevent the stain from adhering to the wood fibers. This creates a weak bond that easily deteriorates.
Moisture Problems
The chemicals in pressure treated lumber can sometimes slow down the drying process, even after the wood has been exposed to air for some time. The treatment process itself injects water into the wood, and it needs to evaporate.
If the wood is exposed to rain or high humidity shortly after staining, this can also compromise the bond. The water can seep into the stain layer before it has fully cured, leading to adhesion issues.
To avoid this, it’s critical to follow the recommended drying times. A moisture meter can be a useful tool for confirming that the wood is dry enough before you begin staining. Aim for a moisture content below 15% for best results.
Surface Contamination
Even seemingly clean wood can have invisible contaminants. Sap, oils, or residues from the treating process can all interfere with stain adhesion.
Always thoroughly clean and rinse the wood. If you used a cleaner, make sure all residue is removed. A final rinse with clean water is essential.
If you suspect significant sap, you might need a specific sap remover or degreaser.
Sometimes, the wood itself may have a waxy or oily feel from the treatment. Light sanding helps to remove this surface layer. Always wipe away all sanding dust before applying stain.
Durability and Longevity Concerns
When staining pressure treated lumber, people want the finish to last. If the stain doesn’t hold up well over time, it can be disappointing.
The effectiveness of the stain depends on many factors, including the quality of the stain itself, the preparation of the wood, and the environmental conditions the wood is exposed to. For instance, a deck that gets direct sun all day will likely require more frequent maintenance than a shaded porch.
Choosing a stain specifically designed for exterior use and pressure treated wood is crucial. These products are formulated to withstand harsh weather, UV rays, and foot traffic, offering better longevity.
Factors Affecting Durability
Several factors influence how long your stain will last:
- Type of Stain: Oil-based stains generally offer better penetration and flexibility, leading to longer-lasting protection compared to some water-based options.
- UV Exposure: Direct sunlight is a major cause of stain degradation. Stains with strong UV inhibitors will perform better in sunny areas.
- Weather Conditions: Constant exposure to rain, snow, and extreme temperature changes can break down the stain over time.
- Wood Movement: Wood expands and contracts with changes in moisture and temperature. A flexible stain can move with the wood, while a rigid one may crack.
Proper application is also key. A well-applied stain, especially if it’s a two-coat system, will offer better protection than a single, thin coat.
Extending the Stain’s Life
To maximize the lifespan of your stain:
- Choose High-Quality Products: Invest in premium exterior stains known for their durability.
- Follow Preparation Steps: Thorough drying, cleaning, and sanding are non-negotiable.
- Apply Correctly: Follow the manufacturer’s instructions for application, including drying times between coats.
- Regular Maintenance: Clean the surface regularly and re-stain as needed, before the stain is completely worn away.
Addressing issues like mildew promptly will also prevent it from compromising the stain and the wood underneath. A well-maintained finish is a durable finish.
Can Pressure Treated Lumber Be Stained Yes Or No
The answer to “Can Pressure Treated Lumber Be Stained?” is a definitive yes, but with important conditions. It’s not as simple as just opening a can and applying it to fresh wood. Success hinges on proper preparation, understanding the wood’s properties, and selecting the right products.
The key takeaway is that while it is stainable, patience and the right approach are essential. You must allow the lumber to dry thoroughly, clean it meticulously, and often give it a light sanding. Once these steps are completed, you can apply a stain suitable for exterior use, preferably one formulated for treated wood.
The “Yes But” Factor
The “yes but” aspect of staining pressure treated lumber comes down to the treatment process itself. The chemicals used to protect the wood can affect its porosity and moisture content.
When lumber is freshly treated, it’s saturated with chemicals and water. Trying to stain it at this stage is like trying to paint on a wet surface; the stain won’t adhere properly and will likely result in an uneven, short-lived finish. This is why waiting for the wood to dry is the most critical step.
The type of stain also matters. Some stains are formulated to penetrate better and adhere to treated wood more effectively. Look for products specifically recommended for pressure treated lumber or for exterior decks and fences.
When It Works Best
Staining pressure treated lumber works best when:
- The lumber has been allowed to dry for a significant period (weeks to months) after purchase.
- The surface is clean, free from dirt, mildew, and sap.
- A light sanding has been performed to open the wood grain.
- A high-quality exterior stain, ideally one formulated for treated wood, is used.
- The stain is applied evenly, following the wood grain, and in manageable sections.
When these conditions are met, you can achieve a beautiful and durable finish on your pressure treated wood projects.
When It Might Not Work Well
Staining pressure treated lumber might not work well or will yield poor results if:
- The lumber is stained immediately after purchase or installation without adequate drying time.
- The surface has not been properly cleaned or is still dirty or moldy.
- Aggressive chemicals or cleaning agents are used that might react with the wood treatment.
- The wrong type of stain is used, such as an interior-only product or one not designed for exterior conditions.
- The application is rushed or done unevenly, leading to lap marks and blotchiness.
In such cases, the stain may peel, fade, or look splotchy very quickly, leading to disappointment and the need for redoing the work sooner than expected.
The Importance of Testing
A simple test can help determine if your lumber is ready for staining. Sprinkle a small amount of water onto the surface. If the water beads up and sits on top, the wood is still too wet or has a surface sealer that needs to be addressed.
If the water soaks in, it’s a good sign that the wood is ready for staining.
You can also test the stain in an inconspicuous area. Apply a small amount of your chosen stain to a scrap piece of the same pressure treated lumber. Let it dry completely to see how it looks.
This will give you an idea of the color and how well it adheres before you commit to the whole project.
This testing method is invaluable because it allows you to identify potential problems with adhesion, color, or appearance before you invest significant time and effort into the entire project. It helps ensure you are using the right products and techniques for your specific lumber and stain.

Frequently Asked Questions
Question: How long does pressure treated lumber need to dry before staining?
Answer: It typically needs to dry for at least a few weeks, and sometimes up to several months, depending on the climate and the specific wood. A good test is to sprinkle water on it; if it soaks in, it’s likely ready.
Question: Can I paint pressure treated lumber instead of staining it?
Answer: Yes, you can paint pressure treated lumber, but the same preparation steps apply regarding drying and cleaning. Paint may offer more complete coverage but can also chip or peel if not applied correctly.
Question: What is the best stain for pressure treated decks?
Answer: High-quality exterior stains, especially oil-based or water-based formulas designed for decks and treated wood, are best. Look for products with good UV protection and water repellency.
Question: Will staining make pressure treated lumber last longer?
Answer: Staining doesn’t add to the wood’s structural integrity against rot or insects, as the treatment already provides that. However, it protects the wood from UV damage and moisture, which can help preserve its appearance and prevent cracking, thus indirectly extending its overall life.
Question: What if I stained my pressure treated lumber too soon?
Answer: If you stained it too soon and the stain is patchy or peeling, you may need to wait longer for it to dry or consider stripping the existing stain. Once dry, clean and re-stain, ensuring thorough preparation.
Wrap Up
So, yes, you can stain pressure treated lumber. The key is patience and proper preparation. Let it dry, clean it well, and sand lightly.
Choose a good exterior stain and apply it carefully. Follow these steps, and you’ll get a beautiful finish that lasts.