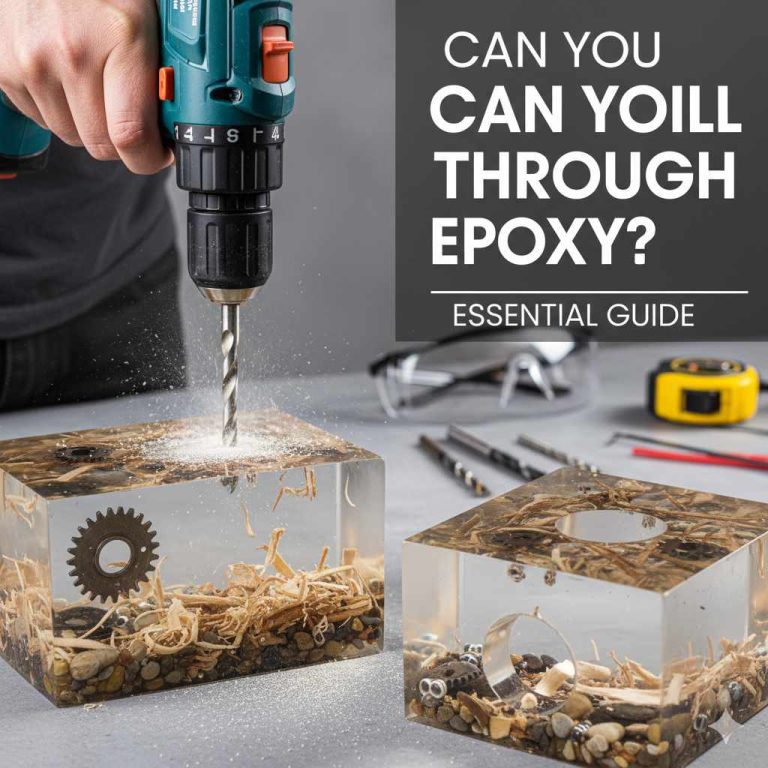
Can You Drill Into Granite: Essential Guide
Can you drill into granite? Yes, you absolutely can drill into granite! With the right tools, techniques, and a bit of patience, drilling into granite for home projects like installing a soap dispenser, a pot rack, or even a new faucet is entirely achievable for any DIY enthusiast. This guide will walk you through everything you need to know for a safe and successful drilling experience.
Hey there, DIY warriors! Md Meraj here, your go-to guy for making those home projects feel less like a chore and more like a triumph. Today, we’re tackling a question that often stops folks in their tracks: “Can you drill into granite?” Many of you have probably stared at your beautiful granite countertops or backsplashes, dreaming of adding a new fixture or hook, but then hesitated, worried about cracking or damaging that stunning stone. It’s a valid concern! Granite is tough, and the thought of making a hole in it can be intimidating. But guess what? With the right approach, you can absolutely drill into granite safely and effectively. Think of it as unlocking a new level in your home improvement toolkit!
Fear not! I’m here to break down the process into simple, manageable steps. We’ll cover the essential tools you’ll need, the best drilling techniques, and crucial safety tips. By the end of this guide, you’ll feel confident and ready to take on any granite drilling project, big or small. Let’s get your project from a dream to a drilled reality!
Why Drilling Into Granite Can Seem Daunting
Granite is a natural igneous rock, formed from molten magma that cooled slowly over millions of years. This process creates an incredibly dense, hard, and durable material. Its resilience is what makes it a popular choice for kitchen countertops and bathroom vanities – it can withstand heat, scratches, and daily wear. However, this same hardness is what makes drilling into it seem like a daunting task. Unlike softer materials like wood or drywall, granite doesn’t yield easily. The fear of chipping the edge, causing a hairline fracture that spreads, or simply having your drill bit skate across the surface, rendering your efforts useless, is very real for beginners.
Historically, drilling granite was a job for specialized professionals with heavy-duty equipment. This perception, combined with the high cost of granite itself, can create a mental block. Many people envision needing industrial-grade tools or risking a costly mistake. Thankfully, modern DIY tools and specialized drill bits have made drilling granite accessible to the average homeowner. The key is understanding the material, choosing the right equipment, and applying the correct technique with patience. It’s not about brute force; it’s about smart application of pressure and the right tools.
Essential Tools and Materials for Drilling Granite
Before you even think about picking up a drill, let’s make sure you have the right gear. Having the correct tools is half the battle when it comes to drilling into granite. It ensures you work efficiently, safely, and achieve a clean result. Here’s what you’ll need:
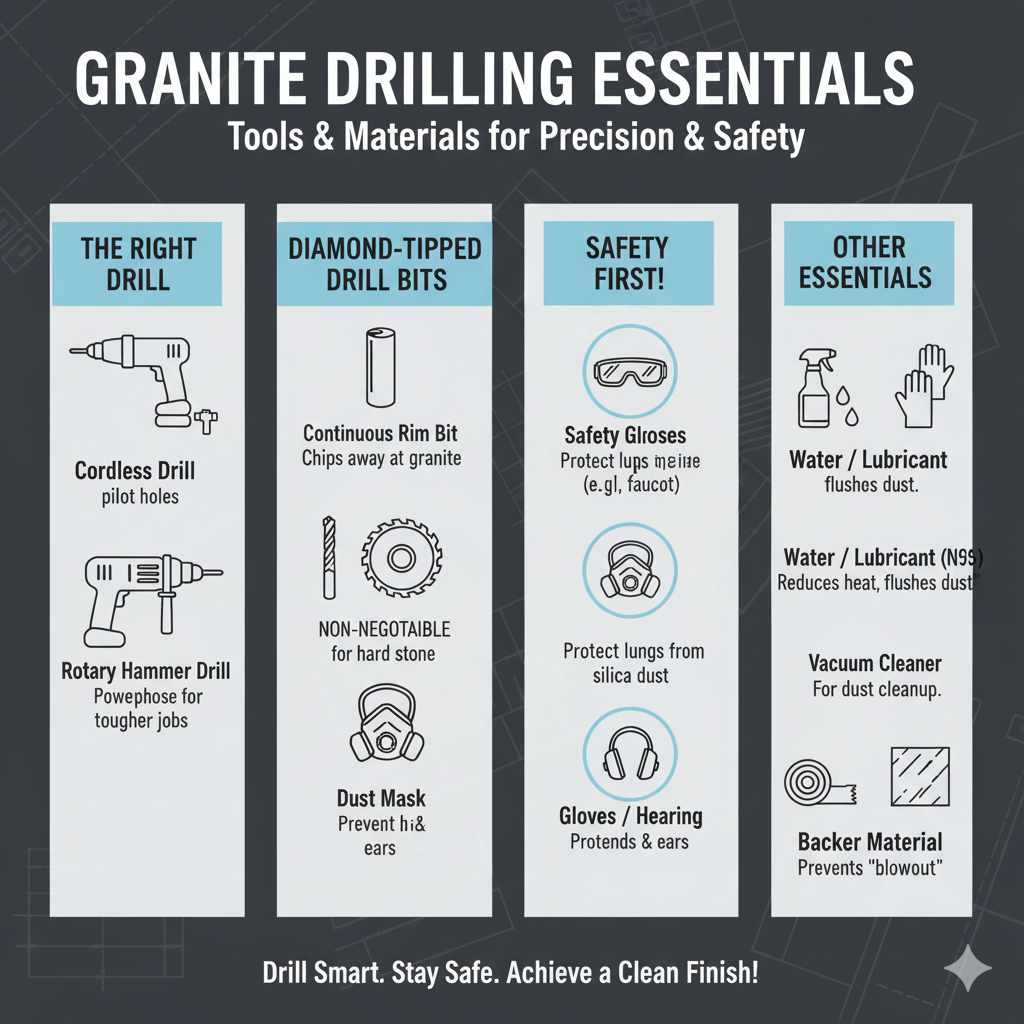
1. The Right Drill
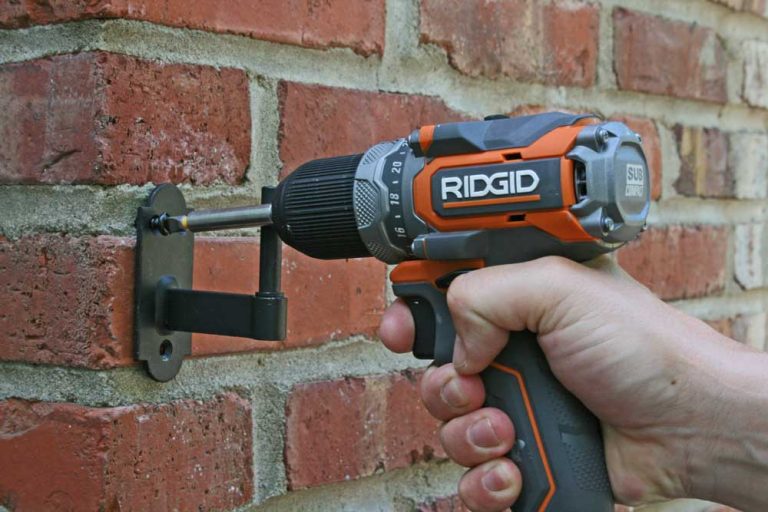
You’ll need a drill that can handle the job. While a standard homeowner drill can work, a hammer drill or a rotary hammer drill is highly recommended, especially for larger holes or thicker granite. These drills provide an oscillating hammering action that helps break through hard materials much more effectively than a standard drill’s rotation alone.
- Cordless Drill: Good for small pilot holes or if you don’t have access to power. Ensure it has good torque settings.
- Hammer Drill: A significant step up. The hammering action helps chip away at the granite. Most DIYers will find this sufficient.
- Rotary Hammer Drill: The powerhouse of drills. This is your best bet for tougher jobs or larger bits, offering strong hammering action.
2. Diamond-Tipped Drill Bits
This is non-negotiable. Standard masonry bits will simply dull and fail to penetrate granite. Diamond is the hardest known material, and its abrasive properties are essential for cutting through stone. You’ll want bits specifically designed for drilling hard stone or tile. The size will depend on what you’re drilling for – thicker bits for larger anchors or pipes, smaller bits for most household needs.
- Look for bits with a continuous rim or a turbo rim for cleaner cuts.
- Diamond-tipped hole saws are excellent for creating larger openings like for a faucet.
3. Water or Lubricant
Drilling into granite generates a lot of heat. Heat is the enemy of both your drill bit and the granite, as it can cause brittle fractures and significantly shorten the life of your diamond bit. A steady stream of water or a specialized drilling lubricant will keep things cool and help flush away dust and debris. You can use a spray bottle filled with water, a hose with a gentle flow, or even a small trickle from a faucet if you’re drilling near one.
4. Safety Gear
Safety first, always! Granite dust, when inhaled, can be harmful. Protect yourself and your eyes.
- Safety Glasses: Absolutely essential. Flying debris is a real risk.
- Dust Mask: A N95 respirator is recommended to protect your lungs from silica dust.
- Gloves: Protect your hands from rough edges and provide a better grip on the drill.
- Hearing Protection: Hammer drills can be quite noisy.
5. Other Helpful Items
- Painter’s Tape: To mark your spot and help prevent the bit from wandering on the surface, especially at the start.
- Measuring Tape and Pencil/Marker: For precise placement.
- Vacuum Cleaner: To clean up dust and debris as you go.
- Bucket or Container: To catch water and dust if working on a countertop.
- Drill Press (Optional): For absolute precision and stability, especially for critical placement.
Choosing the Right Drill Bit Size for Your Project
The size of the hole you need will dictate the size of the drill bit. It’s crucial to select this carefully to ensure your chosen hardware will fit. Always measure the base of the item you’re installing (like a soap dispenser pump, faucet, or wall anchor) and choose a bit that’s slightly larger than that measurement. Going slightly larger is better than going too small, as you can always widen a hole a touch, but it’s impossible to shrink one.
Here’s a quick guide based on common DIY needs:
| Typical ApplicationRecommended Drill Bit Size (Diameter)Notes | ||
|---|---|---|
| Installing a faucet spout or sink base | 1.25 – 1.5 inches (32 – 38 mm) | Often requires a diamond-tipped hole saw. Check faucet specifications. |
| Installing a soap dispenser or lotion pump | 0.75 – 1 inch (19 – 25 mm) | A standard diamond-tipped drill bit is usually sufficient. |
| Installing wall anchors for hanging heavy items (e.g., pot racks) | 0.25 – 0.5 inches (6 – 12 mm) | Choose based on the anchor size. Your anchor packaging will specify. |
| Running small wires or cables | 0.25 inches (6 mm) or smaller | Standard diamond drill bits work well here. |
| Installing a new drain assembly | 1.25 – 1.75 inches (32 – 45 mm) | May require larger diamond hole saws. Confirm drain pipe diameter. |
Remember to always double-check the manufacturer’s specifications for the item you are installing. They will often specify the required hole diameter. For very precise work, like installing multiple holes in a straight line for a complex faucet assembly, consider using a drill press modified for stone, or employ a jig designed for precise hole placement.
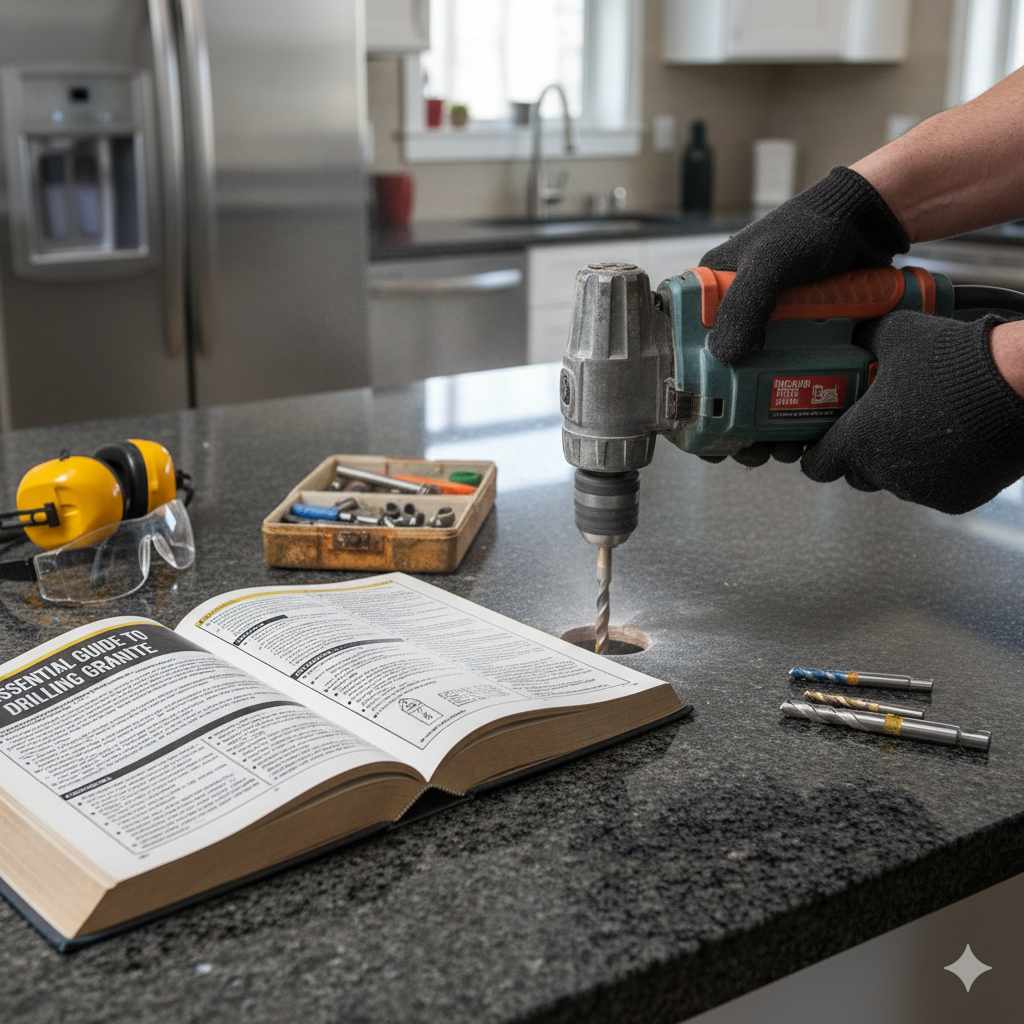
Step-by-Step Guide to Drilling Granite
Alright, let’s get down to business. Here’s how to drill into granite safely and effectively. Patience is your best friend here – no rushing!
Step 1: Mark Your Drilling Spot
Use a measuring tape and a pencil or marker to accurately mark the exact spot where you want to drill. For extra precision, especially at the start of the drill, apply a small piece of painter’s tape over the marked spot. This helps prevent the drill bit from “walking” or sliding around on the smooth granite surface. Mark the center of your hole directly on the tape. If you’re drilling near the edge, be extra cautious.
Step 2: Set Up Your Drill and Bit
Install the correct diamond-tipped drill bit into your drill. Make sure it’s secured properly. If you’re using a hammer drill or rotary hammer, set it to the appropriate mode. For granite, you typically want the drill function with a light hammering action if available, or just the rotary function for less aggressive drilling. Avoid the max hammer setting that might be intended for concrete, as it can be too much for granite and cause chipping.
Step 3: Start the Drill – Slowly and Steadily
Begin drilling at a slow speed. Place the tip of the drill bit precisely on your marked spot on the tape. Apply gentle, consistent downward pressure. Let the diamond bit do the work; forcing it will only increase the risk of cracking the stone or overheating the bit. As the bit begins to bite into the granite, you can gradually increase the speed of your drill.
Step 4: Cool the Bit and the Stone!
This is CRUCIAL. As you drill, periodically stop and apply water or your chosen lubricant to the drilling area. You want to keep the bit and the granite cool. A common practice is to have a helper slowly dribble water onto the spot as you drill, or to stop every 30 seconds to a minute to pour water around the bit. If you see steam, that’s a clear sign it’s too hot, and you need to stop and cool it down IMMEDIATELY. For larger holes with hole saws, it’s even more important to keep a steady flow of water. Look up resources like Family Handyman’s guide for visual tips on cooling techniques.
Step 5: Continue Drilling with Consistent Pressure
Once you’ve finished with the initial bite and are cooling effectively, continue drilling. Maintain a steady, moderate speed and consistent pressure. Let the drill’s rotation and the diamond bit do the cutting. You will feel resistance, but it should be a smooth cutting action rather than a jarring struggle. If the drill bit seems to be jamming or struggling, ease up on the pressure and ensure you’re keeping it cool.
Step 6: Break Through the Other Side
As you get close to breaking through the granite, ease up on the pressure considerably. This is a critical point where chipping can occur. Slow down your drill speed and reduce pressure to a minimum. The goal here is to let the bit gently finish the cut without snagging on the exit side. If you’re drilling through a countertop, you might want to place a piece of scrap wood underneath to prevent splintering on the underside, although granite is less prone to splintering than wood.
Step 7: Clean Up the Hole and Area
Once the hole is complete, let the drill bit come clear while still spinning slowly, then stop the drill. Carefully remove the bit from the hole. Use water to flush out any remaining dust and debris from the hole. A small brush or even your finger (carefully!) can help dislodge any stubborn bits. Clean the surrounding granite surface thoroughly. Use a vacuum cleaner to pick up all the dust. A clean hole ensures a good fit for whatever you’re installing.
Maintaining Your Diamond Drill Bits
Diamond-tipped drill bits are an investment, and proper care will extend their lifespan significantly. Because they work by abrasion rather than cutting like a traditional bit, they can become “loaded” with material or dull over time if not maintained. Here’s how to keep them performing their best:
- Cooling is Key: As emphasized throughout, excessive heat is the biggest enemy. Always use water or lubricant.
- Avoid Excessive Force: Let the diamond do the grinding. Forcing the bit can chip the diamond segments or overheat the bit.
- Clean After Use: After drilling, rinse the bit thoroughly with water to remove any stone dust and slurry. This prevents material from hardening on the bit.
- “Sharpen” or Re-energize: Over time, the diamond segments can become glazed with the material they’re cutting. To re-energize them, you can drill into a softer, abrasive material like a brick or a concrete block for a few seconds. This helps expose fresh diamond particles.
- Proper Storage: Store your diamond bits in a clean, dry place. Avoid storing them with other metal tools where they could get damaged. A designated bit case is ideal.
Drilling Techniques for Different Scenarios
While the core principles remain the same, drilling in different situations might require slight adjustments in technique. Understanding these nuances can help you achieve a cleaner, safer outcome.
Countertop Drilling
This is perhaps the most common and nerve-wracking scenario. The key here is precision and avoiding any damage to the visible surface. Always ensure you have a water supply ready, as backsplash or faucet installations often require multiple holes. Remember to reduce pressure significantly as you break through—you don’t want a chip on the underside that could snag plumbing. A template can be very helpful if you need multiple holes in specific alignment. You can find excellent visual guides on countertop drilling from reputable sources like This Old House videos which often demonstrate techniques clearly.
Backsplash Drilling
Granite backsplashes are usually thinner than countertops, making them slightly less intimidating. However, the aesthetic importance is just as high! The same principles of using diamond bits, water cooling, and slow speeds apply. For smaller holes (e.g., for switch plates or outlet covers), you might get away with a standard drill and meticulous care, but a hammer drill and diamond bit will still be faster and cleaner. Be mindful of the grout lines if working on a tiled backsplash with granite accents.
Drilling for Anchors
If you’re drilling into a granite wall or a granite-clad feature for hanging something, you’ll likely be using smaller diameter bits (e.g., 1/4″ to 1/2″). This is generally easier than drilling large holes for plumbing. The primary concern here is ensuring the anchor fits snugly. Use a bit that matches the anchor’s specified diameter. Water cooling is still recommended, especially for larger anchoring bits, but might be less critical for very small holes unless you’re drilling many of them rapidly. Make sure you’re drilling deep enough to accommodate the full length of your chosen anchor.
Using a Drill Press
For the ultimate in control and accuracy, a drill press is invaluable. While not all DIYers have one, if you do, it can simplify granite drilling. You can clamp the granite securely, ensuring perfect perpendicularity. Using a drill press with a water-cooling setup (sometimes a rubber dam or a specially designed water feed) is the professional approach. It allows for very consistent speed and pressure, minimizing the risk of error. However, ensure your drill press has enough power and a sturdy enough chuck to handle the torque required for granite.
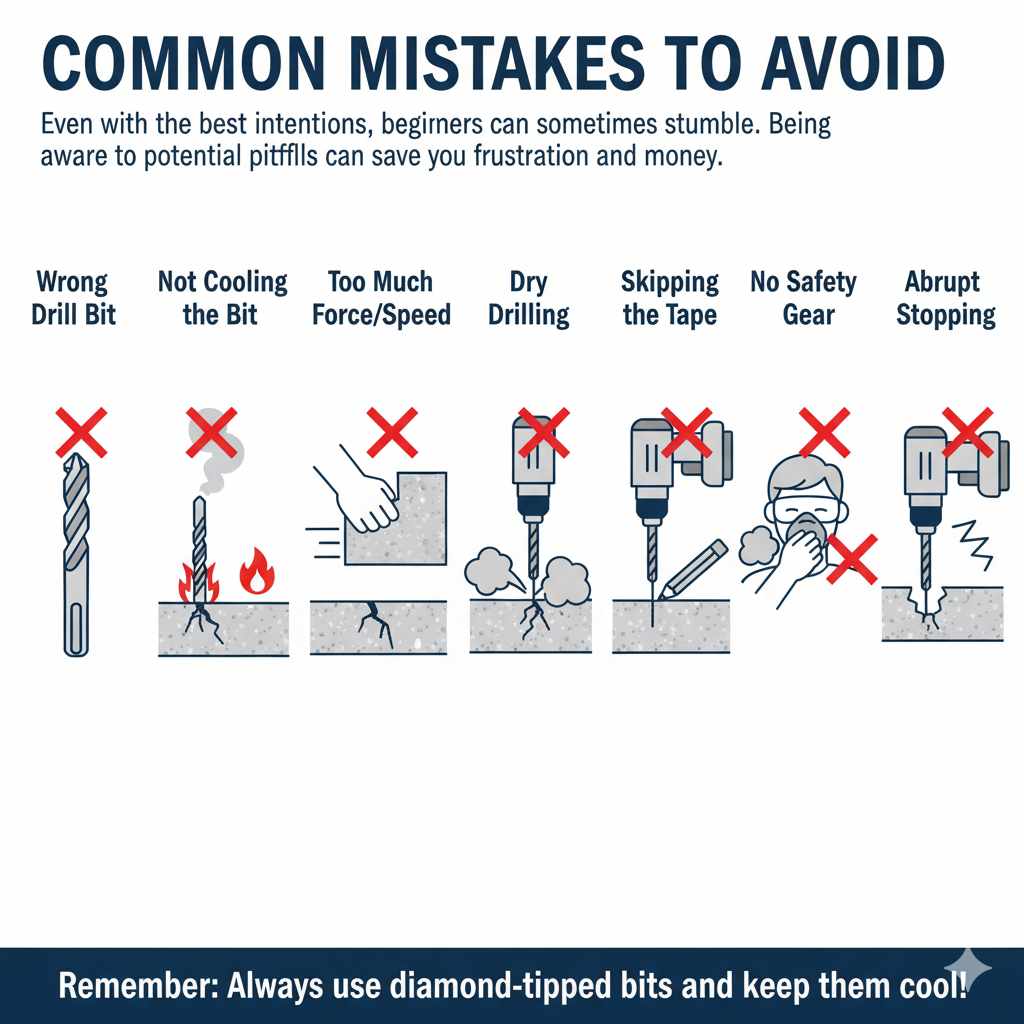
Common Mistakes to Avoid
Even with the best intentions, beginners can sometimes stumble. Being aware of potential pitfalls can save you frustration and money.
- Using the Wrong Drill Bit: This is the #1 mistake. A standard masonry bit will not work on granite. Always use diamond-tipped bits designed for stone.
- Not Cooling the Bit: Overheating your bit leads to premature wear, reduces its effectiveness, and significantly increases the risk of cracking the granite.
- Drilling Too Fast or with Too Much Force: Granite is hard, but brute force can cause it to chip or shatter, especially near edges. Let the diamond abrasives do the slow, steady work.
- Dry Drilling: Directly related to not cooling. Dry drilling is inefficient, generates dangerous dust, and overheats everything involved.
- Skipping the Painter’s Tape: At the start, a bit sliding on the smooth surface can easily wander, ruining your precise mark. Tape provides initial traction.
- Not Wearing Proper Safety Gear: Granite dust is a silica hazard. Protect your lungs and eyes.
- Stopping and Starting Too Abruptly: Especially when breaking through, sudden stops or jerky movements can cause chips. Smooth, consistent action is best.
Frequently Asked Questions About Drilling Granite
Q1: How do I know if I need a hammer drill to drill into granite?
A hammer drill is highly recommended, especially for larger diameter holes or if your diamond bit isn’t cutting as cleanly as you’d like. The hammering action helps break through the hardness of granite more efficiently than a standard drill’s rotary action alone.