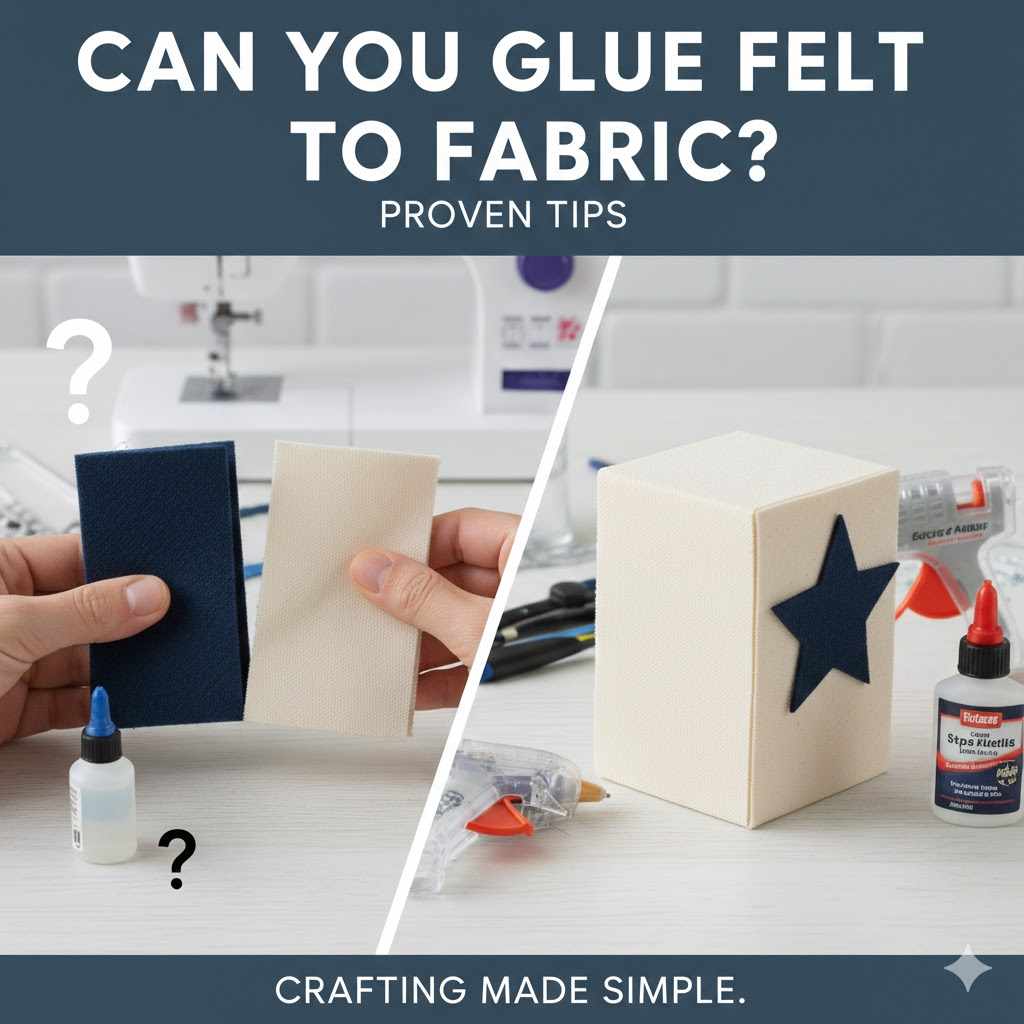
Can You Glue Felt to Fabric? Proven Tips
Yes, you absolutely can glue felt to fabric! Achieving a strong, lasting bond is easy once you choose the right adhesive for your project’s needs, whether it’s crafting, décor, or simple repairs. This guide gives you simple, proven tips to pick the perfect glue and apply it correctly every time for great results.**
Welcome to the workshop! I’m Md Meraj, and I know that starting any craft project, like attaching soft felt to regular cloth, can feel tricky. Will the glue soak through? Will the felt peel off tomorrow? You want your creations to last, but reading those tiny glue labels can be confusing. Don’t worry! Gluing felt to fabric is very straightforward when you know the best adhesives and a few easy tricks. We are going to break down exactly which glues work best and how to apply them so you can create durable, professional-looking fabric projects without needing fancy tools. Let’s get your next project sticking perfectly!
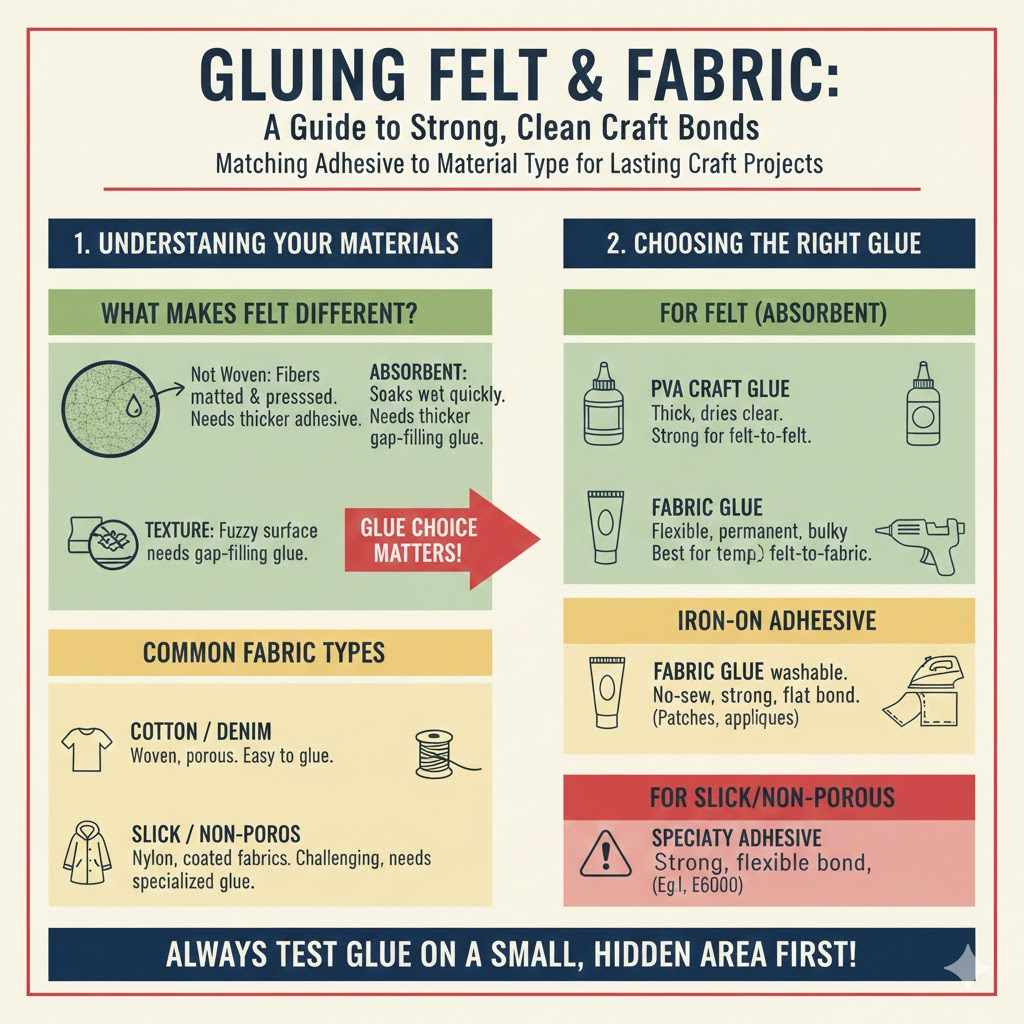
Understanding Felt and Fabric: Why Glue Choice Matters
Before we start spreading glue, let’s chat about what we are working with. Felt and fabric are different surfaces, and that changes how glue sticks.
What Makes Felt Different?
Felt is not woven like standard cloth (cotton, denim, polyester). It’s made by matting, condensing, and pressing fibers together using heat, moisture, and pressure.
This process creates a dense, slightly fuzzy surface. Because it lacks a true woven grain, felt tends to soak up liquids very quickly. This is a big factor in glue selection.
- Absorption: Felt absorbs wet glues quickly, which can cause thin glues to bleed through the top layer, creating a mess or weakening the bond.
- Texture: The soft, slightly uneven surface needs an adhesive that can fill small gaps to grab onto both sides.
Fabric Varieties You Might Glue To
Your success depends on the backing fabric. A heavy canvas needs a different approach than a lightweight silk or jersey knit.
Generally, most common craft and clothing fabrics—like cotton, denim, and most synthetic blends—are straightforward to glue felt onto. However, very slick or non-porous fabrics (like nylon rain gear or plastic-coated textiles) present bigger challenges.
The Best Adhesives: An Expert Guide to Gluing Felt to Fabric
When deciding “can you glue felt to fabric,” the answer depends almost entirely on the glue you select. You need a formula that grabs both the porous felt and the woven fabric effectively. Here are the top contenders, ranked by beginner usability and strength.
1. Fabric Glue: The Crafting Go-To
If you are making something that needs to be washed later, fabric glue is always your safest bet. Modern fabric glues are designed specifically for this material.
Pros and Cons of Fabric Glue
| Pros | Cons |
|---|---|
| Flexible once cured (won’t crack when washed) | May take several hours to fully dry |
| Non-toxic and generally machine washable | May not hold very heavy loads compared to industrial options |
| Dries clear on most types | Can seep through very thin felt if applied too thickly |
Look for brands specifically mentioning a strong hold on natural and synthetic fibers. Always check the manufacturer’s recommendation for water resistance, especially if gluing felt to clothing.
2. Hot Glue (Low-Temp/High-Temp): The Speed Demon
Hot glue is incredibly fast, which is great for quick assembly or structural holds. However, we need to be cautious with heat.
Expert Tip: For many crafting purposes, a low-temperature hot glue gun works wonders for felt because the lower heat is less likely to melt synthetic felt or scorch delicate fabrics. High-temp guns offer stronger bonds but require careful application.
When to Use Hot Glue
- Attaching felt decorations to rigid items (like picture frames or cardboard backing).
- When you need instant holding power before permanent gluing.
- For thicker felt where seepage isn’t an issue.
Avoid hot glue on very thin or fine fabrics, as the heat can sometimes leave small bumps or warp the base material.
3. Permanent Craft or Tacky Glue (PVA-Based)
These are standard white craft glues (like Elmer’s, but specialized versions exist). They work well because they are thick, minimizing soak-through.
If you are adhering craft felt (the cheaper, synthetic kind) to heavy cotton fabric (like canvas totes), a high-quality PVA glue will give a fantastic, permanent bond once fully dry.
4. Spray Adhesive: For Large, Even Coverage
If you are laminating a large piece of felt onto a big expanse of fabric (like upholstering a small headboard insert), spray adhesive provides an even coating without globs.
Safety First: When using aerosol sprays, ensure you are in a well-ventilated area. Consider looking at eco-friendly options, such as those approved by organizations like the U.S. Environmental Protection Agency (EPA) for reduced hazardous substances in consumer products (Learn more about greener product standards).
Step-by-Step Guide: How to Glue Felt to Fabric Like a Pro
Whether you chose fabric glue or tacky glue, the application method is key to a long-lasting, clean bond. Follow these steps for success.
Tools You Will Need
- Your Felt Piece (cut to size).
- Your Base Fabric (clean and ironed).
- The Chosen Adhesive (fabric glue, tacky glue, or hot glue).
- Applicator: Small sponge brush, foam dauber, or clean toothpick.
- Protective surface (wax paper or a scrap cutting mat).
- Clamps or heavy books for curing (if using wet glue).
Phase 1: Preparation is Everything
In crafting, a good setup prevents 90% of mistakes. We are aiming for durability and cleanliness here.
Step 1: Clean Your Surfaces
Make sure both the back of your felt and the area on the base fabric are free of dust, lint, or sizing (a finish often found on new fabric). Wash and dry the base fabric if it’s going to be washed later—this prevents the fabric from shrinking away from the felt adhesive bond.
Step 2: Pre-Fit and Mark
Place the felt piece exactly where you want it on the fabric. If it’s complicated, use a tailor’s chalk to mark light guidelines around the edges of the felt. This ensures perfect alignment when you add the glue.
Step 3: Protect Your Workspace
Lay down wax paper or parchment paper beneath your base fabric. This catches any drips or bleed-through, saving your table. If using spray adhesive, cover a large area entirely.
Phase 2: Applying the Adhesive
This is where we manage absorption and coverage. Remember: a thin, even layer is better than one big blob!
Step 4: Choose Your Application Method
The method changes slightly based on the glue:
- For Wet Glues (Fabric Glue/PVA): Squeeze a small amount of glue onto a disposable surface (like wax paper). Use a small foam brush or sponge to pick up the glue and lightly stipple it onto the back of the felt piece. Use light, even pressure. Cover the entire back surface, getting close to the edges, but don’t overload it.
- For Hot Glue: If using a low-temp gun, run a thin bead around the outer perimeter of the felt piece (about 1/8 inch from the edge). Immediately follow up with a few smaller lines or dots toward the center for stability.
- For Spray Adhesives: Spray both the back of the felt and the application area on the fabric (this is called applying to both surfaces, which often gives a stronger initial tack). Follow the spray can instructions regarding “open time” (the few seconds you wait before pressing pieces together).
Phase 3: Bonding and Curing
Proper clamping or pressure ensures maximum adhesion contact.
Step 5: Join the Pieces
Carefully place the felt onto the marked area of the base fabric. Take your time! Once the wet glue touches the fabric, adjustability time is minimal.
Step 6: Apply Pressure
Firmly press the felt down with your hands for at least 30 seconds to ensure all fibers make contact with the wet adhesive.
For wet glues, you need ongoing pressure during the curing stage. Place a sheet of wax paper directly on top of the glued felt (to prevent sticking to whatever you place on top) and then weigh it down with a large, flat book or several clamps. Let it cure according to the glue manufacturer’s directions—this usually means 12 to 24 hours.
For hot glue, curing is instant, but be mindful not to pull or stress the joint for a few hours while the fabric settles around the bond.
Troubleshooting Common Felt-to-Fabric Gluing Issues
Even with the right approach, beginner challenges pop up. Here is how we fix them, workshop style.
Issue 1: The Glue Seeped Through the Felt
This happens when using too much wet glue on thin felt. It dries shiny and stiff on the front.
- Fix: If the bond is already set, gently use a small, sharp pair of scissors or a razor blade to carefully shave off the dried glue bead on the top side. For next time, use a foam applicator (as mentioned above) instead of direct squeezing, or switch to spray adhesive or low-temp hot glue.
Issue 2: The Felt Edges Are Peeling Up
This is usually due to insufficient pressure during curing or adhesive only being applied near the center.
- Fix: Gently lift the peeling edge. If the glue is still slightly tacky, try adding a very tiny amount of fabric glue underneath with a needle-tip applicator and press down firmly again. Always use a heavy flat weight that covers the entire piece for at least 12 hours.
Issue 3: The Glue Cracked After Washing (If Applicable)
If you used a standard craft glue (like basic school glue) on items intended to be washed, it wasn’t flexible enough.
- Fix: Unfortunately, most non-fabric glues are not designed to survive laundering. For future projects that need washing, you must stick exclusively to dedicated flexible fabric glues. If it’s an important item, try peeling back the felt, carefully scraping off the old dried glue with a stiff brush, and re-adhering it with proper fabric glue.
Tips for Special Fabric Types
Not all fabrics react the same way to adhesives. Let’s tailor your technique for common workshop fabrics.
Gluing Felt to Heavy Fabrics (Canvas, Denim, Upholstery)
These sturdy fabrics are forgiving. You can afford to use a thicker layer of glue or hot glue without fear of bleed-through or scorching.
Recommendation: Hot glue for quick, strong structural hold, or standard thick PVA craft glue for a heavy-duty permanent bond that won’t feel stiff when handled.
Gluing Felt to Synthetic or Stretchy Fabrics (Knit, Spandex, Fleece)
Stretch materials can be tough because when they move, they stress the adhesive line.
Recommendation: Use a highly flexible fabric glue, ideally one labeled for knits or sportswear. When applying, try to keep the fabric flat and relaxed. Do not stretch the base fabric while gluing or curing. The glue must cure while the fabric is in its natural resting state.
Gluing Felt to Thin, Delicate Fabrics (Silk, Organza)
The biggest risk here is the glue showing through the front or soaking through and staining the material.
Recommendation: Spray adhesive is often best here, as it dries to a very thin film. Apply the spray adhesive very lightly to both sides and allow a bit more drying time before joining. Alternatively, use a high-quality fabric glue, but apply it only in fine dots rather than a full coat, and ensure your felt piece isn’t too heavy.
Choosing Felt Types for Better Adhesion
Did you know the type of felt you buy significantly impacts your glue results? When considering “can you glue felt to fabric,” keep the felt material in mind.
Wool Felt vs. Synthetic Felt (Acrylic/Craft Felt)
| Felt Type | Adhesion Quality | Best Glue Match |
|---|---|---|
| 100% Wool Felt | Excellent; porous and accepts wet glues well. | Fabric Glue, PVA Glue (Dries flat and strong). |
| Synthetic (Acrylic/Craft) Felt | Good; sometimes stiffer and slightly less porous. | Hot Glue (for quick bond) or Specialized Fabric Glue. |
| Felt with Adhesive Backing | Very Easy (already has glue!) | Only use if the existing backing is strong enough for the base fabric. |
Natural wool felt has microscopic fibers that grip adhesives better than the flatter, slicker surfaces of polyester craft felt. If you are using synthetic felt, make sure your glue is designed for synthetic-to-natural fiber bonds.
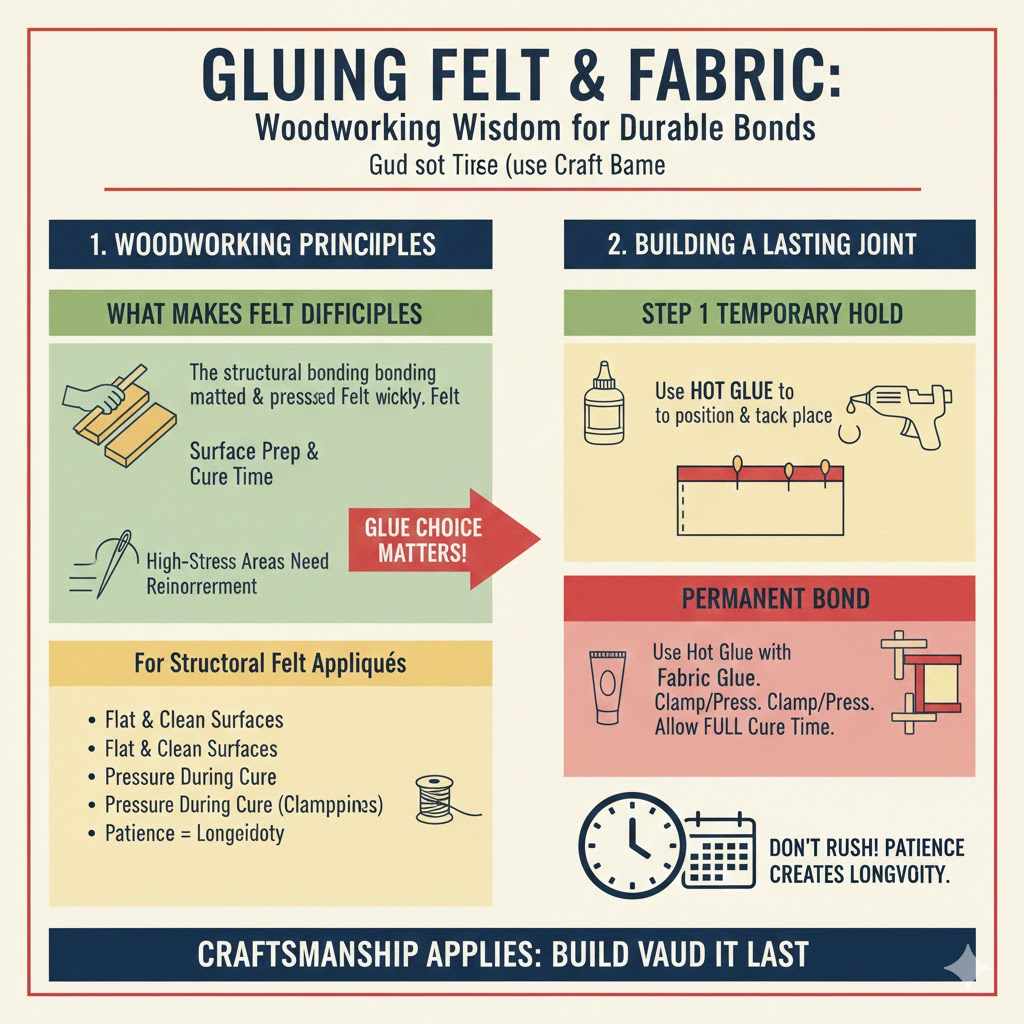
Considering the “Woodworking Mentor” Angle: Durability and Structure
Even though we are working with fabric, the principles of strong structural bonding I use in woodworking still apply: surface preparation and cure time are everything. When I build a joint, I ensure surfaces are perfectly flat and that the wood has time to cure under pressure—the same concept works here.
If your felt appliqué is structural (holding something closed, bearing weight, or being constantly handled), you need the strongest, most flexible bond possible. For high-stress areas, even when using fabric glue, I highly recommend using hot glue as a temporary clamp first, then reinforcing the joint with fabric glue after you achieve the perfect position.
A bond created with craftsmanship takes time. Don’t rush the curing time, especially if the project is something you want to display or use often. Patience creates longevity!
FAQ: Beginner Questions on Gluing Felt to Fabric
Here are some common questions I hear often in the shop when people start working with fabric adhesives.
Q1: Can I use super glue (cyanoacrylate) to attach felt to fabric?
A: Generally, no. Super glue dries rock-hard and inflexible. When the fabric moves or is washed, the hard glue line will cause the felt to pop right off, often taking bits of the fabric fiber with it. It is not recommended for fabrics.
Q2: How long do I have to hold the felt in place before I can let go?
A: If you used fabric glue or PVA glue, you need to apply constant pressure (using books or clamps) for at least 2–4 hours, and ideally let it cure untouched for a full 24 hours. If you used low-temperature hot glue, you can let go almost instantly.
Q3: Is it better to glue the felt, or sew it?
A: Sewing is always the most durable, permanent option, especially for garments that get heavy use or washing. However, gluing is much faster, leaves no needle holes, and is perfect for non-washable décor items. Glue is great for affordability and speed!
Q4: Can I glue felt to water-resistant or waterproof fabric?
A: This is tricky. Water-resistant coatings often repel adhesives. For success, you need a dedicated waterproof fabric glue, and you must scuff or slightly roughen the waterproof surface with very fine sandpaper first to help the glue grip.
Q5: Will fabric glue stains come out of my clothing if I make a mistake?
A: Once standard fabric glue has dried completely (cured), it is usually permanent and will not come out, even through washing. This is why protecting your work area is so important and why you should place your felt perfectly before applying pressure.
A: If possible, use fusible webbing (a heat-activated adhesive sheet) first to bond the two materials, then use minimal fabric glue just around the edges for added security before sewing decorative stitching over the top. If you must only glue, try to apply the adhesive only to the very center of the felt piece, leaving a small unglued border that you can then stitch down.
Conclusion: Crafting with Confidence
You now have all the knowledge you need to successfully answer the question, “Can you glue felt to fabric?” The secret lies not in a single magic glue, but in matching the right adhesive to your specific project needs—whether that’s flexibility for clothing, speed for quick decor, or strength for structural elements.
Remember the key takeaways: preparation is crucial, thin, even coats prevent bleeding, and you must respect the curing time. Whether you opt for a purpose-made fabric glue, the speed of hot glue, or the coverage of a spray adhesive, take your time on the first try. With a little patience, you’ll find that bonding felt to fabric creates beautiful, lasting results that are sturdy enough for any project you bring into your workshop. Go ahead, start sticking with confidence—I know you can make something great!