Can You Glue Wet PVC? Essential Quick Fix
No, you generally cannot successfully glue wet PVC pipe or fittings. Water prevents the solvent cement from properly fusing (welding) the PVC surfaces, leading to weak, leaky, and ultimately failed joints. Drying the surface completely is the crucial first step for a lasting repair.
Welcome to the workshop! Dealing with plumbing issues can feel stressful, especially when water seems to be everywhere. If you’ve found a small leak or need to connect a piece of PVC pipe that’s still damp, the immediate question is: “Can I just glue it now?” Trying to rush the process when surfaces are wet almost always leads to leaks down the road.
That’s frustrating, right? As a DIY mentor, I want to show you that solving this isn’t difficult. We will walk through exactly why water is the enemy and the simple steps you must take to ensure your PVC joint is rock solid, saving you time and preventing future leaks. Let’s turn that damp problem into a permanent fix!
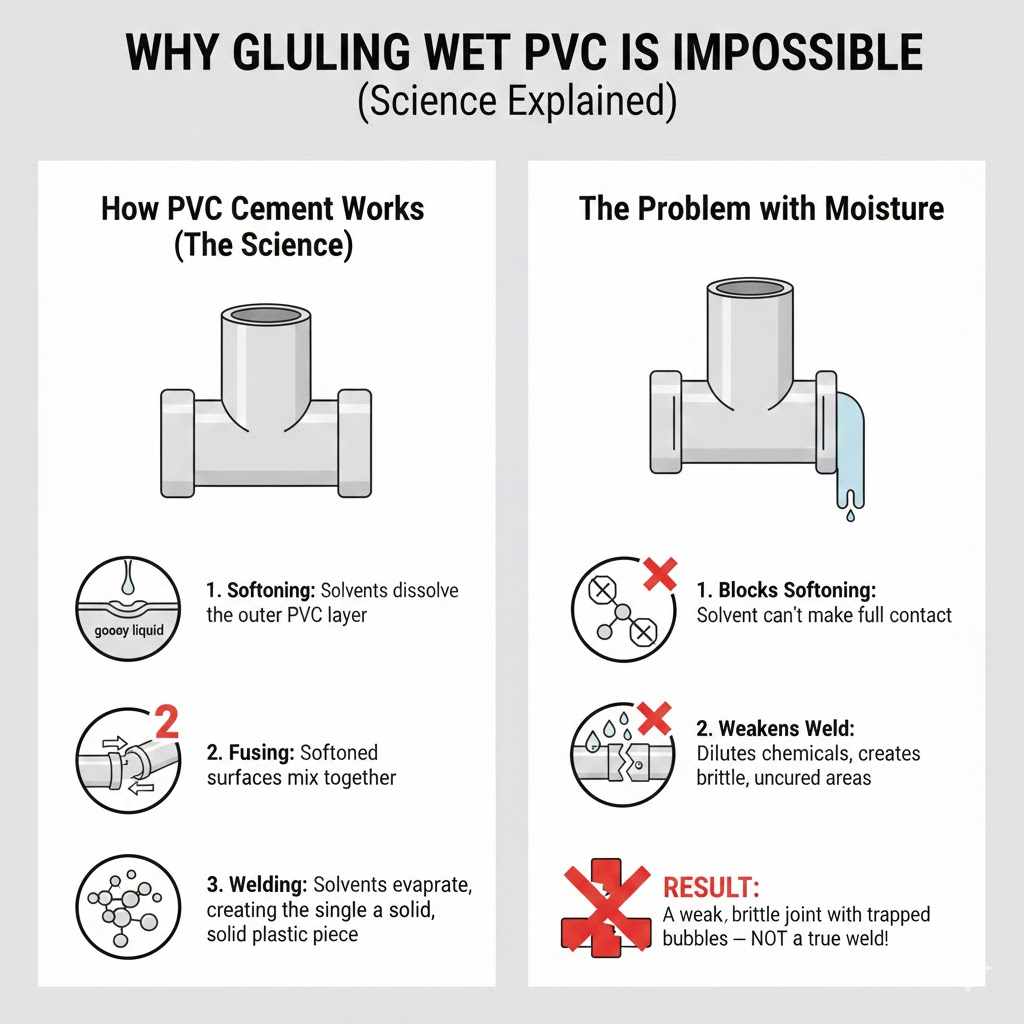
Why Water Makes Gluing PVC Impossible (The Science Explained Simply)
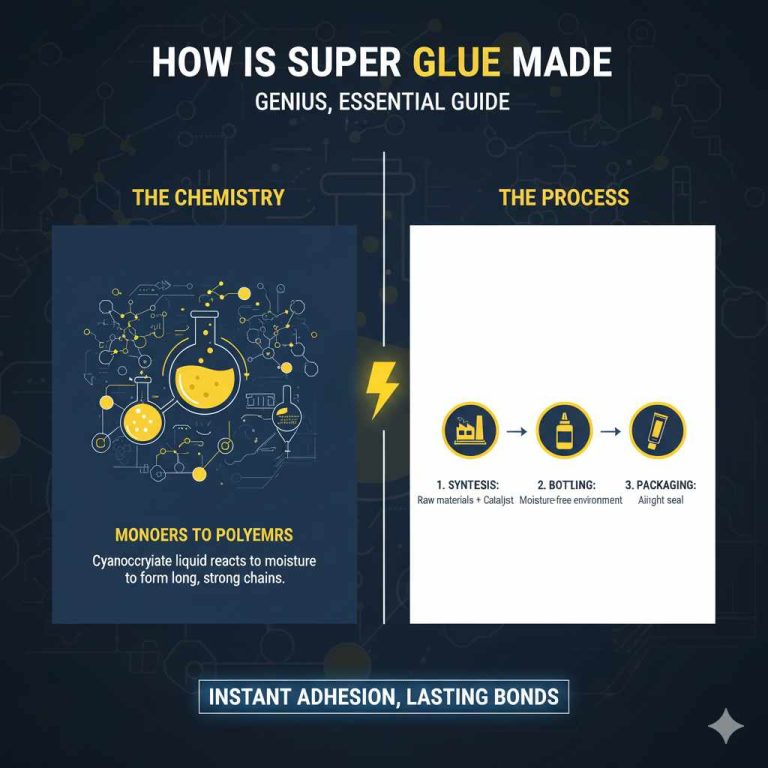
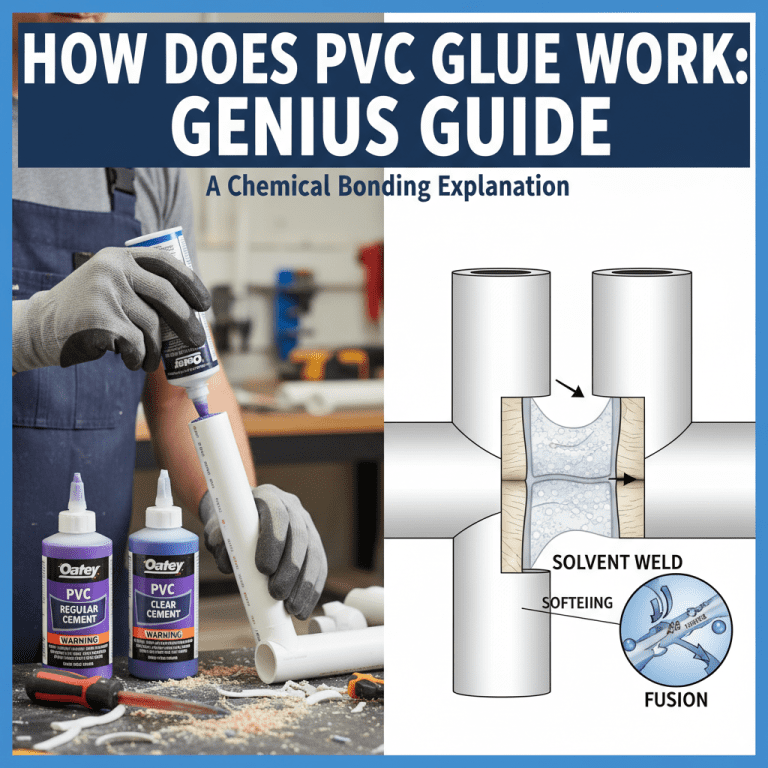
Before we fix the problem, we need to understand why the fix won’t work if the pipe is wet. PVC cement—also called solvent cement—doesn’t work like regular glue. It’s not an adhesive; it’s a chemical welder.
When you apply PVC cement, it performs three main actions very quickly:
- Softening: The cement contains solvents (like MEK or THF) that temporarily dissolve the outer layer of the PVC plastic, turning it into a thick, gooey liquid.
- Fusing: You push the fitting onto the pipe, mixing these two softened surfaces together.
- Welding: As the volatile solvents evaporate (a process often regulated by organizations like ASTM International standards for plumbing materials), the dissolved plastic molecules chemically re-bond, creating a single, solid piece of plastic.
The Role of Moisture
Water interferes dramatically with step 1 and 3.
When moisture (water) is present on the pipe surface or inside the joint:
- The solvent cannot make full contact with the PVC surface to soften it evenly.
- Water often blocks or dilutes the essential chemicals in the cement, slowing down or stopping the necessary chemical reaction.
- Instead of creating a true chemical weld, you get a weak bond filled with tiny bubbles or uncured areas where the water was trapped.
The result? A joint that looks dry on the outside but is incredibly brittle and will almost certainly fail under water pressure. For a strong, long-lasting connection, PVC requires dry surfaces.
Essential Tools and Materials for a Successful PVC Joint
When you are tackling any PVC repair, having the right supplies ready makes the job go smoothly. Since we are dealing with moisture, preparation is key!
What You Will Need:
Gather these items before you even think about cutting or gluing:
- New PVC Pipe or Fitting (if replacing a section)
- Rags or Clean, Dry Cloths (plenty of them)
- A Utility Knife or PVC Ratcheting Cutter
- PVC Primer (Color indicator type is great for beginners)
- Quality PVC Cement (Use the correct type for your application—Schedule 40 or DWV—check local codes if unsure)
- Safety Glasses (Always wear eye protection!)
- A Sandpaper block or Deburring tool
The Step-by-Step Guide to Repairing Wet PVC (The Right Way)
The critical takeaway here is that you can repair the area, but you must fully dry the surfaces before applying the primer and cement. Here is the dependable method I use in the workshop for any PVC repair near moisture.
Step 1: Safety First and Stopping the Flow
Never start working until you have eliminated the moisture source.
- Shut Off Water: Locate the main water shutoff valve for the system or zone you are working on and turn it completely off. For pressurized lines (like irrigation or household plumbing), drain the line by opening the lowest faucet until the flow stops.
- Contain Drips: If you cannot completely shut off the flow and a slow drip persists, place a bucket underneath. For stubborn drips during the glue-setting phase, we have a temporary fix later, but first, reduce the ambient moisture.
- Don eye Protection: Safety glasses go on now.
Step 2: Drying the Exterior Surface Thoroughly
This is the most crucial step to counter the “wet” problem. Do not just wipe it once and assume it’s dry!
- Wipe Down: Use multiple clean, dry rags to vigorously wipe down the exterior of the pipe end and the inside socket of the fitting (if reusing fittings). Wipe in circles, changing cloth sections frequently.
- Air Dry: Allow the surfaces to air dry for several minutes. If the surrounding environment is humid (like in a crawlspace or near a hose bib), the dampness will return quickly.
- Use Heat (Cautiously): For stubborn dampness, you can use a low-setting hairdryer or a heat gun on a very low setting, held far back, to help evaporate residual moisture. Never overheat PVC, as it can warp. Work quickly back to wiping.
- Test Surface: When you think it’s dry, touch the area. If it feels cool or damp, keep drying. You are aiming for room temperature and totally dry to the touch.
Step 3: Preparing the Surfaces for Bonding
Good preparation ensures the strongest possible chemical weld. Think of this as sanding skin before applying superglue—it helps the chemicals key into the material.
- Remove Burrs: Use a utility knife, sandpaper, or a specialized deburring tool to remove any sharp edges or rough spots, especially inside the cut edge of the pipe. Smooth edges prevent damage to the seals.
- Scuff the Surface: Lightly score the outside of the pipe end and the inside socket of the fitting using medium-grit sandpaper (around 120-grit) or emery cloth. This roughens the surface microscopically so the solvent cement can grip better.
- Clean Again: Wipe away all dust created by the sanding with a clean, dry cloth. Do not use water or solvent here—just dry dust removal.
Step 4: Applying Primer
The primer cleans deep into the plastic and ensures the solvent cement works its magic. Many modern cements are “one-step” (primer/cement combined), but using separate primer often yields a stronger joint, especially when dealing with any lingering doubts about moisture.
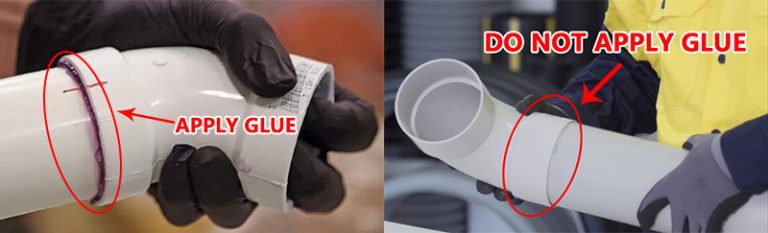
- Apply Primer: Use the applicator brush provided with the primer. Apply a generous, even coat to the outside of the pipe end and the inside surface of the fitting socket.
- Watch for Color Change: If you use a colored primer (usually purple), it helps you see exactly where you applied it. Ensure complete coverage.
- Wait Briefly: Primer works instantly, but give it just 5 to 10 seconds to penetrate before moving to the cement application.
Step 5: Applying the Cement and Assembly
Work quickly now! Once the cement hits the pipe, you have limited working time (usually under 30 seconds before it starts to set).
- Cement on Pipe: Apply a liberal, even coat of cement to the outside of the pipe end (the area that will slide into the fitting). The coat should be just thick enough to flow when rotated.
- Cement on Fitting: Apply a slightly thinner but still generous coat to the inside of the fitting socket.
- Push and Twist: Immediately and firmly push the pipe completely into the fitting socket. As you push, give the pipe a quarter-turn twist (about 90 degrees). This action spreads the softened plastic evenly, squeezing excess cement out around the joint collar.
- Hold Firmly: Hold the pipe and fitting tightly together without movement for at least 30 seconds. This prevents the natural spring-back of the pipe from pushing the fitting apart before the chemical weld starts to set.
Step 6: Curing and Testing
This waiting period is often where DIYers rush, leading to leaks. Do not skip the recommended cure times!
Cure time depends heavily on temperature, humidity, and pipe diameter. Always check the cement can for specific instructions, but here is a general guideline:
| Condition | Joint Handling Time (Initial Set) | Pressure Testing Time (Full Cure) |
|---|---|---|
| Small Diameter (1/2″ to 1″) | 10 minutes | 2 hours |
| Medium Diameter (2″ to 3″) | 20 minutes | 6 hours |
| Large Diameter (4″ and above) | 30 minutes | 24 hours |
For robust repairs on main water lines, waiting the longer “Full Cure” time is always the wisest approach. For drainage (DWV) lines, handling time can be shorter, but testing should still be patient. For the absolute best long-term results, review best practices provided by manufacturers like the Plastics Industry Association (PLASTICS).
Special Case: When You Absolutely Cannot Dry the Area (Temporary Fixes)
Sometimes, you are dealing with an active leak, perhaps in a crawlspace or outdoors during rain, and you simply cannot shut off the water long enough to dry the pipe fully.
Md Meraj’s Mentor Advice: A truly permanent, high-pressure repair requires a dry surface. However, if you need a temporary stop so you can eventually make the proper repair, you have limited options. Use these only as placeholders!
Option 1: Fiberglass Repair Wrap (Best Temporary Measure)
These kits come in a sealed tube containing a fiberglass tape and a resin activator, often similar to casting plaster.
- Roughen: While the pipe is wet, use a file or rough sandpaper to scuff the area around the leak. A perfect weld is impossible, but scuffing gives the resin something to stick to.
- Wipe Lightly: Wipe the area only enough to remove loose debris, leaving the surface damp.
- Wrap Quickly: Submerge the wrap briefly in water (as directed by the package) and wrap it tightly around the leak site. It hardens like a cast in minutes.
This wrap creates an external pressure bandage, buying you time. However, you MUST still drain and dry the system, remove this bandage, and properly solvent weld a permanent fix when possible.
Option 2: Specialized Wet-Surface Adhesives
Some epoxy putties (often labeled as plumbing epoxy or “sticks”) are designed to cure even when submerged or when applied to damp surfaces. These are excellent for sealing holes in drain pipes (non-pressure), but they are generally NOT suitable for high-pressure water mains where the chemical fusion of solvent cement is required.
Always check the label to ensure the product is rated for PVC and your specific pressure requirements. If in doubt about codes for pressurized lines, consult the Uniform Plumbing Code (UPC) requirements or a licensed professional before relying on epoxy for drinking water systems.
Troubleshooting Common PVC Gluing Mistakes
Even when you know you shouldn’t glue wet PVC, sometimes joints still fail. Here are the common pitfalls and how to avoid them next time.
| Symptom | Likely Cause | Fix for Next Time |
|---|---|---|
| Leak immediately upon pressurizing. | Water prevented full chemical weld. Pipe was still wet under the cement. | Increase drying time. Use a heat source carefully if necessary. |
| Joint fails later (weeks/months). | Not enough cement, or pipe was inserted too slowly (not enough “squeeze out”). | Apply cement thicker (but still smooth). Twist 90 degrees during insertion. Hold joint firmly for 30 seconds minimum. |
| Joint is sticky or mushy after curing. | Cure conditions too cold, or pipe/cement ratio was incorrect (too much cement or highly humid air trapped solvent). | Ensure ambient temperature is above 40°F (4°C). Double-check solvent cement suitability for low temperatures. |
| Visible crack near the fitting edge. | Pipes were cut roughly, or joint was too tight/stressed during initial assembly. | Use a high-quality cutter or miter saw. Always check fit before priming. If reusing an existing joint, ensure no strain on the pipe. |
Tips for Excellent PVC Fitment Before Gluing
A great bond starts long before you touch the glue. Proper fitting ensures the surfaces mate correctly, which is vital when you’re worried about moisture.
The Dry Fit Test
Always perform a dry fit for every joint you plan to glue:
- Insert the dry pipe fully into the dry fitting without primer or cement.
- The pipe should slide in easily, offer slight resistance about 3/4 of the way in, and then seat firmly when pushed the rest of the way.
- When fully inserted, you should see a consistent bead (ring) of cement/pipe material around the entire joint circumference. If the pipe bottoms out too soon, you might not have enough pipe inserted to bond properly.
Proper Insertion Depth
For reliable plumbing, standard pipe fitting requires inserting the pipe to the depth line indicated by the manufacturer or local code standards. Never rely on just a shallow insertion. If you cut your pipe too short, you risk having a failure point right where the pressure concentrates. When working with salvaged pipe sections, measure carefully to ensure you have full socket engagement.
PVC Handling and Safety When Working with Solvents
As a mentor, I must remind you that working with PVC cement and primer involves strong solvents. Your safety ensures the durability of your repair!
Always remember these basic safety protocols:
- Ventilation is Non-Negotiable: Work outdoors or in an extremely well-ventilated area. These fumes are hazardous to inhale.
- Avoid Contact: If cement or primer gets on your skin, wipe it off immediately with a dry rag, and then wash the area thoroughly with soap and water. Avoid getting any on your eyes.
- Ground Clearance: When dealing with underground repairs, ensure that soil moisture or surrounding wet ground does not immediately splash water onto your freshly glued joint during the critical cure time. Sometimes shielding the repair with plastic sheeting temporarily helps prevent overspray or condensation from interfering.
Frequently Asked Questions (FAQ) About Wet PVC Gluing
Q1: Can I use an all-weather or all-purpose PVC cement on a slightly damp pipe?
A: No. While “all-weather” cement is formulated to cure better in colder temperatures, it still requires the surfaces to be fundamentally dry to chemically weld the plastic surfaces together. Dampness will still compromise the bond strength.
Q2: How long should I wait after wiping the water off before applying primer?
A: Wait at least 5 minutes after initial wiping, especially if the ambient humidity is high or the area is enclosed. If you feel the surface temperature is cool (indicating residual moisture), wait longer. You must wait until the surface feels fully dry to the touch.
Q3: Does sanding or roughing the surface help if the pipe is wet?
A: Sanding only helps by increasing surface area for the cement to bond to. It does nothing to negate the water already sitting on the plastic. You must always dry the surface, and then sand/prime.
Q4: I used PVC cement, and it looks cloudy. Is this normal?
A: Cloudiness, often called “blushing,” usually means moisture was present when the cement was applied. The solvent evaporated too fast, leaving a hazy white mark. This indicates a weak spot in the weld. For low-pressure drains, it might hold, but for pressurized systems, you must cut it out and re-glue when dry.
Q5: What happens if I use CPVC cement on PVC pipe?
A: While they look similar, CPVC cement is chemically different. Never mix them. PVC cement on PVC pipe provides a strong weld. CPVC cement may soften the PVC, but it will not create the required, long-term molecular bond.
Q6: Can I use my hot air gun to dry the area faster?
A: Yes, cautiously. Use the lowest heat setting and keep the gun moving constantly, about 8–12 inches away from the surface. Excessive or focused heat can soften, warp, or even melt the PVC pipe or fitting, leading to a ruined component and potential warping in the rest of the line.
Conclusion: Confidence in Your Dry Connection
If you asked if you can glue wet PVC, the answer from an experienced builder is a firm but friendly, “Not if you want it to last.” Water is the ultimate barrier to the essential chemical fusion PVC solvent cement relies upon. Trying to take a shortcut by gluing over moisture is just planning for a headache next week.
The secret to making a repair that holds forever—whether you are tackling irrigation, drainage, or basic household supply lines—lies entirely in patience during the preparation phase. Stop the water, dry the surfaces thoroughly, prep them with primer, and then execute your chemical weld quickly and decisively. By following these straightforward steps—especially the drying process—you are guaranteed a craftsmanship-level repair that builds lasting confidence in your DIY skills. Now go ahead, seal that connection perfectly!