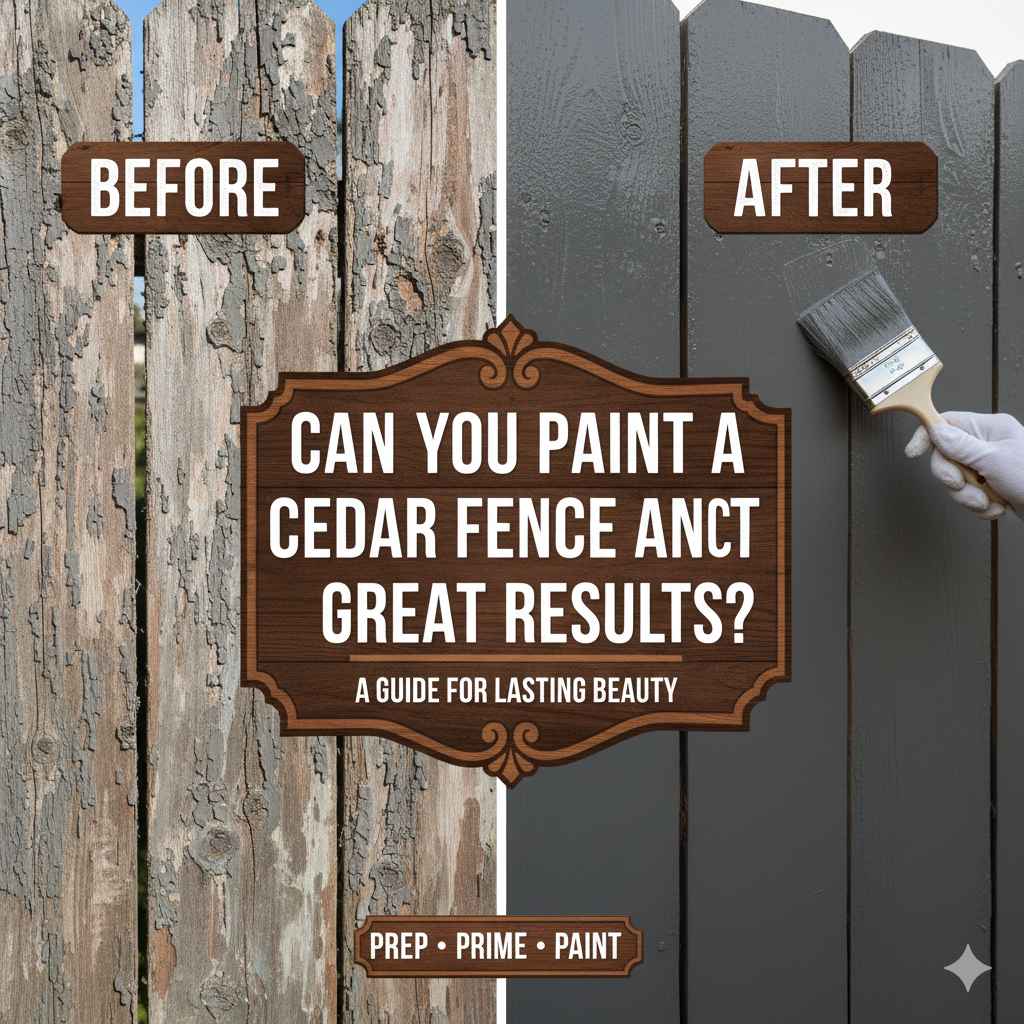
Can You Paint a Cedar Fence and Get Great Results?
Thinking about painting your cedar fence can seem tricky at first. Many people wonder, Can You Paint a Cedar Fence the Right Way?, and that’s totally understandable! Cedar wood is known for its natural beauty and unique properties. Plus, getting it wrong can mean wasted time and money. Don’t worry, though. This guide will take you step-by-step through the whole process, making it easy to get a professional-looking finish. We’ll explore everything you need, from prep work to the final coat, ensuring your fence looks fantastic for years to come. Ready to get started?
Prepping Your Cedar Fence for Painting Success
Before you even think about grabbing a paintbrush, you need to prepare your cedar fence. This stage is key to a long-lasting and beautiful finish. Skipping these steps can lead to peeling paint and a fence that doesn’t look its best. We’ll cover everything from cleaning and repairing to sanding and priming. Getting the surface ready is like building a solid foundation for a house; it’s essential for the whole project’s success. This section will guide you through the process, ensuring your fence is ready to be painted.
Cleaning Your Fence: The First Step
The first task is cleaning the fence. Over time, fences collect dirt, mildew, and other debris that will prevent the paint from adhering properly. Using a garden hose with a spray nozzle or a pressure washer (use caution with a pressure washer, as too much pressure can damage the wood) is a good beginning. You’ll also need a cleaner specifically designed for outdoor wood surfaces.
These cleaners help to remove mildew, mold, and any old paint that might be loose. Make sure to rinse the fence thoroughly after cleaning and let it dry completely before moving on to the next step. Let the fence sit and dry for at least a day or two, especially in humid conditions.
- Choosing the Right Cleaner: Look for a cleaner made for wood. Avoid harsh chemicals that could damage the cedar. Many cleaners are biodegradable and environmentally friendly. Choose one that targets mildew and mold, which are common on fences.This is really important, because mold and mildew will impact the look and durability of your paint job. Make sure you read the instructions and follow them exactly. After cleaning, inspect the fence for any damaged boards or sections that need repair.
- Pressure Washing: If using a pressure washer, use a low-pressure setting, and keep the nozzle a safe distance from the wood. Start from the bottom and work your way up to prevent water from getting behind the boards.Pressure washing is a fast way to clean your fence, but it can also damage the wood if done incorrectly. Always test a small, hidden area first to make sure the pressure isn’t too high. If the wood starts to splinter, reduce the pressure.
- Scrubbing Tough Spots: For stubborn stains or areas with heavy mildew, use a scrub brush. This will help remove dirt and grime that the cleaner might miss.A good scrub brush can make all the difference. Work in small sections, and pay extra attention to areas that are exposed to sunlight or moisture. Consider using a brush with a long handle to make it easier to reach high or hard-to-access sections.
Repairing Damage and Imperfections
Inspect your fence carefully for any damage after it’s cleaned and dried. This could include cracks, splits, or loose boards. Any imperfections need to be addressed before painting. You can use wood filler for small cracks and splits. For larger damage, you may need to replace the damaged boards. Make sure to choose cedar that matches the existing fence. Use exterior-grade wood filler and ensure it’s fully dry and sanded smooth before you begin the next step. This repair work sets the stage for a smooth, even finish.
- Filling Cracks and Splits: Use exterior-grade wood filler to fill in any cracks or splits. Apply the filler with a putty knife, pressing it firmly into the damage. Let it dry completely according to the manufacturer’s instructions.Proper filling is crucial for a smooth paint finish. Don’t be shy about using a little extra filler to ensure the crack is completely filled. After it’s dry, sand the filled areas to make them flush with the surrounding wood.
- Replacing Damaged Boards: If a board is severely damaged, it’s best to replace it. Remove the damaged board, and then cut a new cedar board to the correct size. Use exterior-grade screws to attach the new board securely.When replacing a board, make sure the new piece is flush with the other boards. If the old board was treated in any way, make sure to consider the treatment for the new board.
- Sanding the Wood: Sanding smooths out any rough spots or imperfections on the wood’s surface. This is essential for proper paint adhesion. Use sandpaper with the appropriate grit – a medium grit (around 120-150) is typically a good choice for cedar.Sanding creates a surface that’s ready for paint. Sand in the direction of the wood grain for the best results. A random orbital sander can make this job go faster, but make sure to wear a dust mask to protect your lungs.

Selecting the Right Paint for Your Cedar Fence
Choosing the right paint is one of the most critical decisions when you want to paint your cedar fence. There are many options, from different types of paint to colors and finishes. The paint you choose will have a big impact on how your fence looks and how long it lasts. Different paints offer various benefits, so it is important to know what you want to achieve. For instance, do you want a specific color or finish? This section will discuss the best paints for cedar fences, explaining how to select the right one for your particular project.
Paint Types for Cedar Fences
Several types of paint are well-suited for cedar fences, and it’s essential to select the right one to ensure both the appearance and the longevity of your painted fence. The main options include exterior latex paint and oil-based paint. Each has benefits and drawbacks, and the ideal choice depends on your specific needs and preferences. Also, keep in mind that the best paint choice might depend on your location’s climate.
- Exterior Latex Paint: This is a popular choice due to its flexibility and water resistance. It is often easier to apply and clean up than oil-based paints. Latex paint is also less prone to cracking and fading over time.Latex paint is a good option if you want a flexible paint that can handle changing weather conditions. It is also environmentally friendly, with low levels of volatile organic compounds (VOCs). Always choose exterior-grade latex paint for best results.
- Oil-Based Paint: Oil-based paint offers excellent durability and can penetrate the wood, providing a stronger bond. This paint is very resistant to moisture, but it can take longer to dry and has a strong odor.Oil-based paint can provide a superior finish, but it’s important to be aware of the VOCs. Make sure you have good ventilation when applying this type of paint. It’s often chosen for its long-lasting performance.
- Stains vs. Paints: Paint creates a solid color, while stain allows the wood grain to show through. Both have their own distinct looks. Stain is more popular if you want to emphasize the natural wood grain, while paint offers a wider range of colors.Consider the look you want to achieve. If you like the natural look of cedar, a semi-transparent stain might be better. If you want a specific color, paint is the better choice.
Paint Finishes and Colors
Choosing the right finish and color is an important factor. Paint finishes range from matte to high-gloss, and each provides a different look and level of protection. The color you select will impact your fence’s appearance, so choose wisely. Remember, you want something that matches your home and personal preferences. Thinking about these choices before you start your project will help you achieve the results you want.
- Paint Finishes: Choose your finish based on how much shine and protection you want. Flat finishes have little shine but offer good coverage, while gloss finishes are shiny and highly durable. Semi-gloss is a popular middle-ground option.Consider the amount of foot traffic and exposure your fence gets. High-gloss finishes are better for areas that need frequent cleaning, such as fences near driveways. Matte finishes can hide imperfections better.
- Color Considerations: The color of your fence can enhance or clash with your home’s exterior. Think about the colors of your house, landscaping, and other exterior elements when selecting a color. Lighter colors can make a fence look larger, while darker colors can make it appear smaller.If you’re unsure about a color, consider getting samples and testing them on a small section of your fence. This allows you to see how the color looks in different lighting conditions before committing to the full project.
- Using Paint Samples: Always test your chosen color on a small, inconspicuous area of your fence before painting the whole thing. This will help you make sure you love the color and that it works with your home’s exterior.Paint colors can appear different depending on the sunlight. Test the samples in the morning, afternoon, and evening to get a true idea of how it will look. A small investment in paint samples can save you from a major disappointment later on.
Applying Paint to Your Cedar Fence
The actual painting process involves several steps to achieve a smooth and professional-looking finish. From applying primer and the first coat to the second coat, each step is important for getting great results. Knowing the proper methods for applying the paint, like using the correct tools, can make a difference. Taking your time and following the steps outlined below will ensure a beautiful, long-lasting fence.
Tools and Techniques
Having the right tools and knowing the proper techniques are essential. Selecting the correct brushes, rollers, and other tools will help speed the process. Knowing the right painting techniques will ensure a smooth, even application. Proper planning and preparation will also make the job easier, safer, and produce a high-quality finish.
- Brushes and Rollers: Choose high-quality brushes and rollers for a better finish. Brushes are great for detailed work and edges. Rollers are faster for larger, flat surfaces.Use a brush with synthetic bristles for latex paint and natural bristles for oil-based paint. A roller with a 3/8-inch nap is often a good choice for cedar fences, but read the paint instructions to see what the manufacturer recommends. Clean your tools thoroughly after each use.
- Applying the Primer: Applying a good primer before painting is a must. The primer will help the paint adhere to the wood, block stains, and provide a uniform surface. Apply the primer evenly, using the correct tools for your project.The primer is the foundation for your paint job. Make sure you allow the primer to dry completely before applying the first coat of paint. Follow the manufacturer’s instructions for drying times, which vary depending on the product and weather conditions.
- Painting the First Coat: Apply the first coat of paint in smooth, even strokes. Work in sections, and avoid applying too much paint at once. This will prevent drips and runs. Allow the first coat to dry completely before applying the second.Applying the first coat properly is important. Always paint in the same direction as the wood grain. Make sure you overlap your strokes slightly to avoid any gaps in coverage. Read the instructions for the paint, and follow the recommended drying times.
Completing the Process: Second Coat and Beyond
The second coat of paint helps to build the color and provides extra protection. Make sure the first coat is fully dry before starting. The additional protection provided by the second coat is key to making your paint job last longer. It’s also important to know how to maintain your newly painted fence to make sure it looks great for a long time.
- Applying the Second Coat: After the first coat has dried completely, apply the second coat of paint. This will provide a more uniform finish and better protection. You should follow the same techniques as the first coat, focusing on smooth, even strokes.The second coat enhances the color, coverage, and durability of your fence. Don’t rush; take your time and make sure you get a smooth, even finish. Proper application of the second coat will protect your fence from the elements.
- Dry Times: The amount of time that each coat must dry will vary depending on the type of paint and weather conditions. Make sure to read the instructions on the paint can. Ensure your painted areas are fully dry before exposing them to anything, like rain or debris.Give your fence ample time to dry. Insufficient drying time can lead to problems like blistering and peeling. The weather and humidity levels can affect the dry time. Painting on a warm, dry day will help the paint dry quicker.
- Maintenance: To keep your fence looking great, you should maintain it. Regular cleaning and occasional touch-ups will keep your fence looking its best.Even with high-quality paint, a fence will require a little maintenance. Inspect the fence regularly for any signs of damage or wear, and address problems as they appear. Cleaning your fence once or twice a year can help it last longer.
Common Problems and Solutions
Even with careful planning and execution, problems can sometimes arise. Knowing what common problems can come up when you paint your fence is key to avoiding issues. From peeling paint to fading, these issues can often be fixed. This section will discuss these problems and their solutions, so you’ll be prepared if issues arise. Understanding how to handle these potential issues will help you achieve a professional-looking result.
Peeling and Blistering
Peeling and blistering are common issues that can ruin the look of your paint job. These issues are often caused by poor preparation, moisture, or improper application. Finding the cause and making corrections will prevent these problems from happening again. These tips will help you avoid these paint problems.
- Causes of Peeling: Peeling is often caused by poor surface preparation, painting over dirt or mildew, or applying paint over old, failing paint. Moisture trapped beneath the paint can also cause peeling.Always make sure the surface is clean, dry, and properly prepared before painting. Remove any loose or flaking paint before applying the primer. Consider the weather conditions, and avoid painting when rain is expected. Proper prep is the most important factor in preventing peeling.
- Causes of Blistering: Blistering often results from painting in direct sunlight, painting over a damp surface, or using the wrong type of paint. Trapped moisture and heat can create blisters under the paint.Avoid painting in direct sunlight; paint in the shade or during cooler parts of the day. If you see blisters, you’ll need to scrape off the blisters, sand the surface, and repaint.
- Solutions: If you experience peeling or blistering, you’ll need to remove the failing paint, sand the surface, and start again with a good primer. Make sure the surface is clean and dry before applying new paint.Addressing these issues early can prevent further damage. If the damage is extensive, you may need to strip the paint completely and start over. Always follow the manufacturer’s instructions for paint application to avoid these problems.
Fading, Cracking, and Other Issues
Besides peeling and blistering, other issues can happen. Fading, cracking, and other types of wear and tear can impact the look and durability of your paint job. Knowing the causes of these issues and how to resolve them will help you. Understanding these problems will help your fence last longer and look better.
- Causes of Fading: Fading is often caused by prolonged exposure to sunlight. The specific color of the paint and the quality of the paint can also impact fading. Some colors are more prone to fading than others.When selecting your paint, choose a high-quality product with UV protection. Consider using a darker color, which often lasts longer. Keep in mind that all paints will fade over time, particularly when exposed to sunlight.
- Causes of Cracking: Cracking is usually a result of the paint drying too quickly, applying too thick of a coat, or using a paint that’s not flexible enough for the wood. The wood’s natural expansion and contraction can also cause cracks.Use paint designed for exterior use, and make sure to apply the coats thinly. Use flexible paints, which can withstand expansion and contraction better than rigid ones. Avoid applying paint in direct sunlight, and allow each coat to dry completely.
- Solutions: For fading, you can repaint the fence with a color with UV protection. For cracking, you might have to remove the old paint, sand the surface, and repaint with a more flexible paint.Take care of these problems as soon as you find them. Addressing small cracks early can prevent them from becoming bigger problems. If the damage is extensive, you may need professional help to restore your fence.
Real-Life Examples and Scenarios
Seeing real-life examples can help you better understand what to expect. These examples will illustrate how proper preparation, paint selection, and application techniques result in great results. Consider the following case studies and scenarios when thinking about painting your cedar fence.
- The Successful Refurbishment: A homeowner meticulously cleaned and prepped their cedar fence, including filling cracks and sanding the surface. They chose a high-quality exterior latex paint with UV protection. After two coats, their fence looked brand new and has lasted for five years without signs of peeling or fading. They are glad they spent the time preparing the fence correctly.This shows the value of the pre-paint preparation. The homeowner invested the time and effort into preparing the surface. That hard work led to a durable and beautiful finish. Their meticulous prep work was the key to their success.
- The Color Experiment: A homeowner tested several paint colors on a small area of their fence before committing to a final color choice. After seeing how the colors looked at different times of the day and in various weather conditions, they selected a color they loved. This approach meant they were happy with the final color choice.This highlights the importance of testing paint colors before you commit to painting the entire fence. By experimenting with color choices, the homeowner avoided potential disappointment and achieved a result they love. The homeowner was happy with the final color because they had tested several options first.
- The Importance of a Primer: A homeowner used a primer on their cedar fence before applying the paint. This helped the paint adhere properly and prevent peeling. Without the primer, the paint would likely have peeled or blistered.Priming is critical for the success of your paint project. The use of a primer ensured the paint adhered to the cedar wood. Priming creates a better finish and stops potential problems, like peeling or blistering.

Frequently Asked Questions
Question: Do I need to prime my cedar fence before painting?
Answer: Yes, priming is usually recommended. It helps the paint adhere to the wood, blocks stains, and provides a uniform surface for the paint to stick to.
Question: Can I paint my cedar fence in any weather?
Answer: No, you should avoid painting in direct sunlight or during wet or humid conditions. The ideal temperature is between 50 and 85 degrees Fahrenheit with low humidity.
Question: What’s the best type of paint for a cedar fence?
Answer: Exterior latex paint is a popular and effective choice because it is flexible and water-resistant. Oil-based paint is also an option, providing great durability but with a longer drying time.
Question: How often should I repaint my cedar fence?
Answer: This depends on factors like the type of paint, the weather, and sun exposure. You may need to repaint every 5-10 years.
Question: How do I clean my cedar fence before painting?
Answer: Start by removing any loose debris. Then, use a wood cleaner specifically designed for outdoor surfaces. You can use a pressure washer or garden hose to rinse the cleaner. Allow it to dry completely.
Final Thoughts
So, Can You Paint a Cedar Fence the Right Way? Absolutely! With the right knowledge and some effort, you can transform your cedar fence from worn to wonderful. Remember, prepping the surface is the most important part; this step guarantees the success of the project. Choosing the correct type of paint, from exterior latex to oil-based options, will help. Proper application techniques, like applying two coats, are key to a beautiful and lasting finish.
While some challenges, like peeling or fading, can come up, knowing how to solve these problems will ensure your success. So, explore and gather supplies. With a little effort, your fence will look amazing!