Can You Paint Over Gel Stain? Genius Tips for Best Results
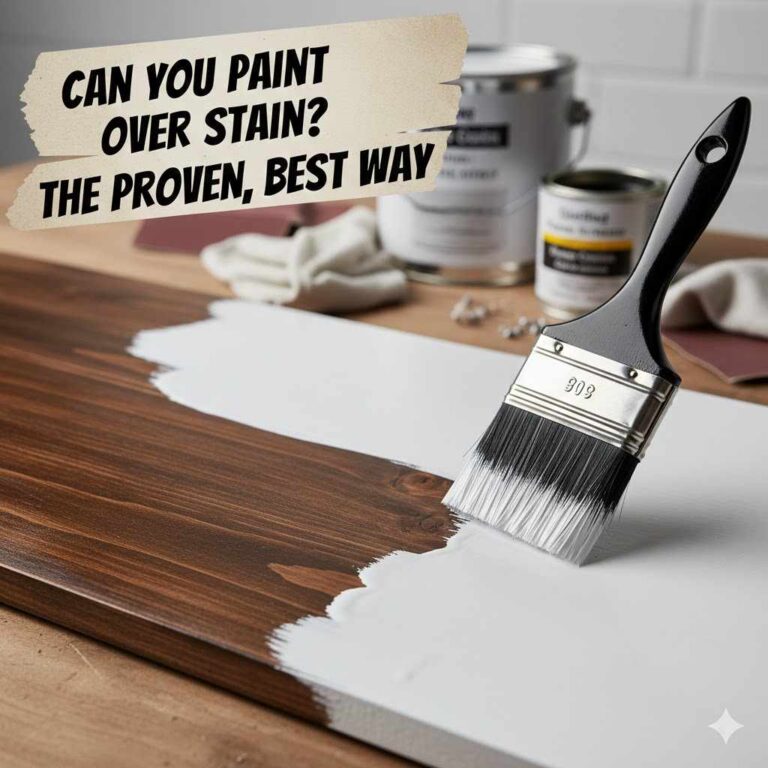
Yes, you can absolutely paint over gel stain! The key to a beautiful, long-lasting finish is proper surface preparation. You must clean the surface well, lightly sand it to create grip, and then use a high-quality bonding primer before applying your paint. This simple process ensures the paint will stick perfectly.
Have you ever looked at a piece of furniture with a dark, dated gel stain finish and wished you could just give it a fresh coat of paint? You’re not alone! Many people wonder if it’s possible to paint over that thick, slick surface. It feels like the paint would just slide right off.
Well, I have some great news for you. Not only can you paint over gel stain, but it’s also one of the easier refinishing projects you can tackle. You don’t need to strip the whole piece down to bare wood. With the right steps and a little patience, you can completely transform your piece. In this guide, I’ll walk you through everything you need to know, step-by-step, to get a flawless, professional-looking paint job.
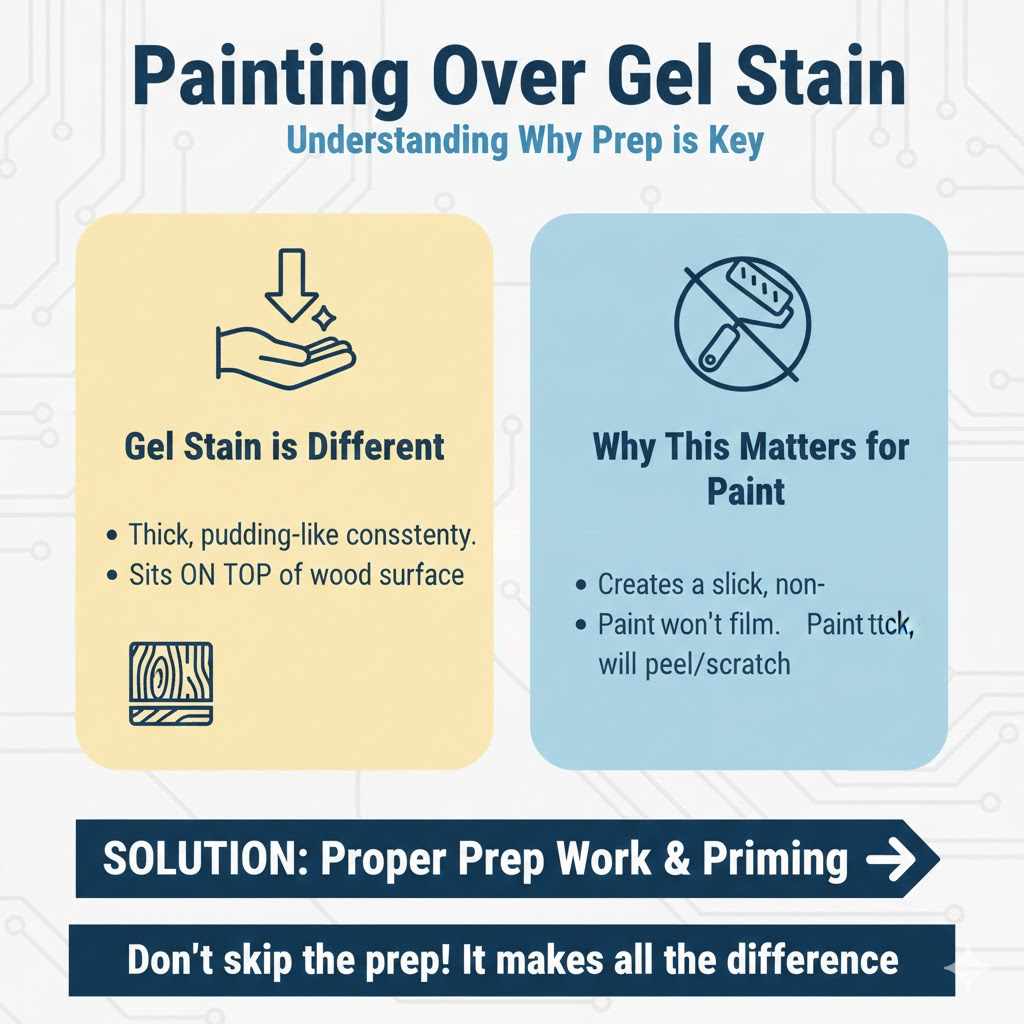
Understanding Gel Stain: Why It’s Different
Before we grab our brushes, it’s helpful to know what we’re working with. Gel stain isn’t like the traditional liquid stains you might be used to. Those liquid stains are thin and soak deep into the wood fibers, coloring them from within.
Gel stain, on the other hand, is thick, like pudding. It’s designed to sit on top of the wood’s surface. Think of it more like a translucent layer of color that coats the wood rather than dyeing it. This is great for woods like pine that can get blotchy with liquid stains, and it’s also why you can use it over previously finished surfaces.
Why Does This Matter for Painting?
Because gel stain creates a film on the surface, you aren’t really painting wood—you’re painting over a very slick, non-porous coating. If you just slapped paint directly onto the gel stain, it would have nothing to hold onto. It would likely peel, scratch, or chip off very easily.
The secret, then, is to prepare that slick surface so the new paint has something to grab. That’s where our prep work comes in, and trust me, it’s the most important part of the entire project.
The Perfect Project: When to Paint Over Gel Stain
Painting over a gel-stained piece is a fantastic solution in many situations. It’s a great choice if you:
- Want to update an old or out-of-style piece of furniture (like a 90s-era honey oak cabinet).
- Need to cover a damaged or uneven gel stain finish that would be hard to repair.
- Are changing your home decor and the dark wood color no longer matches.
- Prefer the look of a solid, opaque paint color over a wood grain finish.
- Have a piece of thrifted furniture with a good shape but a finish you don’t love.
Your Game Plan: Tools and Materials for Success
Getting your supplies ready before you start makes the whole process smooth and stress-free. There’s nothing worse than having to stop mid-project for a run to the hardware store. Here’s what you’ll need.
Essential Supply Checklist
- Cleaning Supplies: A good degreaser like TSP substitute or denatured alcohol, plus some clean cloths or rags.
- Sandpaper: Fine-grit (220-grit is perfect) sandpaper or a sanding sponge.
- Tack Cloth: For removing every last bit of sanding dust.
- Painter’s Tape: To protect any areas you don’t want to paint.
- Safety Gear: Gloves, dust mask, and safety glasses. Always protect yourself! Proper ventilation is also key, as discussed in guidelines from the Occupational Safety and Health Administration (OSHA).
- High-Quality Bonding Primer: This is non-negotiable! More on this below.
- Your Chosen Paint: A durable cabinet and furniture paint or a high-quality acrylic latex enamel works best.
- Applicators: A good quality paintbrush, a small foam roller, or a paint sprayer depending on your project and preference.
- Drop Cloths: To protect your floors and workspace.
Choosing the Right Primer: Your Secret Weapon
If you take one thing away from this guide, let it be this: you must use a bonding primer. A regular drywall primer or a “paint-and-primer-in-one” product will not work well here. They aren’t designed to stick to glossy, non-porous surfaces like gel stain.
A bonding primer is specially formulated with powerful adhesives that create a super-strong connection between the slick surface and your new paint. It’s the bridge that ensures your paint job will last.
Here’s a quick table to help you choose the right one for your project.
| Primer Type | Best For | Pros | Cons |
|---|---|---|---|
| Shellac-Based Bonding Primer (e.g., Zinsser B-I-N) | Blocking tough stains, knots, and odors. Excellent adhesion to glossy surfaces. | Dries very fast, amazing at blocking bleed-through, sticks to anything. | Strong fumes (requires excellent ventilation), cleanup with denatured alcohol. |
| Water-Based Bonding Primer (e.g., KILZ Adhesion, Insl-X Stix) | Interior projects, easier cleanup, and low odor. Great for most furniture and cabinets. | Low odor, easy soap-and-water cleanup, dries relatively quickly. | May not block heavy stains as effectively as shellac-based primers. |
For most beginner projects like cabinets or a dresser, a high-quality water-based bonding primer is the perfect choice. It’s effective and much more user-friendly.
Step-by-Step Guide: How to Paint Over Gel Stain Flawlessly
Ready to transform your piece? Let’s break it down into simple, manageable steps. Follow these carefully, and you’ll get amazing results.
Step 1: Prep Your Workspace
Before you even touch your furniture, get your area ready. Lay down drop cloths to protect your floor. Make sure you have good lighting and open a window for ventilation. If you’re working on something with hardware, like cabinets or a dresser, remove all the knobs, handles, and hinges now. Put them in a labeled bag so you don’t lose them!Step 2: Clean the Surface ThoroughlyThis step is critical. Over the years, furniture collects dust, grease, and grime, even if it looks clean. Paint and primer will not stick to a dirty surface. Use a cloth dampened with a TSP substitute or denatured alcohol to wipe down the entire piece. Focus on high-touch areas like drawer fronts and cabinet doors. Let it dry completely.Step 3: The “Scuff Sand”Now it’s time to sand, but don’t panic! You are not trying to remove the gel stain. The goal is simply to “scuff up” the glossy finish. This light sanding creates thousands of microscopic scratches that give the primer something to grip onto. It’s called creating a “mechanical tooth.”Take your 220-grit sandpaper or sanding sponge and lightly rub it over every surface you plan to paint. Move in the direction of the wood grain if you can see it. You’ll know you’re done when the original sheen is gone and the surface looks dull and matte. It should feel slightly rough to the touch.Step 4: Clean Away the DustSanding creates a lot of fine dust. This dust is the enemy of a smooth paint finish. First, use a vacuum with a brush attachment to remove the bulk of it. Then, follow up with a tack cloth. A tack cloth is a special sticky cloth that picks up every last particle of dust, leaving you with a perfectly clean surface ready for primer.Step 5: Apply a Thin Coat of Bonding PrimerStir your bonding primer thoroughly. Using a high-quality brush or a small foam roller, apply a thin, even coat of primer to the entire piece. Don’t try to get full coverage in one go. A thin coat is much more effective. Thick coats of primer can obscure details and take forever to dry properly. Let the primer dry according to the manufacturer’s instructions on the can.Step 6: Lightly Sand the Primer (Optional but Recommended)For an extra-smooth, professional finish, give the dried primer a very light sanding with a super-fine grit sandpaper (320-grit or higher). This will knock down any small bumps or brush marks, giving your paint a perfect canvas. After sanding, be sure to wipe away the dust with a tack cloth again.Step 7: Apply Your First Coat of PaintIt’s finally time for color! Using a clean, high-quality brush or roller, apply your first coat of paint. Just like with the primer, thin, even coats are best. Avoid the temptation to go back and forth over the same spot too many times, as this can create brush marks. Apply the paint and move on. Let this coat dry completely.Step 8: Apply the Second CoatOnce the first coat is fully dry (check the paint can for recommended recoat times), apply your second coat. This coat will deepen the color and provide a uniform, solid finish. Two thin coats are always better and more durable than one thick coatStep 9: Let It Cure, Not Just Dry!This is the final test of your patience. Your painted piece might feel dry to the touch in a few hours, but it isn’t fully hardened or “cured.” Curing is the chemical process where the paint becomes its most durable. This can take anywhere from a few days to a few weeks depending on the paint, temperature, and humidity.Be gentle with your newly painted piece during this time. Avoid placing heavy objects on it or sliding things across the surface. Once it’s fully cured, you’ll have a rock-hard, beautiful finish that will last for years.TermWhat It MeansTypical TimeframeDry to the TouchThe surface is no longer tacky. You can lightly handle the piece.1-4 hoursReady to RecoatThe paint is stable enough to have another coat applied over it.4-24 hoursFully CuredThe paint has reached its maximum hardness and durability.7-30 day
Common Mistakes to Avoid for a Perfect Finish
Even seasoned DIYers can make mistakes. Here are a few common pitfalls to watch out for when painting over gel stain:
- Skipping the Cleaning: If you paint over grease or furniture polish, the primer will fail, and your paint will peel. Cleaning is your foundation for success.
- Sanding Too Much (or Not at All): Remember, you only need to dull the finish, not remove it. But skipping the scuff sand entirely means your primer will have nothing to grip.
- Using the Wrong Primer: A standard wall primer just won’t stick. You absolutely need a “bonding” primer designed for slick surfaces.
- Rushing Between Coats: Applying a second coat before the first one is dry can lead to a gummy, uneven mess that never cures properly. Patience is your best tool.
- Applying Thick Coats: Thick coats look messy, hide details, and are more prone to chipping and dripping. Always opt for two thin coats instead of one thick one.
Frequently Asked Questions (FAQ)
1. Do I have to strip the gel stain off completely before painting?
No, and that’s the best part! You do not need to strip the gel stain. You only need to clean and lightly “scuff sand” the surface to remove the gloss and give the primer something to grip. This saves a massive amount of time and effort.
2. What’s the best type of paint to use over gel stain?
For high-traffic items like kitchen cabinets or tabletops, an alkyd urethane enamel is extremely durable. For furniture like dressers or bookshelves, a high-quality acrylic latex enamel (often labeled as “cabinet and trim” paint) is a great, easy-to-use option.
3. Can I use chalk paint over gel stain?
Yes, you can use chalk paint. Many people love it because it’s known for its strong adhesion. However, for the best and most durable results, I still strongly recommend you follow the steps of cleaning, scuff sanding, and using a bonding primer first. This ensures the chalk paint finish will last much longer without chipping.
4. My gel stain is new. How long should I wait before painting over it?
If the gel stain was just applied, you must wait for it to fully cure before you begin the painting process. This is different from being dry to the touch. Check the directions on the gel stain can, but this typically takes anywhere from 72 hours to a full week. Painting over uncured stain can cause adhesion problems.
5. Will the dark color of the gel stain show through my new paint?
No, not if you use a good primer! A quality bonding primer, especially a shellac-based one, is designed for stain-blocking. It creates an opaque, neutral base coat that will prevent the dark gel stain color from bleeding through your new, lighter paint color.
6. Can I just use a “paint and primer in one” product?
While those products are great for painting over drywall, they are not recommended for this specific project. A “paint and primer in one” does not contain the powerful bonding agents needed to adhere to a slick surface like gel stain. For a job that lasts, always use a separate, dedicated bonding primer.
Conclusion: Your Beautiful New Finish Awaits!
So, can you paint over gel stain? Absolutely. As you can see, the process isn’t about brute force or harsh chemical strippers. It’s about working smart. By focusing on three key steps—thorough cleaning, a light scuff sand, and the all-important bonding primer—you are setting yourself up for a beautiful, durable, and professional-looking finish.
Painting is one of the most rewarding ways to breathe new life into old furniture. It allows you to customize your space and save a cherished piece from the curb. Don’t be intimidated by that glossy surface. Grab your supplies, follow these steps, and get ready to be proud of your work. You’ve got this!
Happy painting!