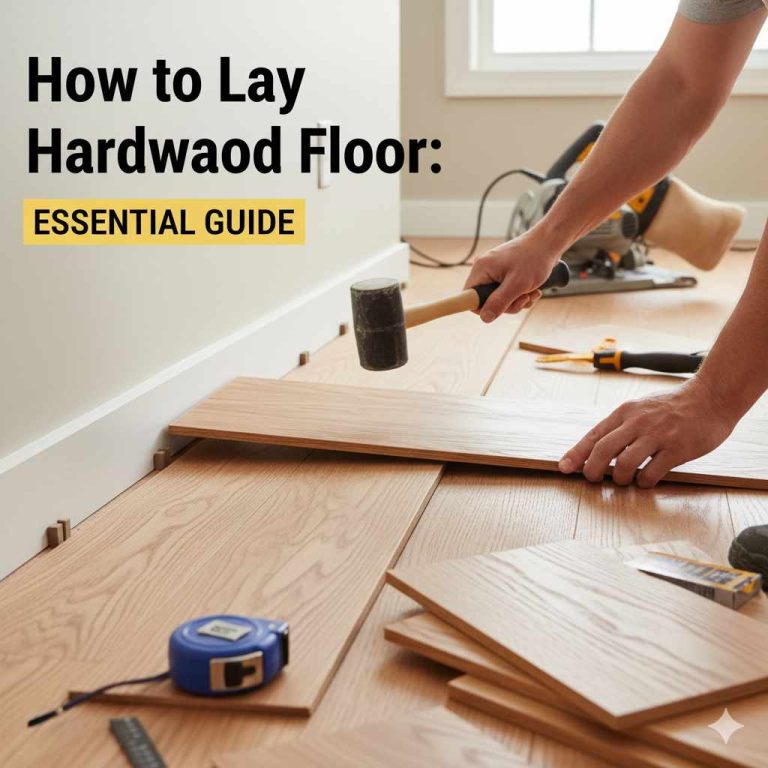
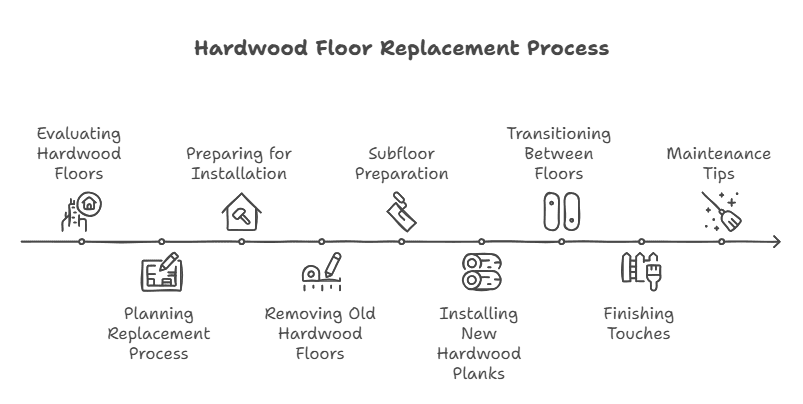
Change Hardwood Floor: Quick Guide to Elegant Interiors
To change hardwood floors, follow these steps: 1. Remove the old flooring by cutting the boards and prying them up.
2. Install the new hardwood flooring by placing and securing the boards in the desired pattern. Changing hardwood floors involves removing the existing flooring and replacing it with new hardwood boards. This process can be done as a DIY project with the right tools and knowledge.
Start by removing the old flooring, cutting the boards, and prying them up. Then, install the new hardwood flooring by placing and securing the boards in the desired pattern. It’s important to properly prepare the subfloor and ensure a smooth installation for a beautiful and durable result.
Evaluating Your Hardwood Floors
Consider evaluating your hardwood floors if you’re considering a change. Assess the condition of the flooring to determine whether refinishing or replacing is the best option for a fresh look.
Identifying Signs Of Damage
When it comes to evaluating your hardwood floors, it’s important to start by identifying any signs of damage. This will help you determine whether refinishing or replacement is the best course of action. Here are some key indicators to look out for:
- Scratches and gouges: Over time, hardwood floors can accumulate scratches and gouges from regular wear and tear. While minor scratches can often be repaired through refinishing, deep gouges may require replacement.
- Warping and cupping: If you notice that your hardwood floors are starting to warp or cup, it could indicate water damage or humidity issues. In such cases, replacement might be necessary to prevent further damage.
- Stains and discoloration: Stubborn stains or discoloration that cannot be removed through refinishing may require replacement of the affected boards.
- Loose or squeaky boards: If you have boards that are loose or squeaky, it could be a sign of underlying structural issues. In such cases, replacement may be the best solution.
Refinishing Vs. Replacement: Making The Decision
Once you have evaluated the condition of your hardwood floors, you can make an informed decision between refinishing and replacement. Here are some factors to consider:
- Extent of damage: If the damage is limited to surface imperfections like scratches and minor stains, refinishing can often restore the floor’s beauty. However, if the damage is extensive, such as deep gouges or water damage, replacement may be necessary.
- Cost considerations: Refinishing is generally more cost-effective compared to replacement. However, if the damage is severe or if you desire a completely new look, the cost of replacement may be justified.
- Time and disruption: Refinishing hardwood floors is a quicker process compared to replacement, which can involve removing and installing new boards. If time is a constraint or if you want to minimize disruption, refinishing might be the better option.
- Long-term goals: Consider your long-term goals for your hardwood floors. If you plan to stay in your home for a long time and want to enjoy the beauty of new flooring, replacement may be the best choice. However, if you are looking for a more budget-friendly solution or plan to sell your home in the near future, refinishing could be a suitable option.
In conclusion, evaluating your hardwood floors is crucial in determining whether refinishing or replacement is the right decision. By identifying signs of damage and considering factors such as extent of damage, cost, time, and long-term goals, you can make an informed choice that aligns with your needs and preferences.
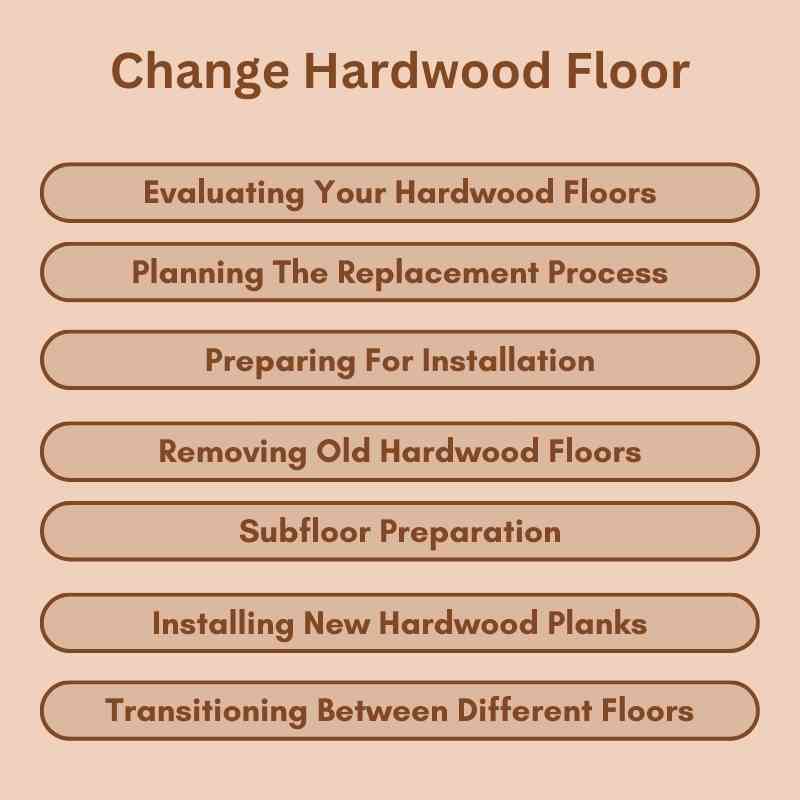
Planning The Replacement Process
When considering replacing your hardwood floor, it’s essential to plan the process meticulously to ensure a successful outcome. This involves acquiring the necessary tools and materials, measuring and ordering the new hardwood, and preparing the space for installation. Let’s delve into the details of planning the replacement process step by step.
Tools And Materials Required
Before commencing the replacement of your hardwood floor, it’s crucial to gather the essential tools and materials to facilitate a smooth and efficient process. Here’s a list of the items you’ll need:
- Safety goggles
- Dust mask
- Gloves
- Measuring tape
- Chalk line
- Hammer
- Pry bar
- Table saw
- Nail gun
- Hardwood flooring adhesive
- Moisture barrier
- Underlayment
- Hardwood flooring planks
Measuring And Ordering Your New Hardwood
Precise measurements are vital when ordering new hardwood for replacement. Start by measuring the length and width of the room, factoring in any alcoves or irregularities. Once you have the measurements, it’s time to calculate the square footage required for the new hardwood.
When ordering the hardwood, consider purchasing approximately 10-15% extra to account for any mistakes or imperfections. This surplus ensures that you have ample material to complete the project without delays.
Preparing For Installation
Preparing for the installation of a new hardwood floor requires careful planning and preparation. Before starting the installation process, it is important to remove any old flooring and ensure that the subfloor is clean, level, and free of any debris that could affect the installation.
Additionally, it is important to measure the space and calculate the amount of flooring needed to avoid any delays or complications during the installation process.
Clearing The Room
Before beginning the installation process, it’s crucial to clear the room of all furniture, area rugs, and any other items that may obstruct the installation of the new hardwood floor. This ensures a clean and open space for the installation team to work efficiently and effectively.
Removing The Baseboards
Next, it’s essential to remove the baseboards along the walls where the new hardwood flooring will be installed. Carefully detach the baseboards using a pry bar or putty knife to avoid damaging them. Label each baseboard section to ensure they can be reinstalled correctly once the flooring is in place.
Removing Old Hardwood Floors
When it comes to changing hardwood floors, the first step is removing the old planks. This process requires careful handling and the right tools to ensure a smooth transition. In this article, we will guide you through the process of cutting and prying up old planks, as well as handling stubborn nails and adhesive.
Cutting And Prying Up Old Planks
Before you can install new hardwood floors, you need to remove the old ones. Start by cutting the old planks into manageable sections using a circular saw. This will make it easier to pry them up. Remember to wear safety goggles and gloves during this process.
Once the planks are cut, use a pry bar to gently lift them up from the subfloor. Start at one end and work your way across the room, applying even pressure to avoid damaging the surrounding area. If the planks are nailed down, be careful not to splinter the wood as you pry them up.
Handling Stubborn Nails And Adhesive
After removing the old planks, you may encounter stubborn nails and adhesive residue on the subfloor. To remove nails, use a claw hammer or a pry bar to carefully pull them out. If the nails are difficult to remove, you can use a pair of pliers to grip and twist them out.
As for adhesive residue, there are various methods you can use depending on the type of adhesive. For water-based adhesives, you can use warm water and a scraper to loosen and remove the residue. For solvent-based adhesives, you may need to use a solvent or adhesive remover to dissolve the residue.
Remember to thoroughly clean the subfloor after removing the old hardwood floors to ensure a smooth surface for the installation of the new ones.
By following these steps and taking the necessary precautions, you can successfully remove old hardwood floors and prepare the space for the installation of new ones. Stay tuned for our next article, where we will guide you through the process of installing new hardwood floors.
Subfloor Preparation
Preparing the subfloor is essential when changing hardwood floors. It involves proper sanding, leveling, and cleaning to ensure a smooth and stable surface for the new flooring installation. By following the necessary steps, you can achieve a flawless and long-lasting result.
Inspecting The Subfloor
Before installing a new hardwood floor, it is important to inspect the subfloor. The subfloor must be dry, clean, and level to ensure the new hardwood floor is installed correctly. Inspect the subfloor for any signs of damage, such as cracks, dips, or unevenness. If the subfloor is not in good condition, it will need to be repaired or replaced before installing the new hardwood floor.
Repairing And Leveling As Needed
If the subfloor has any damage, it must be repaired and leveled as needed. Start by removing any damaged or loose sections of the subfloor. Then, repair any cracks or dips using a patching compound. Once the compound is dry, sand it down to create a smooth surface. If the subfloor is not level, use a leveling compound to even it out.
Installing A Moisture Barrier
Before installing the new hardwood floor, it is important to install a moisture barrier. This will help prevent moisture from seeping into the subfloor and causing damage. There are several different types of moisture barriers available, including tar paper, roofing felt, and plastic sheeting. Choose the one that best suits your needs and install it according to the manufacturer’s instructions.
Proper subfloor preparation is essential for a successful hardwood floor installation. Inspecting the subfloor, repairing and leveling as needed, and installing a moisture barrier will ensure that your new hardwood floor looks great and lasts for years to come.
Installing New Hardwood Planks
Installing new hardwood planks is a great way to change the look of your hardwood floor. With proper prep work and the right tools, you can easily replace damaged or outdated planks and give your floor a fresh, updated appearance.
Refinishing is an option for superficial damage, but severe damage may require plank replacement. Transition strips can be used to seamlessly connect different hardwood floors.
Installing new hardwood planks can give your home a fresh and modern look. It is a great way to upgrade your flooring without the need for a complete overhaul. However, installing new hardwood planks can be a challenging task, especially if you are doing it for the first time. In this post, we will guide you through the process of installing new hardwood planks, focusing on laying the first row and staggering seams for stability.
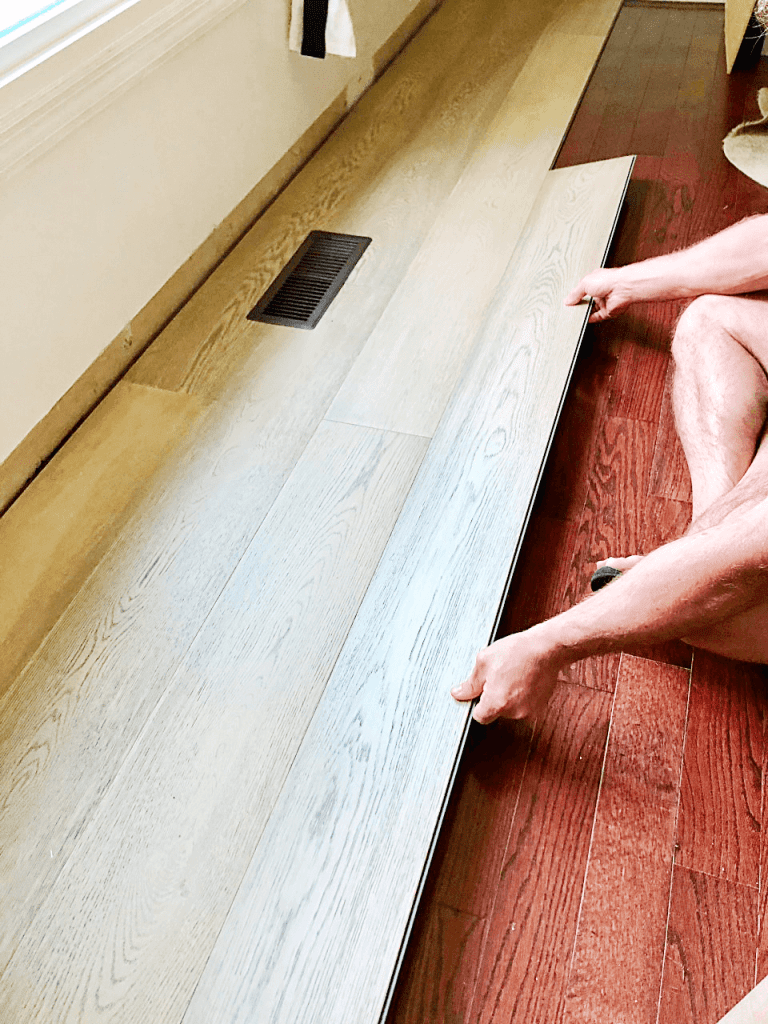
Laying The First Row
The first row of hardwood planks is the most important, as it sets the foundation for the rest of the flooring. Before laying the first row, you need to ensure that the subfloor is clean, level, and dry. If there are any bumps or dips, use a self-leveling compound to even out the surface.
Once the subfloor is ready, lay the first row of planks against the longest straight wall in the room, leaving a 1/2-inch gap between the wall and the planks for expansion. Use a flooring nailer to secure the planks to the subfloor, making sure that they are tightly butted together.
Staggering Seams For Stability
When installing hardwood planks, it is important to stagger the seams for stability. Staggering the seams means that the end joints of adjacent planks are not in a straight line, but rather offset from each other. This helps to distribute weight and prevent the planks from shifting or separating over time.
To stagger the seams, cut the first plank of the second row to a random length, ensuring that it is at least 6 inches shorter than the first plank of the first row. Use the remaining piece of the cut plank to start the third row, and continue this pattern throughout the installation.
In conclusion, installing new hardwood planks can be a challenging but rewarding task. By following these tips for laying the first row and staggering seams for stability, you can achieve a beautiful and durable hardwood floor that will last for years to come.
Transitioning Between Different Floors
Transitioning between different floors can be a challenge, especially when changing hardwood floors. There are several options to consider, such as using T-molding, transition strips, thin-metal transitions, buffer zones, square-nose or angled-nose molding, or flush stair nose molding. It’s important to choose the best solution for a seamless and aesthetic transition.
When it comes to changing hardwood floors, one important aspect to consider is transitioning between different types of flooring. Whether you’re replacing an old hardwood floor or transitioning between hardwood and another type of flooring material, choosing the right transition molding and using proper installation techniques can help you achieve a seamless and visually appealing result.
Choosing The Right Transition Molding
Transition molding plays a crucial role in creating a smooth and aesthetically pleasing transition between different floors. It not only covers the gap between two types of flooring but also provides a finished look to the overall flooring design. When selecting transition molding, consider factors such as the height difference between the floors, the type of flooring materials being transitioned, and the style that complements your overall interior design.
There are various types of transition molding available, including T-molding, reducer molding, threshold molding, and stair nosing. T-molding is commonly used for transitioning between two floors of equal height, while reducer molding is ideal for transitioning between different height floors, such as hardwood to carpet or vinyl. Threshold molding is commonly used for transitioning between hardwood and tile, and stair nosing is used for transitioning between hardwood and stairs.
Installation Techniques For A Seamless Look
Proper installation techniques are crucial for achieving a seamless transition between different floors. Here are some techniques to consider:
- Accurate measurement: Measure the width and height of the transition area accurately to ensure the molding fits properly.
- Prepare the subfloor: Ensure the subfloor is clean, level, and free from any debris or imperfections that could affect the installation.
- Use adhesive or nails: Depending on the type of transition molding and flooring materials, use appropriate adhesive or nails to secure the molding in place.
- Seal the edges: To create a seamless look, use a color-matched sealant to fill any gaps or spaces between the molding and the flooring.
- Finishing touches: Once the molding is installed, ensure it is properly sanded, stained, and finished to match the surrounding flooring.
By following these installation techniques, you can achieve a seamless transition between different types of flooring, enhancing the overall look and functionality of your space.
Finishing Touches
When it comes to changing hardwood floors, the finishing touches are crucial for achieving a polished and professional look. The final steps of the process involve sanding and refinishing the floors, as well as reinstalling baseboards and trim to complete the transformation. Let’s delve into these essential finishing touches.
Sanding And Refinishing
Sanding and refinishing the hardwood floors is a critical step in the process of changing them. This involves removing the existing finish and any imperfections on the surface to prepare it for the application of the new finish. The process typically includes sanding the floors with progressively finer grits of sandpaper to achieve a smooth and even surface.
Reinstalling Baseboards And Trim
Once the hardwood floors have been refinished, the next step is to reinstall the baseboards and trim. This involves carefully securing the baseboards along the perimeter of the room to conceal the edges of the flooring and create a seamless transition between the walls and the new floors. Additionally, reinstalling the trim around doorways and other architectural features adds the final touch to the newly transformed space.
Maintenance Tips For Your New Floor
Congratulations on your new hardwood floor! To ensure its longevity and keep it looking beautiful, it’s crucial to follow proper maintenance practices. By implementing the right care routine, you can protect your investment and enjoy the natural elegance of hardwood for years to come.
Regular Cleaning Practices
Regular cleaning is essential for maintaining the pristine appearance of your hardwood floor. Here are some recommended cleaning practices:
- Vacuum or sweep the floor regularly to remove dirt, dust, and debris that can cause scratches.
- Use a damp mop with a hardwood floor cleaner to gently clean the surface, ensuring the mop is not overly wet to prevent water damage.
- Avoid harsh cleaners and abrasive tools that can scratch or damage the floor’s finish.
Protecting Your Floor From Damage
Preventing damage is crucial for preserving the beauty and integrity of your hardwood floor. Here are some tips to protect your floor:
- Place doormats at entryways to trap dirt and prevent it from being tracked onto the floor.
- Use furniture pads under table legs, chairs, and other heavy furniture to prevent scratches and dents.
- Avoid high heels and pets’ sharp claws that can cause scratches and gouges on the floor’s surface.
DIY Vs. Professional Installation
When deciding between DIY and professional installation for changing hardwood floors, consider the complexity of the task. DIY may be suitable for simple replacements, but professional installation is recommended for intricate patterns and large areas. It’s important to weigh the cost savings against the potential for errors.
Assessing Skill Levels For DIY
Installing hardwood floors can be a rewarding project for those who enjoy hands-on work and have some experience with DIY projects. However, it’s crucial to assess your skill level before embarking on this task. Here are a few factors to consider:
- Your previous experience with home improvement projects
- Your comfort level with using power tools
- Your ability to follow detailed instructions
If you have little to no experience with DIY projects or lack confidence in your skills, it may be best to leave hardwood floor installation to the professionals. Hiring an expert ensures a high-quality installation and eliminates the risk of costly mistakes.
When To Hire A Professional
While DIY installation can be a cost-effective option, there are instances where hiring a professional becomes necessary. Consider the following scenarios:
- If you have limited time or availability to dedicate to the project
- If you lack the necessary tools and equipment
- If your project requires extensive subfloor preparation or repairs
- If you want to ensure a flawless and professional-looking finish
Professional installers have the expertise, experience, and specialized tools to handle any challenges that may arise during the installation process. They can also provide valuable advice on choosing the right hardwood flooring and offer warranties for their work, giving you peace of mind.

Frequently Asked Questions
Is It Worth Replacing Hardwood Floors?
If the damage to your hardwood floors is mostly superficial, refinishing is usually the best choice. However, if the damage is severe and includes rot or water damage, replacing the damaged planks may be necessary. It is worth replacing hardwood floors if the condition is beyond repair.
Refinishing or replacing depends on the extent of the damage.
Can You Replace Hardwood Floors Yourself?
Yes, you can replace hardwood floors yourself with proper knowledge and tools for successful installation.
How Do You Transition From One Hardwood Floor To Another?
Transitioning from one hardwood floor to another can be done using T-molding, transition strips, thin-metal transitions, buffer zones, or square-nose/angled-nose moldings. These solutions create seamless and aesthetically pleasing transitions between different hardwood floors. Proper installation ensures a smooth and professional-looking transition.
How Do You Update Old Hardwood Floors?
To update old hardwood floors, follow these steps:
1. Sand the floor’s main area, edges, and corners.
2. Clean the floor thoroughly.
3. Change the sandpaper and sand again.
4. Buff and clean the floor.
5. Apply a stain and topcoat to the floor.
6. Lightly sand the floor. By following these instructions, you can give your old hardwood floors a fresh and updated look.
Conclusion
Replacing hardwood floors can be a daunting task, but it is worth it to have a beautiful and updated look in your home. Whether you choose to DIY or hire a professional, it’s important to properly remove and install the new flooring.
Remember to consider the condition of the existing floors and whether refinishing or replacement is the best option. With the right tools and knowledge, you can successfully replace your hardwood floors and enjoy the fresh new look they bring to your space.