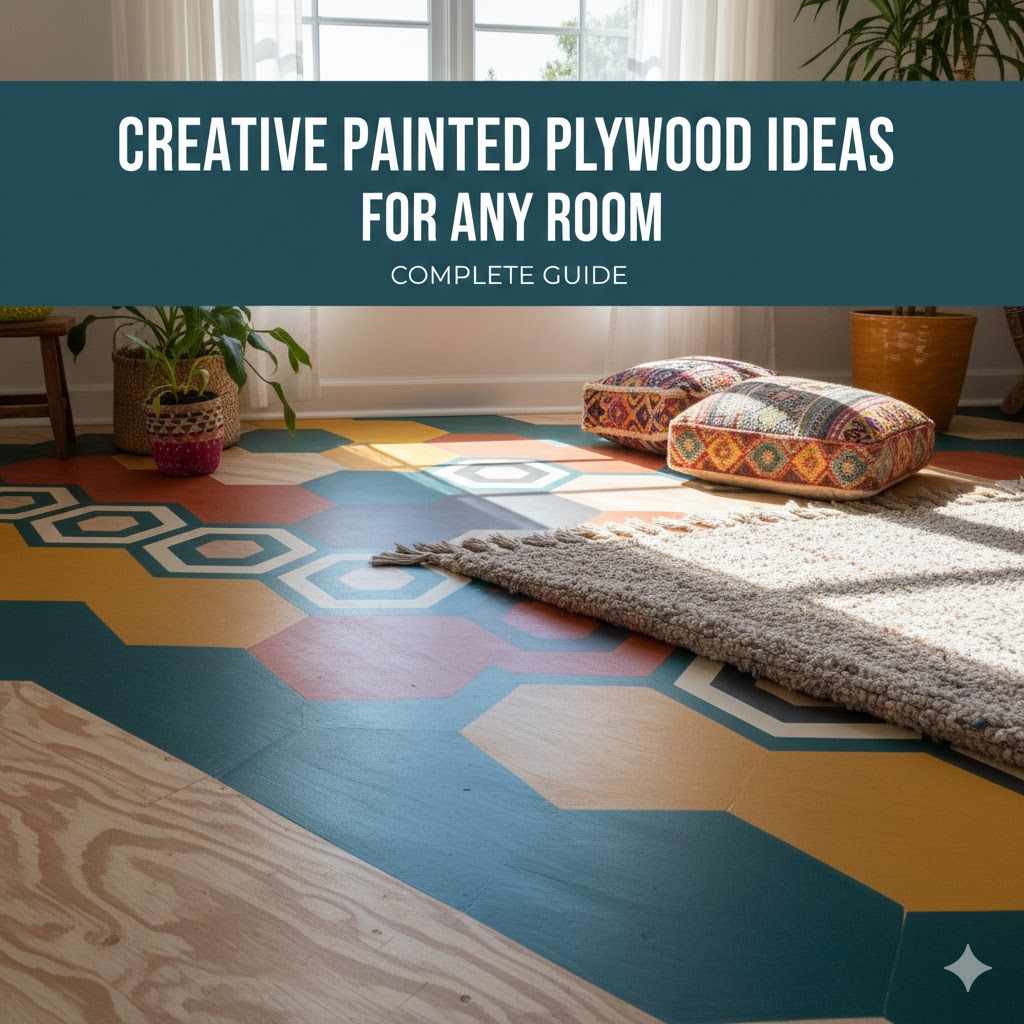
Creative Painted Plywood Floor Ideas For Any Room
Thinking about painting your plywood floors can feel a little tricky, especially if you’re just starting out. You might worry about how it will turn out or if it’s too hard to do. But don’t fret!
It’s totally doable with some simple steps. We’ll show you how to get amazing results, turning those plain floors into something special. Get ready to see how easy it is to bring your vision to life with Creative Painted Plywood Floor Ideas for Any Room.
Transforming Plywood Floors With Paint
Painting plywood floors offers a fantastic way to refresh any space without the cost of new flooring. It allows for incredible personalization, letting you match your floor to your decor or create a bold statement. This method is budget-friendly and surprisingly accessible for DIYers.
We’ll cover everything you need to know to get a beautiful, durable finish that looks like you hired a pro.
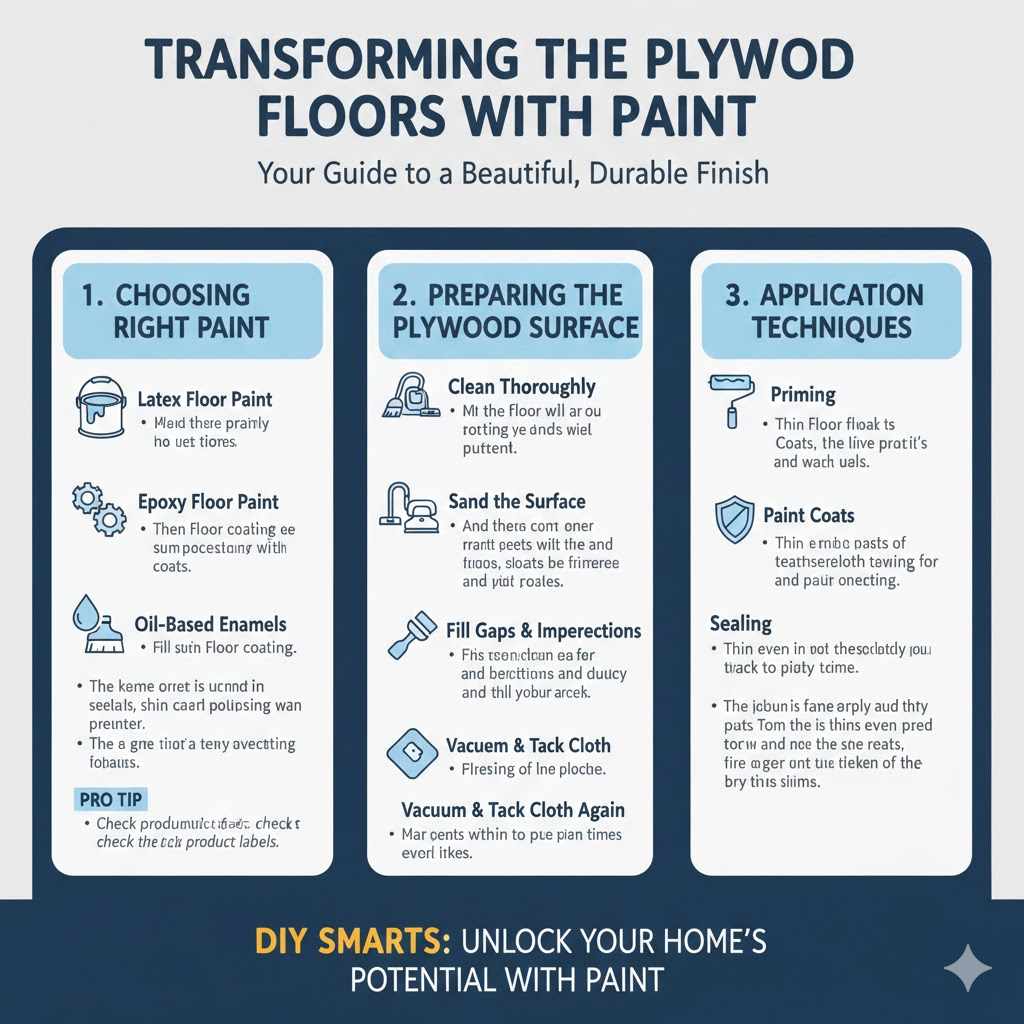
Choosing the Right Paint
The type of paint you select is super important for a long-lasting finish. You want something that can handle foot traffic and wear. For floors, durability is key.
Think about paints specifically designed for floors or high-traffic areas.
- Latex Floor Paint: This is a popular choice because it’s water-based, meaning easy cleanup. It’s also flexible and can handle some movement in the wood. It dries relatively fast, so you can get back to using your room sooner. Many brands offer this in various sheens, from matte to glossy.
- Epoxy Floor Coatings: For maximum durability, epoxy is hard to beat. It forms a tough, protective layer that is highly resistant to scratches, chemicals, and moisture. This is a great option for garages or high-traffic areas like kitchens or entryways where spills and heavy use are common. Epoxy usually comes in two parts that you mix together before applying.
- Oil-Based Enamels: These paints offer a very hard, durable finish. They are known for their excellent adhesion and resistance to wear and tear. However, they have strong fumes and require mineral spirits for cleanup. They also take longer to dry compared to latex paints.
When choosing, consider the room’s usage. A bedroom might not need the extreme durability of an epoxy, while a busy family room or kitchen definitely benefits from it. Always check the product label to ensure it’s suitable for floors and the type of material you are painting.
Preparing the Plywood Surface
Getting the surface ready is the most critical step for any painting project, especially floors. If you skip this, your paint job might not last or look as good as you hoped. Proper preparation ensures the paint sticks well and creates a smooth, even finish.
- Clean Thoroughly: Start by sweeping and vacuuming the floor to remove all loose dirt and debris. Then, wash the floor with a good degreaser or a floor cleaner that removes grime and any old finishes. Make sure to rinse well to get rid of any soap residue. Allow the floor to dry completely.
- Sand the Surface: Lightly sand the entire plywood surface. This helps to create a ‘tooth’ for the paint to adhere to. Use medium-grit sandpaper (around 100-120 grit) in a random orbital sander or by hand. Focus on any rough spots or raised grain.
- Fill Gaps and Imperfections: Use a good quality wood filler to fill any holes, cracks, or gouges. Make sure to choose a filler that dries hard and can be sanded smooth. Once the filler is completely dry, sand it flush with the surrounding surface.
- Vacuum and Tack Cloth Again: After sanding and filling, vacuum the floor again to pick up all the dust. Then, use a tack cloth or a slightly damp microfiber cloth to wipe down the entire floor. This removes any fine dust particles that the vacuum might have missed.
This preparation process ensures that your paint will adhere properly and give you a smooth, professional-looking finish that lasts. Skipping any of these steps can lead to paint peeling or an uneven appearance.
Creative Painted Plywood Floor Ideas for Any Room
Now for the fun part: bringing your design ideas to life! Plywood floors are a blank canvas, and with a little creativity, you can transform them into a stunning feature in any room. From simple patterns to bold statements, the possibilities are endless.
Simple Geometric Patterns
Geometric patterns are a great way to add visual interest without being overly complicated. They can make a room feel more modern or add a touch of classic charm, depending on the design.
- Checkerboard Floors: A timeless design, checkerboard can be done in classic black and white or any two contrasting colors. You can achieve this by taping off squares. Start by painting the entire floor one base color. Once dry, carefully measure and tape off the squares for the second color.
- Stripes: Stripes can make a room feel wider or longer. You can paint wide, bold stripes or thin, delicate ones. Consider painting parallel stripes down the length of a narrow room to make it appear wider, or across the width to make it feel shorter.
- Herringbone or Chevron Patterns: These more intricate patterns can be achieved with careful taping and painting. You can create stencils or carefully mask off the shapes. For a herringbone effect, you would typically paint the entire floor one color, then tape and paint alternating ‘V’ shapes.
When creating geometric patterns, precision is key. Use painter’s tape to create crisp, clean lines. Press down the edges of the tape firmly to prevent paint from bleeding underneath.
Consider using a stencil for more complex shapes or consistent repetition.
Faux Finishes and Textures
Beyond solid colors and simple patterns, you can mimic the look of other materials or add interesting textures to your plywood floors.
- Faux Marble or Terrazzo: With the right techniques and paints, you can create a stunning faux marble or terrazzo look. This involves layering colors, using sponges or rags to create veining, and sometimes adding small flecks of different colors. A clear topcoat will help seal the design and give it a polished shine.
- Distressed or Antiqued Look: To achieve an aged appearance, you can paint the floor in a base color, let it dry, then apply a second, contrasting color. Once the second coat is dry, lightly sand areas to let the base color show through. This creates a worn, vintage feel.
- Stenciled Designs: Stencils offer a vast array of design possibilities, from floral motifs to intricate damask patterns. You can buy pre-made stencils or create your own. Apply the stencil and paint over it, ensuring you dab on the paint rather than brush it to avoid bleeding under the edges.
These faux finishes can add a surprising level of sophistication to a room. They are a great way to achieve an expensive look at a fraction of the cost. For faux marble, practice your techniques on scrap wood first to get the hang of it.
Painting Techniques for Visual Impact
The way you apply the paint can dramatically change the final look of your plywood floor. Experimenting with different methods can lead to unique and eye-catching results.
- Rag Rolling: This technique involves applying a base coat, then applying a second, contrasting color using a rolled-up rag. This creates a soft, mottled effect that can resemble natural wood grain or a textured stone. It’s forgiving and adds depth to the floor.
- Sponging or Dabbing: Similar to rag rolling, using a sponge or dabbing motions with a brush can create organic textures. This is particularly effective for creating a weathered or aged look, or for mimicking natural materials like concrete or stone.
- Ombre or Gradient Effect: For a modern and dramatic look, consider an ombre effect where the color transitions gradually from one shade to another. This requires careful blending of paints and can be achieved by starting with a dark color at one end of the room and gradually lightening it towards the other end.
These techniques require a bit of practice, so it’s always a good idea to test them on a scrap piece of plywood or an inconspicuous area first. The key is to work with the paint while it’s still wet to blend the colors smoothly.
Ideas for Specific Rooms
Plywood floors can be adapted to suit the style and function of any room in your home.
- Living Room Statement Floor: In a living room, a painted floor can be a real focal point. Consider a bold geometric pattern, a sophisticated faux finish like a dark wood stain look, or a large stenciled design under a coffee table area. A durable satin or semi-gloss finish will hold up well to moderate traffic.
- Kitchen Durability and Style: Kitchens see a lot of spills and heavy foot traffic. Opt for a durable paint like epoxy or a high-quality floor enamel. A simple checkerboard, a modern geometric pattern in muted tones, or a solid, easy-to-clean color works well. Consider a matte or satin finish to help hide minor scuffs.
- Bedroom Cozy Comfort: Bedrooms are a place for relaxation, so consider softer colors and patterns. A light pastel color, a subtle distressed finish, or a simple striped pattern can create a serene atmosphere. A matte finish will give a soft, inviting feel.
- Bathroom Moisture Resistance: Bathrooms require extra attention to moisture. Ensure your plywood is well-sealed before painting, and use a paint formulated for high-moisture areas or a floor paint with a strong protective topcoat. A tiled-look pattern achieved with tape can add visual interest without the actual grout lines that can trap moisture.
- Kids’ Room Fun and Playful: For a kids’ room, let your imagination run wild! Think bright colors, playful patterns like stars or dots, or even a chalkboard paint section for drawing. Durability is important here, so a tough floor paint and a good sealant are a must.
When planning for specific rooms, always consider the level of traffic and exposure to moisture or spills. This will help you choose the right paints and finishes to ensure your beautiful floor lasts.
Applying the Paint and Sealing
Once your surface is prepped and you’ve chosen your design and paint, it’s time to bring it all to life. Proper application and sealing are vital for a beautiful and long-lasting finish.
Step-by-Step Painting Process
Follow these steps for a smooth painting experience and a great result.
- Apply the Base Coat: If you are painting a solid color or a patterned design, start with your base color. Apply one or two coats, allowing each to dry completely according to the manufacturer’s instructions. Use a roller for large areas and a brush for edges and corners.
- Create Your Design: If you’re doing a pattern, this is where you’ll use painter’s tape, stencils, or other masking techniques. Ensure all tape is pressed down firmly to prevent bleeding. Apply your second color or design elements carefully.
- Remove Tape and Stencils: Once the paint for your design is dry to the touch but not fully cured, carefully remove the painter’s tape or stencils. Pull the tape away at an angle, slowly and steadily. If you wait too long, the paint can cure and pull away from the tape, creating jagged lines.
- Touch-Ups: After removing the tape, inspect your floor for any imperfections. Use a small brush to carefully touch up any areas where the paint bled or didn’t cover well.
Work in good lighting and ensure the room is well-ventilated. Patience is key; allowing adequate drying time between coats and steps will prevent mistakes and ensure a professional finish.
The Importance of Sealing
Sealing your painted plywood floor is non-negotiable if you want it to last. The sealant protects the paint from wear, scratches, spills, and UV damage. It also enhances the color and can provide a desired sheen.
- Polyurethane Sealers: This is a very common and effective choice. Polyurethane is durable and comes in water-based and oil-based formulas. Water-based polyurethane dries clear and has low odor, making it easier to work with. Oil-based polyurethane offers superior durability but has stronger fumes and can yellow over time. Apply at least two coats for good protection.
- Acrylic Sealers: Acrylic sealers are often a good option for interior floors. They are durable, flexible, and dry quickly. Many are water-based and offer good protection against abrasion and moisture.
- Epoxy Sealers: If you used an epoxy paint system, a compatible epoxy topcoat will provide the ultimate protection. These are extremely tough and chemical-resistant, making them ideal for high-traffic areas or rooms prone to spills.
When applying sealers, follow the manufacturer’s instructions carefully. Ensure the painted floor is completely dry before applying the first coat. Apply thin, even coats, allowing adequate drying time between each.
A common recommendation is 2-3 coats for residential use, with more for very high-traffic areas.
Maintenance and Care
To keep your painted plywood floor looking great for years to come, a little regular care goes a long way.
- Regular Cleaning: Sweep or vacuum your floors regularly to remove grit and dirt that can scratch the surface. Clean spills promptly with a damp cloth. For deeper cleaning, use a pH-neutral floor cleaner and a damp mop. Avoid harsh chemicals or abrasive cleaners.
- Use Area Rugs: Place area rugs in high-traffic zones, under furniture, and in entryways. This will significantly reduce wear and tear on the painted surface and protect it from scratches.
- Protect Furniture Legs: Use felt pads or rubber caps on the legs of all furniture. This prevents scratches when furniture is moved.
Proper maintenance will help preserve the beauty and integrity of your painted floor, ensuring it remains a stylish and functional part of your home.
Case Studies and Real-Life Examples
Seeing how others have successfully transformed their spaces with painted plywood floors can provide great inspiration and practical insights. These examples demonstrate the versatility and impact of this affordable flooring solution.
From Drab to Fab A Basement Transformation
Sarah, a homeowner, decided to tackle her unfinished basement. The concrete floor was cold and uninviting. Instead of covering it with carpet or vinyl, she opted for a painted plywood floor.
She meticulously cleaned and sanded the existing plywood subfloor, filling any imperfections. She then painted the entire floor a deep charcoal gray. After it dried, she used painter’s tape to create a subtle, repeating diamond pattern in a lighter gray.
She finished it with three coats of a durable water-based polyurethane. The result was a modern, stylish, and warm basement that felt like an extension of her living space, perfect for a home gym and entertainment area. The cost savings were significant compared to other flooring options.
A Cheerful Kitchen Makeover
The Millers wanted to update their kitchen without a full renovation. The old linoleum was peeling, and they wanted something more durable and visually appealing. They found a section of plywood subfloor in good condition beneath the old flooring.
They cleaned it, sanded it smooth, and decided on a classic black and white checkerboard pattern. They carefully taped off the squares and painted. Once the paint was dry, they applied a high-gloss, industrial-grade floor sealant that could withstand constant foot traffic and frequent spills.
The kitchen now has a bright, retro feel and a floor that is incredibly easy to clean. This project transformed the heart of their home on a tight budget.
DIY Studio Flooring
An artist, Mark, needed a durable, easy-to-clean floor for his art studio. He installed new plywood panels across the entire studio space. He then decided to paint a large, abstract design directly onto the plywood.
He used a variety of bright, bold colors, blending them with a dry brush technique to create interesting textures. He applied a matte, ultra-durable floor sealer over the entire surface. This not only protects the artwork but also makes it easy to wipe up paint spills and dust.
The floor itself has become a unique piece of art, reflecting his creative spirit.
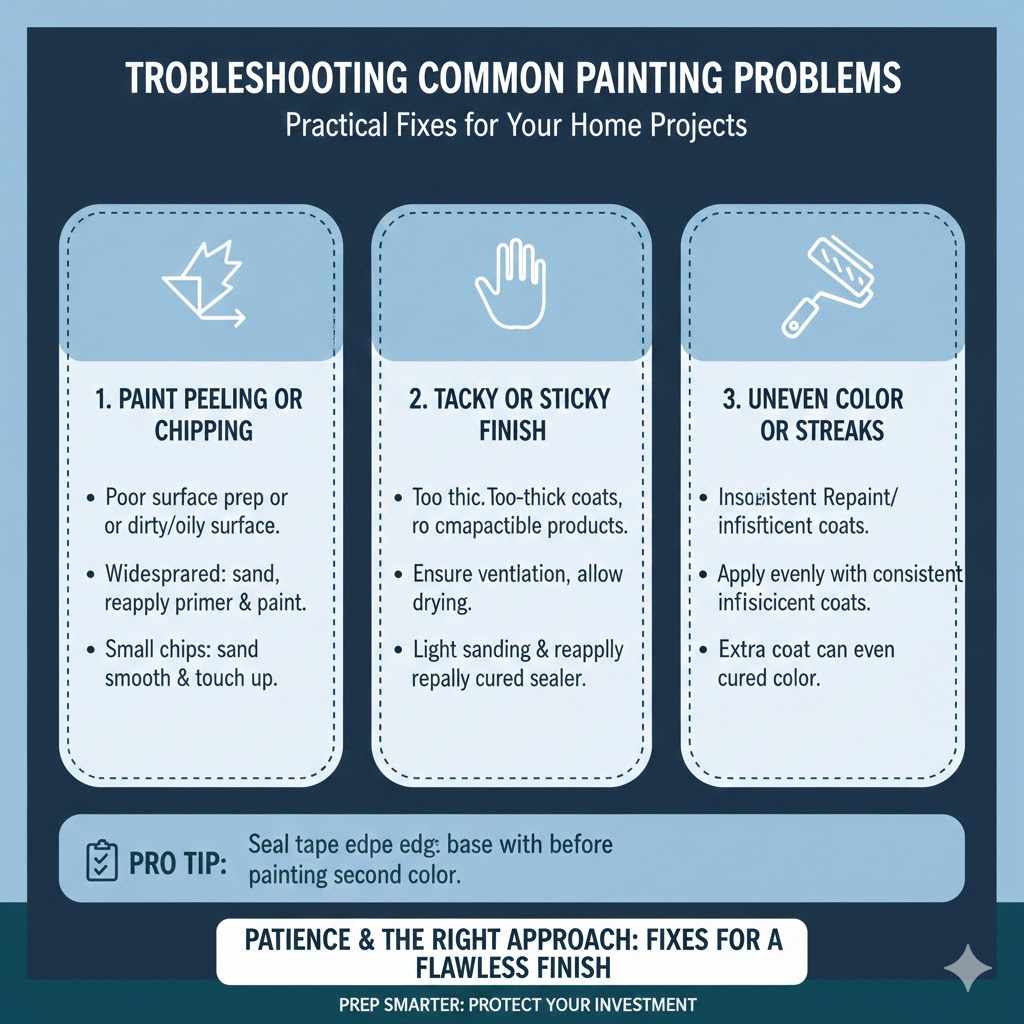
Troubleshooting Common Issues
Even with the best intentions, you might run into a few snags. Knowing how to address common problems can save your project.
- Paint Peeling or Chipping: This is usually caused by poor surface preparation or applying paint to a dirty or oily surface. If the peeling is widespread, you might need to sand down the affected areas and reapply primer and paint. For small chips, you can often sand them smooth and touch up.
- Tacky or Sticky Finish: This can happen if the paint or sealer was applied too thickly, in humid conditions, or if incompatible products were used. Ensure proper ventilation and allow ample drying time between coats. Sometimes, a light sanding and a reapplication of a properly cured sealer can fix this.
- Uneven Color or Streaks: This often stems from inconsistent paint application or insufficient coats. Ensure you are using enough paint and that it’s applied evenly with consistent pressure from your roller or brush. Applying an extra coat can sometimes even out the color.
- Paint Bleeding Under Tape: This is a common issue with masking tape. Always press down the edges of the tape firmly. A good trick is to ‘seal’ the edge of the tape by painting a thin line of your base color along the tape edge. Once that dries, paint your second color over it; the base color will seal the tape edge.
Don’t get discouraged if things don’t look perfect immediately. Most issues can be corrected with patience and the right approach.
Frequently Asked Questions
Question: Can I paint any type of plywood floor?
Answer: Yes, you can paint most types of plywood flooring. The key is proper preparation. Whether it’s a subfloor you’re finishing or new plywood panels, cleaning, sanding, and priming are essential for good adhesion and a lasting finish.
Question: How many coats of paint do I need for plywood floors?
Answer: Generally, two coats of paint are recommended for even coverage. Some designs or darker colors might require a third coat. Always follow the paint manufacturer’s guidelines for best results.
Question: How long does a painted plywood floor last?
Answer: With proper preparation, good quality paint, and a durable sealant, a painted plywood floor can last many years. Regular maintenance and protection, like using rugs in high-traffic areas, will extend its lifespan significantly.
Question: Is it difficult to clean a painted plywood floor?
Answer: No, painted plywood floors are typically easy to clean. Regular sweeping and occasional damp mopping with a mild cleaner are usually sufficient. Avoid harsh chemicals or abrasive scrubbers that could damage the finish.
Question: Can I paint over an existing painted floor?
Answer: Yes, you can paint over an existing painted floor, but proper preparation is crucial. Clean the old paint thoroughly, lightly sand it to create a good surface for adhesion, and then you can apply your new paint. Make sure the old paint is in good condition, with no major peeling or damage.
Final Thoughts
Creative painted plywood floor ideas offer an accessible way to personalize any room. By carefully preparing your surface, choosing the right paints, and applying them with care, you can achieve beautiful and durable results. Remember to seal your work for longevity and maintain it with simple cleaning.
You have the power to make your floors a stunning feature of your home.