DIY Bench Simple: Create Your Own Stylish Seating Easily
Building your own bench can be a rewarding project. It’s simpler than you think.
Creating a DIY bench is a fun and practical way to enhance your space. Whether you need extra seating for your garden or a unique piece for your living room, making a bench yourself is a fantastic option. You don’t need to be a master woodworker to get started.
With basic tools and materials, you can build a sturdy and stylish bench. This project allows you to customize the design to suit your style and needs. Plus, it’s a great way to save money while learning new skills. In this guide, we’ll walk you through the steps to create a simple DIY bench, making the process easy and enjoyable. Let’s get started!
Introduction To DIY Benches
Welcome to the world of DIY benches! Building your own bench is a rewarding project. You can create a functional and beautiful piece of furniture. Plus, you can customize it to fit your style and needs. Whether for your garden, patio, or living room, a DIY bench adds charm and utility.
Benefits Of DIY Benches
DIY benches are cost-effective. You save money by building one yourself. You also get the satisfaction of creating something with your own hands. It’s a great way to improve your woodworking skills. With a DIY bench, you can choose the materials. This means you can ensure quality and durability. Customization is another big benefit. You can design the bench to fit your space perfectly. A DIY bench is also a fun project. It’s a great way to spend your free time creatively.
Choosing The Right Style
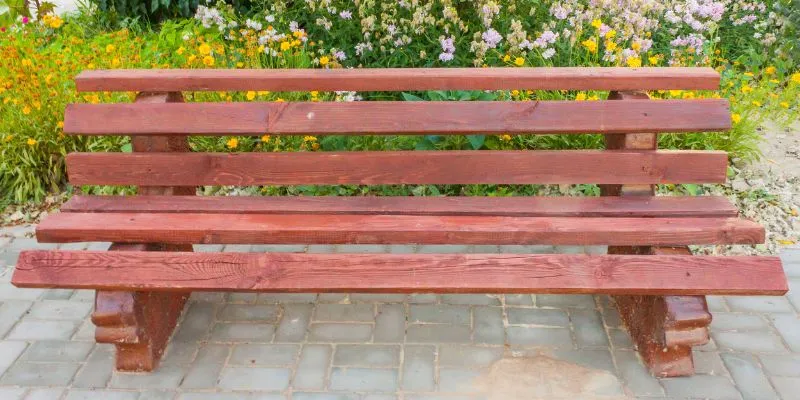
When choosing a style for your bench, consider your space. Think about where you will place the bench. Is it for indoor or outdoor use? For a garden, rustic styles work well. For a modern living room, sleek designs are ideal. Consider the materials too. Wood is a popular choice for its natural look. Metal can add a contemporary touch. Think about the bench’s function. Will it be for seating or storage? Do you need a backrest or armrests? Your answers will guide your style choice.

Materials And Tools Needed
Creating a DIY bench can be a rewarding project. It adds functionality and charm to your space. To get started, gather the right materials and tools. This ensures your bench is sturdy and looks great.
Essential Materials
First, you need some essential materials. These include wooden planks for the bench seat and legs. Choose durable wood like pine or cedar. You will also need screws and nails to hold the pieces together. Wood glue can add extra strength to the joints. Finally, sandpaper is vital for smoothing rough edges.
Recommended Tools
Having the right tools makes the job easier. A measuring tape ensures your cuts are accurate. Use a saw to cut the wooden planks to size. A drill is necessary for making holes for screws. You will also need a screwdriver for fastening screws. A hammer can help with nails, and a level ensures your bench is even. Lastly, a sander or sandpaper smooths the wood.
With these materials and tools, you can start building your DIY bench. Happy crafting!
Preparing Your Workspace
So, you’ve decided to build a DIY bench? Fantastic! Before diving into the fun part of hammering and sawing, it’s crucial to prepare your workspace. A well-organized and safe workspace can make your project smoother and more enjoyable. Let’s ensure you have everything set up perfectly with these simple steps.
Safety Measures
First things first, safety should always be your top priority. Here are some essential safety measures to consider:
- Wear Safety Gear: Protect your eyes with safety goggles, your hands with gloves, and your ears with ear protection if using loud tools.
- Keep Your Workspace Clean: A clutter-free area reduces the risk of accidents. Ensure there are no loose items on the floor where you could trip over.
- Ventilation: If you’re working with paints or adhesives, ensure your workspace is well-ventilated to avoid inhaling harmful fumes.
- Proper Lighting: Good lighting helps you see clearly, reducing mistakes and preventing accidents.
Organizing Tools And Materials
Once safety is taken care of, the next step is to organize your tools and materials. This step can save you time and frustration down the line. Here’s how:
- Make a Checklist: List all the tools and materials you will need for your bench. This may include a saw, hammer, nails, wood, screws, and a tape measure.
- Setup a Tool Station: Arrange your tools in a designated area where they are easy to reach but not in the way. A workbench or a sturdy table works well.
- Materials Storage: Keep your wood and other materials organized. You can use shelves or designated bins to keep everything in order.
- Label Everything: If you have multiple types of screws, nails, or other small items, label them. This makes finding what you need quick and easy.
Getting your workspace ready might seem like a chore, but trust me, it’s worth it. A safe, organized workspace allows you to focus on the fun part of building your DIY bench. Plus, it minimizes the risk of accidents and mistakes. Happy building!
Cutting The Wood
Cutting the wood is a crucial step in building your DIY bench. Proper cuts ensure the bench is sturdy and looks professional. Follow these steps to measure, mark, and cut the wood accurately.
Measuring And Marking
First, gather your measuring tools. A tape measure and a pencil work best. Measure the wood pieces according to your bench design. Double-check each measurement before marking. This helps avoid mistakes and wasted wood.
Use a straight edge or ruler to draw precise lines. These lines guide your cuts. Make sure the marks are clear and easy to see. Consistent measurements ensure all parts fit together well.
Using The Saw Safely
Safety is key when cutting wood. Wear safety goggles to protect your eyes. Use gloves to protect your hands. Always keep your fingers away from the saw blade.
Set the wood firmly on a stable surface. Clamp it down if needed. This prevents the wood from moving while you cut. Start the saw before it touches the wood. Guide the saw slowly along the marked lines. Let the saw do the work.
After cutting, check the pieces for accuracy. Sand the edges to remove splinters. Proper cuts make assembly easier and safer.
Assembling The Bench Frame
Building your own bench can be a rewarding experience. One of the most crucial steps is assembling the bench frame. This part of the project lays the foundation for a sturdy and durable bench. With a few basic tools and some easy-to-follow steps, you’ll be able to put together a strong frame that will support your bench for years to come.
Joining The Pieces
First things first, let’s talk about joining the pieces of your bench frame. You’ll need to gather your wooden planks, screws, and a trusty drill. Start by laying out the pieces on a flat surface, ensuring everything is aligned properly. Use a tape measure to double-check your measurements – you don’t want any wobbly parts!
Begin by attaching the legs to the seat supports. Drill pilot holes to prevent the wood from splitting. Insert screws and tighten them securely. Repeat this process for all legs. Once the legs are attached, connect the side rails to the legs, making sure everything is square and even.
Ensuring Stability
Now that the basic frame is assembled, it’s time to ensure stability. No one likes a wobbly bench, right?
- Cross braces: Add cross braces between the legs. This will add extra support and keep your bench from swaying.
- Check for level: Use a level to check that your bench is even. Adjust as needed by tightening or loosening screws.
- Corner braces: For added strength, you can use metal corner braces on the inside corners of the frame.
Once you’ve added these extra supports, give your bench a little shake. It should be rock solid!
With these steps, you’ll have a sturdy, reliable bench frame ready for the next phase of your project. Remember, taking your time during this stage will pay off in the long run. Happy building!
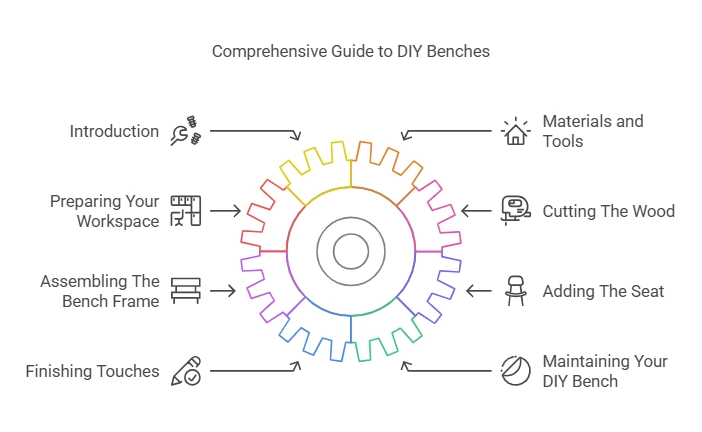
Adding The Seat
Now that you’ve built the frame of your DIY bench, it’s time to add the seat. This is the part where comfort meets style. You want a seat that is not only sturdy but also comfortable to sit on. In this section, we’ll cover how to secure the seat and choose comfortable materials.
Securing The Seat
Securing the seat is crucial to ensure the bench is stable and safe to use. Here are some simple steps to follow:
- Measure the Seat: Measure the frame of your bench to determine the size of the seat. Make sure to add a bit of extra length and width for overhang if desired.
- Cut the Seat: Using your measurements, cut a piece of wood or plywood to size. Ensure the edges are smooth to avoid any splinters.
- Attach the Seat: Place the seat on top of the frame. Use wood screws to secure it in place. Make sure the screws are evenly spaced to distribute weight evenly.
Using a drill and screws, attach the seat securely. This will prevent any wobbling or shifting when someone sits on the bench. Remember, safety first!
Choosing Comfortable Materials
Choosing the right materials for your seat can make a big difference in comfort. Here are some popular options:
- Wood: A classic choice, wood is sturdy and durable. You can add a cushion for extra comfort.
- Plywood: More affordable than solid wood, plywood is easy to work with and strong enough for a seat.
- Foam Cushion: Adding a foam cushion can make your bench more comfortable. Choose a high-density foam for better support.
Personally, I prefer using a combination of wood and a foam cushion. This way, you get the best of both worlds: the sturdiness of wood and the comfort of foam. Plus, you can cover the foam with a fabric that matches your décor. Who doesn’t love a cozy bench that also looks great?
So, whether you’re creating a reading nook or a place to put on your shoes, take your time with this step. A well-secured, comfortable seat will make your DIY bench a favorite spot in your home.
And there you have it! Adding the seat to your DIY bench is straightforward, and with the right materials, it can be a comfortable place to relax. Happy building!
Finishing Touches
Congratulations! You’ve almost completed your DIY bench. Now, it’s time to add those finishing touches that will make your bench look fantastic. This step is where your bench really comes to life. We will focus on two key areas: sanding the wood and applying paint or stain.
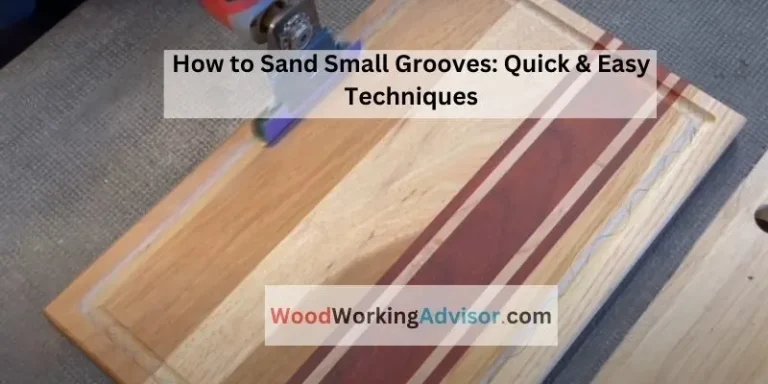
Sanding The Wood
Sanding is essential for a smooth finish. It helps in removing any rough edges and splinters. Here’s how you can do it:
- Start with a coarse-grit sandpaper (about 80-grit) to remove big imperfections.
- Move to a medium-grit sandpaper (around 120-grit) for a finer finish.
- Finish with a fine-grit sandpaper (220-grit) to make the wood feel smooth to the touch.
Remember, patience is key. Sanding can be a bit tedious, but it’s worth the effort. If you have an electric sander, it will make the job faster. If not, a sanding block will work just fine. Make sure to sand along the grain of the wood to avoid scratches.
Applying Paint Or Stain
Next, it’s time to give your bench some color. Whether you choose paint or stain depends on the look you want:
| Paint | Stain |
|---|---|
| Offers a wide range of colors | Enhances natural wood grain |
| Provides a solid color finish | Available in various wood tones |
| Needs primer and multiple coats | Usually requires fewer coats |
Painting: If you decide to paint, start with a primer. This helps the paint adhere better and provides a smoother finish. After the primer dries, apply your paint in thin, even coats. It’s better to apply multiple thin coats rather than one thick coat to avoid drips.
Staining: If you prefer a natural wood look, staining is the way to go. Apply the stain with a brush or cloth, following the wood grain. Wipe off any excess stain with a clean cloth. You might want to apply a second coat if you desire a deeper color.
After painting or staining, let your bench dry completely. For an extra layer of protection, consider applying a clear sealant. This will help your bench withstand the elements and last longer.
And there you have it! Your DIY bench is now ready to take a prime spot in your home or garden. Enjoy the fruits of your labor and the compliments that are sure to come your way.
Maintaining Your DIY Bench
Maintaining your DIY bench is essential for keeping it in good condition. With regular care, your bench can last for many years. Proper maintenance also ensures the safety of those using it. In this section, we will discuss some easy ways to maintain your DIY bench.
Regular Inspections
Check your bench for damage every month. Look for cracks, loose screws, or splinters. Pay attention to the joints and legs. They bear the most weight and stress. If you find any damage, repair it immediately. Regular inspections can prevent bigger problems down the line.
Repair Tips
If you find a crack, use wood glue to fix it. Apply the glue and clamp the area until it dries. For loose screws, tighten them with a screwdriver. If a screw hole is stripped, use a larger screw or fill the hole with wood filler. Sand down any rough spots to avoid splinters. Keep the bench clean to prevent dirt buildup. A clean bench is easier to inspect and maintain.
Frequently Asked Questions
What Can I Use To Make A Bench?
You can use wood, metal, or concrete to make a bench. Reclaimed wood offers a rustic look. Metal provides durability. Concrete adds a modern touch.
How Do I Prevent My DIY Bench From Rotting?
To prevent your DIY bench from rotting, use pressure-treated wood. Apply waterproof sealant, ensure proper drainage, and keep it elevated. Regularly inspect and maintain.
What Is The Best Wood For A DIY Bench?
The best wood for a DIY bench is cedar. It’s durable, resistant to decay, and has a beautiful finish. Oak and pine are also great choices for their strength and affordability.
How To Build A DIY Garden Bench?
To build a DIY garden bench, gather wood, screws, and tools. Cut wood to size, assemble the frame, and attach the seat and backrest. Sand and paint for a polished finish.
Conclusion
Building your own bench is both fun and rewarding. Simple tools and materials make it easy. Plus, you get a customized piece of furniture. Enjoy the process and the results. Your DIY bench will stand out. It’s a great project for beginners.
Give it a try and see. You’ll be proud of your work. Happy building!