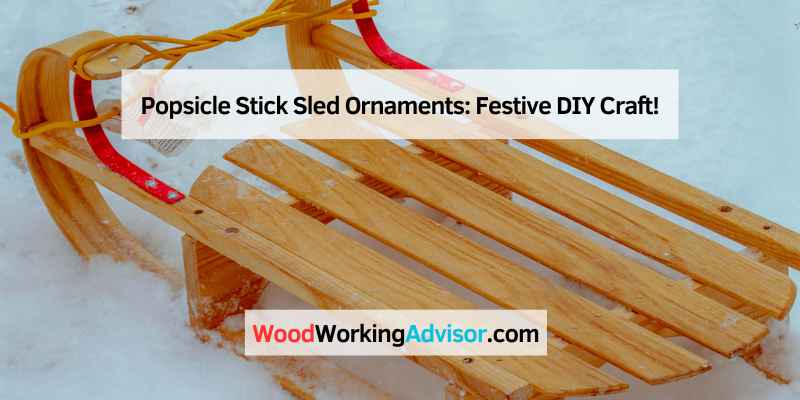
Popsicle Stick Sled Ornaments: 7 Sticks, One Consistent Method
A popsicle stick sled ornament takes about 7 craft sticks, wood glue, and 15-20 minutes to build — but cut the sticks with wire cutters instead of scissors, since scissors tend to crack the wood along the grain. It’s simple enough for kids to help glue and decorate under light supervision, especially around hot glue. This guide covers the exact stick count and layout, decorating ideas, and how to store them so they survive next year’s move to the attic.
Introduction To Popsicle Stick Sled Ornaments
Best Craft Sticks Pick
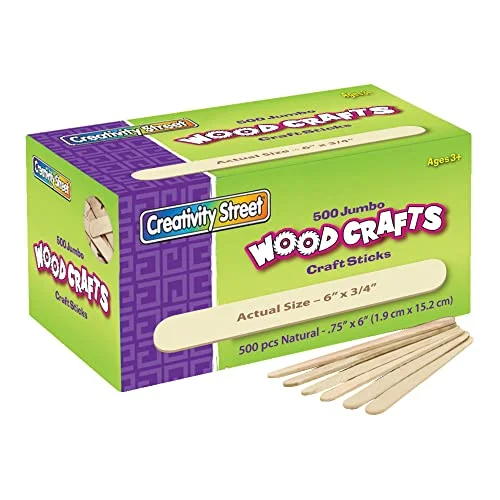 |
Creativity Street Jumbo Craft Sticks, Box of 500 – $13.56 At 7 sticks per sled, a box of 500 is enough for about 70 sled ornaments — plenty for a classroom project or a whole year of holiday gifts.
|
As an Amazon Associate we earn from qualifying purchases.
Popsicle stick sled ornaments cost under a dollar in materials per ornament if you already have glue and paint on hand, which is what makes them a common classroom and Sunday-school craft alongside being a home project. The build takes one sitting for the gluing, plus a second short sitting once the glue has fully cured for decorating.
📊 Wire cutters trim craft sticks cleaner than scissors, which can crack or splinter the wood along the grain — a pocket knife has the same splintering problem. Source: Sustain My Craft Habit, 2026
Materials Needed For Your DIY Sled
To create your DIY sled, gather essential materials. Choose sturdy popsicle sticks for strength. Look for wide and flat sticks to make a stable base.
For adhesives, use hot glue for quick bonding. Wood glue is great for a strong hold. Craft glue can work well for lighter decorations.
Decorative elements can make your sled unique. Use paint to add vibrant colors. Glitter gives a fun sparkle. Consider miniature ornaments or stickers to enhance the design.
Step-by-step Crafting Guide
- Cut your pieces: use wire cutters (not scissors) to cut 5 craft sticks down to about 2.5 inches each for the seat slats. Leave 2 full-length sticks uncut — these become the runners.
- Build the seat: lay the 5 short pieces side by side and glue a diagonal support stick across the back to hold them together, or glue them directly onto the runners in the next step.
- Attach the runners: glue the 2 full-length sticks lengthwise underneath the seat, spaced evenly near the two edges, so the seat sits flat on top of them like a sled deck on its rails.
- Let it cure: wood glue needs about 20-30 minutes to set enough to handle, and a full 24 hours to fully cure before you decorate or hang it.
Decorating Your Sled Ornament
To create a festive look on your sled ornament, use different painting techniques. Bright colors make your design pop. Try mixing shades for a unique effect. Sponging or stenciling can add depth and fun patterns.
Adding sparkle makes any ornament special. Use glitter to highlight certain areas. Apply a glue coat first, then sprinkle glitter over it. Sequins can also bring extra shine. Glue them on for a dazzling finish.
For a rustic touch, incorporate ribbon and twine. Wrap them around the sled for a cozy feel. You can create bows for extra charm. Choose colors that match your overall theme for a coordinated look.
Innovative Design Variations
The same basic build works for more than Christmas: swap in orange and black paint with a small pumpkin cutout for Halloween, or reds and pinks with a heart accent for Valentine’s Day. The runners-and-seat structure stays identical — only the paint and glued-on accents change.
Gift-giving And Display Ideas
A small kraft gift box with a handwritten tag turns one of these into a stocking-stuffer-sized gift. For display, stringing 3-4 sleds along a length of twine makes a garland for a mantel or window, instead of hanging them one at a time on the tree.
Involving Kids In The Crafting Process
Kids can safely handle the painting and gluing steps once the wood glue has been applied by an adult, or with a kid-safe glue stick for the lighter decorative pieces. Hot glue guns and wire cutters are the two steps that need direct adult supervision — both the glue gun tip and cut stick edges can be sharp enough to nick skin.
Preserving Your Ornaments For Future Holidays
To keep your Popsicle stick sled ornaments safe, store them carefully. Use a box or container with padding. This protects them from bumps and falls.
Keep ornaments away from direct sunlight. This prevents fading and damage. A cool, dry place is best for storage.
Check your ornaments regularly. Look for signs of wear or damage. If needed, fix them gently with glue.
For cleaning, use a soft cloth. Avoid harsh chemicals that can harm the paint. Always handle with care to keep them looking great.
Conclusion: Embracing The Joy Of DIY Holiday Crafts
Crafting with popsicle sticks brings joy to every holiday season. Making sled ornaments is a fun activity for all ages. Children can express their creativity while learning new skills. Each ornament tells a unique story, adding charm to your decorations.
Sharing this experience with family creates lasting memories. The laughter and excitement during crafting time are priceless. Gather your supplies and let your imagination run wild!
Looking for more ideas along the same lines? Browse our full list of popsicle stick crafts for more projects that reuse the same basic tools and glue.
Frequently Asked Questions
What Materials Do I Need For Sled Ornaments?
To create popsicle stick sled ornaments, you’ll need popsicle sticks, glue, scissors, and decorative items like paint, glitter, or ribbon. These materials are easily available and can be found in craft stores. You might also want twine or string for hanging the ornaments on your tree.
How Do I Make Sled Ornaments Step By Step?
Cut 5 sticks to about 2.5 inches for the seat and keep 2 full-length sticks as runners. Glue the seat pieces together, then glue the 2 runners lengthwise underneath. Let the glue cure fully (about 24 hours) before decorating and attaching a hanging loop.
Can Kids Help With Sled Ornament Crafting?
Absolutely! Crafting popsicle stick sled ornaments is a perfect activity for kids. They can assist in decorating and gluing. Just ensure adult supervision, especially with scissors and hot glue. This activity promotes creativity and fine motor skills, making it enjoyable for the whole family.
How Can I Customize My Sled Ornaments?
Customization options are endless! You can paint your sleds in various colors or patterns. Adding glitter or stickers can enhance their festive look. Consider personalizing them with names or dates for a unique touch. This way, your ornaments can reflect your personal style and holiday spirit.
Why Use Wire Cutters Instead Of Scissors To Cut Craft Sticks?
Scissors tend to crack or splinter craft sticks along the wood grain. Wire cutters give a cleaner cut, and a pocket knife has the same splintering problem as scissors.
Conclusion
Creating popsicle stick sled ornaments is a fun and simple craft. They bring holiday cheer and add a personal touch to your decorations. This project is perfect for all ages. Gather your supplies and let your creativity shine. Enjoy making memories while crafting these delightful ornaments that can be cherished for years to come.
Sponsored / affiliate links. As an Amazon Associate I earn from qualifying purchases. I may earn additional commission from eligible campaigns.