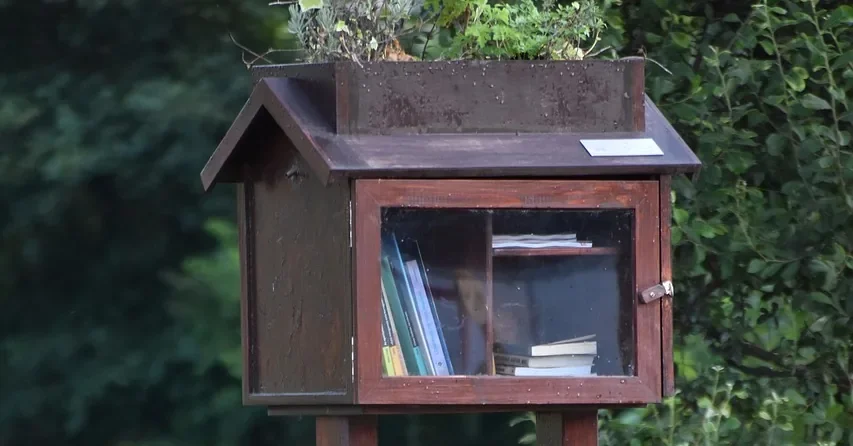
DIY Little Free Library Plans: Cut List, Post Depth & Real Cost
A DIY Little Free Library is a weatherproof book box on a post, and one 4×8 sheet of 3/4 inch exterior plywood covers the box below. The cut list makes a 21.5 by 12.75 inch box with a sloped roof, set on a post dug 2 feet deep, the depth Little Free Library’s own install sheet gives. Official building costs run $5 to $150. This guide covers materials, cut list, assembly, weatherproofing, post setup and registration.
Materials and Tools for a Weatherproof Little Free Library
Best Library Box Glue Pick
 |
Titebond III Ultimate Wood Glue, 16 oz ($9.58) The cut list below has a lot of plywood-edge joints (28 screws’ worth), and a bead of glue in each one is the cheap way to keep wind-driven rain out of them.
|
As an Amazon Associate we earn from qualifying purchases.
Every material below is chosen for one job: keeping water out of end grain and joints. The two plans Little Free Library hosts on its own site, a single-sheet plan by James Zimmerman and a Kalamazoo group plan, use the same basic recipe of exterior plywood, exterior screws and a sloped roof.
| Item | Spec used in this plan | Why |
|---|---|---|
| Plywood | One 4×8 sheet of 3/4 inch exterior-grade (CDX) plywood | Little Free Library’s Zimmerman plan specifies CDX; interior plywood swells when wet |
| Door frame | One 8 ft 1×3 board (actual 3/4 x 2-1/2 inches) | Frame pieces total 83.5 inches, so one 96 inch board covers it with kerf to spare |
| Door window | 1/8 inch acrylic sheet, at least 17.5 x 21.25 inches | Lets people see the books without opening the door in rain |
| Screws | 2-1/2 inch exterior-coated screws, about 28 for the box plus 6 for the post | Edge-driven screws need length; the plans above use 2.5 to 3 inch screws |
| Glue | Water-resistant exterior wood glue | Seals the joint so rain cannot wick along the screw |
| Hinge and latch | Piano hinge or two flush hinges, plus a hook-and-eye or catch | The Zimmerman plan suggests a hook-and-eye as the simplest latch |
| Post | 4×4, 5 feet long, rated for ground contact | See the post section; our 4×4 versus two 2x4s page explains why a solid 4×4 matters |
| Finish | Exterior primer and paint, or a sealer | Covers every face and every cut edge |
You will also need a circular saw or table saw, a drill with a pre-drill bit, a level, a tape measure and a post hole digger or spade.
Little Free Library Dimensions and Cut List
Little Free Library does not publish one required size. Its two hosted plans differ, so the numbers below are our own adaptation with the arithmetic shown. We have not built this exact box, so dry-fit the pieces before you glue anything. Measure your plywood first: sheets sold as 3/4 inch are often a little thinner (commonly 23/32 inch), so adjust the widths to what you actually have.
| Dimension | How it is worked out | Result |
|---|---|---|
| Inside width | Chosen | 20 in. |
| Outside width | 20 + 3/4 + 3/4 (two sides) | 21.5 in. |
| Inside depth | Chosen | 12 in. |
| Outside depth | 12 + 3/4 (back panel) | 12.75 in. |
| Roof slope | Front 25.5 in. minus back 24 in. = 1.5 in. drop over 12.75 in. | 6.7 degrees |
| Sloped top edge length | Square root of (12.75 squared + 1.5 squared) | 12.84 in. |
| Roof overhang, sides | (25.5 minus 21.5) / 2 | 2 in. each side |
| Roof overhang, front and back | 17.5 minus 12.84 = 4.66 in. of overhang, 3.5 at the front | 3.5 in. front, 1.16 in. back |
The slope is the same idea as the 6 degree roof in Little Free Library’s Zimmerman plan, with the high edge at the front so rain runs off the back, away from the door.
| Part | Qty | Size (inches) | Notes |
|---|---|---|---|
| Roof | 1 | 25.5 x 17.5 | Plywood |
| Sides | 2 | 12.75 x 25.5 before cutting the slope | One edge cut to 24 in., 6.7 degree top |
| Back | 1 | 20 x 24 | Bevel the top edge about 7 degrees |
| Base | 1 | 20 x 12 | Sits between the sides, flush with their bottoms |
| Shelf | 1 | 19.75 x 11.5 | 1/4 in. narrower than the opening so it drops in |
| Door stiles | 2 | 1×3 x 25.25 | Full door height |
| Door rails | 2 | 1×3 x 16.5 | 21.5 minus (2 x 2.5) = 16.5 |
| Shelf cleats | 2 | 3/4 x 3/4 x 11.5 | Scrap strips |
Checking that everything fits on one sheet: rip a 25.5 inch strip off the 48 inch width. Along its 96 inch length, the pieces take 17.5 + 12.75 + 12.75 + 24 + 12 + 11.5 = 90.5 inches, plus about 0.75 inch of saw kerf, so 91.25 inches in total. That leaves a 22.5 by 96 inch offcut of plywood for a second project.
The inside works out to 23.25 inches tall at the back (24 minus the 3/4 inch base) and 24.75 inches at the front. With the shelf top 12 inches above the floor, each level has 11.25 inches of clear height at the back, so books up to roughly 11 inches tall fit. The door is 21.5 by 25.25 inches, which leaves a 1/4 inch gap under the roof at the front. Its opening is 16.5 by 20.25 inches (21.5 minus 5, and 25.25 minus 5).
How to Build a Little Free Library Step by Step
Follow these steps in order. The numbers refer to the cut list above.
- Cut the panels: Rip a 25.5-inch strip off a 4×8 sheet, then crosscut the roof, two sides, back, base and shelf from the cut list.
- Cut the slope: Cut the top edge of each side at 6.7 degrees so one end is 25.5 inches tall and the other 24 inches, and bevel the top of the back panel to match.
- Pre-drill and glue: Pre-drill every screw hole, then run a bead of exterior glue along each joint before assembling.
- Assemble the box: Screw the base and back between the two sides with 2-1/2 inch exterior screws, four screws per joint.
- Fit the roof: Set the roof on the sloped edges with a 2 inch overhang on each side and 3.5 inches at the front, then screw it down.
- Build the door: Join four 1×3 pieces into a frame, 21.5 by 25.25 inches, and fit a 17.5 by 21.25 inch acrylic panel behind it.
- Add the shelf: Screw two cleats to the sides with their tops 11.25 inches above the floor and drop the shelf onto them.
- Finish and mount: Prime and paint all six faces and every cut edge, then screw the base to a post topper with six 2.5 inch screws.
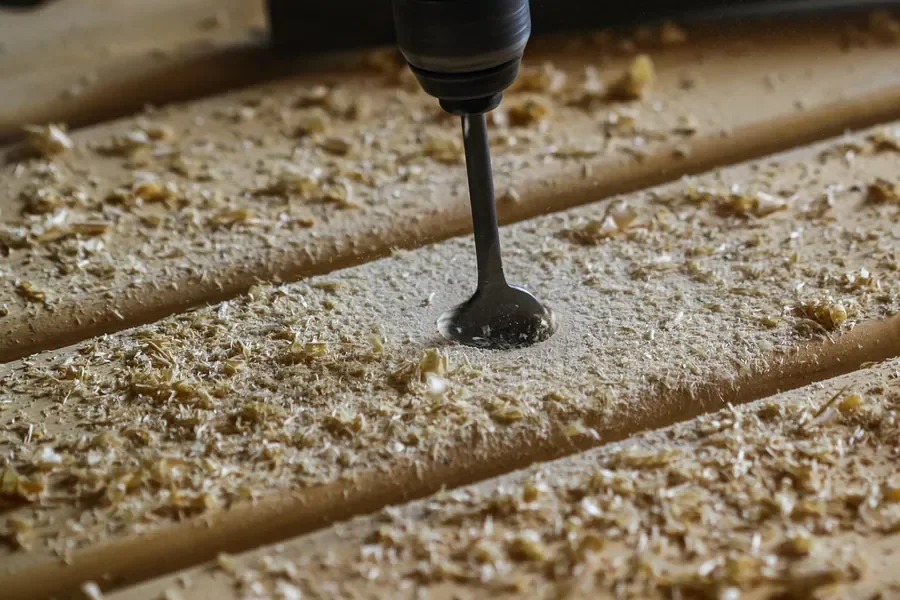
Pre-drilling matters more here than on most boxes, because nearly every screw goes into a plywood edge. The Zimmerman plan pre-drills every hole and uses four screws for every two pieces joined, which is where the 28-screw count in the materials table comes from: 8 for the sides and back, 8 for the sides and base, and 12 for the roof.
Weatherproofing a Little Free Library: What Actually Keeps It Dry
- Glue plus screws on every joint. Screws alone leave a path for water along the shank. A bead of glue before assembly closes it.
- Overhang that is wide enough. The 2 inch side and 3.5 inch front overhang above come from the proportions in the Zimmerman plan, which uses 2 inches at the sides and 3.5 to 4 inches at the front.
- Finish all six faces. The plans above suggest sealing the roof, painting the exterior, and caulking where trim meets plywood. Seal the cut edges too, since end grain soaks up water first.
- Roof covering. The two plans mention cedar shakes over tar paper, metal roofing or flashing, and a ridge cap. A painted plywood roof is the minimum.
- Weatherstripping around the door. A foam strip stops wind-driven rain better than a tight fit alone. (Our suggestion, not in the plans.)
For sealer choice and reapplication, our guide to weatherproofing wood for outdoors covers the full process. If you prefer cedar for the box, does cedar wood rot explains how long it lasts and why ground contact is the weak point.
How to Set the Post: 2 Feet Deep, Concrete Optional
Most people over-think the post. Little Free Library’s install sheet is short, and it has two details that a lot of build guides get wrong.
| Item | Little Free Library install sheet | What it means |
|---|---|---|
| Hole | 2 feet deep, 1 foot wide | Dig at least 24 in. down |
| Post | 5 feet long | 60 minus 24 = 36 in. above ground |
| Backfill | Tamped dirt | Concrete “usually isn’t necessary” |
| Screws | 6 screws, 2.5 inches, through the base into a post topper | Matches the 6 post screws in the materials table |
| Before digging | Call 811; check local zoning | Utility locate service (US) |

With the box floor at about 36 inches, the front of our roof ends up near 36 + 25.5 + 0.75 = 62.25 inches off the ground. Dig deeper if you want the box lower for small children, as the install sheet suggests. The install sheet screws the box base to a post topper, and the Kalamazoo plan suggests angled supports under a scrap of plywood to make the mounting surface.
Little Free Library says concrete around the post base “usually isn’t necessary”, and its Kalamazoo plan says the same for a 24 to 30 inch hole. Source: Little Free Library, How to Install a Little Free Library and Kalamazoo plan
Set the post in the ground as if it will rot eventually: use a post rated for ground contact, and keep the box itself off the soil. Our page on cedar and rot explains why untreated wood fails first at the soil line.
Most stewards place the library 3 to 5 feet from the sidewalk or nearest path, according to the install sheet. Confirm local zoning allows it before you dig.
What a Little Free Library Really Costs
Little Free Library’s own cost page gives much lower numbers.
| Item | Cost | Source |
|---|---|---|
| Building materials, recycled | About $5 | Little Free Library cost page |
| Building materials, all new lumber and hardware | Up to about $150 | Little Free Library cost page |
| Post and installation materials | About $30 to $40 | Little Free Library cost page |
| Registration and charter sign for a library you built | $49.95, one time | Little Free Library cost page |
| All-in total for a library you build (materials, post, registration) | About $80 to $230 | Little Free Library cost page |
| Pre-built library from the official store | From $189 | Little Free Library cost page |
Prices on that page were read on the date this article was updated and can change, so check the page before you budget.
Registering, Naming and Stocking Your Library
You can build and stock a book box without registering. The organization says it welcomes book sharing in any form, and it hosts free plans. What you cannot do without registering is use the name. According to its trademark FAQs, only registered stewards can use the Little Free Library name, and the trademark covers close variations too, so an unregistered box needs a different name, such as “Neighborhood Book Box”.
Registration means buying a charter sign. It also unlocks the steward account and the world map. Little Free Library suggests naming at least one steward, a person responsible for keeping the box clean and stocked, and getting permission from the property owner if the box is not going on your own property (Little Free Library’s insider’s guide).
For stocking, start with books you already own and rotate them. Take out anything damp, since a wet book in a closed box spoils its neighbors. Our beginner project page on making small wooden boxes is a good warm-up if you have never built a box, and free birdhouse plans use the same sloped-roof construction at a smaller scale.
Other Mini Library Designs: Cabinets, Kits and Themed Boxes
A mini library exchange does not have to be a post-mounted box, and Little Free Library’s insider’s guide points to cheaper routes. It says one of the most affordable ways to start is to turn a piece of furniture into a library, and names a cabinet, a bookshelf, a mini-refrigerator and even a washing machine. It also lists kits from its store that come with step-by-step instructions and, it says, can be assembled in as little as two hours.
Frequently Asked Questions
How big should a Little Free Library be?
There is no official size. The box in this guide is 21.5 inches wide, 12.75 inches deep and 24 to 25.5 inches tall, which gives two shelves with 11.25 inches of clear height each. The two plans Little Free Library hosts on its own site use different sizes, so pick one that fits the books you expect to stock.
How deep should a Little Free Library post be?
Little Free Library’s install sheet says to dig a hole 2 feet deep and 1 foot wide. With a 5-foot post that leaves about 3 feet above ground. You can dig deeper if you want the box lower for small children.
Do I need concrete for a Little Free Library post?
No. The official install sheet says to backfill with tamped dirt and that pouring concrete around the base is something some stewards do but usually isn’t necessary. Concrete is a judgment call for loose soil or windy sites, not a requirement.
How much does it cost to build a Little Free Library?
Little Free Library puts building costs at about $5 with recycled materials up to $150 with all-new lumber and hardware, plus about $30 to $40 for a post. Registering a library you built costs a one-time $49.95. Those figures come from the organization’s cost page.
Do I have to register my Little Free Library?
You do not have to register to build a book-sharing box. You do have to register, by buying a charter sign, to use the name Little Free Library, and the organization says its trademark also covers close variations such as Little Library.
What is the best wood for a Little Free Library?
Use exterior-grade plywood or a rot-resistant solid wood such as cedar for the box, and a post rated for ground contact. Little Free Library’s Zimmerman plan specifies CDX exterior-grade plywood, and its cost page suggests exterior plywood, pine or cedar with exterior house paint. Interior plywood and particleboard swell when they get wet.
Conclusion
A well-built little library comes down to exterior plywood, glued and screwed joints, a sloped roof and a post dug 2 feet deep. Build the box from the cut list, dry-fit before gluing, and check Little Free Library’s install sheet and your local zoning before you dig.
Sponsored / affiliate links. As an Amazon Associate I earn from qualifying purchases. I may earn additional commission from eligible campaigns.