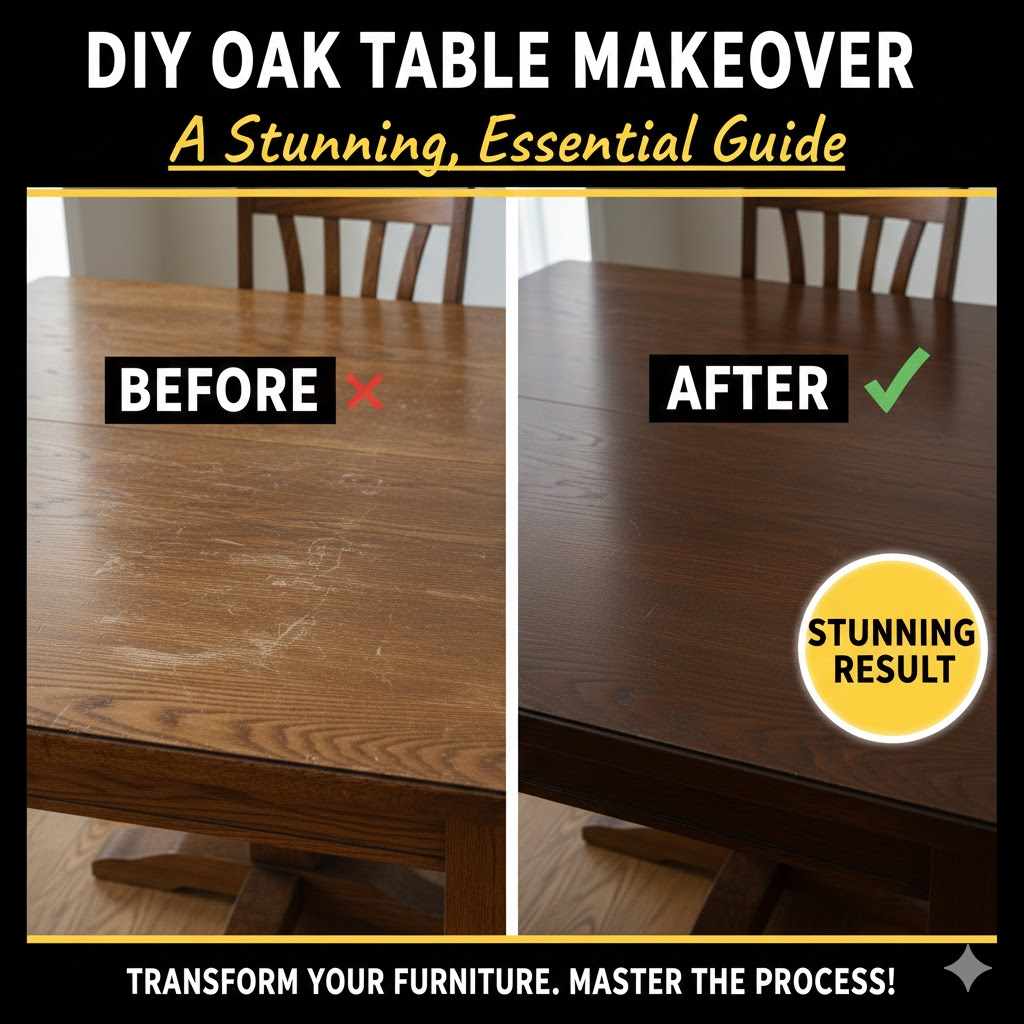
DIY Oak Table Makeover: A Stunning, Essential Guide
A DIY oak table makeover is a simple, rewarding project perfect for beginners. The process involves cleaning, thoroughly sanding to remove the old finish, applying a quality primer to block wood tannins, and finishing with your choice of paint or stain. Finally, protect your work with a durable topcoat to ensure a beautiful, long-lasting result.
Have you ever looked at your old oak table and thought it looks a bit… dated? Maybe it’s that classic golden or “honey” oak finish from a few decades ago. It’s a common sight in many homes. That table is probably built like a rock, made from solid wood, but its style just doesn’t fit your home anymore. You might think you need to buy a whole new table to get a fresh look. But what if I told you that you don’t? With a little bit of effort, you can transform that outdated piece into a stunning centerpiece. In this guide, I’ll walk you through every simple step. Let’s get started!
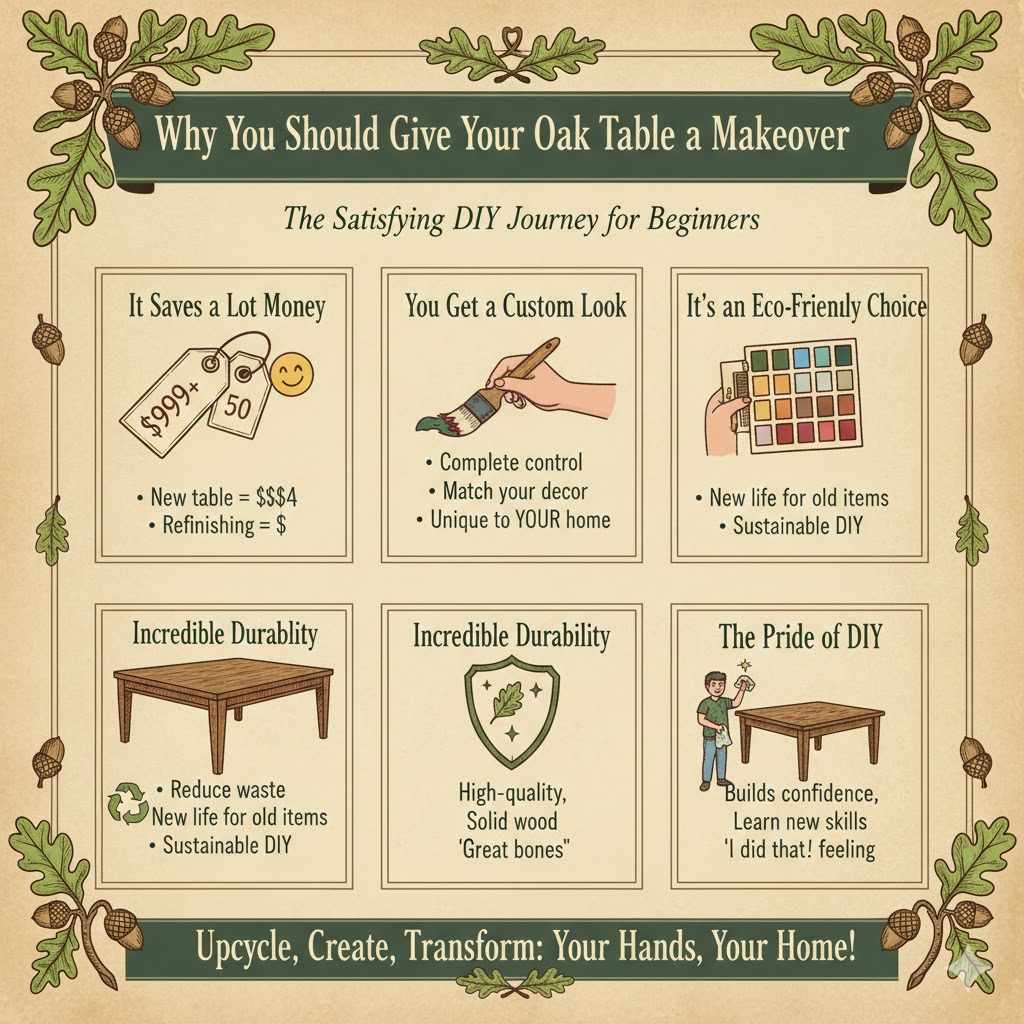
Why You Should Give Your Oak Table a Makeover
Before we grab our tools, let’s talk about why this project is so worthwhile. Giving an old oak table a makeover isn’t just about changing its color. It’s one of the most satisfying DIY projects you can take on, especially as a beginner.
- It Saves a Lot of Money: A new solid wood dining table can cost hundreds, if not thousands, of dollars. Refinishing your existing one costs only a fraction of that, mainly for supplies like sandpaper and paint.
- You Get a Custom Look: You are in complete control! You can choose the exact color and finish to perfectly match your home’s decor. You can’t get that level of customization from a store-bought table.
- It’s an Eco-Friendly Choice: Why send a perfectly good piece of furniture to a landfill? Upcycling your table is a sustainable choice that reduces waste and gives an old item a new life.
- Incredible Durability: Older oak furniture was often made with high-quality, solid wood. Unlike much of today’s fast furniture, your old table has great bones. A new finish will make its quality shine through again.
- The Pride of DIY: There is nothing quite like the feeling of looking at a beautiful piece of furniture and knowing you did that with your own hands. It builds confidence and skills you can use on future projects.
Gathering Your Tools and Materials
Having everything ready before you start makes the whole process smoother and more enjoyable. Think of it as setting up your kitchen before you start cooking! You don’t need a professional workshop for this, just a few key items.
Safety First!
Your safety is the most important tool you have. Wood dust and fumes from finishes can be harmful, so let’s make sure you’re protected.
- Safety Goggles: Protect your eyes from dust and splashes.
- Dust Mask or Respirator: Essential for sanding and when working with products with strong fumes. A simple N95 mask is good for dust, but a respirator is better for fumes.
- Gloves: Nitrile gloves are great for protecting your hands from stains, paints, and cleaners.
For more detailed information on workshop safety, the Occupational Safety and Health Administration (OSHA) provides excellent guidelines that apply just as well to a home setup.
Essential Supplies List
Here’s a breakdown of what you’ll need for each stage of your DIY oak table makeover.
- For Cleaning:
- A good degreasing cleaner (like TSP substitute or a 50/50 mix of denatured alcohol and water)
- Clean, lint-free rags
- A bucket for your cleaning solution
- A scrub pad for stubborn spots
- For Sanding:
- Random orbital sander (highly recommended to save time and effort)
- Sandpaper discs for the sander (grits 80, 120, and 220 are a great starting point)
- Sanding block or sponges for edges and details
- Shop vacuum to clean up dust
- Tack cloth for wiping away fine dust particles before painting
- For Finishing:
- Painter’s tape (to protect any areas you don’t want to paint)
- Stain-blocking primer (shellac-based is excellent for blocking oak tannins)
- Your choice of paint or stain
- A durable topcoat (polyurethane, polycrylic, or furniture wax)
- High-quality paint brushes and small foam rollers
- Staining rags (if you are staining)
- Drop cloths to protect your workspace
Choosing Your Perfect Finish
The biggest decision you’ll make is what you want your table to look like in the end. A painted finish offers a modern, clean look, while stain enhances the natural beauty of the oak grain. You can even do a combination of both! Here’s a simple table to help you decide.
| Finish Type | Pros | Cons | Best For |
|---|---|---|---|
| Paint | Completely changes the look; huge color variety; can hide imperfections in the wood. | Can chip over time if not sealed properly; hides the natural wood grain. | Modern, farmhouse, or colorful styles. Great for tables with some damage. |
| Stain | Enhances the natural oak grain; timeless and classic look; very durable. | Requires sanding the old finish off completely; limited to wood tones. | Traditional, rustic, or craftsman styles. Perfect for tables in good condition. |
| Two-Tone (Paint & Stain) | Offers a custom, high-end look; best of both worlds (e.g., stained top, painted legs). | Requires a bit more prep work with painter’s tape and careful application. | A versatile look that fits many styles, especially modern farmhouse. |
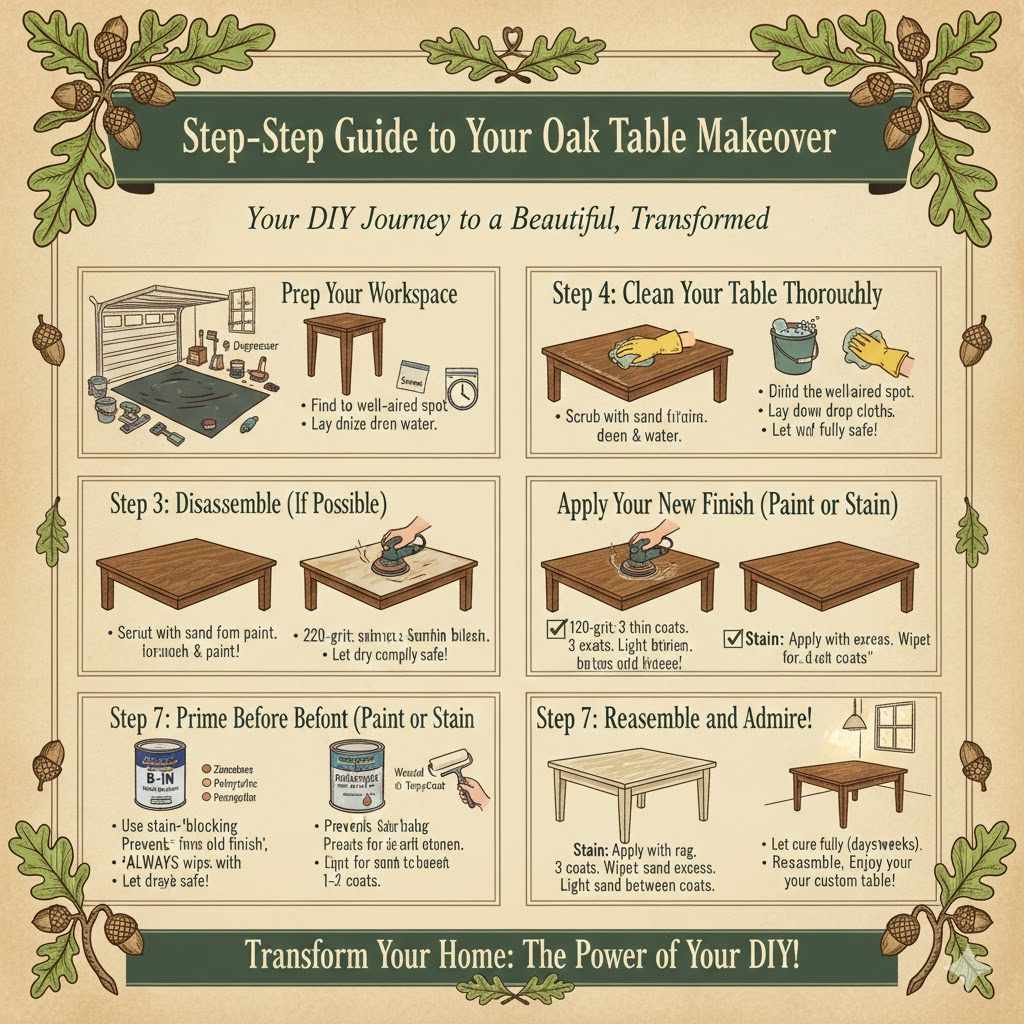
Step-by-Step Guide to Your Oak Table Makeover
Ready to get started? We’re going to break this down into simple, manageable steps. Just focus on one step at a time, and you’ll do great. Remember, patience is your friend here!
Step 1: Prep Your Workspace
First things first, set up a good spot to work. This project can get a little messy, so preparation is key.
- Find a space with good ventilation, like a garage with the door open, a covered patio, or even a well-aired room. Good airflow is important, especially when you start working with primers and topcoats.
- Lay down drop cloths to protect your floor from dust, spills, and drips.
- Organize all your tools and supplies so they are within easy reach. This saves you from hunting for something with paint on your hands later!
Step 2: Clean Your Table Thoroughly
You cannot skip this step! Years of kitchen grease, furniture polish, and grime have built up on your table, even if you can’t see it. Paint and stain won’t stick to a dirty surface.
- Mix your degreasing cleaner according to the directions on the package. If you’re using a TSP substitute, it’s usually a small amount mixed into a bucket of warm water.
- Wearing your gloves, use a rag to scrub down every single surface of the table. Pay extra attention to the edges of the tabletop and the legs, where grime tends to collect.
- Wipe the table down with a clean rag dampened with plain water to rinse off any cleaning residue.
- Let the table dry completely before moving on to the next step.
Step 3: Disassemble (If Possible)
This step is optional but can make your life much easier. If the legs of your table can be unbolted from the top, I highly recommend doing it.
- Working on the tabletop and the base separately allows you to easily reach every angle for sanding and painting.
- It prevents paint from dripping onto another surface.
- Just be sure to keep all the screws and hardware in a labeled plastic bag so you don’t lose anything!
Step 4: The Sanding Process
Sanding is arguably the most important step for getting a professional-looking result. Its purpose is to remove the shiny old topcoat and create a slightly rough surface that the new primer and paint can grip onto. Don’t be intimidated; with a random orbital sander, it goes much faster than you think.
- Start with a medium grit (120-grit): Attach a 120-grit sanding disc to your orbital sander. Start sanding the large, flat surfaces like the tabletop. Move the sander slowly and steadily in the direction of the wood grain. Your goal is to remove the shine and scuff up the surface. You don’t need to sand down to bare wood if you are painting, but you do if you are staining.
- Focus on the details: For curved legs, edges, and other tricky spots, use a sanding sponge or a sheet of sandpaper wrapped around a block. This gives you more control.
- Wipe away the dust: After your first pass of sanding, the table will be covered in fine dust. Use your shop vacuum with a brush attachment to clean up most of it, then wipe the rest away with a tack cloth. A tack cloth is a sticky piece of cheesecloth that is amazing at picking up any leftover dust.
- Finish with a finer grit (220-grit): Switch to a 220-grit sandpaper for one final, light sanding pass. This will create a super smooth surface, which is the perfect canvas for your finish. Remember to wipe it all down with a tack cloth again. Your surface should feel smooth as silk!
For more great tips on sanding techniques, Bosch Tools offers a helpful knowledge center with easy-to-understand advice.
Step 5: Prime Before You Paint
If you are painting your oak table, primer is your secret weapon. Oak wood contains natural oils called “tannins.” Without a good primer, these tannins can bleed through your beautiful new paint job, creating ugly yellow or pinkish stains. Don’t risk it!
- Choose a stain-blocking primer. A shellac-based primer like Zinsser B-I-N is a popular choice among professionals for its superior ability to block tannin bleed.
- Apply a thin, even coat of primer to the entire table. Use a small foam roller for the large flat surfaces to get a smooth finish, and a brush for the legs and edges.
- Don’t worry if the first coat looks a bit streaky. The goal is coverage, not perfection.
- Let the primer dry completely according to the can’s instructions. A second light coat can be a good idea for extra protection, especially if you’re painting a light color over dark wood.
Step 6: Apply Your New Finish (Paint or Stain)
Now for the fun part—the transformation! Whether you’re painting or staining, the key is to apply thin, even coats.
If you are painting:
- Stir your paint thoroughly. Don’t shake it, as that creates air bubbles.
- Apply your first coat of paint. Just like with the primer, use a foam roller for flat areas and a brush for the details. Work in long, even strokes. The first coat should be thin; it’s better to apply two or three thin coats than one thick, drippy one.
- Let the first coat dry completely. Check the paint can for recoat times.
- Lightly sand between coats with a very fine grit sandpaper (320-grit) for an extra-smooth finish. Be sure to wipe away the dust with a tack cloth.
- Apply your second coat. A third may be needed for full coverage, especially with lighter colors.
If you are staining:
- Make sure you have sanded the entire table down to the bare, raw wood. Stain needs to soak into the wood, and it can’t do that if any old finish is left.
- Apply the stain with a clean, lint-free rag. Work in small sections, wiping the stain on in the direction of the wood grain.
- Let the stain sit for a few minutes (check the can for recommendations), then use a fresh, clean rag to wipe off the excess. The longer you let it sit, the darker the color will be.
- Let the stain dry completely. If you want a deeper color, you can apply a second coat.
Step 7: Protect with a Topcoat
Your table looks amazing, but it’s not done yet! A dining table sees a lot of action—spills, hot plates, and daily use. A protective topcoat is not optional; it’s essential to protect your hard work.
| Topcoat Type | Durability | Look | Application Notes |
|---|---|---|---|
| Oil-Based Polyurethane | Very High | Adds a warm, amber tone. Can yellow over white paint. | Apply thin coats with a high-quality natural bristle brush. Strong fumes, so requires good ventilation. |
| Water-Based Polycrylic | High | Crystal clear, non-yellowing. Perfect for light or white paint. | Apply thin coats with a synthetic brush. Dries quickly. Lightly sand with 320-grit paper between coats. |
| Furniture Wax | Medium | Creates a soft, matte, buttery finish. | Apply with a cloth, buff off the excess. Needs to be reapplied every 6-12 months. Not ideal for high-use tables. |
For a dining table, a water-based polycrylic in a satin finish is a fantastic choice. It’s durable, easy to clean up, and won’t change the color of your paint.
- Stir your topcoat gently. Again, don’t shake it.
- Apply a very thin, even coat using a high-quality brush.
- Let it dry completely.
- Apply at least three coats to the tabletop for maximum durability, and two coats to the legs and apron. Lightly sand with 320-grit sandpaper between coats for the smoothest finish, wiping with a tack cloth each time.
Step 8: Reassemble and Admire!
This is the final hurdle. Let your table cure. Paint and topcoats might feel dry to the touch in a few hours, but they take much longer to fully harden, or “cure.” This can take anywhere from a few days to a month, depending on the product and your climate. Be gentle with your table during this time. Once it has fully cured, reassemble the legs, move it into place, and step back to admire your incredible work. You did it!
FAQ: Your Oak Table Makeover Questions Answered
Do I really have to sand my oak table before painting?
Yes, absolutely. Sanding is essential for a lasting finish. It scuffs up the old, slick surface, giving the new primer and paint something to grip onto. Without sanding, your paint will easily chip and peel off. You don’t need to sand to bare wood, just enough to remove the shine.
What is the best paint to use for an oak table?
For a table, you need a durable paint. High-quality acrylic enamel or a cabinet and furniture paint are excellent choices because they are designed to level out smoothly and cure to a hard finish. While chalk paint is popular for its adhesion, it is very soft and requires a very durable topcoat to be suitable for a table.
How can I stop the oak wood grain from showing through the paint?
Oak has a very open, deep grain. If you want a perfectly smooth, modern finish, you may need to use a wood grain filler. After sanding, you apply the filler with a putty knife, working it into the grain. Once it’s dry, you sand it smooth before priming and painting. This extra step will give you a flawless, grain-free look.
Can I stain my oak table a different color without sanding it completely?
Unfortunately, no. Traditional stain must penetrate into the wood fibers to work. It cannot soak through an existing layer of finish or sealer. To re-stain an oak table, you must sand it all the way down to raw, bare wood. Gel stains can sometimes work over existing finishes, but the result can be less durable and may look more like a transparent paint.
How long does it take for the new finish to cure?
Cure time is different from dry time. While a table might be dry to the touch in a few hours, it takes much longer to fully harden. For most paints and polycrylics, allow at least 72 hours before light use, but it can take up to 30 days for the finish to reach its maximum durability. Be patient and treat it gently for the first few weeks.
What is the most durable topcoat for a dining table?
Oil-based polyurethane is traditionally known for being extremely durable and resistant to heat and scratches. However, it can add a yellow/amber tint, which may not be ideal over white or light-colored paint. A high-quality, water-based polycrylic or a specially formulated tabletop sealer is a fantastic, non-yellowing alternative that offers excellent durability for everyday use.
Is it better to use a brush or a roller to paint a table?
The best approach is to use both! Use a small, high-density foam roller for the large, flat surfaces like the tabletop. This will give you a beautiful, streak-free finish. Use a high-quality angled brush for the table legs, edges, and any detailed areas where a roller can’t reach.
Conclusion: Your New Table Awaits
And there you have it! Your old, tired oak table has been given a second chance. It’s no longer just a piece of furniture, but a reflection of your style and a testament to your hard work. By following these steps—cleaning, sanding, priming, and finishing—you’ve done more than just paint some wood. You’ve learned a new skill, saved a quality piece of furniture from the curb, and created something beautiful and functional for your home.
This DIY oak table makeover is the perfect project to build your confidence. Every time you gather around that table with family and friends, you’ll feel a sense of pride. So go ahead, find that old piece of oak furniture hiding in your home, and get ready to transform it. You’ve got this!