Can You Stain Oak Cabinets? Yes, With the Right Prep
Yes, you can stain oak cabinets – but there’s a catch most guides skip: if your cabinets already have a factory finish on them (and almost all do), stain can’t soak into the wood until that finish is scuff-sanded or fully stripped off first. Stain only penetrates bare, open wood. Try to wipe it onto an intact glossy poly or varnish coat and it will mostly just sit on top, smear, or wipe away instead of taking.
Do your golden oak cabinets feel a little stuck in the past? It’s a common story. Those sturdy, well-made cabinets have served you well, but their look might not match your modern style. The good news is you don’t need a massive budget or a full remodel to bring them back to life – you can stain them, as long as you treat the existing finish correctly first.
Staining oak is one of the most rewarding DIY projects you can tackle. It highlights the wood’s bold, open grain while giving it a fresh, updated color. In this guide, I’ll walk you through every step – including the finish-prep work that most tutorials gloss over – from start to finish. If your cabinets are already clean and you just want to keep their current color looking its best rather than changing it, our guide to cleaning oak cabinets without damaging the finish is the better starting point. If you’re ready to change the color, let’s get started.
Why Staining Oak Cabinets is a Great Idea
Before we grab our tools, let’s talk about why this project is such a winner. Deciding to stain your existing oak cabinets instead of replacing them comes with some real benefits.
- It’s incredibly cost-effective. A full cabinet replacement can run thousands of dollars. Staining only requires a few supplies like sandpaper, a wood conditioner, and stain. You get a brand-new look for a tiny fraction of the price.
- You preserve high-quality wood. Older oak cabinets are often solid wood, something that’s expensive and harder to find in today’s market. Staining puts that quality to use instead of sending it to a landfill.
- It enhances the natural beauty. Unlike paint, which covers the wood, stain soaks into bare wood and enhances oak’s unique grain patterns. That’s exactly why the prep work matters so much – stain can only do this where the wood is actually open to receive it.
- It’s a project you can do yourself. You don’t need to be a professional woodworker to get great results. With patience and the right steps, anyone can successfully refinish their cabinets.
Best Gel Stain For Existing Oak Cabinets
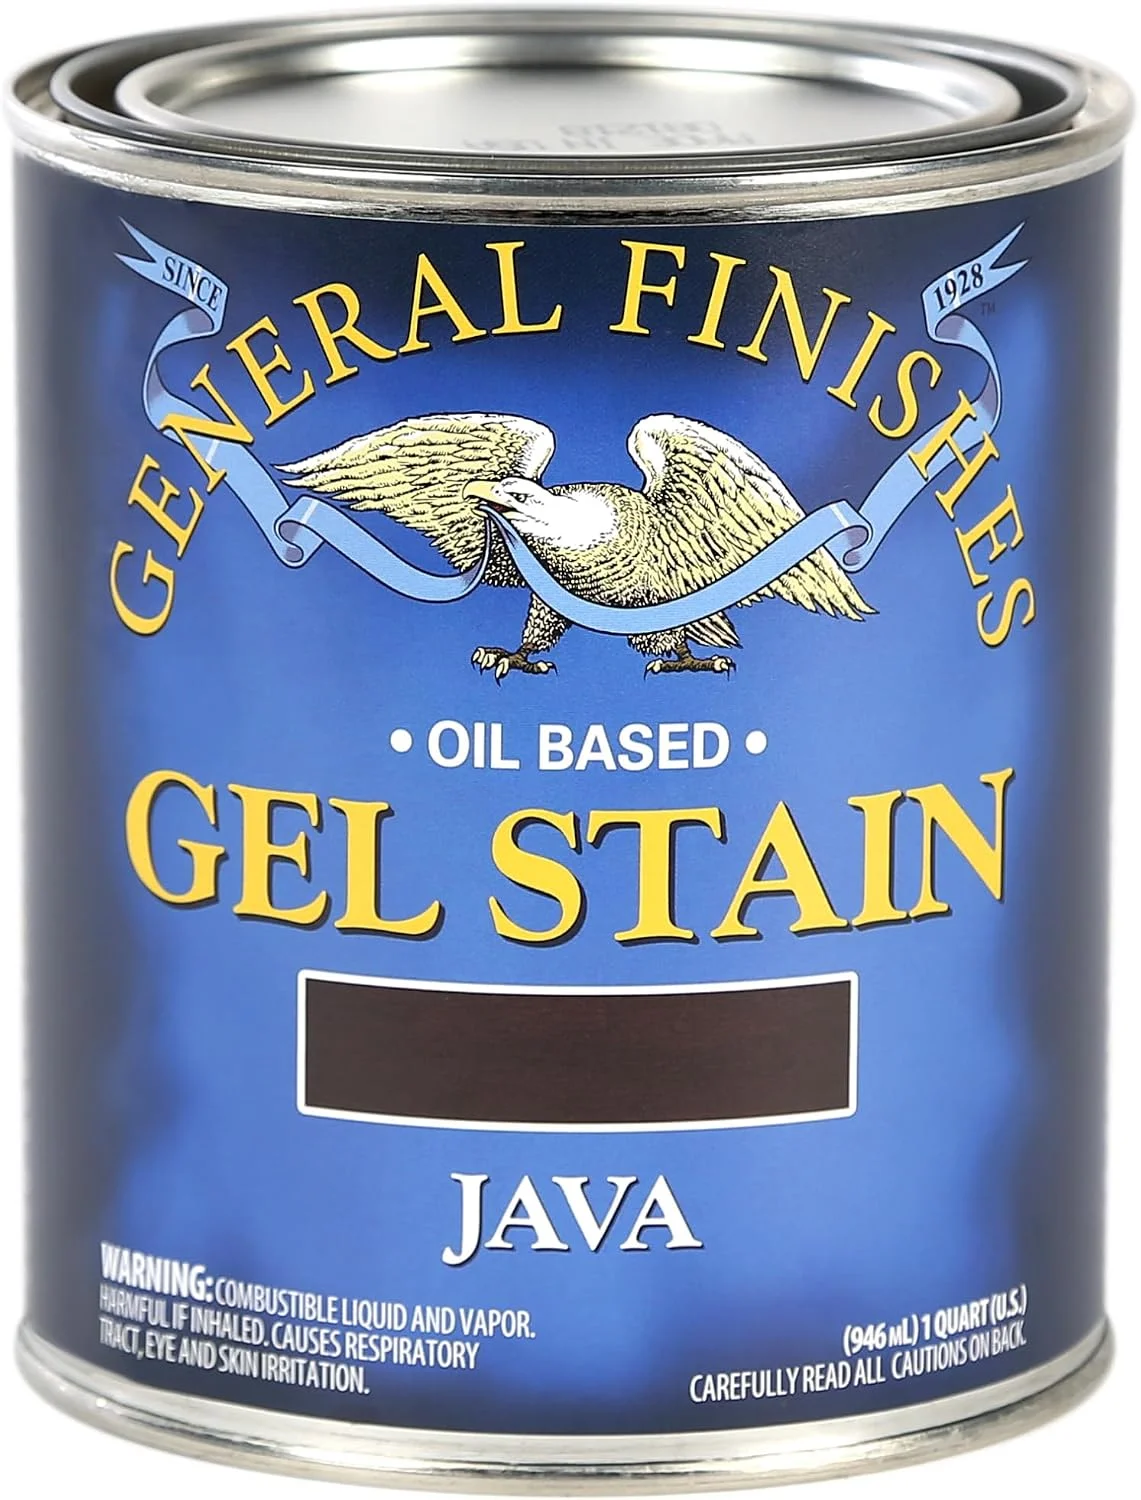 |
General Finishes Oil Base Gel Stain, Java, 1 Quart – $59.74 A thick, heavy-bodied gel stain that sits more on the surface instead of soaking deep – it’s more forgiving on oak’s open grain and easier to control once you’ve sanded off the old finish.
|
Understanding Your Oak Cabinets: The Key to Success
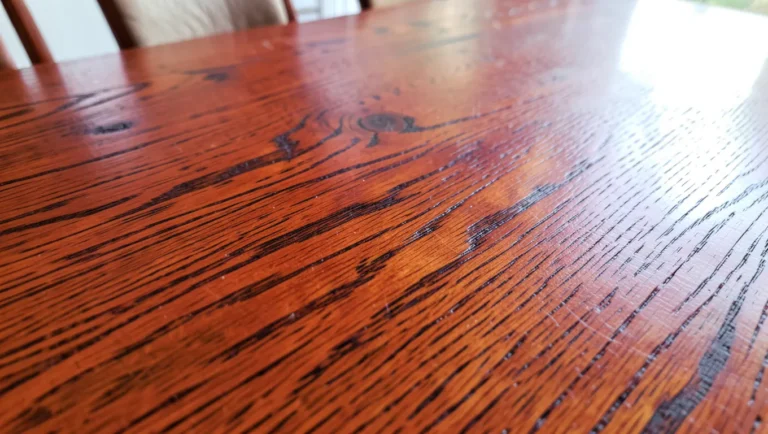
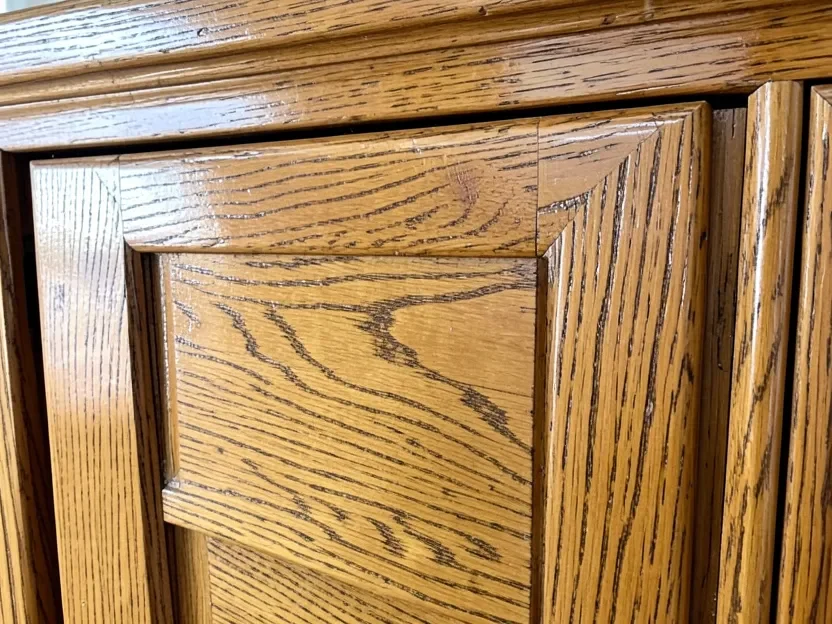
Oak is a wonderful wood to work with. It’s strong, durable, and has a very prominent, open grain pattern – a real, distinctive trait of oak compared to closed-grain woods like maple or birch. On oak, that grain doesn’t just add texture, it actively changes how stain looks once it’s applied: the open pores pull in more color along the grain lines, so the grain pattern shows through more prominently than it would on a smoother wood. That’s a genuine characteristic to plan for, not a flaw – most people find it’s exactly what gives a stained oak cabinet its classic, textured look.
Staining Over an Existing Finish vs. Bare Oak
This is the step most “can you stain cabinets” articles never actually explain, and it’s the single biggest reason a DIY stain job fails. New, unfinished oak is bare wood – its pores are wide open, so stain soaks straight in. Existing kitchen cabinets are almost never bare. They left the factory (or the last remodel) with a clear film finish on them – polyurethane, varnish, or lacquer – sealing the wood’s surface. That film is what’s actually between your rag and the oak.
Stain is designed to penetrate wood fibers, not stick to a hard, sealed coating. Wipe a liquid or gel stain onto an intact glossy finish and, at best, it beads up and wipes away with the excess; at worst, it dries as an uneven, streaky film on top of the old coating that never really “takes” the way it does on prepped wood. The fix is mechanical, not a different product: the existing finish has to be broken through first, either by:
- Scuff-sanding – roughing up and dulling the existing finish (not sanding it fully away) with 120-150 grit sandpaper so stain has a textured, open surface to grip. This works if you want a similar or slightly deeper tone and the current finish is in decent shape.
- Full stripping or sanding to bare wood – removing the old finish completely, which is necessary if you want a real color change, if the existing finish is failing (cracking, peeling, or badly worn), or if you want the most even, predictable stain result.
A chemical deglosser (sometimes sold as “liquid sandpaper”) can substitute for the scuff-sand step on cabinets that are in good shape, but it dulls the finish rather than removing it – it’s a shortcut for scuffing, not a replacement for full stripping when you actually want to go significantly lighter or darker. Either way, skipping this step is the single most common reason a “stained” cabinet ends up patchy, tacky to the touch, or peeling within a few weeks.
Gel Stain vs. Oil-Based Stain
When you go to the hardware store, you’ll mainly see two types of stain suitable for this project: traditional oil-based penetrating stain and gel stain. Both can give you great results on oak once the surface is properly prepped, but they work differently.
Here’s a simple table to help you decide which is right for you:
| Feature | Oil-Based Stain | Gel Stain |
|---|---|---|
| How it Works | Soaks deep into open wood pores. | Sits more on the surface, like a thin layer of colored pudding. |
| Application | Thin liquid, applied with a rag or brush and wiped off. | Thick consistency, applied with a rag and wiped off. Very little dripping. |
| Best For | Highlighting the natural grain of the wood on raw or fully sanded wood. | Providing a more uniform color and minimizing blotching. Excellent for beginners and for scuff-sanded surfaces. |
| Cleanup | Requires mineral spirits. | Requires mineral spirits. |
| Dry Time | Relatively fast. | Longer dry time between coats. |
For most beginners working with existing oak cabinets, I highly recommend starting with a gel stain. It’s much more forgiving on a scuff-sanded surface and gives you greater control over the final color.
Gathering Your Tools and Materials
Having everything ready before you start makes the whole process smooth and enjoyable. Think of it as setting up your workshop for success. Here’s a checklist of what you’ll need:
Safety First!
- Safety glasses
- Dust mask (especially for sanding)
- Nitrile gloves (to protect your hands from stain)
- Good ventilation (open windows or use fans)
Prep & Cleaning
- Drill or screwdriver (for removing hardware)
- Small plastic bags and a marker (for labeling screws and hinges)
- Drop cloths or plastic sheeting
- Painter’s tape
- Degreasing cleaner (like TSP substitute or a mix of warm water and Dawn soap)
- Clean cloths or shop towels
- Scrub sponge
Sanding & Staining
- Random orbital sander (optional, but a huge time-saver)
- Sanding block or sandpaper
- Sandpaper in various grits (120, 150, and 220 are good choices)
- Chemical deglosser / liquid sandpaper (optional alternative to hand-scuffing an intact finish)
- Tack cloth or a vacuum with a brush attachment
- Pre-stain wood conditioner (highly recommended)
- Your choice of stain (gel or oil-based)
- High-quality natural bristle brushes or lint-free rags for application
- Protective topcoat (polyurethane is a great choice for kitchens)
Step-by-Step Guide to Staining Your Oak Cabinets
Alright, it’s time for the fun part! Let’s transform those cabinets. Take your time with each step, and remember that good finish-prep is the foundation of a beautiful result – rushing the sanding step is where most stain jobs go wrong.
Step 1: Prepare Your Workspace and Cabinets
First, clear your counters and protect your workspace. Lay down drop cloths on the floor and cover your countertops with plastic sheeting. Use painter’s tape to protect any walls or appliances that meet the cabinet frames.
Next, empty your cabinets. Then, using your drill or screwdriver, carefully remove all the cabinet doors and drawers. As you remove each piece, label it! A simple trick is to write a small number in the space where the hinge sits. Put the corresponding hinges and screws for each door into a labeled plastic bag. This will save you a huge headache during reassembly.
Step 2: Clean Everything Thoroughly
Kitchen cabinets accumulate years of grease, grime, and cooking oils sitting on top of that clear finish. Sandpaper alone won’t cut through grease – it just clogs and skates over it. Using a good degreasing cleaner like TSP substitute, scrub every surface you plan to stain: doors, drawer fronts, and cabinet frames. Follow the product’s instructions, rinse well with a clean, damp cloth, and let everything dry completely. This step is critical and cannot be skipped.
Step 3: Sand Through the Existing Finish
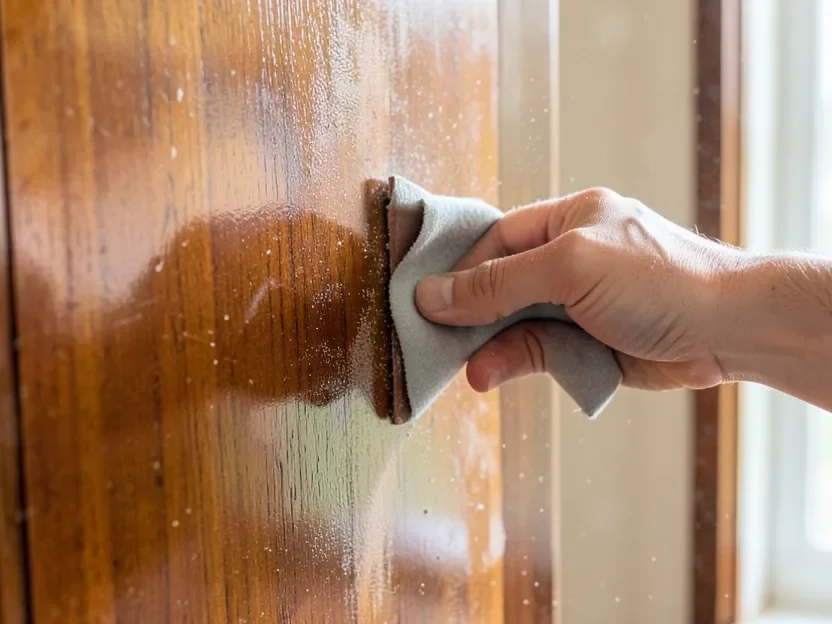
This is the step that actually makes staining possible. Sanding does two things: it cuts through the old clear topcoat that’s sealing the wood, and it opens the grain back up so it can absorb stain again. You don’t need to sand every trace of old finish away down to raw wood for a scuff-sand approach, but you do need to remove all the glossiness – if any shiny, unsanded patches remain, stain will visibly skip over them.
Start with a medium-grit sandpaper, like 120-grit, to cut through the existing finish. A random orbital sander is excellent for flat areas like door panels, but you’ll need to sand detailed or curved areas by hand. Move the sander with the direction of the wood grain. Run a hand over the surface as you go – if it still feels slick or shows sheen under a light, keep sanding that spot. After the old finish is gone, switch to a finer 150-grit paper to smooth out any scratches. You can finish with 220-grit for an ultra-smooth surface, but don’t go any finer, as over-polishing the wood can actually close the grain back up and prevent it from accepting stain evenly – the opposite of what you want.
| Grit | Purpose | Tool |
|---|---|---|
| 120-Grit | Cuts through the old clear coat and light scratches. | Random orbital sander or hand sanding. |
| 150-Grit | Smooths the surface after the first sanding pass. | Random orbital sander or hand sanding. |
| 220-Grit | Final smoothing step before staining for a flawless feel. | Hand sanding is often best for this final pass. |
Once you’re done sanding, it’s time to clean up. Vacuum every surface with a brush attachment to remove all the dust. Follow up with a tack cloth to pick up any remaining fine particles. Your surfaces should be perfectly clean and smooth, with no leftover sheen anywhere.
Step 4: Apply the Pre-Stain Wood Conditioner
Remember how we talked about oak’s open pores? This is where we tame them so the color goes on evenly instead of blotchy. Apply a liberal coat of pre-stain wood conditioner with a clean rag or brush, moving with the grain. Let it soak in for about 5-15 minutes (check the directions on the can). Then, wipe off any excess with a clean rag. The conditioner works best when you apply stain within two hours of applying it, so plan your time accordingly.
Step 5: Apply the Stain
Now for the magical transformation! Always test your stain on a hidden spot first, like the back of a cabinet door, to make sure you like the color and that the surface is actually taking stain evenly.
Using a clean, lint-free rag or a natural bristle brush, apply a liberal coat of stain to one surface at a time. Always work in the direction of the wood grain. If you’re using gel stain, it will feel thick, almost like painting. Cover the entire surface evenly.
Step 6: Wipe Off the Excess Stain
The secret to a beautiful stain job isn’t how much you put on, but how much you wipe off. The longer the stain sits, the darker the color will be. After letting the stain sit for 5-15 minutes (again, check the can for specific times), use a new, clean rag to wipe off all the excess stain. Wipe gently, always following the grain. The goal is to leave behind an even layer of color in the wood’s open grain, not a thick film sitting on top of it. If you want a darker color, let it dry completely and apply a second coat.
Step 7: Protect Your Work with a Topcoat
Stain provides color, but it doesn’t provide protection. For durable kitchen cabinets, a topcoat is essential. Polyurethane is the toughest choice. It comes in oil-based (which adds a slight amber tint) and water-based (which dries perfectly clear) varieties. The Forest Products Laboratory suggests at least two coats for durable protection.
Apply your first thin coat of polyurethane with a high-quality brush. Let it dry completely according to the manufacturer’s instructions. Once dry, lightly sand the surface by hand with 220-grit sandpaper to knock down any bumps or dust nibs. Clean the dust with a tack cloth, then apply your second coat. For kitchen cabinets, a third coat is a great idea for maximum durability.
Step 8: Reassemble and Admire
Give your cabinets plenty of time to cure. This can take several days, so be patient! Once the finish is hard and no longer tacky, it’s time for the final, most satisfying step. Carefully reattach your doors and drawer fronts using the hardware you so cleverly labeled and saved. Step back and admire your beautiful, newly transformed kitchen. You did it!
Frequently Asked Questions (FAQ)
Can you stain oak cabinets that already have a finish on them?
Only after that finish is scuff-sanded or fully removed. Stain penetrates open wood pores, and an intact polyurethane, varnish, or lacquer coating blocks that penetration – stain applied straight over it will bead, smear, or wipe away rather than taking color. Sand until the shine is gone (120-grit, then refine with 150 and 220), or use a chemical deglosser to dull the finish, before applying a pre-stain conditioner and your stain.
Can I stain oak cabinets without sanding?
Technically, you can use products like a chemical deglosser (“liquid sandpaper”) instead of hand-sanding, but the results are rarely as durable or as even. For stain to penetrate properly, the old protective topcoat has to be broken through one way or another. A thorough sanding is the most reliable way to guarantee a long-lasting, professional-quality finish.
What is the best stain for oak cabinets?
For beginners, gel stain is often the best choice for oak. Its thick consistency provides a more uniform color, minimizes blotching in the deep oak grain, and is less messy to apply. Brands like General Finishes and Minwax make excellent gel stains that are widely available.
How do I fix a blotchy stain on oak?
The best way to fix blotchiness is to prevent it by using a pre-stain wood conditioner. If you already have a blotchy finish, you can try applying another coat of stain, focusing on the lighter areas to even them out. In more serious cases, you may need to sand the area down and start again, making sure to use a conditioner this time.
Can you stain dark oak cabinets a lighter color?
Staining is a transparent process, so you cannot stain dark wood to a lighter color. The existing color of the wood will always show through. To go significantly lighter, you would need to completely strip and sand the wood down to its raw state and then potentially use a wood bleach before applying a very light-colored stain. This is a much more advanced process.
How long does it take to stain kitchen cabinets?
This depends on the size of your kitchen. For an average-sized kitchen, plan for at least a full weekend. Day 1 would be for prep, cleaning, and sanding. Day 2 would be for staining and the first topcoat. You’ll then need a few more days for additional topcoats and proper drying/curing time before you can reassemble everything.
Do I need to remove the cabinet doors to stain them?
Yes, absolutely. Removing the doors and drawers is essential for a professional result. It allows you to clean, sand, and stain every surface properly without having to work in awkward positions or worry about drips. It also makes it much easier to get an even finish on all sides.
Is it better to stain or paint oak cabinets?
This is a matter of personal preference. Painting covers the wood grain completely for a solid, modern look, but it can chip over time. Staining enhances the natural wood grain, providing a warm, textured look that is often more durable than paint. If you love the look of wood, staining is the way to go. If you want a solid color, choose paint. For safety information on paint and stain check out the resources provided by the U.S. Consumer Product Safety Commission.
Conclusion: A Project Worth Your Effort
There you have it – a complete guide to transforming your oak cabinets with stain. The steps themselves are simple, and the one that actually determines whether the project succeeds is the one most guides skip: getting past the existing finish before you ever open the stain can. Handle that properly, and the rest is straightforward.
Staining your cabinets is more than just a home improvement project; it’s an opportunity to put your own personal touch on the heart of your home. You’ll save a huge amount of money, keep beautiful solid wood in use, and gain an incredible sense of accomplishment every time you walk into your kitchen. So go ahead, embrace the project, and get ready to fall in love with your cabinets all over again.
Sponsored / affiliate links. As an Amazon Associate I earn from qualifying purchases. I may earn additional commission from eligible campaigns.