DIY Wood Desk Top: Build One From Slab to Finish
A DIY wood desk top comes together in five steps: pick a wood that can take daily wear, join the boards into a slab, sand it flat, then seal and finish it.
The finish is what actually decides how the desk holds up — skip it or rush it, and even a well-built slab will pick up water rings and scratches within months. Here’s the full build, from choosing your wood to the last coat of finish.
Choosing The Right Wood
Best Desktop Finish Pick
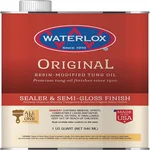 |
Waterlox Original Sealer & Finish – 1 Qt A penetrating oil-varnish blend that seals and finishes in one product, built to handle daily desktop wear.
|
The wood you pick determines almost everything downstream — how flat the glue-up stays, how the finish looks, and how the surface holds up to a laptop, a coffee mug, and years of elbows. Hardwood costs more up front but needs less babying later; a softwood top works fine too as long as you budget extra time for finishing.
Types Of Wood
Oak, maple, and walnut are the three hardwoods that show up most often in desk builds, and each brings something different: oak has an open, visible grain that hides scuffs well, maple is harder and takes stain unevenly (a pre-stain conditioner helps), and walnut is softer than the other two but has the richest natural color, often needing nothing more than oil. Pine and other softwoods run 40-60% cheaper per board foot and are easier to cut and sand, but they dent under a dropped stapler or a pushed-in chair in a way hardwood doesn’t — workable for a first build or a kid’s desk, less so for a daily-use work surface.
Wood Quality And Durability
Sight down the length of every board before buying, not just across its face — a board that looks flat from above can still have a twist or a bow that only shows up when you sight down the edge, and that defect won’t sand out later. Small tight knots are fine structurally and can even look intentional in a rustic build; loose knots that move when you press on them, or any crack that runs with the grain, are the ones to reject. A softwood top finished properly with several coats of a hard-wearing sealer will outlast a hardwood top with a single thin coat of wipe-on finish.
Essential Tools And Materials
A circular saw with a straightedge guide handles the initial rough cuts, but a track saw is worth borrowing or renting if you can — it leaves a glue-ready edge straight off the saw instead of requiring a separate jointing pass. You’ll also want at least four bar or pipe clamps long enough to span the full width of the desk (clamping pressure that only reaches the edges leaves the center of a wide glue-up slightly proud), a random-orbit sander, and a drill with both a countersink bit and driver bits if you’re using pocket screws or hardware. On materials: pick boards of matching thickness, get a wood glue rated for the humidity where the desk will live (standard yellow glue is fine for most home offices), and buy enough sandpaper in 80, 120, and 220 grit that you’re not stopping mid-project for more.
Measuring And Cutting
Measure the final desk dimensions first, then work backward to figure out how many boards you need, accounting for roughly 1/8 inch of width lost per glue joint once you’ve jointed each edge. Mark your cut lines with a combination square rather than eyeballing a straightedge — a line that’s off by even a degree over a 4-foot board translates to a visible gap at the far end of a glued-up top. A crosscut sled on a table saw gives the cleanest, most repeatable cuts if you have one; a circular saw with a guide rail is the practical alternative for long rip cuts, and a hand saw is fine only for the shortest trim cuts where precision matters less.
Assembling The Desk Top
This is where the individual boards actually become a single slab, and it’s the step most likely to go wrong if you rush it — a poorly aligned glue-up means hours of extra sanding later, or a top that’s permanently slightly cupped.
Joining Wood Pieces
Dry-fit every board before any glue comes out — lay the whole top out, check the grain direction and color match across joints, and mark each board’s orientation so you put it back exactly the same way. Apply glue to both mating edges (not just one), then clamp using cauls — straight scrap boards clamped across the top and bottom of the glue-up — to keep the panel from bowing as the clamps squeeze it flat. Standard wood glue needs about 30 minutes of clamp time to grab and 24 hours before you can sand or stress the joint, even though it feels solid much sooner.
Securing The Structure
If you’re adding breadboard ends or an apron for extra rigidity, drill your pilot and countersink holes before driving any screws — forcing a screw into hardwood without a pilot hole is a reliable way to split the board right at the joint. Slightly oversize the pilot holes on any cross-grain attachment point (where a support runs perpendicular to the top’s grain) so the top can expand and contract seasonally without cracking; a screw with no room to move in a humid summer is exactly what causes that crack you see in old furniture years later.
Sanding And Smoothing
Start at 80 grit to knock down glue squeeze-out and level any slight misalignment between boards, then work up through 120 and finish at 220 — skipping a grit (going straight from 80 to 220, for instance) leaves scratches the finer paper can’t remove, since each grit is really just erasing the scratch pattern the previous one left behind. Always sand with the grain, not across it or in circles with a hand block, and keep a random-orbit sander moving constantly rather than letting it sit in one spot, which can create a visible low spot or swirl marks that only show up once the finish goes on. Wipe the surface with a tack cloth or a barely damp rag between grits so you’re not grinding coarse dust back into the wood at the next grit level.
Staining And Finishing
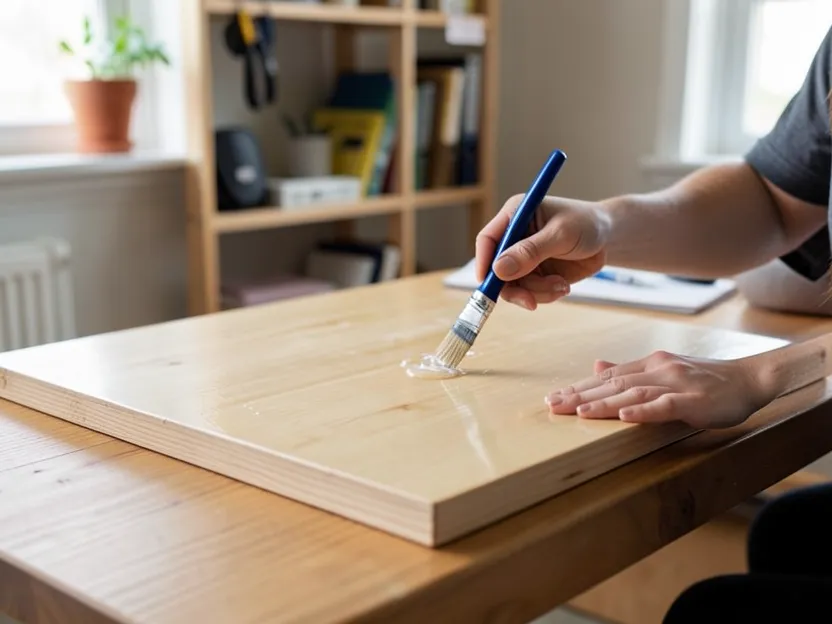
Always test stain on an offcut from the same batch of wood, not just any scrap — grain-hungry woods like pine and maple absorb stain unevenly and can turn blotchy without a pre-stain conditioner, while oak and walnut take stain much more predictably. Apply the stain with a rag or brush, let it sit for the time the can specifies (usually 5-15 minutes), then wipe off the excess with a clean rag before it dries tacky; the color comes from what soaks in, not what sits on the surface. Once the stain has fully cured (24 hours is typical), a wipe-on oil-varnish blend like Waterlox or Danish oil is the most forgiving topcoat for a first-time finisher, since it doesn’t show brush marks the way a film finish like polyurethane can — plan on at least three coats with a light 320-grit sanding between each for something that’ll hold up to daily desk use.
Mounting The Desk Top
Center the finished top on the base and use figure-8 desktop fasteners or slotted metal clips rather than screwing straight through the apron into the top — those fasteners let the solid-wood top expand and contract with humidity without splitting, which a rigid screw connection won’t allow over a full year of seasonal changes. If you’re building a simpler leg-frame base, drill pilot holes at a slight angle through the apron into the underside of the top, deep enough to grab but not so deep you punch through the visible surface.
Once mounted, push down on each corner and check for any rock or flex — a wobble usually means one leg is slightly shorter than the others rather than a loose top attachment. Corner braces (small triangular blocks glued and screwed into each inside corner of the base) fix most wobble issues and add real rigidity for a fraction of the material cost of thicker legs.
Adding Personal Touches
A round-over router bit (1/4 or 3/8 inch radius) is the easiest edge profile for a first project and also the most forgiving of your body — a sharp 90-degree edge digs into forearms during long work sessions in a way a rounded one doesn’t. A chamfer or ogee profile takes more router passes and a steadier hand but reads as more furniture-grade if that’s the look you’re after.
A grommet hole drilled near the back edge for cable pass-through is worth adding before you finish the top, not after — it’s far easier to drill and sand a clean hole in bare wood than to cut through a finished surface later. If you want built-in storage, a simple drawer box under one side adds real function without the complexity of a full pedestal base, and it’s a reasonable next project once the top itself is done.
Maintenance Tips
Wipe your wood desk down with a dry or barely damp cloth for routine dusting, and skip ammonia-based glass cleaners or anything abrasive — they can dull or cloud an oil finish over repeated use. A light coat of paste wax once or twice a year renews the surface sheen and adds a bit more water resistance without needing to sand and refinish.
The biggest everyday threats to a desk finish are heat and standing moisture, not general use — a hot laptop base or a coffee mug left without a coaster can leave a ring or a cloudy patch in an oil or lacquer finish within days. Most water-ring cloudiness in an oil finish can be buffed out with a little extra oil and fine steel wool, but a heat mark that’s actually scorched the finish usually needs a local sand-and-refinish of that spot.
Frequently Asked Questions
What Type Of Wood Is Good For A Desk Top?
Solid wood like oak, walnut, and maple are excellent for desk tops. They offer durability, elegance, and a timeless look.
How Thick Should Wood Be For A Desk Top?
A desk top should be 1 to 1. 5 inches thick. This thickness ensures durability and stability.
Is Plywood Strong Enough For A Desk?
Yes, plywood is strong enough for a desk. It offers durability, stability, and a smooth surface for work.
Is Mdf Better Than Plywood For Desktop?
Plywood is generally better for desktops due to its strength and durability. MDF is cheaper but less sturdy.
Conclusion
Most of the risk in this build is front-loaded into the glue-up and the finish schedule — get the boards flat and aligned before the glue sets, and give the finish the full cure time between coats, and the rest of the project is straightforward carpentry. A desk built this way, refinished every few years as the top shows wear, will outlast most flat-pack furniture by decades.
Sponsored / affiliate links. As an Amazon Associate I earn from qualifying purchases. I may earn additional commission from eligible campaigns.