Wood Liquor Dispenser How to Make: Safe DIY Stand Build
The safe way to make a wood liquor dispenser is to build a wooden stand around a glass jar that has a stainless steel spigot. The wood holds the jar and catches drips, but it never holds the liquor itself.
Most tutorials tell you to cut a wooden box, drill a hole, and screw in a tap. That works for a prop. It does not work for a bar you actually use, because raw wood soaks up spirits, leaks at the tap, and can give the liquor a woody or finish-tainted taste. Plywood glue lines and many finishes are also not meant for months of contact with 40 percent alcohol.
This guide covers a build that holds up: a hardwood cradle with a drip tray, sized around a standard 1-gallon glass jar. You will get a cut list, the load math for the shelf, a pour-count table, and a clear rule for which finishes are safe near alcohol and which are not.
What Holds the Liquor: A Glass Jar in a Wood Stand
BEST GLASS JAR FOR THE STAND |
1 Gallon Glass Beverage Dispenser with Lid and Stainless Steel Spigot: $24.99
|
The design that works is simple. A glass jar with a stainless steel spigot holds the liquor. A wooden stand lifts the jar high enough for a glass to fit under the spigot, and a shallow drip tray under the spigot protects the wood. Everything you can see is wood, and everything the liquor touches is glass and stainless steel.
Buy the jar first and build the stand around it, not the other way around. Spigot height, jar width, and lid size vary from one jar to the next, so every dimension below is a starting point that you should replace with your own measurements.
Why Wood Should Never Touch the Liquor
The most common advice online is to seal a wooden box with a “food-safe finish” and pour the liquor straight in. The label hides a problem: food-safe means the cured finish is not toxic if you eat off it. It does not mean the finish survives being soaked in alcohol.
- Shellac dissolves in alcohol. Shellac flakes are normally dissolved in denatured alcohol to make the finish, so a spill of 80-proof spirits can soften or cloud a shellac coat. See our guide to shellac finishing before using it near a bar.
- Wood is porous. Even a sealed inside surface has pinholes, end grain, and glue joints where liquid creeps in. A leaking wooden reservoir stains and eventually rots the wood around the tap.
- Barrels are a special case. Small oak barrels are made by coopers with tight-fitting staves and are swelled with water before use, and they add oak flavor to whatever sits inside. That is a different project from a dispenser and is not a substitute for a glass jar.
- Water-based finishes need full cure. A cured film such as polycrylic is generally treated as safe for incidental contact, but it is not designed for standing liquid. Our page on whether polycrylic is food safe explains the cure-time issue.
The rule for this build: finish the stand for splash and drip resistance only, and keep all liquor inside glass and stainless steel. Do not use leaded crystal for storage, since lead can leach into spirits over time.
How Much Does One Jar Serve? The Pour Math
A standard US shot is 1.5 fluid ounces, which is about 44 mL. A 1-gallon jar is 128 fluid ounces, or 3.785 liters. The table shows how many 1.5-ounce pours each common bottle size gives you.
| Container | Volume | 1.5 oz pours |
|---|---|---|
| 750 mL bottle | 25.4 fl oz | about 16.9 |
| 1 liter bottle | 33.8 fl oz | about 22.5 |
| 1.75 liter bottle (“handle”) | 59.2 fl oz | about 39.4 |
| 1-gallon glass jar | 128 fl oz | about 85 |
This is where a common myth breaks down. A spigot pours by gravity, so the flow rate changes as the level drops, and you cannot judge a 1.5-ounce pour by eye. If you care about pour size, keep a jigger next to the stand and pour into it first. A full jar holds roughly two handles, so most people fill it about halfway to keep the stand lighter and the spirits fresher.
Weight Check: What the Shelf Must Carry
Ethanol at 40 percent alcohol by volume has a density of about 0.935 kilograms per liter. That makes a full gallon of spirits about 3.5 kilograms, or roughly 7.8 pounds, before you add the glass. Weigh your empty jar and add it to that number. A typical filled setup lands in the low-teens of pounds, so plan the stand for at least 25 pounds so it stays stable if someone leans on it or bumps the shelf.
Three-quarter-inch hardwood such as oak or maple handles this easily over a 12-inch span. Avoid thin plywood or MDF for the jar shelf, since it sags under a steady load and swells if a spill wicks in.
Tools and Materials Needed
- Saw: a miter saw, circular saw, or jigsaw for square cuts
- Drill with a countersink bit, plus a pocket-hole jig if you prefer hidden joinery
- Random orbit sander with 120, 180, and 220 grit discs
- Clamps and a combination square
- Waterproof-rated wood glue and 1-1/4 inch wood screws
- Hardwood boards, 3/4 inch thick: oak, maple, or walnut
- Felt or rubber feet, and a shallow metal or glass drip tray
- A glass jar with a stainless steel spigot, sized to fit the stand
Cut list for a jar about 8 inches wide. Scale every number to your own jar before you cut anything.
| Part | Size | Qty | Purpose |
|---|---|---|---|
| Base | 3/4 x 11 x 11 in | 1 | Stable footing and drip tray seat |
| Uprights | 3/4 x 3 x 9 in | 2 | Support the jar shelf |
| Jar shelf | 3/4 x 9 x 11 in | 1 | Holds the jar with the spigot hanging off the front edge |
| Back rail | 3/4 x 3 x 8 in | 1 | Stops the jar sliding back and keeps the stand square |
The shelf height matters more than any other number. Measure from the bottom of your spigot outlet to the bottom of the jar, then add the height of the tallest glass you will use plus about an inch of clearance. If that total exceeds the space under the shelf, raise the uprights.
Step-by-Step Build
- Measure the jar. Record the jar width, the height of the spigot outlet above the jar base, and how far the spigot sticks out from the glass.
- Cut the parts. Use a square to mark the cut lines and cut on the waste side of each line. Check that both uprights are exactly the same height.
- Notch the shelf front. Position the jar near the front edge so the spigot hangs past it, or cut a shallow semicircular relief so the spigot handle can swing freely.
- Assemble dry, then glue. Clamp the uprights to the base and shelf with a square, drill pilot holes, and add glue and screws. Wipe glue squeeze-out right away.
- Attach the back rail. This ties the two uprights together and prevents racking.
- Test-fit the jar. Set the empty jar in place and slide a glass under the spigot to confirm the clearance before you sand.
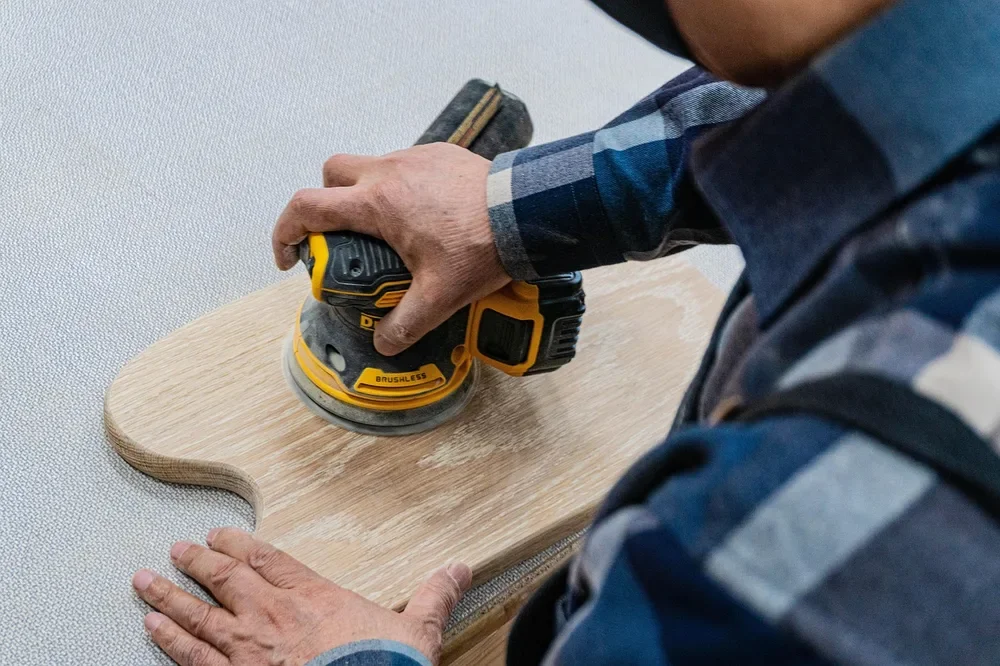
Sanding and Finishing the Stand
Sand through 120, 180, and 220 grit, and ease every sharp edge with a light pass. A rough edge on a shelf that holds a heavy glass jar is also a chipping risk for the glass. For more on choosing a top coat, see our wood sealer guide and our note on whether stain protects wood. Stain alone gives no spill protection.
Because spirits can attack some coatings, use a cured film finish on the stand, wipe up drips promptly, and do not use shellac on the drip zone. Let the finish cure for the full time on the can, often days to a few weeks, before the jar goes on, so a tacky surface does not stick to the glass base. Felt pads under the jar also keep the glass from scratching the wood.
Test for Leaks Before You Fill It
Fill the jar with plain water, set it on the stand, and leave it for 24 hours with a dry paper towel under the spigot. Check the spigot gasket, the nut, and the lid. Tighten the spigot nut a little at a time, because overtightening can crack the glass. If it still weeps, replace the gasket or the spigot before adding spirits.
Safety Notes
- Alcohol is flammable. Keep the stand away from candles, stovetops, and heaters.
- Keep the stand out of reach of children, and think about a lockable cabinet if kids are around.
- Put the stand on a level surface and against a wall so it cannot tip forward when the spigot is pulled.
- Wear eye and dust protection while cutting and sanding, and work with good ventilation when finishing.
Looking for more ideas at this skill level? Browse our list of woodworking projects for adults. If you plan to drill glass yourself, read how to drill a glass jar, but for a liquor dispenser a factory spigot is the safer choice.
Frequently Asked Questions
How do I make a wood liquor dispenser?
Build a hardwood stand around a glass jar that has a stainless steel spigot. Cut a base, two uprights, a shelf, and a back rail, assemble them with glue and screws, sand, finish only the stand, and water-test the jar before filling it with liquor.
Can liquor touch bare or finished wood?
It should not. Wood is porous and can leak, taint the flavor, and stain. Alcohol can also soften finishes such as shellac. Keep the liquor in glass and stainless steel, and use the wood only as a stand.
What finish is safe for a liquor dispenser stand?
Use a fully cured film finish on the stand, and avoid shellac where spills happen. A cured finish is fine for incidental drips, but it is not meant to hold liquid, so the jar, not the wood, must contain the spirits.
How many shots does a 1-gallon dispenser hold?
A 1-gallon jar holds 128 fluid ounces, which is about 85 pours of 1.5 ounces each. A gravity spigot does not pour a precise amount, so use a jigger if pour size matters.
Conclusion
A wood liquor dispenser looks best when the wood does the framing and glass does the holding. Measure the jar, build a solid hardwood cradle with a drip tray, finish it for spills only, and water-test the spigot before you fill it. Do that and you get a bar piece that looks handmade and does not leak, stain, or taint your spirits.
Sponsored / affiliate links. As an Amazon Associate I earn from qualifying purchases. I may earn additional commission from eligible campaigns.