DIY Wood Shutters Exterior: Enhance Your Home’s Curb Appeal
Wood shutters add charm to any home exterior. They offer a rustic touch.
If you want to enhance your home’s curb appeal, DIY wood shutters are a great project. Making your own wood shutters can be both fun and rewarding. It allows you to customize the look of your home. You can choose the design, size, and color that best fit your style.
Building these shutters yourself also saves money. Plus, you get the satisfaction of creating something beautiful and functional. Whether you are a seasoned DIYer or a beginner, this project is doable. With a few tools and materials, you can transform your home’s exterior. Ready to get started? Let’s dive into the process of making DIY wood shutters for your home.
Benefits Of DIY Wood Shutters
Building your own wood shutters can save you money. Store-bought shutters can be expensive. Making them yourself cuts costs. You only need wood and basic tools. You can find affordable materials at local stores. DIY projects can be budget-friendly. Avoid high labor costs by doing it yourself.
DIY wood shutters allow for unique designs. You can choose the wood type and color. Personalize the size to fit your windows perfectly. Add special touches like carvings or paint patterns. Custom shutters can match your home’s style. Express your creativity with your own designs.
Choosing The Right Wood
Cedar is a great choice. It lasts a long time. Cedar is resistant to rot. Redwood is another good option. Redwood is strong and durable. Teak also works well. Teak handles weather well. These woods ensure strong shutters.
Bamboo is eco-friendly. It grows fast. Bamboo is strong and flexible. Reclaimed wood is another good choice. It reuses old wood. This helps the environment. Using these options is good for nature.
Tools And Materials Needed
First, you need a measuring tape. This helps you get the right sizes. A saw is also important. It cuts the wood. Next, a drill is needed. This makes holes for screws. A level ensures straight lines. Don’t forget a screwdriver. This tightens the screws.
You will need wood planks. They form the shutters. Screws hold the wood together. Hinges attach the shutters to the wall. Wood glue adds extra strength. Sandpaper smoothens rough edges. Finally, paint or stain finishes the look.
Measuring Your Windows
First, use a metal tape measure for precision. Measure the width at the top, middle, and bottom of the window. Write down the smallest width. Measure the height on the left, middle, and right sides. Record the smallest height too.
Check for any obstructions like handles or locks. Ensure the window frame is square. Measure diagonally from corner to corner. If the measurements are not equal, the frame is not square. Adjust your measurements accordingly.
Some people measure only the width and height once. This can lead to incorrect sizes. Always measure multiple points. Another mistake is not checking if the frame is square. This can cause fitting issues. Don’t forget to note any obstructions. These can affect shutter placement. Avoid using a cloth tape measure. It can stretch and give inaccurate results.
Cutting And Shaping The Wood
Wear safety goggles to protect your eyes. Use gloves to keep your hands safe. Work in a well-ventilated area. Keep a first aid kit nearby. Secure the wood firmly before cutting. Double-check your tools. Make sure they work well. Be aware of your surroundings. Avoid distractions. Stay focused on the task.
First, measure the wood carefully. Mark the spots to cut. Use a saw to cut the wood. Follow your marks closely. Sand the edges to make them smooth. Shape the wood as needed. Check the fit of each piece. Adjust if needed. Assemble the pieces together. Use screws or nails. Make sure everything is tight.
Credit: www.flowerwindowboxes.com
Assembling The Shutters
First, choose the right joining techniques for your wood shutters. Use wood glue for a strong bond. Clamps can hold pieces together while the glue dries. Wood screws are also helpful. Drill pilot holes to avoid splitting the wood. Dowel joints are another option. They give a clean look and strong hold.
Place panels on a flat surface. Apply wood glue on the edges. Use clamps to keep them in place. Check alignment before the glue dries. Wood screws can add extra strength. Drill holes and screw them in carefully. Use a level to ensure the panels are straight. Let the glue dry completely before moving the shutters.
Finishing Touches
Painting or staining adds beauty to wood shutters. Choose a paint or stain that matches your home’s style. Clean the shutters before applying the paint or stain. Sand any rough spots. Use a primer for better results. Apply the paint or stain in even strokes. Let each coat dry before adding another. Check for any missed spots. This will ensure a smooth finish.
Hardware makes wood shutters functional. Hinges help shutters move. Latches keep them closed. Handles add a nice touch. Choose hardware that fits your shutters. Measure where each piece will go. Mark the spots with a pencil. Drill holes for screws. Attach the hardware securely. Make sure everything aligns well. This ensures the shutters work properly.
Credit: www.youtube.com
Installation Process
Choose the right mounting method for your wood shutters. You can use direct mount or hinged mount. Direct mount is easy. Screws go through the shutter into the wall. Hinged mount allows the shutters to open and close. Pick the method you prefer. Gather the necessary tools before starting. Drill, screws, and a level are needed.
Make sure your shutters are stable. Use strong screws. Check the level of each shutter. Adjust if necessary. Stability is key for long-lasting shutters. Double-check your work. Tighten all screws well. Your shutters will look great and stay in place.
Maintenance Tips
Clean wood shutters often. Dust can make them look bad. Use a soft cloth. A mild soap mixed with water works well. Scrub gently to avoid scratches. Rinse with clean water. Dry shutters well to stop water stains. Regular cleaning keeps shutters beautiful.
Check for broken parts. Fix them quickly to avoid more damage. Paint chips should be fixed. Sand the area and repaint. Tighten loose screws. Oil hinges to stop rust. Regular upkeep helps shutters last long.
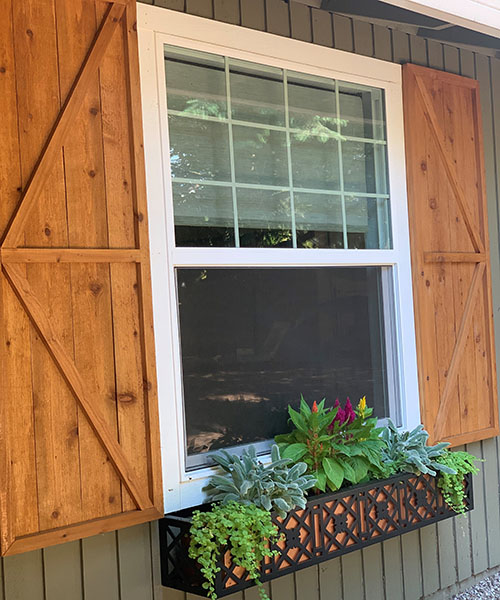
Inspiration And Design Ideas
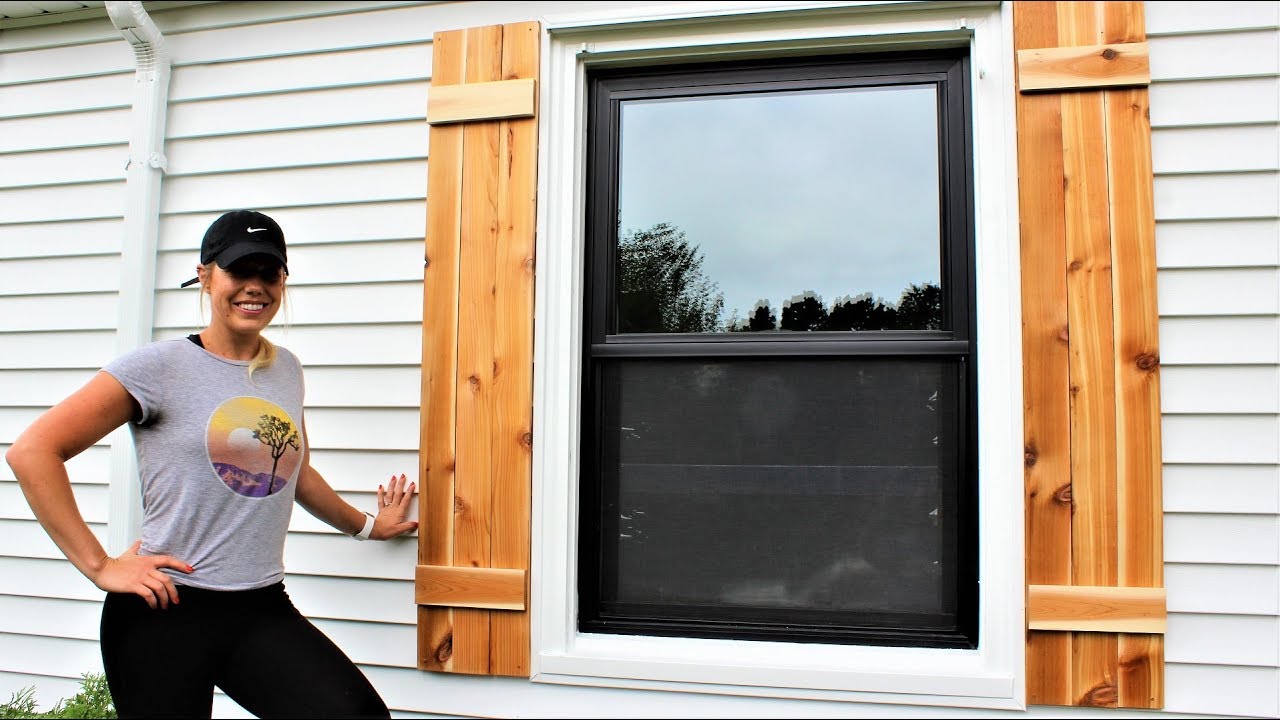
Classic wood shutters add a timeless charm to any home. They usually have simple, elegant lines. Often painted in white or dark colors. These shutters fit well with traditional homes. Think colonial or cottage styles. They can also have decorative cutouts. Hearts, stars, and other shapes are common. Many people love the classic look. It never goes out of style.
Modern wood shutters bring a fresh look to homes. Bold colors and sleek designs are popular. Think grey, navy, or even black. Some designs use mixed materials. Wood and metal together can look very stylish. Louvers may be wider for a contemporary feel. Shutters can also be mounted on tracks. This allows them to slide open and closed. Modern shutters often combine beauty and function.
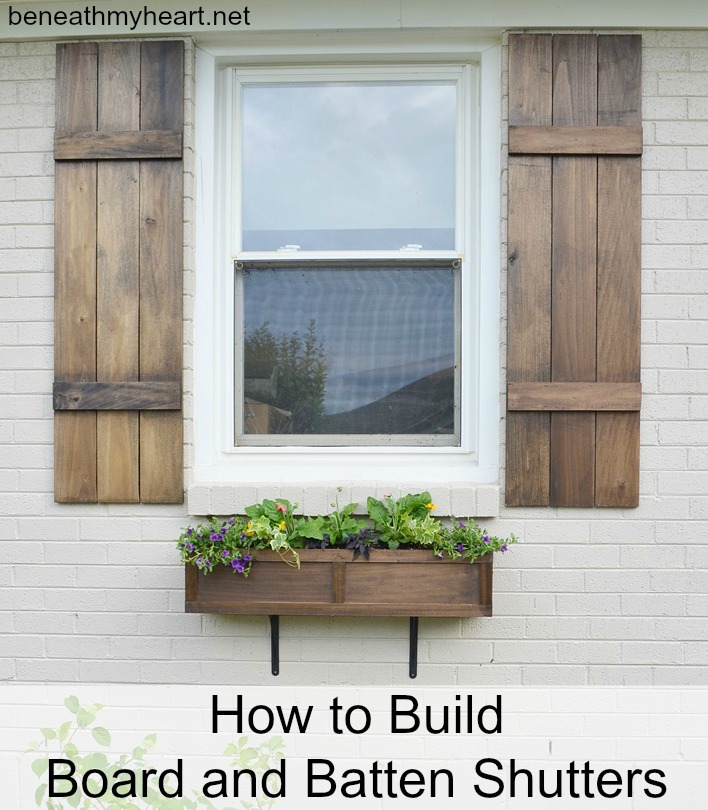
Credit: www.beneathmyheart.net
Frequently Asked Questions
What Kind Of Wood Should You Use For Exterior Shutters?
Use cedar, redwood, or mahogany for exterior shutters. These woods resist decay, insects, and weather damage, ensuring durability.
How To Make Exterior Wooden Shutters?
To make exterior wooden shutters, measure your windows and cut wood to size. Assemble the pieces using glue and screws. Sand the wood, apply primer, and paint or stain. Attach the shutters to your house with appropriate hardware. Ensure they are securely fastened and aligned properly.
What Is A Cheap Alternative To Shutters?
Blinds are a cheap alternative to shutters. They provide privacy, light control, and come in various styles and colors.
How Much Does It Cost To Build Wood Shutters?
The cost to build wood shutters ranges from $200 to $500 per pair. Prices vary based on size and materials.
Conclusion
Creating your own exterior wood shutters can be a rewarding experience. They add charm and character to your home. Plus, you save money with this DIY project. The process is simple, even for beginners. Gather your materials, follow the steps, and enjoy the results.
Your home will have a fresh, new look. Happy woodworking!