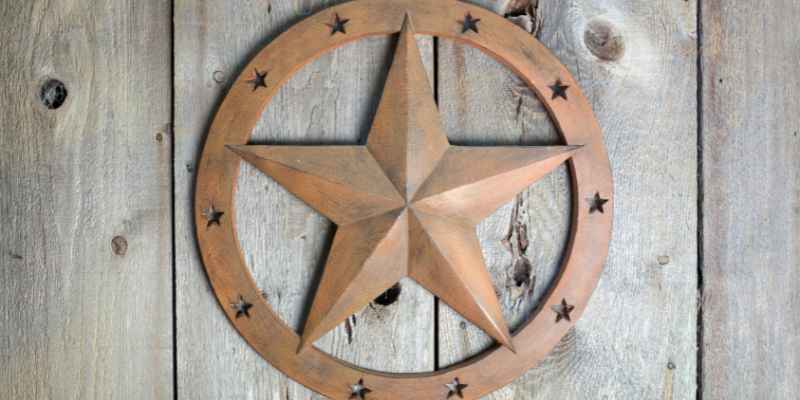
How to Make a Texas Star Out of Wood: DIY Mastery
To make a Texas star out of wood, start by cutting five equal-length boards into a star shape. Assemble the pieces using wood glue and nails for stability.
Creating a Texas star out of wood is a rewarding project that adds rustic charm to any space. This iconic symbol, often associated with Texas pride, can enhance your home’s décor or serve as a unique gift. The process is simple and requires basic woodworking skills and tools.
Whether you plan to hang it on a wall or use it as a centerpiece, crafting your own Texas star allows for personal touches and customization. Gather your materials and let’s dive into the step-by-step guide to bring this classic design to life with a personal flair.
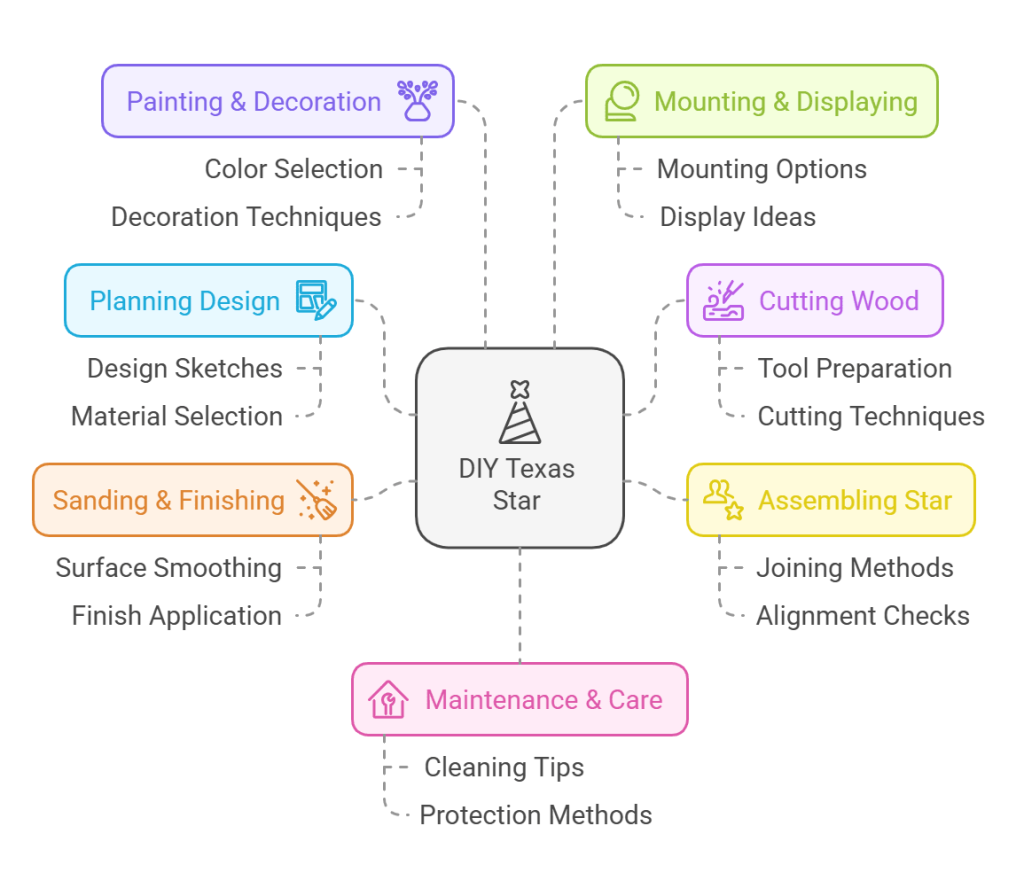
Introduction To Texas Star Craftsmanship
The Texas Star is a beautiful symbol of Texas pride. Many people enjoy making this craft. It adds a unique touch to homes and gardens. The star’s design is simple yet striking. Crafting it can bring joy and satisfaction.
To create your own Texas Star, gather essential materials. You will need wood, a saw, sandpaper, and paint. Choose wood that is strong and durable. Make sure to have a measuring tape and pencil for accurate cuts. A drill will help with making holes for hanging.
| Materials | Tools |
|---|---|
| Wood (Pine, Cedar) | Saw |
| Paint | Sandpaper |
| Measuring Tape | Drill |
| Pencil | Brush |

Planning Your Texas Star Design
Choosing the right wood is key for your Texas Star project. Pine is a great choice because it is light and easy to work with. Cedar adds a nice smell and helps resist rot. Plywood can also work well for larger stars.
After selecting the wood, sketch your design on paper. Start with a simple outline. Use a ruler for straight lines. Make sure your star looks balanced and symmetrical. Adjust the design as needed until it feels right.
Cutting The Wood
Safety is the top priority before cutting wood. Always wear safety goggles and ear protection. Use a sharp saw for clean cuts. Ensure the workspace is clear and well-lit.
Measure your wood precisely. Use a tape measure for accuracy. Mark your cutting lines with a pencil. Double-check all measurements before cutting. Small mistakes can ruin your project.
Secure the wood on a stable surface. Use clamps to hold it in place. This prevents movement while cutting. Take your time to make smooth, steady cuts. Rushing can lead to accidents.
Assembling The Star
Start by laying out all the pieces of wood. Make sure they are correctly oriented. Each piece should fit together nicely. Use a square to check the angles for accuracy.
For securing the connections, use wood glue on the edges. This helps to hold the pieces firmly. After applying glue, use clamps to keep everything in place. Let the glue dry for several hours. This ensures a strong bond.
After the glue dries, reinforce the star with screws. Place them strategically at the joints for added strength. This step makes the star durable and ready for display.
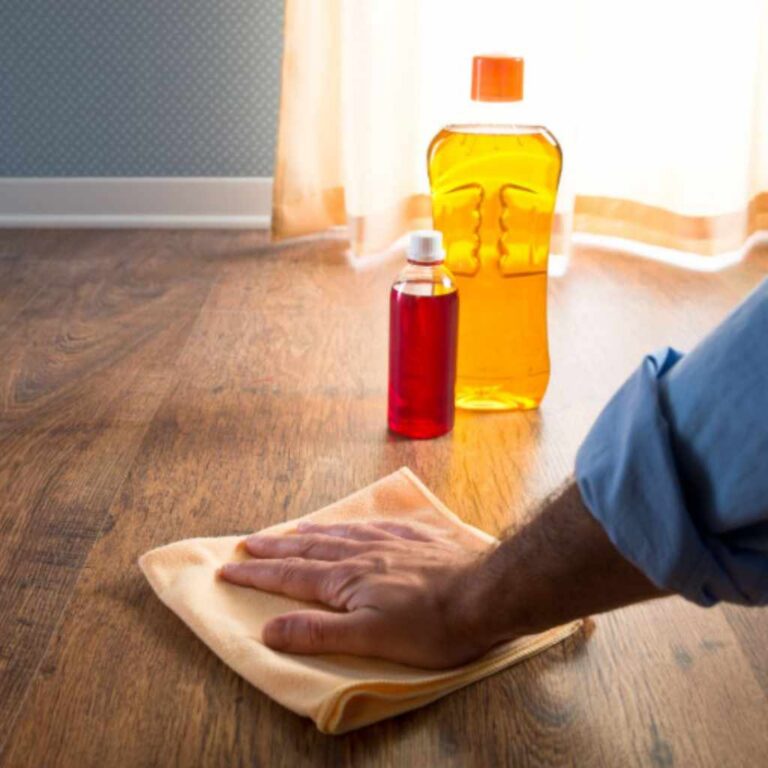
Sanding And Finishing Touches
To achieve a smooth finish on your Texas star, start with sanding. Use fine-grit sandpaper for the best results. Sand in the direction of the wood grain to avoid scratches. Always wear a mask to protect against dust.
After sanding, choose the right finish for your project. Stains enhance the wood’s natural beauty. Paint can add vibrant colors but may hide the grain. Consider using a clear coat for protection. This will keep your star looking great.
For a glossy look, use a high-gloss finish. A matte finish gives a more subtle appearance. Test different finishes on a scrap piece first. This helps you see how the final product will look.
Painting And Decoration
Selecting the right colors and patterns is key for your Texas star. Choose colors that match your home’s style. Bright and bold colors can make a statement, while soft colors create a calming effect.
Patterns can add extra charm. Consider stripes, polka dots, or even a distressed look. Use painter’s tape to create clean lines for sharp designs.
To achieve a professional look, start with a primer. This helps colors stick better. Use high-quality paint for a smooth finish. Apply several thin coats instead of one thick coat.
Lastly, let each layer dry completely before adding the next. This ensures even color and prevents drips. Enjoy creating your beautiful Texas star!
Mounting And Displaying Your Texas Star
Choosing the perfect spot for your Texas Star is very important. Look for a place that gets good visibility. High walls or fences work well for this purpose. Make sure it complements your home’s style.
Hanging securely is key to keep your Texas Star safe. Use strong hooks or brackets for support. Make sure the hardware is rated for outdoor use. Check the weight of your star to choose the right tools.
Consider the weather in your area. Windy areas may need extra security. Always check the installation after storms to ensure it stays in place. This will keep your star looking great year-round.
Maintenance And Care
To keep your Texas Star looking great, regular cleaning is essential. Use a soft cloth to remove dust and dirt. Avoid harsh chemicals as they can damage the wood finish. A mixture of warm water and mild soap works well for deeper cleaning.
For long-term preservation, store the star in a dry place. Protect it from direct sunlight to prevent fading. Consider applying a wood sealant every few years. This helps to keep the wood safe from moisture and pests.
Inspect the star regularly for any signs of damage. Repair any cracks or scratches promptly to maintain its beauty.
Frequently Asked Questions
How Do I Start Making A Texas Star?
Begin by gathering materials like wood, a saw, and sandpaper. Sketch your design on paper, ensuring accurate dimensions. Cut the wood into star shapes using the saw. Smooth the edges with sandpaper for a polished look. Follow up with painting or staining for a finished appearance.
What Wood Is Best For A Texas Star?
Pine and cedar are excellent choices for making a Texas Star. They are readily available and easy to work with. Both types of wood can be painted or stained to enhance their beauty. Select high-quality wood to ensure durability and longevity in your project.
How Do I Hang A Wooden Texas Star?
To hang your wooden Texas Star, use sturdy wall anchors or hooks. Measure the desired height and mark the wall accordingly. Make sure the star is level before securing it. This ensures it will be displayed prominently and safely in your space.
Can I Customize My Texas Star Design?
Absolutely! Customizing your Texas Star allows for personal flair. Consider altering the size, color, or adding unique patterns. Incorporate personal symbols or designs that reflect your style. This customization makes your Texas Star truly one-of-a-kind and meaningful.
Conclusion
Creating a Texas star out of wood is a rewarding project. With simple materials and tools, you can craft a beautiful piece. This star adds charm to any space. Whether for decoration or a gift, it showcases your creativity. Embrace your woodworking skills and enjoy the process of making something unique.