Caulking Finisher Tool Set: How It Smooths Joints Faster
A caulking finisher set is a handful of shaped scraper tips that tool a fresh bead of caulk into a clean, concave line in seconds – the same result you’d get running a wet finger along the joint, but faster, more consistent, and without caulk under your fingernail for the rest of the day. Most kits also include a caulk remover blade for stripping out old, cracked caulk before you lay a new bead.
The finger-smoothing method still works fine for a single small repair, and plenty of people never buy a dedicated tool for it. Where a finisher kit earns its low price is on longer runs – a full tub surround, a kitchen backsplash, or several windows in one sitting – where a consistent scraper radius keeps every pass looking the same, instead of the bead’s profile drifting as your finger tires or the caulk builds up under your nail.
What’s Actually In One of These Kits
The Kit This Guide Covers
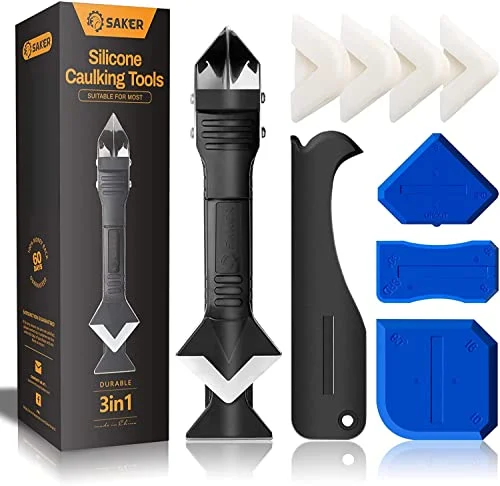 |
Saker Silicone Caulking Tool 3-in-1 Kit Includes multiple angled scraper heads plus a grout and old-caulk removal blade, covering both the prep and finishing steps this guide walks through.
|
A typical set includes several angled scraper heads sized for different joint widths and corner angles (inside corners, outside corners, flat runs), a stiffer blade for scraping out old caulk, and sometimes a small grout-shaping tip for tile work. The scraper heads snap onto a shared handle rather than each being a separate tool, which is the main thing that makes these sets compact and cheap compared to buying individual specialty tools.
None of this replaces the caulking gun itself – the gun dispenses the caulk, the finisher tool just shapes the bead after it’s laid down. If you don’t already have a caulking gun, that’s a separate, equally necessary purchase.
Most kits come with several corner-shaped caulk shields too – thin plastic guards you press into an inside corner before tooling the bead, which keep the finishing tool from smearing caulk onto the adjacent wall or trim. They’re a small addition, but they make a visible difference on tricky inside corners where two beads meet.
Choosing the Right Caulk First
The finishing tool only shapes what you’ve already applied, so picking the right caulk for the job matters more than which finisher kit you buy. Silicone caulk resists water well and suits bathrooms, sinks, and tubs, but it can’t be painted over once cured. Acrylic latex caulk is easier to work with, cleans up with water, and takes paint, making it the standard choice for trim, baseboards, and painted woodwork. Read the tube’s label before buying – “paintable” and “waterproof” are not the same claim, and using the wrong type in a wet area is a common source of failed, moldy caulk lines.
A third option, siliconized acrylic latex, splits the difference – it takes paint like standard latex caulk while holding up to moisture noticeably better than plain latex, which makes it a reasonable middle ground for a kitchen backsplash or a window trim that sees occasional splashing but isn’t fully submerged like a shower surround.
Preparing the Joint
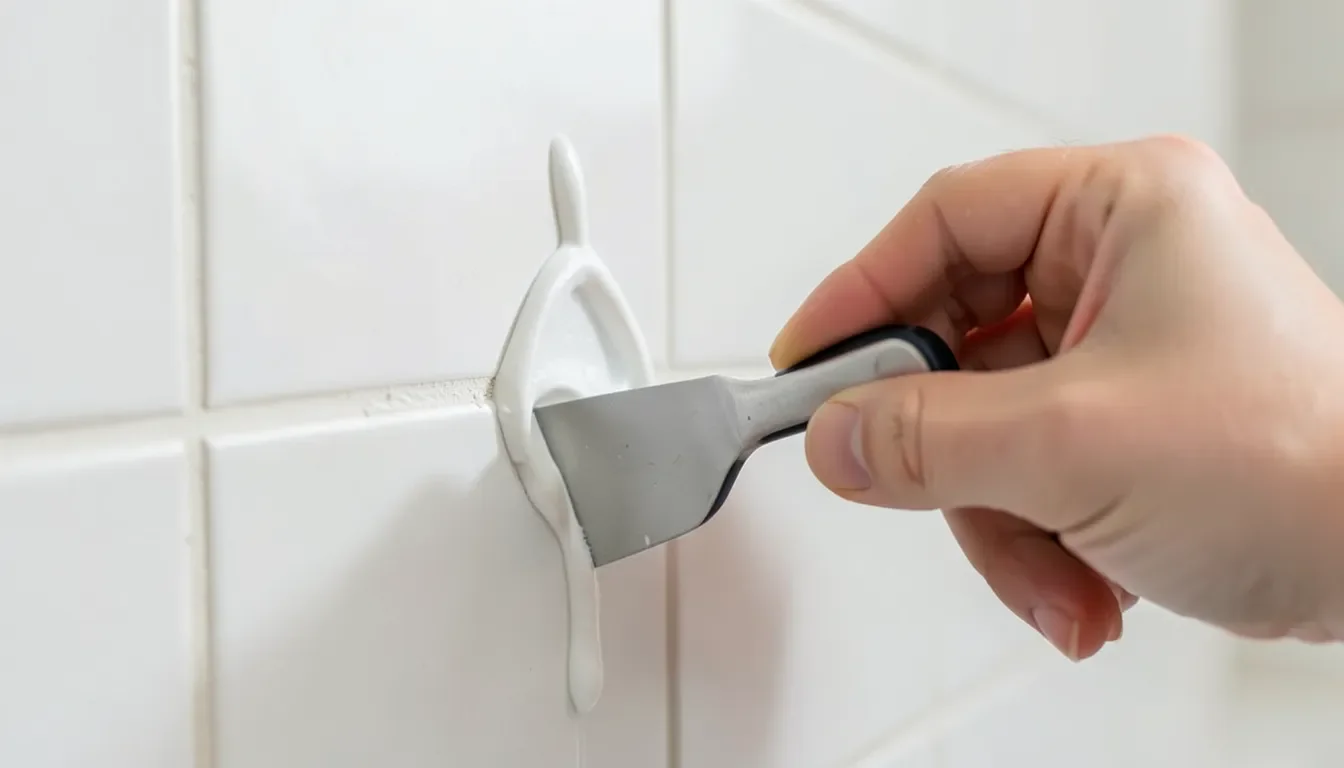
- Remove old caulk completely using the kit’s scraper blade or a dedicated caulk remover tool – new caulk applied over old, failing caulk won’t bond properly and will fail again quickly.
- Clean and dry the joint thoroughly. Any residue, soap scum, or moisture left behind stops the new caulk from adhering.
- Check for mold or mildew in a bathroom joint before recaulking, and treat it with a bleach-water solution or mold-specific cleaner first – sealing fresh caulk over an active mold problem just traps it under the new bead.
- Mask off the edges with painter’s tape if you want a perfectly straight line, especially on a visible seam like a baseboard-to-wall joint.
Applying and Finishing the Bead
- Cut the tube tip at a shallow angle, and keep the opening small – a wider cut than necessary lays down more caulk than you need and makes a thicker, harder-to-finish bead.
- Run a steady, even bead along the joint, moving at a consistent pace so the amount of caulk stays uniform.
- Draw the finishing tool along the bead at roughly a 45-degree angle in one continuous pass, using the scraper size that matches the joint width. Wipe the tool clean between passes so it doesn’t drag dried caulk back into the line.
- Remove the tape immediately, before the caulk skins over, for the cleanest edge.
- Let it cure fully per the tube’s instructions before exposing the joint to water or paint.
Common Mistakes
- Cutting the tip too wide – lays down a thicker bead than needed, which is harder to finish cleanly and wastes caulk.
- Moving the finishing tool too fast or stopping mid-line – creates visible ridges or gaps where the pass restarts.
- Skipping surface prep – caulk applied over dust, old sealant, or moisture looks fine at first and fails within weeks.
- Leaving tape on too long – pull it while the caulk is still fresh, or it tears the edge of the bead instead of leaving a clean line.
- Not wiping the tool between passes – dried caulk stuck to the scraper drags and smears the next section.
- Reusing a scraper radius that’s too small or large for the joint – a mismatched scraper either leaves excess caulk standing proud of the surface or scoops out more than the joint needs, creating a visible dip.
Maintaining the Tools
Wipe scraper heads clean with a damp cloth right after use, before any residual caulk has a chance to cure on the tool itself – cured silicone especially is difficult to remove once it sets. Rinse with warm water and mild soap for stubborn spots, dry fully, and store the set somewhere dry to prevent the metal scraper edges from rusting.
If cured caulk does build up on a scraper edge despite regular cleaning, isopropyl alcohol on a cloth softens most silicone and latex residue enough to wipe or gently scrape away without damaging the tool’s plastic body. Avoid harsh solvents that could soften or crack the plastic scraper heads themselves.
Frequently Asked Questions
What is the easiest caulk for beginners?
Acrylic latex caulk is the easiest for beginners. It’s simple to apply, easy to clean, and dries quickly.
Is there a tool to make caulking easier?
Yes, a caulking gun makes caulking easier. It provides a steady flow and ensures precise application. For best results, use a quality caulking gun with a smooth trigger.
How do you get a good finish with caulking?
To get a good finish with caulking, clean the surface first. Apply caulk smoothly and evenly. Use a caulking tool for a neat line. Smooth the caulk with a damp finger or tool. Let it dry completely before touching.
What is the best caulk for finish work?
The best caulk for finish work is a high-quality acrylic latex caulk. It offers smooth application, easy cleanup, and paintability.
Conclusion
A caulking finisher set won’t fix bad surface prep or the wrong caulk for the job, but it does turn the finishing step into something fast and repeatable instead of a wet-finger guessing game. Pick the right caulk for the surface, prep the joint properly, and the finishing tool does the rest in one clean pass. Wipe it off between sections and it stays useful for the next project too. For a bathroom or kitchen with several joints to redo at once, it pays for itself in the time saved over finger-smoothing each seam by hand.
Sponsored / affiliate links. As an Amazon Associate I earn from qualifying purchases. I may earn additional commission from eligible campaigns.