How Do I Remove Peel and Stick Tile Glue: Effortless Guide
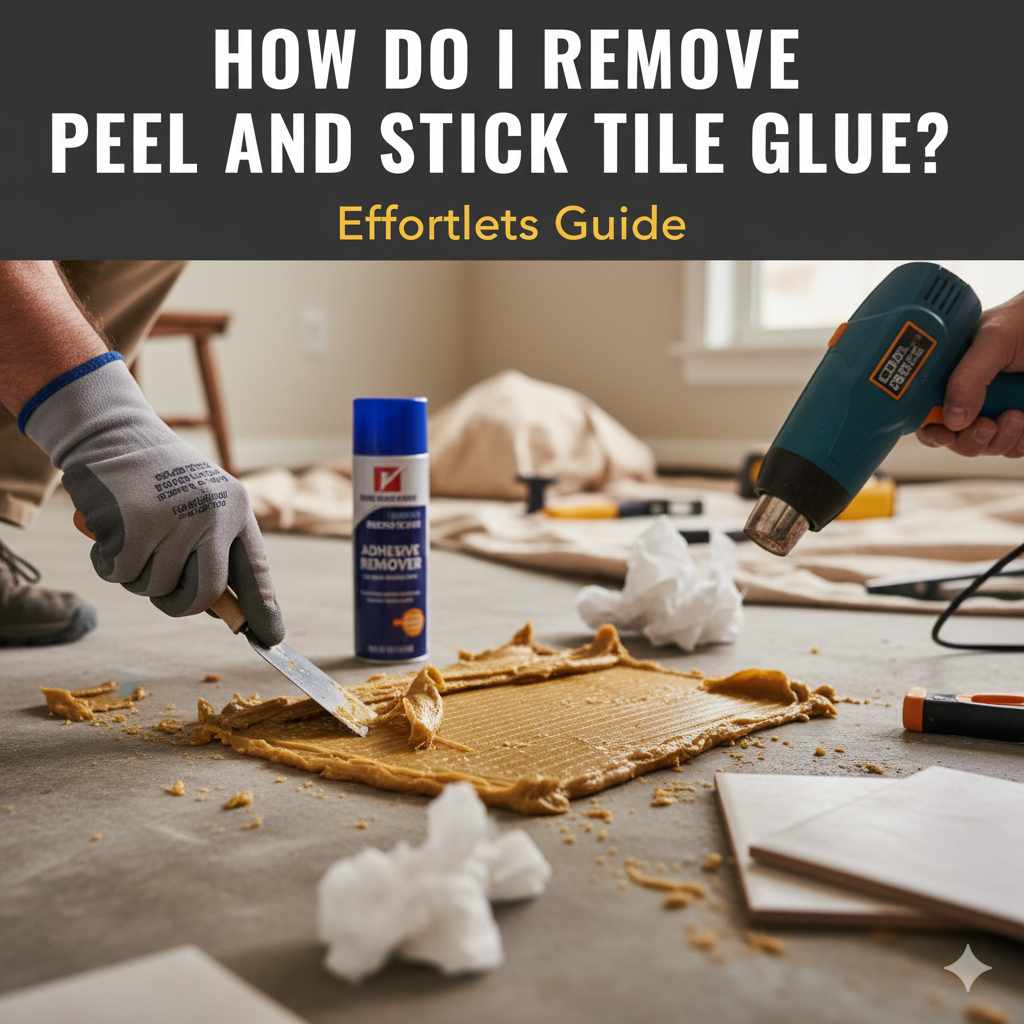
To remove peel and stick tile glue effortlessly, start by gently softening the adhesive with heat or a mild solvent. Scrape away loosened glue with a plastic scraper or putty knife, then clean the surface thoroughly with a degreaser and water. Patience is key to avoid damaging the subfloor.
Peel and stick tiles are a fantastic way to refresh a space without a huge mess or professional help. But what happens when you want a change, or perhaps those tiles have seen better days? Removing the old glue can feel like a daunting task, leaving you wondering if you’ll ever get that smooth surface back. Don’t worry! It’s a common hurdle for DIYers, and with the right approach, you can tackle this sticky situation with confidence. This guide will walk you through simple, effective methods to get rid of that stubborn peel and stick tile glue, making your next project a breeze. We’ll cover everything you need to know to make this process smooth and successful. Stick around, and let’s get that surface prepped!
Understanding Peel and Stick Tile Glue
Peel and stick tiles themselves are designed for easy installation, often featuring a grid of adhesive on their backside. The glue used is typically a strong, water-resistant adhesive formulated to bond well to various surfaces like linoleum, concrete, or wood subflooring. Over time, and especially with exposure to moisture or temperature changes, this adhesive can become less flexible and harder to remove. The type of subfloor you’re working with also plays a role; some materials are more porous and can absorb the adhesive, making removal a bit trickier. Understanding that this isn’t just a simple goo but a tenacious adhesive is the first step towards effective removal.
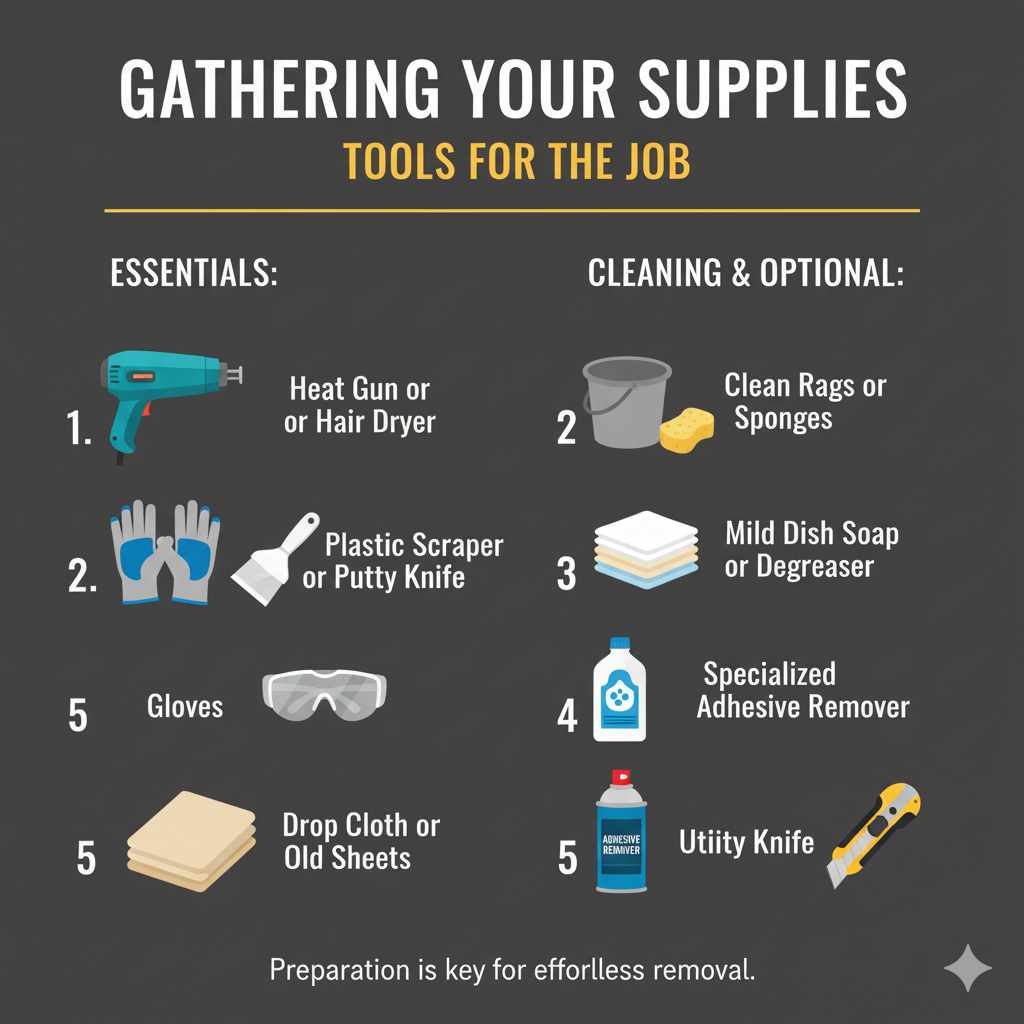
Gathering Your Supplies: Tools for the Job
Before you dive in, having the right tools makes all the difference. It’s like setting up your workbench before starting a woodworking project – preparation is key! Having everything ready means you can work efficiently and safely.
Here’s a list of supplies that will help you remove that stubborn glue:
Heat Gun or Hair Dryer: This is your secret weapon for loosening the glue.
Plastic Scraper or Putty Knife: A metal one can scratch your subfloor, so opt for plastic.
Gloves: To protect your hands from any cleaning solutions.
Safety Glasses: Always a good idea when scraping or cleaning.
Drop Cloth or Old Sheets: To protect your surrounding areas from dust and debris.
Bucket: For water and cleaning solutions.
Clean Rags or Sponges: For wiping and cleaning.
Mild Dish Soap or Degreaser: For cleaning up adhesive residue.
Optional: Specialized Adhesive Remover: For particularly stubborn spots.
Optional: Utility Knife: For scoring stubborn edges if needed.
Having these items on hand will ensure you’re well-equipped for the task ahead.
Step-by-Step Guide: Removing Peel and Stick Tile Glue
Let’s get down to business! Follow these steps carefully, and you’ll have that glue gone before you know it. Remember, patience is your best friend here. Rushing can lead to frustration and potential damage to your subfloor.
Step 1: Prepare Your Workspace
First things first, clear the area. Remove any furniture, rugs, or obstacles. Lay down a drop cloth or old sheets around the edges of the tile area. This will catch any scraped-off glue or cleaning solution drips, keeping your room cleaner. Ensure good ventilation, especially if you plan to use any cleaning solvents.
Step 2: Loosen the Glue with Heat
This is where the magic happens. Turn your heat gun to a medium setting or use your hair dryer on a high heat setting. Hold it a few inches away from the tile and move it back and forth across a small section. You’re not trying to melt the glue, just gently warm and soften it. This will make it much easier to scrape off. Work in small sections, about 1-2 square feet at a time.
Step 3: Scrape Away the Tile and Softened Glue
Once a section is warm, immediately take your plastic scraper or putty knife. Slide it under the edge of the tile at a low angle. Gently pry up the tile. As you lift, the softened adhesive should come with it. For stubborn tiles, you might need to apply a bit more heat. If the tile breaks apart, don’t worry – just focus on removing the pieces and the glue.
Step 4: Address Remaining Adhesive Residue
After removing the tiles, you’ll likely have some sticky residue left behind. This is where your cleaning supplies come in.
For Light Residue: Dampen a clean rag with warm, soapy water. Rub the residue in a circular motion. It should start to ball up and lift off.
For Stubborn Residue: You can try a mild degreaser or a solution of warm water and white vinegar. Apply it to the residue, let it sit for a few minutes to break down the glue, and then scrub with a sponge or rag. You can also try a dedicated adhesive remover, but always follow the manufacturer’s instructions and test in an inconspicuous area first.
For particularly tough spots, you might need to apply a little more heat and then scrape again.
Step 5: Clean the Surface Thoroughly
Once you’ve removed all the visible glue, it’s time for a final clean. Wipe down the entire area with a clean, damp cloth to remove any lingering soap or cleaner residue. For most subfloors, especially wood, ensure it’s completely dry before proceeding with any new flooring installation. You can use a dry cloth or allow it to air dry.
If you’re working with a particularly sticky residue that won’t budge, some sources like This Old House suggest using a dedicated adhesive remover, being careful to follow all safety precautions. Always ensure proper ventilation and wear protective gear.
Alternative Methods for Tough Glue
Sometimes, the standard methods need a little extra oomph. If you’ve tried the heat and scrape, and you’re still finding stubborn glue patches, consider these alternatives.
Using a Solvent-Based Adhesive Remover
For situations where heat and scraping aren’t enough, a solvent-based adhesive remover can be very effective. Products like Goo Gone or WD-40 are often recommended for adhesive removal.
How to Use:
1. Test First: Always test the product in a small, hidden area to ensure it doesn’t damage your subfloor.
2. Apply Sparingly: Apply a small amount of the remover directly to the glue residue.
3. Let it Sit: Allow the remover to work for the time recommended by the manufacturer. This gives the solvent time to break down the adhesive.
4. Scrape and Wipe: Use your plastic scraper to lift the softened glue, then wipe away with a clean rag.
5. Clean Thoroughly: After using any solvent, clean the area very well with warm water and mild soap to remove all traces of the chemical.
Remember, proper ventilation is crucial when using solvents.
The Power of Steel Wool (Use with Caution!)
For very tough, dried-on adhesive that is incredibly resistant, fine-grade steel wool (like #0000) can sometimes be used, but this method requires extreme caution.
When to Consider Steel Wool:
Only on non-delicate subfloors like concrete.
As a last resort after all other methods have failed.
How to Use Steel Wool Safely:
1. Moisten: Dampen the area slightly with warm water or a cleaning solution.
2. Gentle Abrasion: Rub the glue residue gently with the steel wool in a small, controlled area.
3. Check Frequently: Constantly check the subfloor for any signs of scratching or damage.
4. Clean Immediately: Once the glue is off, thoroughly clean the area to remove any steel wool particles.
Steel wool can easily scratch wood or vinyl subfloors, so it’s usually not recommended for these surfaces.
Factors Affecting Glue Removal Difficulty
As you work, you might notice some areas are easier to clean than others. Several factors can influence how difficult it is to remove that sticky residue.
Here are some common factors:
Type of Subfloor: Porous surfaces like unsealed concrete or wood can absorb the adhesive, making it harder to remove completely compared to non-porous surfaces like sealed linoleum.
Age of the Adhesive: Older adhesives can harden and become brittle, or conversely, they can bake into the subfloor over time, making them more tenacious.
Exposure to Elements: Heat, direct sunlight, or moisture can affect how the adhesive bonds and degrades over time, sometimes making it stickier or more difficult to remove.
Quality of the Tiles: Cheaper tiles might use a less consistent adhesive, leading to uneven removal.
Original Installation: How well the tiles were initially pressed down can affect how deeply the adhesive penetrated any surface imperfections.
Understanding these can help you adjust your strategy and patience level accordingly.
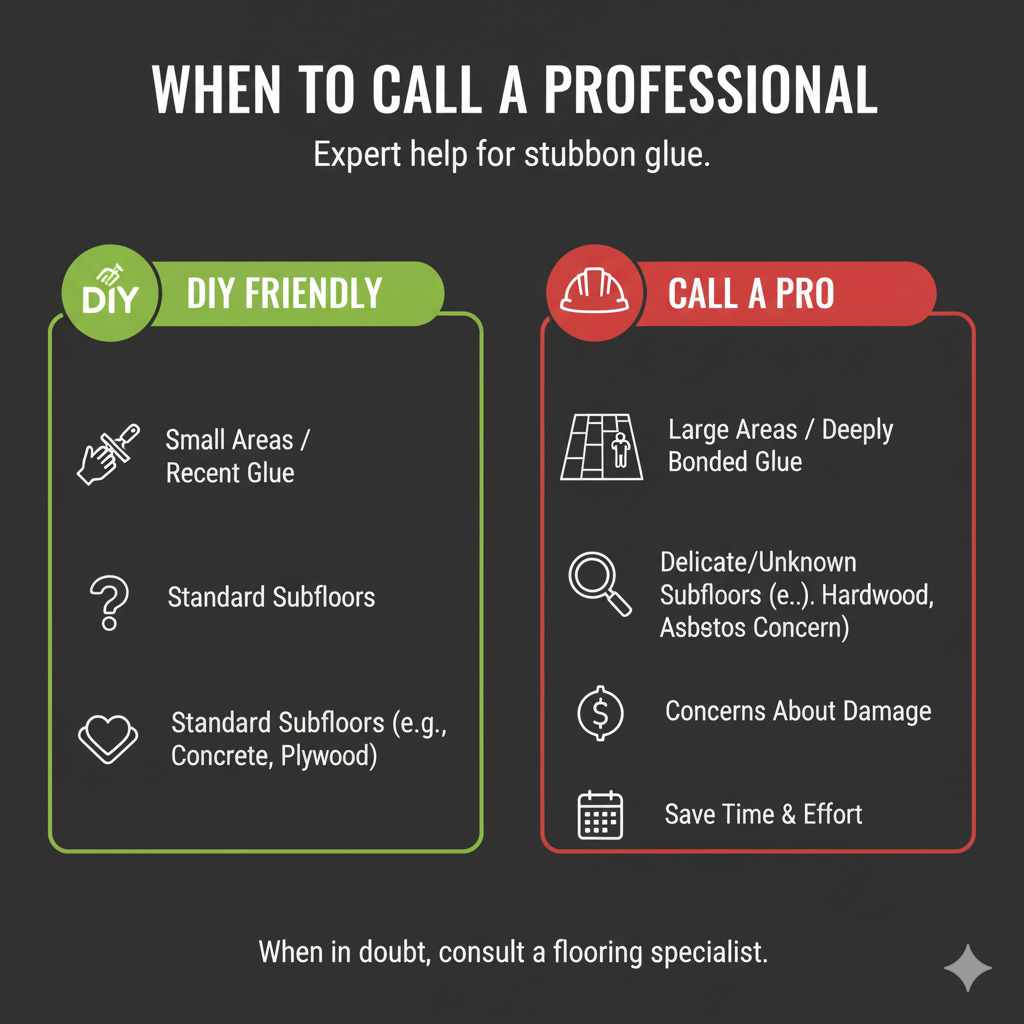
When to Call a Professional
While most peel and stick tile glue removal is a DIY-friendly task, there are times when it’s best to bring in the pros. If you’re unsure about the type of subfloor you have, or if it’s particularly delicate, or if the glue has been in place for a very long time and seems deeply bonded, a professional installer or flooring specialist might be a better choice. They have access to specialized tools and knowledge that can remove the adhesive without damaging your underlying floor. For large areas or if you’re concerned about making a mistake, professional help can save you time and potential costly repairs.
Frequently Asked Questions (FAQ)
Got more questions? We’ve got answers!
Q1: Can I just paint over the old glue?
While it might seem like a shortcut, painting over old peel and stick tile glue is generally not recommended. The adhesive can continue to cause issues, like lifting or bubbling beneath the new paint, and it won’t create a smooth, stable surface for your new finish. Thorough removal is always best for a durable result.
Q2: What’s the easiest way to remove a lot of peel and stick tile glue?
For large areas, combining heat application with a large plastic floor scraper or even a floor scraper tool designed for this purpose can be the most efficient. Working in sections and having a helper can speed things up significantly. Using a mild solvent as part of your cleanup is also key.
Q3: Will scraping damage my subfloor?
There’s a risk of damage if you use excessive force or the wrong tools. Always use plastic scrapers or putty knives, and use a gentle, low angle. If you’re working on a softer subfloor like wood, extreme caution is necessary. If you’re unsure, it’s better to err on the side of caution and use less aggressive methods or seek professional advice.
Q4: Are there home remedies for removing tile glue?
Yes, warm water with a bit of dish soap or white vinegar can help soften and lift some lighter adhesive residues. For tougher jobs, rubbing alcohol or even peanut butter (the oils can help break down adhesives) are sometimes cited, though their effectiveness can vary greatly depending on the adhesive type. Always test these on a small area first.
Q5: How do I clean up after using a chemical adhesive remover?
After using any chemical adhesive remover, it’s crucial to clean the area thoroughly. Wipe down the surface with a clean cloth dampened with warm water and mild dish soap. This removes any remaining remover residue that could affect new flooring or finishes. Make sure to rinse the cloth and repeat until all traces of the cleaner are gone.
Q6: Is peel and stick tile glue safe to remove with kids or pets around?
While the tiles themselves are generally safe, some cleaning solutions and solvents used for glue removal can be harmful. Ensure good ventilation and keep children and pets away from the work area while you are actively using strong cleaners or solvents. Once the area is cleaned and completely dry, it should be safe again.
Conclusion
Removing peel and stick tile glue doesn’t have to be a chore that holds up your renovation dreams. By understanding the adhesive, gathering the right tools, and following these methodical steps, you can successfully clear away that sticky residue. Remember to work in sections, be patient, and always prioritize the integrity of your subfloor. Whether you’re giving your kitchen a new look or refreshing a bathroom, a clean and properly prepped surface is the foundation for any successful DIY project. With a little effort and the guidance here, you’ll be well on your way to a beautiful, smooth finish, ready for whatever comes next in your home improvement journey. Happy crafting, and enjoy your revitalized space!