How to Attach Hole Saw to Drill: Effortless Guide
Attaching a hole saw to your drill is a simple process. Ensure you have the correct arbor, align the hole saw’s threads with the arbor, and tighten securely. Always disconnect power before attachment for safety.
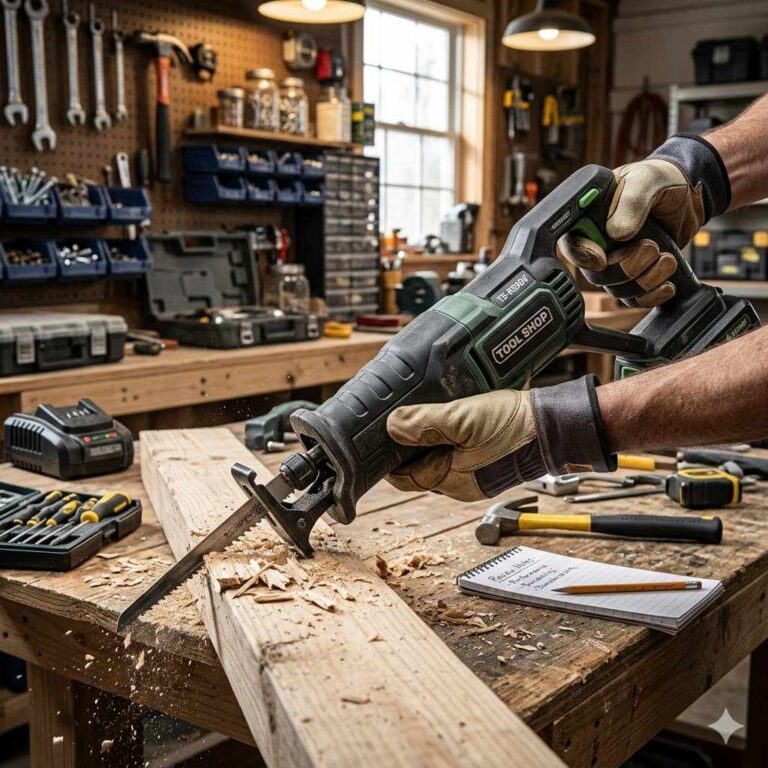
Welcome to the workshop! Today, we’re tackling a common but super important task: attaching a hole saw to your drill. If you’ve ever looked at a hole saw and your drill and wondered how they magically connect, you’re not alone. It might seem a little intimidating at first, but I promise, it’s straightforward once you know the steps. Getting this right means cleaner cuts, safer operation, and less frustration. Let’s get those clean, perfectly sized holes made in no time!
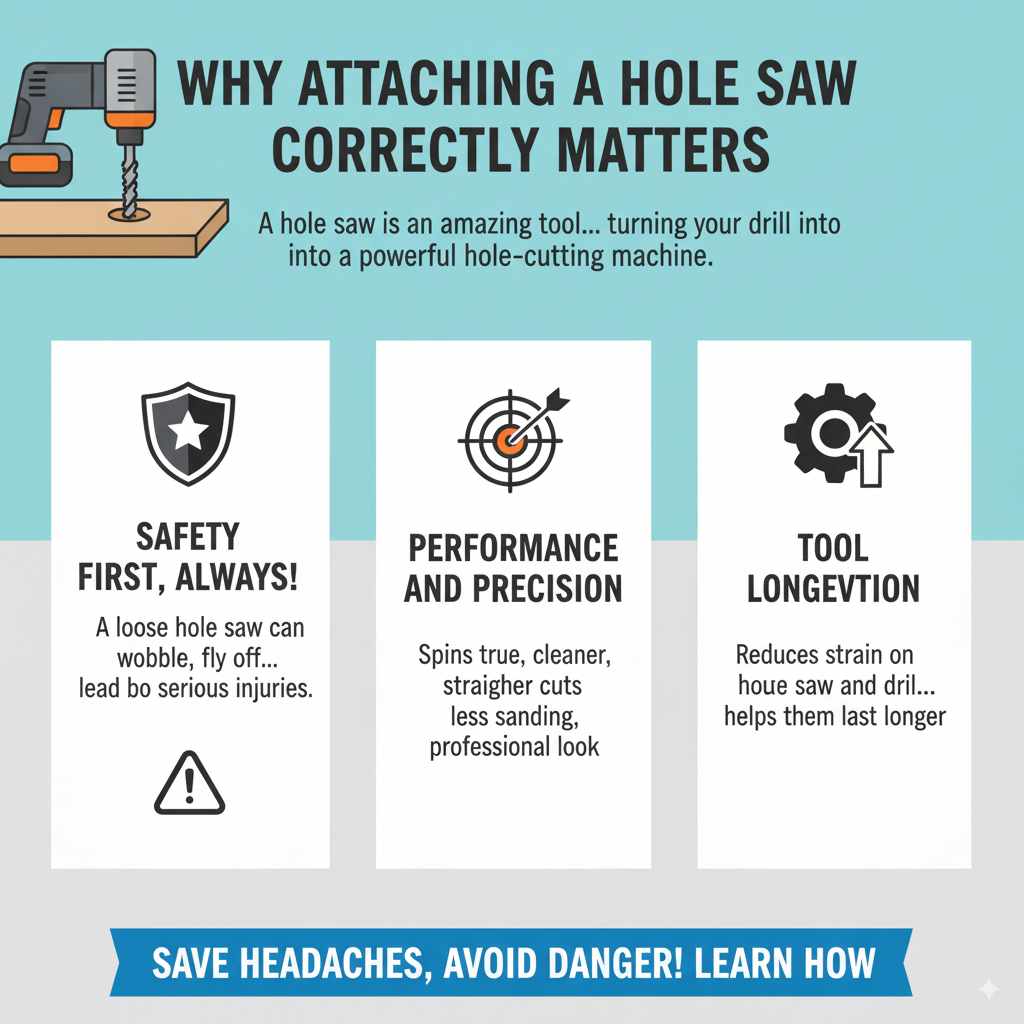
Why Attaching a Hole Saw Correctly Matters
Before we dive into the “how,” let’s talk about the “why.” A hole saw is an amazing tool that lets you cut large-diameter holes in materials like wood, plastic, or thin metal. It’s a blade that attaches to a special holder called an arbor. When you attach the hole saw and arbor to your drill, you’re essentially turning your drill into a powerful hole-cutting machine.
Safety First, Always! The most critical reason for proper attachment is safety. A loose hole saw can wobble, fly off the drill, or cause the drill to kick back unexpectedly. This can lead to serious injuries.
Performance and Precision: A securely attached hole saw will spin true, giving you cleaner, straighter cuts. This means less sanding and finishing work later, and your project will look more professional.
Tool Longevity: Correct attachment reduces strain on both the hole saw and the drill, helping them last longer.
So, a few minutes spent on secure attachment will save you a lot of headaches and potential danger down the line. Ready to learn how to do it right?
Understanding the Components
To attach a hole saw, you need to know its main parts and how they work with your drill.
The Hole Saw Itself
This is the circular blade with teeth on its edge. Hole saws come in many different sizes and are designed for specific materials. The hole saw has a threaded end that connects to the arbor.
The Arbor
The arbor is the shank that holds the hole saw and inserts into your drill chuck. Think of it as the adapter. Most arbors have a threaded section that screws into the base of the hole saw and a pilot drill bit in the center. This pilot bit helps guide the hole saw and keeps it from wandering when you start cutting.
There are a few common types of arbors:
- Mandrel-Style Arbors: These are very common. They have a threaded shaft for the hole saw to screw onto and a hex shank that fits into the drill chuck.
- Quick-Change Arbors: These are designed for faster swapping of hole saws. They often have a mechanism that allows you to click the hole saw into place without threading.
- Adjustable Arbors: Used for large-diameter holes where a specific size hole saw isn’t available. These have adjustable cutting blades.
The Drill Chuck
This is the part of your drill that grips the tool accessory, in this case, the arbor. Most modern drills have a keyless chuck, meaning you can tighten and loosen it by hand. Older drills might use a chuck key to secure the arbor.
Tools You’ll Need
For most hole saw attachments, you won’t need a complex toolkit. Here’s what you’ll likely have on hand:
- Your drill (corded or cordless)
- The hole saw you intend to use
- The corresponding arbor for your hole saw
- Safety glasses (essential!)
- Work gloves (optional, but recommended for handling sharp tools)
If you have an older drill with a keyed chuck, you’ll also need the chuck key.
Step-by-Step Guide: How to Attach a Hole Saw to Your Drill
Let’s get this done! Follow these steps carefully. Remember, safety is paramount at every stage.
Step 1: Disconnect Power!
This is the most critical first step. For a cordless drill, remove the battery completely. For a corded drill, unplug it from the wall outlet. Doing this prevents accidental power-ups while you’re working, which could cause serious injury.
Step 2: Identify Your Arbor Type
Take a look at your arbor. Does it have a threaded end? Does it have a pilot bit? Is it a quick-change style? Understanding its design will make the next steps clearer. The most common type is a threaded arbor with a pilot bit.
Step 3: Mate the Hole Saw to the Arbor
This is where the connection happens.
- For Threaded Arbors: Take your hole saw and locate the threaded opening at its base. Take the arbor and find the threaded end of the shaft that matches your hole saw. Carefully screw the hole saw onto the arbor. Twist it clockwise (remember: “righty-tighty”). Continue screwing until the hole saw is snug against the shoulder of the arbor. Don’t overtighten with brute force, but ensure it’s seated firmly.
- For Quick-Change Arbors: These are often simpler. The arbor usually has a collar that you pull back or twist. Align the hole saw with the arbor’s attachment point and push or twist until it clicks into place. Refer to the manufacturer’s instructions for your specific quick-change system.
Make sure the pilot drill bit is centered and extends past the hole saw’s teeth. It should be removable and replaceable if damaged.
Step 4: Insert the Arbor into the Drill Chuck
Now, it’s time to put the arbor (with the hole saw attached) into your drill.
- Open the drill chuck. You can usually do this by twisting the front part of the chuck counter-clockwise. For keyless chucks, a firm grip and twist are enough. For keyed chucks, insert the key and turn.
- Insert the shank of the arbor (the part that goes into the drill) into the open chuck. Make sure the arbor is seated as far into the chuck as possible.
- Close the drill chuck. Firmly twist the chuck clockwise (or use the chuck key) to tighten it around the arbor’s shank. Give it a good snug finish. You want it gripped tightly so it won’t slip during operation.
Try to balance the grip of the chuck jaws around the arbor shank for the most secure hold.
Step 5: Double-Check for Security
Before you plug in or reattach the battery, give the hole saw and arbor a gentle tug. Try to twist them. They should feel solid and not move independently of the drill. Perform a quick visual check to ensure the chuck jaws are gripping the arbor evenly and tightly.
Step 6: Reconnect Power and Test (Safely!)
Now, you can reconnect the power (plug in the cord or reinsert the battery). Hold the drill firmly with both hands. Point it in a safe direction (away from yourself and others, and free of obstructions). Briefly spin the drill at a low speed. Listen for any unusual noises or wobbles. If everything seems secure and runs smoothly, you’re ready to cut!
Tips for Different Drill Types
The method for attaching a hole saw is largely the same, but there are a few nuances depending on your drill.
Cordless Drills
These are very common for DIYers. The process is identical to the steps above. Just remember to remove the battery to ensure safety. Cordless drills offer portability, making them great for various job sites.
Corded Drills
The primary difference is unplugging from the wall instead of removing a battery. Some heavy-duty corded drills also offer more power and torque, which can be beneficial for larger hole saws or harder materials. Be mindful of the power cord to avoid tripping hazards or entanglement.
Hammer Drills and Rotary Hammers
These drills have a hammering action used for drilling into concrete or masonry. You should NOT use a hole saw for masonry with a hammer drill in hammer mode. The hammering action can damage the hole saw and arbor, and it’s dangerous. If you need to cut large holes in masonry, you need specialized diamond-core bits and appropriate tools. For wood or drywall, you can use these drills in their standard drill-only mode, following the same attachment steps above.
Impact Drivers
While you can sometimes attach a hole saw to certain impact drivers using adapter bits, it’s generally not recommended. Impact drivers deliver rotational force in short bursts (impacts), which can be too jarring for a hole saw. This can lead to inefficient cuts, damage to the hole saw, and a loss of control. A standard drill is the preferred tool for hole saws.
When in doubt, always consult your drill and hole saw manufacturer’s manuals for specific guidance.
Troubleshooting Common Issues
Sometimes, things don’t go perfectly. Here are a few common problems and how to fix them:
- Hole Saw Won’t Screw Onto Arbor: Check if you have the correct arbor for your hole saw. Some arbors are designed for specific hole saw thread sizes. Also, inspect the threads on both the hole saw and the arbor for any dirt, debris, or damage. Clean them carefully.
- Arbor Shank is Too Small/Large for Drill Chuck: Ensure you are using the correct arbor. Some arbors have different shank diameters. If the shank is too small, it won’t grip properly. If too large, it won’t fit. For common hole saws, the shank is usually 3/8″ or 1/2″.
- Drill Chuck Won’t Tighten Enough: Make sure the arbor is fully seated in the chuck before tightening. If the chuck jaws are worn, or the arbor shank is slightly rounded, it might not grip perfectly. Try repositioning the arbor in the chuck. If it persists, the chuck might need replacement or servicing.
- Hole Saw Wobbles During Use: This is often a sign of improper attachment. Disconnect power and re-attach the hole saw and arbor, ensuring everything is snug and the arbor is properly gripped by the drill chuck. Ensure the hole saw itself isn’t warped or damaged.
Hole Saw vs. Forstner Bit vs. Spade Bit: When to Use What
It’s helpful to know that hole saws aren’t the only tool for making holes. Here’s a quick comparison:
| Tool | Best For | Hole Size Range | Pros | Cons |
|---|---|---|---|---|
| Hole Saw | Large, clean holes in wood, drywall, thin metal, plastic. Great for electrical boxes, pipes, vents. | Typically 3/4″ to 7 inches (and up). | Cuts large holes efficiently with relatively clean edges. | Can be more expensive. Requires a specific arbor. Can bind in harder materials. |
| Forstner Bit | Flat-bottomed, precise holes in wood. Ideal for joinery, dowel holes, or when you don’t want the drill bit to pass through. | Usually 1/4″ to 3 inches. | Extremely clean, chip-free holes. Flat bottom. | Slower for large holes. Primarily for wood only. |
| Spade Bit (Paddle Bit) | Fast drilling of large holes in wood where a perfectly clean edge isn’t critical. Good for running wires or pipes through thinner lumber. | Typically 1/4″ to 2 inches. | Affordable, fast for its size. | Creates rough holes. Prone to splintering and blowout. Pilot tip can wander. |
For creating precisely large, smooth-walled holes, the hole saw is often your best bet, especially when paired correctly with your drill.
Safety Precautions When Using Hole Saws
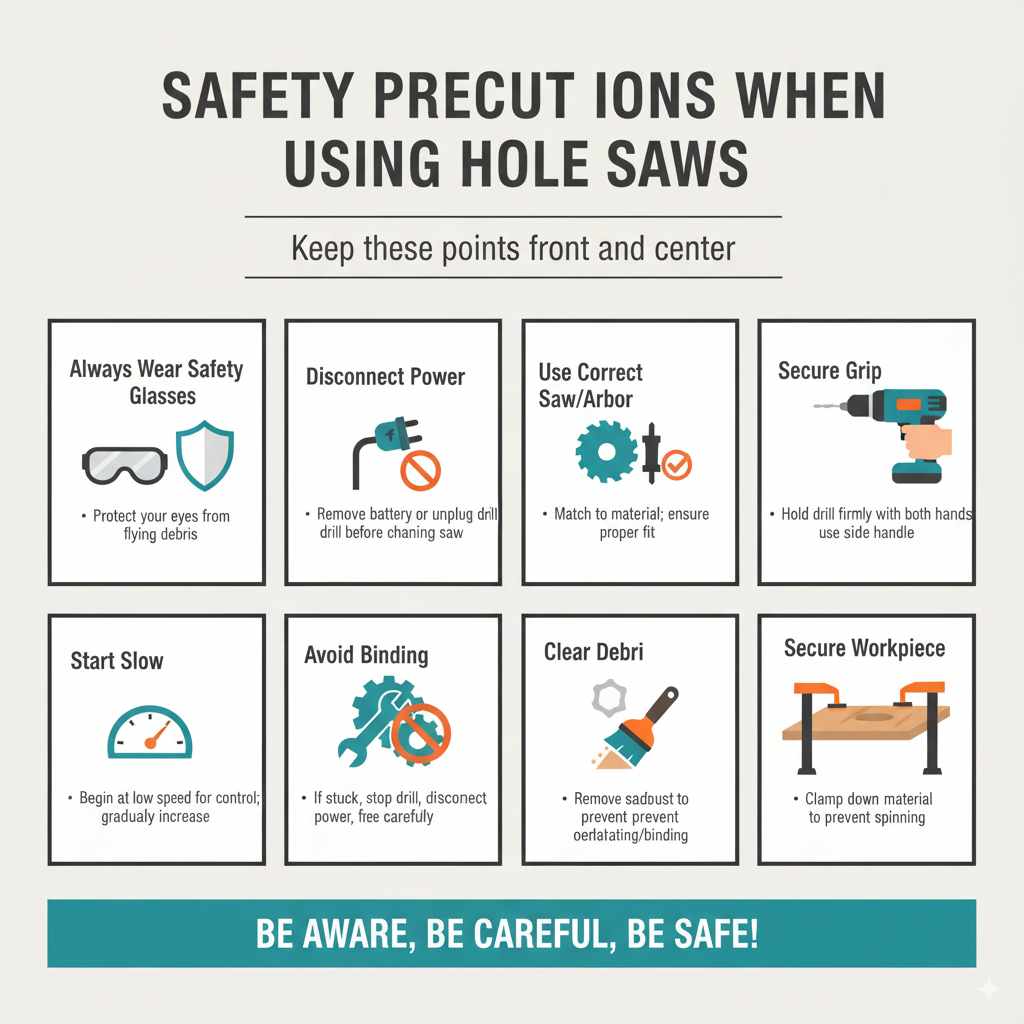
We’ve touched on safety throughout, but let’s make sure these are front and center:
- Always Wear Safety Glasses: Flying debris is a significant risk. Protect your eyes!
- Disconnect Power: Reiterate this: remove the battery or unplug the drill before attaching or detaching the hole saw.
- Use the Correct Hole Saw and Arbor: Match the hole saw to the material you’re cutting. Ensure the arbor fits both the hole saw and your drill.
- Secure Grip: Hold your drill firmly with both hands. For larger hole saws, consider using a side handle if your drill has one.
- Start Slow: Begin drilling at a low speed. Once the pilot bit has engaged the material, you can gradually increase speed if needed, but always maintain control.
- Avoid Binding: If the hole saw gets stuck, do not force it. Stop the drill, disconnect power, and try to free it carefully. Forcing can damage the tool or cause kickback.
- Clear Debris: Periodically clear sawdust or debris from the hole saw. This is especially important on longer cuts to prevent overheating and binding.
- Be Aware of Your Surroundings: Ensure no one is behind the material you’re cutting, as the bit can travel through.
- Secure Your Workpiece: Clamp down the material you are drilling into. This prevents it from spinning if the hole saw catches.
You can find more comprehensive safety guidelines from organizations like the Occupational Safety and Health Administration (OSHA) for power tool safety.
Frequently Asked Questions (FAQ)
Q1: Can I use any arbor with any hole saw?
A: Not always. Hole saws and arbors are designed with specific thread sizes and types. Most common hole saws use a threaded arbor with a pilot bit, but you need to ensure the threads match. Some high-end hole saws or arbors might have proprietary connection systems.
Q2: How tight should I make the hole saw on the arbor?
A: It should be snug and secure. Tighten it clockwise until it’s firm against the arbor. You don’t need excessive force; overtightening can damage the threads. Just ensure there’s no play or wobble.
Q3: What if my drill doesn’t have a keyed chuck?
A: Most modern drills have keyed chucks, which you tighten by hand. The process is the same: open the chuck by twisting it counter-clockwise, insert the arbor, and then tighten it firmly by twisting clockwise. Check that it’s gripped securely.
Q4: Can I use a hole saw on a material harder than wood, like tile?
A: Standard hole saws are generally not designed for hard materials like dense tile or glass. For these, you’ll need specialized hole saws, often with diamond or carbide grit edges, and potentially different drilling techniques (like using water for cooling) and drill speeds. Always check the hole saw’s specifications.
Q5: How do I remove the hole saw from the drill after use?
A: Ensure the drill is unplugged or the battery is removed. Once powered off, open the drill chuck by twisting counter-clockwise. Then, unscrew the hole saw from the arbor (twist counter-clockwise). If the hole saw is stuck on the arbor, you might need to gently tap it free with a rubber mallet or use a bit of penetrating oil if it’s really stubborn, but be careful not to damage the threads.
Q6: What if the pilot bit breaks off?
A: If the pilot bit breaks, you’ll need to replace it. Most arbors have a way to remove the old bit (sometimes a small set screw) so you can insert a new one. Ensure the replacement bit is the correct size and type for your arbor.
Conclusion
And there you have it! Attaching a hole saw to your drill is a fundamental skill that unlocks a world of possibilities for your DIY projects. By understanding the simple steps – especially disconnecting power, securing the hole saw to the arbor, and then firmly seating the arbor in the drill chuck – you can confidently tackle any project that requires a perfectly round opening.
Remember, safety is always your top priority. Always wear your safety glasses and take a moment to ensure everything is tightened securely before you power up. With the right technique and a little practice, you’ll be making clean, precise holes like a seasoned pro in no time. Happy building, and enjoy the satisfaction of a job well done!