How to Cut Stairs Out of Wood: Stringer Layout & Rise-Run Guide
To cut stairs out of wood, calculate your total rise (the floor-to-floor height) and divide it by a target riser height of roughly 7 to 7-3/4 inches to find the number of steps, then lay out each stair stringer with a framing square and a pair of stair gauges so every rise and run is identical. Building codes such as the IRC allow no more than 3/8 inch of variance between the tallest and shortest riser in a flight — a gap that small is still enough to trip someone, because your gait adapts to the first few steps and a sudden change in height catches your foot off guard.
Most DIY stair guides tell you to “measure carefully” and stop there. That’s not enough — consistent rise and run isn’t a nicety, it’s a specific, code-referenced dimension with a real failure mode. Below is the actual layout method carpenters use to hit that tolerance every time, plus what to do differently depending on whether you’re building an open (cut) stringer or a closed (housed) one.
Tools You Need to Cut Stair Stringers
The single most important tool for this job isn’t the saw — it’s the framing square, paired with a set of stair gauges (also called stair buttons). The gauges clamp onto the square’s blade and tongue at your exact rise and run measurements, so you can reposition the square down the board and get the identical mark every single time instead of re-measuring and re-marking each step by hand.
Best For Repeatable Stringer Layout
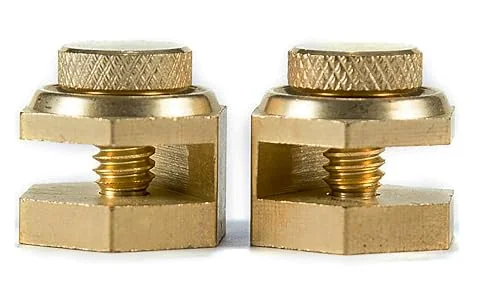 |
Swanson SG0020 Solid Brass Stair Gauges – $6.99 Clamps onto any standard framing square so you can lock in your rise and run once and repeat the exact same mark down the entire stringer.
|
Beyond the square and gauges, you’ll need a circular saw for the long straight cuts, a handsaw or jigsaw to finish the inside corners of each notch (a circular saw’s round blade overcuts if you run it all the way into the corner), a level, a tape measure, a pencil, and standard eye and ear protection. For structural stringers — the boards that actually carry the load — most builders start with 2×12 dimensional lumber; a stringer cut down from anything thinner won’t leave enough material at the notch to stay strong.
Calculate Total Rise and Run Before You Touch a Saw
Start by measuring the total rise: the exact vertical distance from the finished floor at the bottom to the finished floor at the top, including the thickness of any flooring you haven’t installed yet. Divide that number by a target riser height, most commonly somewhere in the 7 to 7-3/4 inch range, to get your step count — round to a whole number, then divide the total rise by that whole number again to get your actual, exact riser height for every step.
For the run (tread depth), the IRC’s typical minimum is 10 inches, and most comfortable residential stairs land somewhere between 10 and 11 inches. These are common code figures, not a universal number — local jurisdictions can and do amend them, so check your specific building department before you cut. A simple comfort check many carpenters still use: rise plus run should land close to 17 to 18 inches, and rise times run somewhere around 72 to 75. A stringer with a 7.5-inch rise and 10-inch run, for example, checks out comfortably on both counts.
Why Riser Consistency Is a Code Requirement, Not a Preference
This is the detail that gets skipped in most quick tutorials. The IRC caps the difference between your tallest and shortest riser in a single flight at 3/8 inch — and the same 3/8-inch tolerance applies to tread depth. That’s a narrow margin on purpose: after the first two or three steps, your body stops consciously watching each riser and starts trusting muscle memory built from the steps before it. A riser that’s even a half-inch taller or shorter than the rest breaks that rhythm, and it’s a well-documented, commonly cited cause of stair falls — inconsistent riser height is one of the most frequently failed items on stair inspections for exactly this reason.
In practice, this means your total-rise math has to be exact before you mark the first line, and every stringer in the set has to be marked from the same square-and-gauge setup, not eyeballed individually. If you’re cutting three stringers for one staircase, mark all three from the same locked-in gauge position before you cut any of them.
Laying Out the Stringer with a Framing Square
Set your stair gauges on the framing square at your final rise and run numbers — rise on the tongue (the narrower arm), run on the body (the wider arm). Starting near one end of your stringer board, align the square so both gauges sit flush against the board’s edge, then trace along the tongue and body to mark one riser line and one tread line, forming an upside-down L. Slide the square down to the point where your last mark ended, butt the gauges against the edge again, and repeat for each step. This is what keeps every step identical — you’re not re-measuring, you’re re-registering the same setup against the board over and over.
Double-check your full layout against your calculated total rise before cutting anything. It’s much faster to catch a math error in pencil than after the first stringer is already notched.
Open (Cut) Stringers vs. Closed (Housed) Stringers
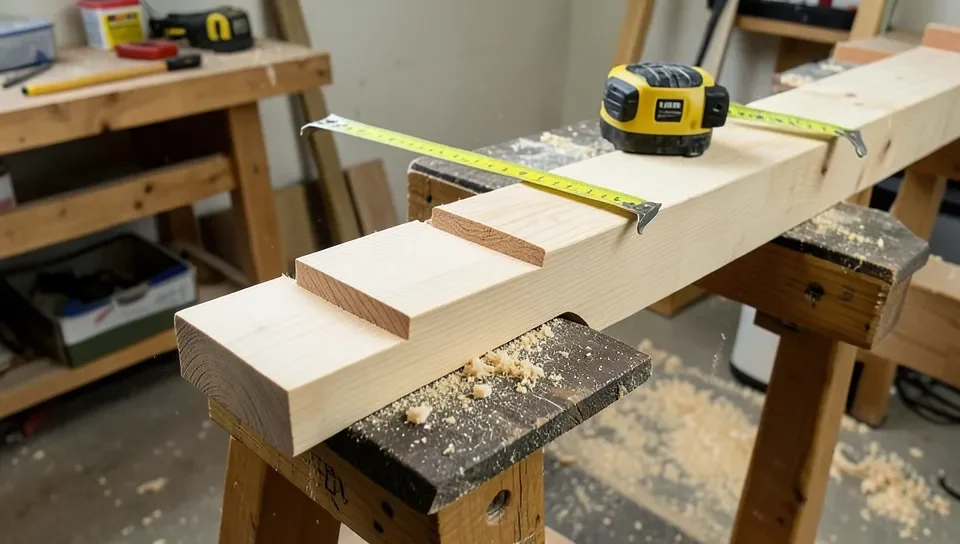
Most DIY stair projects use an open, or “cut,” stringer — the sawtooth-notched board most people picture, with the treads sitting directly on top of the cuts. It’s the version this guide walks through. A closed, or “housed,” stringer stays a solid, uncut board on the outside, with dadoed grooves routed into its inner face so the treads and risers slide into slots instead of resting on notches; it looks cleaner from the side but takes router work most home shops skip.
The real structural issue with an open stringer is the notch itself: every cut removes material, and the point where the tread meets the riser cut is the thinnest remaining section of the board. As a rule of thumb, aim to leave at least 3-1/2 inches of solid wood beyond the deepest point of the notch — on a 2×12, that’s normally not a problem if your rise and run are in the standard range, but a deeper-than-usual run or a smaller board can eat into that margin fast. This is also why the wood species and grade matter for the stringer specifically, separately from whatever you choose for the treads.
Cutting the Stringer
Cut the long rise and run lines with a circular saw, but stop right at the inside corner of each notch — don’t run the blade through the corner, since the blade is round and will overcut past the line into the board you’re trying to keep intact. Finish each inside corner with a handsaw or jigsaw instead. Cut your first stringer, then use it as a template to trace and cut the rest, which is faster than re-measuring each one and guarantees they match.
Choosing the Right Wood
Structural stringers are almost always cut from pressure-treated pine, SPF, or Douglas fir dimensional lumber — graded, load-rated 2×12 stock, not a hardwood board you happen to have. Treads and risers are where hardwood choice matters for looks and wear: oak and maple resist dents and scuffing far better than pine, which is why they’re the common choice for exposed indoor treads, while pressure-treated pine is standard for outdoor stairs that need to shed weather.
Assembling and Installing the Stairs
Attach the top of each stringer securely to the header or ledger board it’s bearing against, and confirm the bottom sits on a solid, level surface or footing — a stringer that shifts even slightly at either end throws off every riser above it. Fasten treads and risers with construction adhesive plus screws, not just nails; screws driven at a slight angle into the stringer resist the seasonal wood movement that causes squeaks down the line. Check level and square as you go, not just at the end, and follow local code for handrail and guardrail height and spacing once the stairs themselves are installed.
Finishing and Maintaining Wood Stairs
Sand through progressively finer grits before finishing, paying extra attention to tread edges where hands and feet make the most contact. A polyurethane topcoat holds up best against wear on treads; stain first if you want to change the wood’s color, then seal over it. Apply thin coats and let each one cure fully — a thick, rushed coat stays soft and dents easily.
Once installed, keep stairs clean with a soft broom or vacuum and a barely damp cloth; standing water and harsh chemicals both damage a finish over time. For a deeper clean between refinishing, a gentle wood cleaner tested on a small area first works well. If a step starts to squeak, it’s almost always a tread that’s worked loose from the stringer — adding a screw or two, angled into the stringer, usually solves it without a full rebuild.
Frequently Asked Questions
How much can riser height vary between steps?
Under the IRC, the tallest and shortest riser in a single flight of stairs can’t differ by more than 3/8 inch, and the same tolerance applies to tread depth. This isn’t just a code formality — a riser outside that range is a documented trip hazard because your foot adapts to the rhythm of the steps before it.
What tools do I need to cut stair stringers?
A framing square with stair gauges for layout, a circular saw for the long cuts, a handsaw or jigsaw to finish the inside corners without overcutting, plus a tape measure, level, and pencil. Safety glasses and hearing protection are essential with any power tool here.
What’s the difference between an open and closed stair stringer?
An open (cut) stringer is notched into a sawtooth shape with the treads resting directly on top — the standard DIY approach. A closed (housed) stringer stays solid on the outside with grooves routed into the inner face so treads slot in, giving a cleaner look but requiring router work most home shops don’t have set up.
What wood is best for stair stringers vs. treads?
Stringers are almost always load-rated dimensional lumber like 2×12 pressure-treated pine, SPF, or Douglas fir — not a hardwood board. Treads and risers are where hardwoods like oak and maple earn their keep, resisting dents and wear far better than softwoods on the surface people actually walk on.
Conclusion
Cutting stairs out of wood comes down to two things: getting your total rise and run math exactly right before you cut, and using a framing square with stair gauges so every stringer repeats that same math identically. Skip either one and you end up with a staircase that’s a real trip hazard, not just an imperfect one. Take the extra ten minutes to double-check your layout in pencil first — it’s the cheapest insurance on the whole project.
Sponsored / affiliate links. As an Amazon Associate I earn from qualifying purchases. I may earn additional commission from eligible campaigns.