How to Mill Wood From a Log: Cutting Patterns & Drying Guide
Milling wood turns a raw log into usable lumber, and the cutting pattern you choose – through-and-through, quarter-sawn, or rift-sawn – decides how much the boards warp later, not just how the grain looks. Quarter-sawn and rift-sawn lumber resist cupping far better than plain-sawn boards, but yield less usable wood per log, a real tradeoff most guides skip. This guide covers choosing a cutting pattern, milling the log safely, and stickering and drying boards before you build anything.
Quick Answer
To mill wood, cut the log into your chosen pattern – quarter-sawn for stability, through-and-through for yield – using a chainsaw mill, bandsaw mill, or portable sawmill. Seal the fresh-cut ends right away, then sticker the boards with spacers every 18–24 inches and air-dry them before building anything. Drying time depends on thickness, species, and climate, not a fixed year-per-inch rule.
Tools and Equipment for Milling Wood
The right equipment depends on how much wood you’re milling and whether you already own the logs. A one-off log or two from a yard tree doesn’t justify a dedicated bandsaw mill; regular milling does. See our saws and tools guide for how a mill attachment fits alongside the rest of a basic shop.
- Chainsaw with a mill attachment – the lowest-cost way to mill occasional logs you already have
- Portable bandsaw mill – faster and more precise for regular milling or larger volume
- Tape measure, chalk line, and a moisture meter
- Wax-based end-grain sealer (such as Anchor Seal) to slow drying cracks
- Stickers – spacer sticks, roughly 3/4″ thick, for stacking boards to dry
- Protective gear: chainsaw-rated chaps, a face shield, hearing protection, and gloves
For most homeowners milling a handful of logs, a chainsaw mill attachment is the lower-cost entry point – it turns a chainsaw you may already own into a basic mill, instead of buying or renting a dedicated bandsaw mill.
Best Chainsaw Mill Attachment Pick
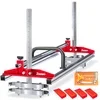 |
Zozen Chainsaw Mill, Fits 14″-36″ Bar – $85.99 Converts a 14″-36″ bar chainsaw into a basic mill for cutting logs into slabs before you sticker and dry them – the entry-level tool this guide’s equipment section covers for occasional milling.
|
As an Amazon Associate we earn from qualifying purchases.
Choosing a Cutting Pattern: Through-and-Through, Quarter-Sawn, or Rift-Sawn
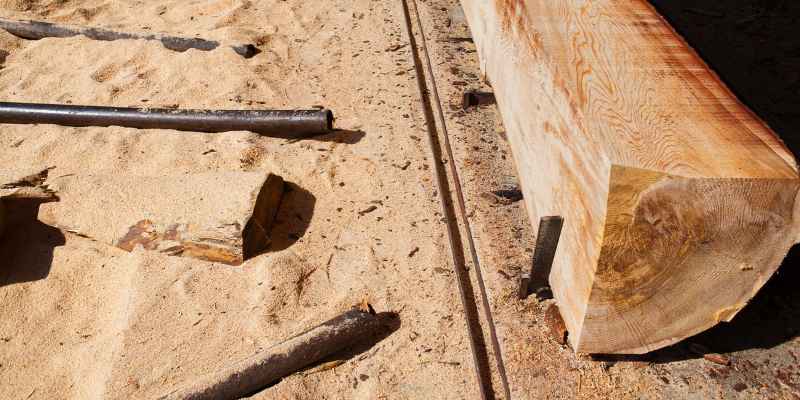
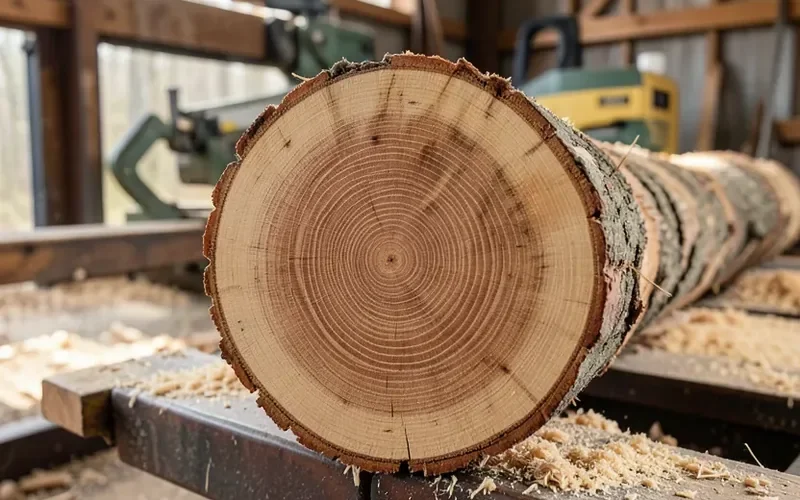
Cutting pattern is how the log is oriented and sliced on the mill, and it changes both how much usable lumber you get and how stable the boards are once dry. This decision matters more than the tool you use to make it.
Through-and-through (plain-sawn) cuts straight, parallel slices from one side of the log to the other with no rotation. It’s the fastest method and gives the highest yield per log, but the growth rings run nearly flat across the board face, so plain-sawn boards cup and warp more as they dry.
Quarter-sawn lumber comes from a log split into quarters first, then cut radially from each quarter. The growth rings run closer to 60–90 degrees to the board face, which makes quarter-sawn boards meaningfully more dimensionally stable and less prone to cupping – the tradeoff is more cuts, more waste, and less usable lumber per log.
Rift-sawn lumber is cut at a consistent 30–60 degree angle to the rings. It’s the most dimensionally stable of the three and shows a clean, linear grain with minimal flecking, but it has the lowest yield of any pattern – most rift-sawn stock goes toward flooring and fine furniture, not general framing.
A fourth real-world option, live-sawn, plows straight through the log without rotating it, similar to through-and-through, but the boards are kept in sequence. A single wide live-sawn board can contain plain-sawn grain at its center and rift- or quarter-sawn grain toward its edges, so stability varies across the width of one plank.
| Cutting Pattern | Stability | Yield per Log | Best For |
|---|---|---|---|
| Through-and-through (plain-sawn) | Lowest – more cupping | Highest | General framing, budget projects |
| Quarter-sawn | High – resists cupping | Lower | Furniture, cabinetry, flooring |
| Rift-sawn | Highest – most stable | Lowest | Flooring, fine millwork |
| Live-sawn | Mixed – varies by board | High | Wide slabs, tabletops, character grain |
Preparing the Log Before You Cut
Clean the log of dirt, bark debris, and grit before the first cut – grit dulls a chain or blade fast. If the log came from a yard or urban tree, run a metal detector over it first; embedded nails, fencing staples, or old hardware are common in yard trees and will wreck an expensive blade on contact.
Make your first cut to remove the top cap of bark, aiming to expose 6–8 inches of flat, clean sapwood – this gives the mill a stable reference face for every cut after it. Check the log for visible cracks, large knots, or splits and mark them; you can often plan your cutting pattern around a defect instead of losing the whole board to it.
Step-by-Step: Milling a Log Into Lumber
- Secure the log: Set the log on rails, sawhorses, or wedges so it can’t roll while you cut.
- Make the first flattening cut: Remove the bark cap and cut a flat reference face across the top of the log.
- Cut to your chosen pattern: Flip or rotate the log as needed and make through-and-through, quarter-sawn, or rift-sawn cuts based on the section above.
- Rough-cut oversized: Leave boards about 1/8″ to 1/4″ over your final target thickness – wood moves as it dries, and you’ll plane to final size after.
- Seal the fresh-cut ends immediately: Brush on a wax-based end sealer within minutes of cutting to slow moisture loss from the end grain, which is where checking and cracking starts.
- Sticker and stack to dry: Stack boards with spacers between every layer (see the drying section below) before you do any final jointing or planing.
Chainsaw Mill Safety: Kickback and Blade Exposure
Milling with a chainsaw mill attachment carries real risks beyond normal bucking or felling cuts. The full length of the bar stays in contact with wood for long, continuous passes instead of short cuts, and the operator works close to a horizontal moving chain for extended stretches – both increase the window for a mistake.
Kickback risk is highest at the nose of the bar, so keep the mill’s guide rails and depth stops in place – never remove them to speed up a cut. Wear chainsaw-rated chaps, a face shield over safety glasses, and hearing protection for every pass, and keep your footing stable rather than overreaching across the log. Fatigue is a real factor on long milling sessions; take breaks rather than pushing through a cut when your grip or attention starts to slip.
Stickering and Air-Drying Your Milled Boards
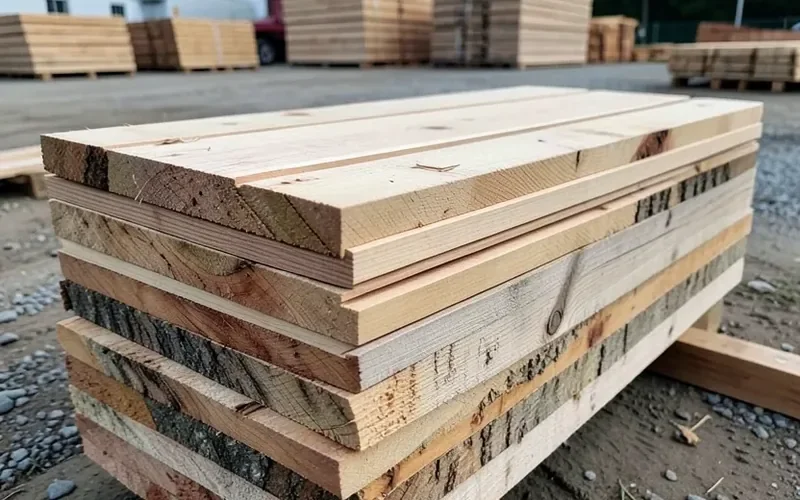
Stickering is stacking freshly milled boards with spacer sticks between every layer so air can move through the whole pile, not just around its edges. Skip this step and boards on the inside of a solid stack dry unevenly, cup, and often develop mold before they ever dry out.
Space stickers about 18–24 inches apart for most species and thicknesses; tighten that to roughly every 12 inches for hardwoods that are prone to warping, such as elm. Line stickers up directly above one another from layer to layer so the stack’s weight transfers straight down instead of bending boards between unsupported spans. Set the whole stack on a raised foundation – lumber stacked over concrete or gravel dries faster than lumber stacked directly on bare ground, since water can’t pool underneath it.
📊 Two-inch lumber can take three to four times as long to air-dry to the same moisture content as 1-inch lumber of the same species. – Source: Oregon State University Extension Service, Air- and Shed-Drying Lumber
The popular “one year of drying per inch of thickness” rule of thumb is a rough generalization, not a fixed law – actual drying time depends on species, thickness, humidity, and whether the stack is covered. Final moisture content depends on your local climate too: the same stack can settle several percentage points lower in a dry region than in a humid one. Check boards with a moisture meter instead of counting months on a calendar.
Common Milling Mistakes to Avoid
- Building with wood that’s still too wet: lumber that hasn’t reached a stable moisture content will keep shrinking and can crack or split joints after a project is finished.
- Skipping the end seal: unsealed end grain loses moisture far faster than the rest of the board, which is why checking and cracking almost always starts at the ends.
- Cutting with a dull chain or blade: a dull edge burns the wood, wanders off your line, and puts more strain on the motor and on you.
- Planing to final thickness before drying: wood keeps moving as it loses moisture, so a board planed dead-flat while still wet is rarely still flat once it’s dry.
- Stacking boards flat with no stickers: even a few days stacked solid can trap moisture and start mold on the inside layers.
Frequently Asked Questions
What tools are needed to mill wood?
At minimum you need a way to cut the log – a chainsaw with a mill attachment for occasional use, or a portable bandsaw mill for regular milling – plus a tape measure, moisture meter, end-grain sealer, and stickers for drying. Chainsaw-rated chaps, a face shield, and hearing protection are essential, not optional.
What’s the difference between quarter-sawn and plain-sawn lumber?
Plain-sawn (through-and-through) boards are cut in flat, parallel slices and give the most usable lumber per log, but their growth rings run nearly flat across the face, so they cup and warp more as they dry. Quarter-sawn boards are cut radially from a quartered log, which makes them notably more stable, at the cost of yield.
How long does milled lumber need to air-dry before I use it?
There’s no fixed year-per-inch answer – drying time depends on species, board thickness, humidity, and whether the stack is covered. As a real data point, 2-inch lumber typically takes three to four times as long to air-dry as 1-inch lumber of the same species. Check with a moisture meter rather than counting months.
Is a chainsaw mill safe to use?
It can be, but the risks are higher than normal chainsaw cuts because the bar stays in continuous contact with wood for long passes and the operator works close to the chain the whole time. Keep the mill’s guide rails in place, wear chainsaw-rated chaps and a face shield, and avoid overreaching or working past the point of fatigue.
Can I mill wood at home without a dedicated sawmill?
Yes – a chainsaw mill attachment lets you mill logs you already have without buying a bandsaw mill. It’s slower and less precise, but for occasional milling of a log or two it’s a realistic, lower-cost starting point.
Conclusion
Milling wood comes down to two decisions that matter more than the tool you use: which cutting pattern fits the project, and whether you actually dry the boards properly before building with them. Pick quarter-sawn or rift-sawn when stability matters more than yield, seal and sticker every board the same day you cut it, and check moisture content instead of guessing by the calendar.
Sponsored / affiliate links. As an Amazon Associate I earn from qualifying purchases. I may earn additional commission from eligible campaigns.