How to Mount a Woodworking Bench Vise: A Step-by-Step Guide
To mount a woodworking bench vise, first, determine the ideal location on the bench. Then, secure the vise using appropriate screws and bolts to ensure stability and sturdiness.
Woodworking bench vises are essential tools for any woodshop. Whether you’re a professional carpenter or a DIY enthusiast, having a vise securely mounted to your workbench can significantly improve the quality and efficiency of your projects. In this guide, we’ll walk you through the step-by-step process of mounting a woodworking bench vise.
By following these simple instructions, you’ll be able to securely attach your vise to your workbench, ensuring that it’s ready for all your woodworking needs. Let’s get started!
Introduction To Bench Vises In Woodworking
The Role Of A Bench Vise
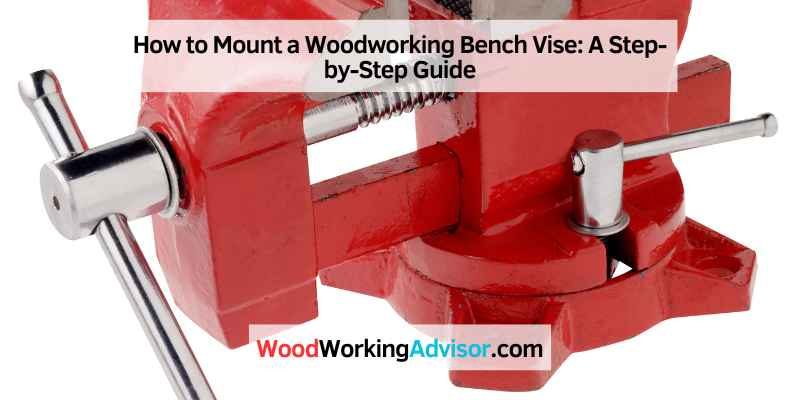
A bench vise is an essential tool in woodworking that firmly holds workpieces in place, allowing for precise and controlled cutting, drilling, and shaping. It enables woodworkers to work with both hands while securing the material, increasing safety and accuracy.
Types Of Woodworking Bench Vises
- Woodworking Bench Vise: Specifically designed for woodworking projects, it typically features wooden jaws to prevent marring delicate workpieces.
- Mechanical Bench Vise: Utilizes a mechanical screw to tighten and secure materials, offering a high level of clamping force.
- Quick-Release Bench Vise: Allows for rapid adjustment of the clamping pressure, enhancing efficiency during woodworking tasks.
Choosing The Right Bench Vise For Your Workshop
When setting up your woodworking bench, one essential tool you’ll need is a bench vise. A bench vise is a mechanical device designed to securely hold your workpiece in place, providing stability and control during various woodworking tasks. However, with so many options available, it can be challenging to choose the right bench vise for your workshop. In this section, we’ll explore the key considerations to keep in mind when selecting a bench vise.
Size And Material Considerations
The first aspect to consider is the size and material of the bench vise. Bench vises come in various sizes, ranging from small 4-inch vises to larger 10-inch or even 12-inch vises. The right size for your workshop depends on the type of projects you typically work on. For smaller projects or limited workspace, a compact vise may be more suitable, while larger projects may require the added clamping capacity of a larger vise.
Additionally, the material of the bench vise is crucial for durability and performance. Cast iron is a popular choice due to its strength and resistance to wear. It provides a stable base for secure clamping and is less prone to flexing. Steel vises are another option, known for their strength and longevity. Consider your specific needs and the materials you typically work with to determine the most appropriate material for your bench vise.
Mounting Options And Locations
Another important factor to consider is the mounting options and locations for your bench vise. There are generally two main mounting options: front-mount and side-mount. Front-mount vises attach to the front edge of your workbench, providing easy access and ample clamping force. Side-mount vises, on the other hand, are secured to the side of the bench, allowing for wider workpieces to be held securely.
When deciding on the location for your bench vise, it’s essential to consider factors such as the height and accessibility. Mounting the vise at a comfortable working height will reduce strain on your back and arms. Additionally, make sure to position the vise in a location that allows for easy maneuvering around the workbench without any obstructions.
Ultimately, the choice of the bench vise size, material, and mounting options depends on your specific needs and the type of woodworking projects you undertake. Take the time to assess your requirements and consider these factors to ensure you select the right bench vise that will enhance your woodworking experience.
Tools And Materials Needed
To mount a woodworking bench vise, you’ll need a few essential tools and materials. These include a drill, screws, a screwdriver or wrench, a measuring tape, and a pencil. By following the proper steps and using the right equipment, you can securely attach the vise to your workbench for efficient woodworking projects.
List Of Essential Tools
Before you begin mounting your woodworking bench vise, you will need to gather the following essential tools:
- A drill
- Drill bits
- A tape measure
- A pencil
- A level
- A wrench or socket set
- A saw
Selecting Your Mounting Hardware
When selecting your mounting hardware, it is important to choose the right size and type of hardware for your specific woodworking bench vise. The mounting hardware you will need includes:
- Lag screws
- Washers
- Nuts
Make sure that the hardware you choose is strong enough to support the weight and pressure of your woodworking projects.
Once you have gathered all the necessary tools and materials, you are ready to begin the process of mounting your woodworking bench vise. Remember to follow all safety guidelines and take your time to ensure that the vise is mounted securely and safely.
Preparation Before Installation
Before mounting a woodworking bench vise, it is important to prepare the area and tools needed. Clear the workspace, secure the vise to a sturdy workbench, and gather necessary hardware. Double-check measurements and ensure proper alignment before drilling into the workbench.
Workspace Setup
Clear your work area to avoid obstacles.
Ensure adequate lighting for better visibility.
Place tools within easy reach for convenience.
Measuring And Marking
Measure the mounting location accurately.
Mark drilling points using a pencil or marker.
Double-check measurements before drilling.

Mounting The Vise Step By Step
Begin by securing the vise to your workbench with mounting bolts. Position it securely for stability. Use a level to ensure it’s straight before tightening the bolts. This step-by-step process ensures a properly mounted woodworking bench vise.
Mounting a woodworking bench vise is an essential step to ensure that your woodworking projects are sturdy and secure. In this section, we will guide you through the step-by-step process of mounting the vise. We will cover everything from attaching the base plate, securing the vise body, and making final adjustments to ensure that your vise is properly mounted and ready for use.
Attaching The Base Plate
The first step in mounting a woodworking bench vise is to attach the base plate. The base plate is the part of the vise that will be attached to the workbench. To attach the base plate, follow these steps:
- Clean the area of the workbench where the base plate will be attached.
- Place the base plate on the workbench in the desired location.
- Mark the holes on the base plate onto the workbench.
- Drill pilot holes for the screws.
- Attach the base plate to the workbench using screws.
Securing The Vise Body
Once the base plate is attached, it’s time to secure the vise body. The vise body is the part of the vise that holds the workpiece. To secure the vise body, follow these steps:
- Place the vise body onto the base plate.
- Mark the holes on the vise body onto the base plate.
- Drill pilot holes for the screws.
- Attach the vise body to the base plate using screws.
Final Adjustments
After securing the vise body, make final adjustments to ensure that your vise is properly mounted. Follow these steps:
- Check the alignment of the vise body to make sure it’s level.
- Check the movement of the vise to make sure it’s smooth and not binding.
- Make any necessary adjustments to the vise body or base plate to ensure that the vise is properly aligned and functioning correctly.
In conclusion, mounting a woodworking bench vise may seem like a daunting task, but by following these step-by-step instructions, you can do it with ease. Properly mounting your vise will ensure that your woodworking projects are secure and sturdy.
Common Mistakes To Avoid
When mounting a woodworking bench vise, it is important to avoid common mistakes such as not properly securing the vise to the bench or not using the correct size bolts. Careful attention to detail and following the manufacturer’s instructions can prevent these mistakes and ensure a secure and functional vise.
Mounting a woodworking bench vise might seem like a simple task, but there are some common mistakes that can easily be made. By being aware of these pitfalls, you can ensure that your vise is mounted securely and functions properly. In this section, we will discuss two of the most common mistakes to avoid when mounting a woodworking bench vise: incorrect placement and over-tightening screws.
Incorrect Placement
One of the most crucial aspects of mounting a woodworking bench vise is placing it in the correct position. Many people make the mistake of not considering the optimal location for their vise, which can lead to difficulties in using it effectively. To avoid this, follow these guidelines:
1. Position the vise at a comfortable working height: Ensure that the top of the vise is at a height that allows you to work comfortably without straining your back or arms.
2. Place the vise near the edge of the workbench: Mounting the vise too far from the edge of the workbench can reduce its functionality. Keep it close to the edge, allowing easy access to the vise jaws.
3. Consider the direction of the vise: Depending on your woodworking projects, you might want to mount the vise facing either towards or away from you. Think about the tasks you’ll be performing most frequently and position the vise accordingly.
Over-tightening Screws
When mounting a woodworking bench vise, it’s important to strike the right balance when tightening the screws. Over-tightening the screws can lead to several issues, including damage to the workbench and impaired functionality of the vise. Follow these tips to avoid over-tightening:
1. Use a torque wrench or screwdriver with a torque-limiting feature: This will help you apply the right amount of force without exceeding the recommended torque. Refer to the manufacturer’s instructions for the specific torque requirements.
2. Tighten the screws evenly: Start by loosely tightening the screws and then gradually tighten them evenly in a diagonal pattern. This ensures that the vise is securely mounted without any undue stress on the screws or the workbench.
3. Check for any movement: After tightening the screws, test the vise by applying some pressure. If you notice any movement or wobbling, re-adjust the screws until the vise is firmly secured.
By avoiding these common mistakes, you can ensure that your woodworking bench vise is mounted correctly, allowing you to work efficiently and safely on your projects. Take the time to carefully consider the placement and tighten the screws appropriately, and you’ll be rewarded with a sturdy and functional vise that enhances your woodworking experience.
Maintenance Tips For Your Bench Vise
Mounting a woodworking bench vise properly is crucial for efficient and safe use. Follow these maintenance tips to ensure a secure installation: align the vise parallel to the bench’s edge, use sturdy mounting hardware, tighten all bolts securely, and periodically check for any loosening or wear.
Regular Cleaning
- Remove dust and debris with a brush.
- Wipe with a clean, dry cloth.
- Check for rust or corrosion regularly.
Lubrication And Tightening
- Apply lubricating oil to moving parts.
- Tighten any loose screws or bolts.
- Ensure smooth operation by testing the vise.
Creative Uses For Your Mounted Bench Vise
Discover the endless possibilities of your mounted bench vise with these creative uses. From woodworking to metalworking, your vise can be a versatile tool for various projects.
Clamping Techniques For Different Projects
Utilize your bench vise for securely holding workpieces in place while sawing or drilling. Adjust the vise to accommodate different sizes and shapes of materials.
Expanding Your Workshop’s Capabilities
Enhance your workshop by incorporating the bench vise into custom workbenches or tool stands. Explore innovative ways to integrate the vise into your workspace.

Frequently Asked Questions
How Do I Choose The Right Woodworking Bench Vise?
To choose the right woodworking bench vise, consider the size of your workbench, the type of projects you’ll be working on, and the materials you’ll be using. Look for a vise with sturdy construction and smooth operation for optimal performance.
What Tools Do I Need To Mount A Woodworking Bench Vise?
You will need a drill, appropriate drill bits, screws, a wrench or socket set, and possibly a hammer or mallet. Make sure to have the correct hardware for securing the vise to your workbench, and follow the manufacturer’s instructions for installation.
Can I Mount A Woodworking Bench Vise Without Prior Experience?
Yes, you can mount a woodworking bench vise without prior experience by following the manufacturer’s instructions carefully. Take your time to ensure proper alignment and secure mounting, and don’t hesitate to seek guidance from woodworking communities or professionals if needed.
Conclusion
Mastering the art of mounting a woodworking bench vise can elevate your craftsmanship. By following the steps outlined in this guide, you can enhance your woodworking projects. Embrace the process, practice diligently, and watch your skills flourish with each project you undertake.
Dive in and enjoy the journey!


