How To Remove Urine Stains – Effortless
Effortlessly remove urine stains from most surfaces using simple household cleaners and gentle techniques, restoring freshness and cleanliness to your home without harsh chemicals or damage.
Accidents happen, and when they involve urine, that telltale odor and stubborn stain can quickly become the unwelcome focus of your attention. Whether it’s a little one learning potty training, a playful puppy, or even a forgetful furry senior, cleaning up after an episode can feel like a serious chore. The good news is tackling these messes doesn’t require a special degree or a pantry full of specialty products. With a bit of know-how and a few common items you’ve likely already got around the house, you can banish those unpleasant marks and get back to enjoying a fresh, clean living space. Let’s dive into how to make urine stain removal surprisingly simple and effective.
Understanding Urine Stains
Before we get to cleaning, I want us to have a quick chat about what we’re dealing with. Urine, as surprising as it might sound, isn’t just water and oopsies. At its core, it’s made of urea, uric acid crystals, and salts. While the water evaporates, those solid crystals can stick around, acting like tiny magnets for odors and even growing into larger colony structures over time, especially if not properly removed. This is why lingering smells and re-appearing stains (from remaining crystals reacting to moisture) are such common frustrations. Think of treating a urine stain not just as removing a discoloration, but as neutralizing those crystalline culprits.
The Science Bit (Easy Version!)
Don’t worry, this won’t be like taking home a biology test! It’s just helpful to grasp a little bit of the “why” so you feel empowered to use the right “how.”
- Uric Acid Crystals: These are the troublemakers linked to persistent odor. They aren’t easily dissolved by just water or basic cleaners you might use for, say, spills from craft time. They require more specialized treatment or thorough enzymatic action.
- Volume of Liquid: The more liquid was involved, the deeper it might penetrate porous surfaces like untreated wood or carpet. Deeper stains generally mean a bit more effort.
- Time is Not Your Friend: Fresh stains are always easier to tackle than set-in ones. The longer urine sits, the more chance it has to bond with fibers or seep further into materials. Treat fresh incidents like breaking news — immediate action yields the best results.
Effortless Urine Stain Removal: Your Toolkit
Having the right supplies is half the battle. We want to keep it simple and effective. Here are some of the go-to ingredients and tools that will help you work wonders:
Gentle Yet Mighty Cleaners
These are your allies, readily found in almost any home:
- White Vinegar: A fantastic natural deodorizer and mild acid that helps break down urine crystals.
- Baking Soda: A wonderful absorbent and deodorizer; it helps lift and neutralize in two key ways.
- Rubbing Alcohol (Isopropyl Alcohol): Effective for disinfecting but can be drying to some surfaces. Always test first and use sparingly.
- Hydrogen Peroxide (3% Solution): A good mild bleaching agent for light-colored fabrics or certain surfaces. Be very cautious testing this on darker or dyed materials, as it can lighten them. Wear gloves!
- Enzymatic Cleaner: These cleaners contain enzymes that literally “eat” the organic matter in urine, breaking down the stain and odor at a molecular level. They are highly recommended for stubborn odors or large areas. You can find these at most pet supply stores or online. A common example is Nature’s Miracle.
- Dish Soap (Mild): Good for the initial mop-up of liquid mess; effective at breaking grease and surface grime.
Essential Tools
Not many fancy gadgets needed here!
- Paper Towels or Clean Cloths/Rags: Your primary tool for blotting and absorbing. Squeeze them out and reuse if cleaning a larger or wet area.
- Spray Bottles: For applying cleaning solutions evenly and without oversaturating, which is crucial for sensitive materials.
- Soft-Bristled Brush orOld Toothbrush: For gently working cleaners into fibrous surfaces like upholstery or carpets.
- Vacuum Cleaner: Especially one with an upholstery attachment for carpets and mats.
- Gloves: To protect your hands, especially if using hydrogen peroxide or stronger cleaners.
Step-by-Step Guide: Tackling the Urge to Toss It All Out!
Don’t despair! Let’s tackle these stains one material at a time, with easy steps perfect for any beginner DIYer.
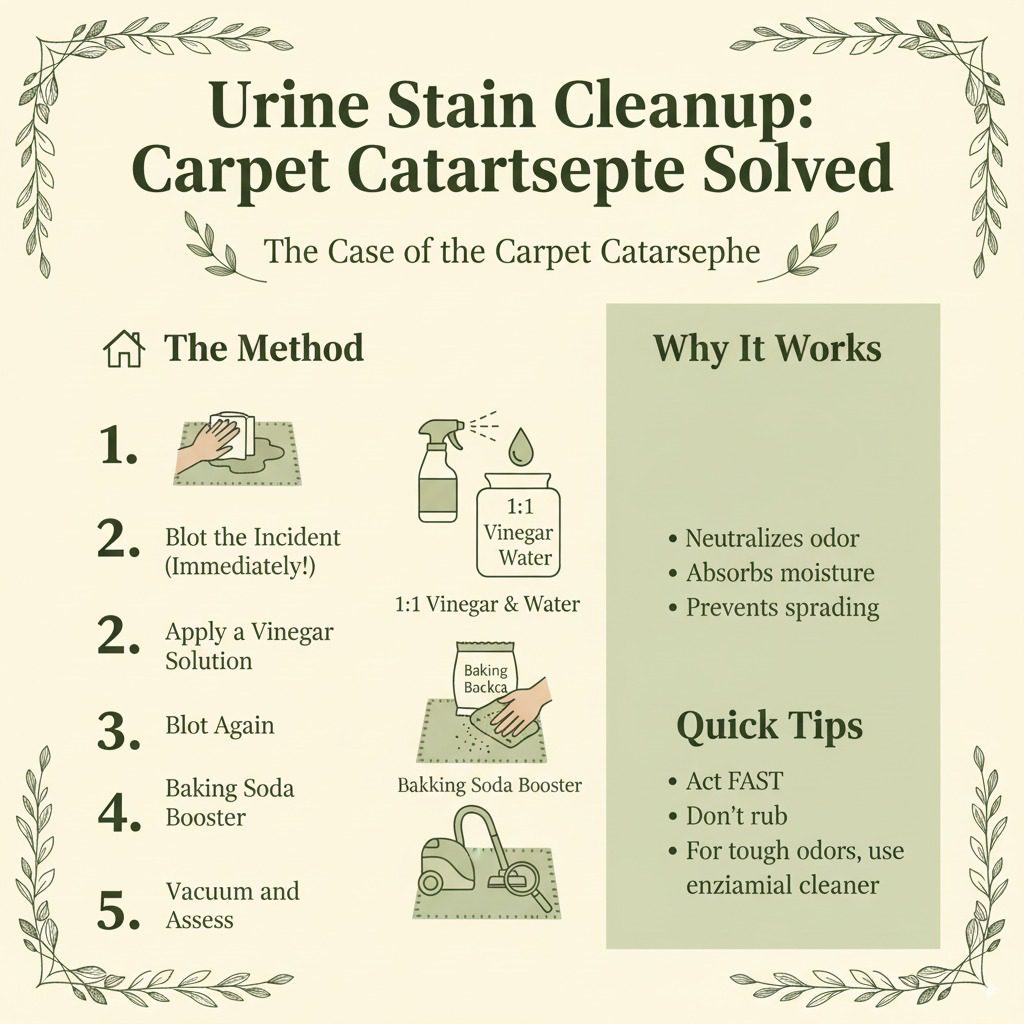
The Case of the Carpet Catastrophe
Carpet and urine can be a tricky combo, but you got this!
- Blot the Incident (Immediately!): Grab those paper towels or clean cloths. Press down firmly on the damp carpet where the accident occurred. Your goal is to absorb as much wetness as possible from the fibers and padding. Lift the towel, use a dry spot, and repeat until minimal moisture transfers. Avoid rubbing, as this can spread the stain and fray carpet fibers.
- Apply a Vinegar Solution: Mix equal parts white vinegar and cool water in a spray bottle. Why vinegar? It’s a champion at neutralizing that ammonia smell. Lightly spritz the affected area, ensuring you don’t soak the carpet to the point of saturation impacting the padding beneath. Let it sit for about 5-10 minutes.
- Blot Again: Use a clean, dry cloth or paper towels to blot up the vinegar solution and any remaining impurities.
- Baking Soda Booster: This is where the magic ✨ really happens! Sprinkle a generous amount of baking soda liberally over the damp spot. It’s an excellent absorbent and will help draw out residual moisture and, more importantly, odor. Let it dry completely. This might take a few hours, or even set and forget overnight.
- Vacuum and Assess: Once the baking soda is thoroughly dried (you’ll know it because it will be loose and powdery), vacuum it all up. Check for any remaining odor or stains. For tougher odors, repeat with the baking soda, or consider an enzymatic cleaner.
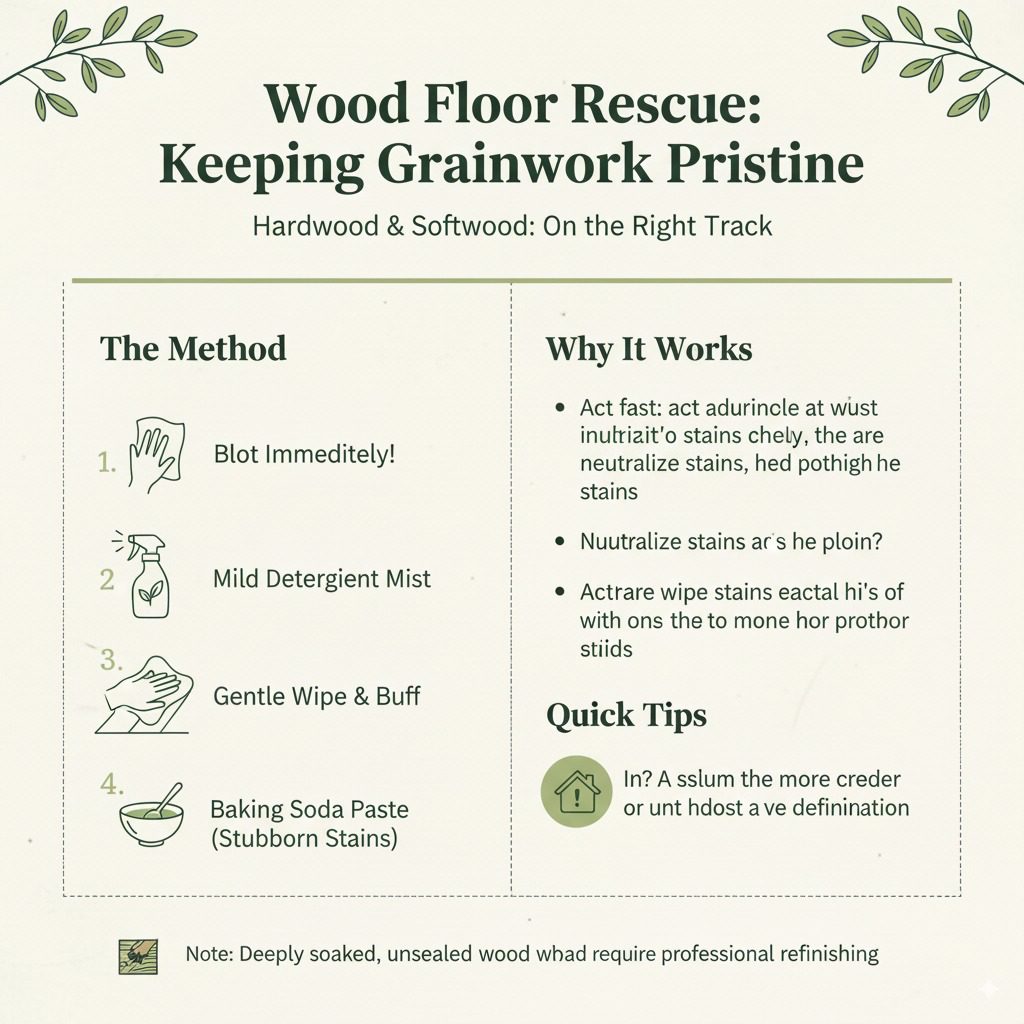
Hardwood & Softwood: Keeping Woobworkers on the Right Track
When it comes to my first love, wood, you need to be a little more careful to preserve that lovely grainwork. The best defense is a swift offense. The sooner you can “catch” a mistake, the easier the cleanup.
We’re aiming for delicate, deliberate touches here to how to remove urine stains from hardwood floors without damaging them.
- First Responder: Act Fast! On sealed hardwood floors, immediately blot up as much of the liquid as possible with absorbent cloths or thick paper towels. If it’s a fresh spill and the finish is intact, a quick blot might be all you need before it soaks in.
- Mild Detergent and Water Mist: Mix a tiny amount of mild dish soap (like Dawn) with warm water in a spray bottle. Light, gentle mists are key. Spritz lightly on a cloth, not directly onto the floor if possible once it’s initial cleanup of bulk liquid done, to avoid excess humidity against baseboards or floor gaps the may not be perfectly sealed.
- Gentle Wipe and Buff: Using the damp cloth you sprayed from step 2, wipe the affected area. Work from the OUTSIDE of the stain IN if you can tell where something has tried. Think: “contaminent containment.” Follow up immediately with a separate, clean, dry cloth to dry and buff the floor surface. We wish to avoid anything standing on the floor for long, since it may get beneath wooden slats & affect grout work.
- For Stubborn Stains (Sealed Hardwood): If a stain has already penetrated and is visible (a dark spot), you’ll need something a bit more active but still cautiously:
- Mix a paste of baking soda and water. Get this onto a cloth with rubber gloves on.
- Gently blot (don’t scrape/scrub vigorously) the stain on the hardwood with the paste by cloth application. It’s an absorbent that pulls up remnants that made the stain, and it usually can go within 5 – 10 minutes. Wipe really well with another, damp (water only) fabric cloth. Again – really buff, and do it ALL DRYLY. This paste draws moisture and odors from treated woods.
- Unsealed or Worn Wood: If your wood is unsealed, unfinished, or the sealant is worn through, urine can penetrate very deeply and quickly. This will be difficult and may require professional sanding and refinishing ofboards.
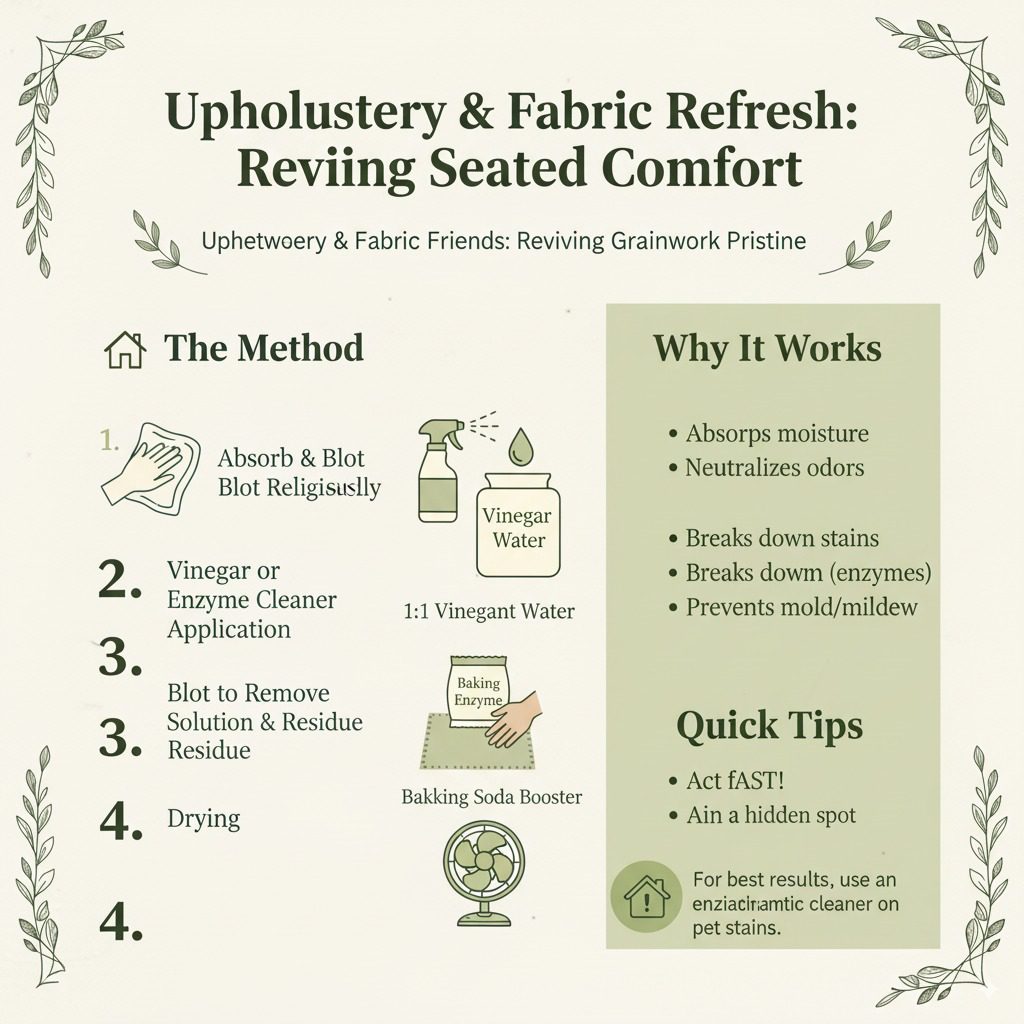
Upholstery and Fabric Friends: Reviving Seated Comfort
For delicate sofas, chairs, or even rugs, a layered approach works wonders:
- Absorb and Blot Religiously: Just like carpet, the immediate focus is moisture. Use towels to blot, press, and absorb until you can hardly get any moisture out. It will feel like you’re patting a wet sponge, but repetition is your friend here. Work from clean to soiled area.
- Vinegar or Enzyme Cleaner Application: This is context-dependent:
- Vinegar Solution (1:1 ratio of white vinegar and water): For general odors and freshening upholstery less susceptible to discoloration. Lightly spray affected section only enough that a clean fabric blotting technique from earlier still can apply to retrieve ‘almost dry’ status when desired.
- Enzymatic Cleaner: This is your champion for fabric messes, especially pet-related ones. Follow the product instructions carefully. Often, you’ll lightly spray the treated, dampened area, let it dwell for the designated time (read the lable:usually 30-5minutes for fabric without rinsing). Use a clean brush/tent to work it in slightly. Check, test, test… what works over a vast selection of cloths! For a lot of carpet, try a hidden corner first test out as usual so one knows what to rely on.
- Blot to Remove Solution and Residue: Go back to your blotting technique. Instead of lifting excess moisture onto the fabric, you are removing stain-causing ingredients.
- Drying: Area must be to dry effectively and quickly if you want to avoid further spread or harm to fibers or fabric from soaking over many, many hours. Position fan to increase air; especially a warm air for such conditions in the area
Decoding Other Surfaces: Laminate, Tile, and Linoleum
When it comes to these surfaces, life is a bit simpler because they are generally less porous and resistant a bit more resilient to messes impacting.
Let’s look where an issue usually appears for novice: the grout itself typically absorb much moisture and can remain damp long or will require much drying to become completely inert to odors. You definitely know, that grout may be rather porous relative to tile itself.
Here are specific surface guidelines
- Sealed Tile and Grout:
- Initial Soak-Up: Blot as much liquid quickly as any moist residue remains dry ASAP on grout and tile you picked.
- Degreasing: mix 1 cup cleaning per gallon water in one large Bucket for a basic solution like mild soap or, if problem is tough with it, white vinegar to the solution here per gallon for a cleaning. Grout may then get the brush. Some soft bristle application tool will assist. Gentle brush might be effective or it usually works very good if you have hard plastic/bristle choice.
- Rinse and Dry : After cleaning, ensure you rinse this area completely again. Do not let anything stand there and use it for removing solution. Again using clean fabrics, dry very well. Pay very close attention with grout to not let too much water absorb back down at grout base or porous spots near seams: fan action of sort is needed more too.
- Laminate Flooring: laminate is quite a tricky topic. While most laminate can tolerate spills for a good many long hours, prolonged saturation – that seen from really prolonged messes or bad mistakes with cleaning protocols – could damage ‘swells’ your planks at very near seams of the floorboard surface for example. Hence.
- Act with speed: Blot spills quickly when detected.
- Wipe with damp cloth This could be damp and have dilution you use (1 tablespoon to a big bowl) dish soap, or with one-quarter part of vinegar into one Gallon Water (so weak!), and you just use it by wiping into surface.
- Immediate dryness: Any remaining damp spot is need dry RIGHT THEN after you are finished with care. Use dry, cloths!
- Linoleum or Vinyl Flooring: Generally is quite user friendly. This flooring usually does a decent job of keeping liquid off – more than some.
- Slightly wet cloth with diluted cleaners like standard cleaner for floors, or diluted soap or weak is great. No issue! So as most situations will involve.
- No need for intensive cleaning if all else has been carefully applied or removed properly by gentle means then do so.
Dealing with Tough Odors and Old, Dried Stains
Sometimes, you might not have caught stains when wet, or stubborn smells persist. These are often the most frustrating. Let’s see what we can do.
Pre-Treatment is Key
For anything set-in, a pre-treatment can seriously boost your cleaning power. The enzymatic cleaners are really your bestfriend for those dried urine issues that are becoming obstinate; many products can take care of much unpleasantness on any sort of porous matter that has taken soaks. These helpers are designed to break down the proteins in urine, thus eliminating both stench and discoloration. Apply the enzyme cleaner generously to the affected odor, then let it sit and “work” for the time specified on the bottle (this dwelling period is critical!). They may take anywhere from half an hour to several hours based around need of your area, or if you go overnight if possible.
Elevating with Baking Soda
Baking soda is like the quiet unsung hero in your odor-battling arsenal—it is wonderful for drawing soaks that are remaining, especially smells that you may try to combat post main event. After initial wet clean-off-up of anything seen, after any spray protocol that should be on for 10 minutes or something else… sprinkle baking soda to truly give this to a whole extent. When the general section concerned is entirely dehydrated (don’t rush this piece of work, it can take many few very several years), Hoover it with good equipment up fully once your area feels very clear again.
When All Else Fails: Professional Help
For very old, deeply penetrated stains, especially on delicate historical wood, valuable carpets, if you find this all very complex or very daunting to get correct after trying several cleaning projects, remember sometimes a professional cleaner or restorer service have much heavier equipment, tools and solutions. What IS great with experienced company that has done prior successful cleaning jobs on most kind surfaces will have means you normally cant for good reason. For example, U.S. Department of Energy suggest for homeowners about using cleaners: Residential Cleaning Information.
Prevention and Quick Maintenance Tips
Let’s wrap this up feeling empowered to both clean and stop the messes that we may have for our house. A tidy floor to stop pet-related and family-member occurrences that may appear is crucial, when can make this house remain really nice.
- Pet Training: Consistently practice training with pets. Regular potty breaks, positive reinforcement, and designated potty areas go a long way.
- Immediate Cleanup Protocols: Train all household members (especially adventurous children!) and yourselves! When accidents occur, immediate paper towel blotting is a trained skill that saves a lot of time/grief from the start.
- Durable Floor Choices: When remodeling or decorating, consider durable materials for high-traffic or pet-prone areas that are easier to clean, like sealed tiles with grout that’s sealed.
- Protective Coverings: Strategically placed rugs in entrances, washable throws on furniture, or specific mattress protectors around cribs or pet beds can catch incidents before they reach the primary surface underneath.
Frequently Asked Questions (FAQs) About Urine Stain Removal
My biggest concern about removing urine stains is if I ruin the material while trying. What would you suggest?
Always test any cleaning solution on an inconspicuous area first! This could be a hidden corner on a carpet, the backside of a cushion, or a small, low-visibility spot on your wood flooring. This gives you a chance to see how the material reacts before tackling the main stain.
How can I tell if an enzymatic cleaner is working if I can’t see or smell much?
The key is that you often DON’T see anything while it’s working initially – that’s the enzymes doing their invisible job. For dried stains, follow the product instructions; they usually advise letting the cleaner sit for a specific period. For lingering odor after blotting and drying, often that signifies the enzymes did their job against specific chemicals in urine remnants.
Is rubbing ice on fabric spots able to use after urine stain appears?
No, rubbing ice on a urine stain isn’t generally recommended. Heat helps to set stains, but ice, while cold, won’t break down the uric acid crystals effectively and could just dampen the area further. Blotting and absorbent materials, followed by appropriate cleaners, is the goal.
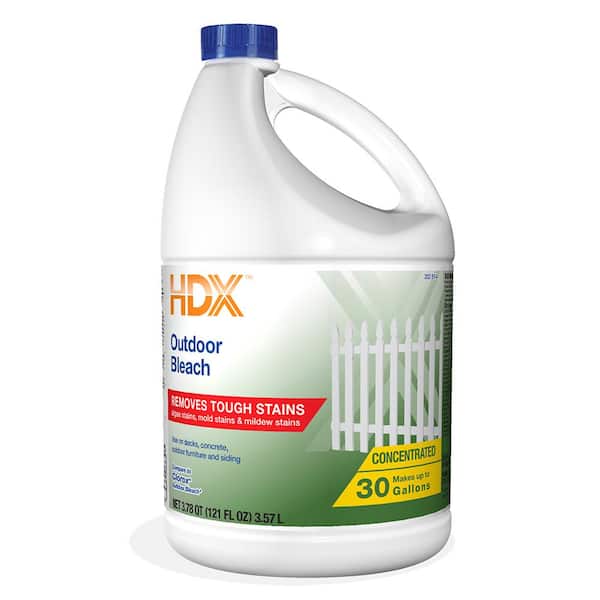
Can I use bleach on urine stains?
While bleach is a powerful disinfectant, it’s generally not recommended for urine stains. Bleach can react with ammonia in urine to create toxic gases. Furthermore, it can irreparably damage or discolor many types of fabrics, carpets, and wood finishes. Stick to gentler and more specific cleaners for best results and safety; professional experts seldom advocate for simple, undiluted bleach for this sort of family incident.
How long until a stain usually goes away for each type we have spoken?
For fresh spots and using suggested method-by-method of this article, you should remove most visible traces in one or two stages of full cleaning to begin the 1–2-day healing part. If the stench persist long into a new or full day though, don’tdoubt its reperformance of original stain.
How did my urine soak into my hardwoods? I could swear I got it quick!
“Quick” is great when you work here. If seal works a lot against much better wood finishes, especially old, unfinished or less commonly good wood then very fast wicking may really seep so into, into many tiny gaps. Always good to check from top sides with lamp when performing house deep clean to locate that problem pronto – as a little lampbeam help can mean a lot when you are checking floors on your favorite part of home.
Materials Comparison For Urn Stains: A Snapshot
Here’s quick chart summarizing cleaning approaches where we might find urine stains affecting various materials used.
| Surface Type | Best Initial Action | Effective Cleaners | Caution Areas |
|---|---|---|---|
| Carpet | Blotting | Vinegar solution, Baking Soda, Enzymatic Cleaner, Hydrogen Peroxide (caution) | Over-saturation of padding |
| Sealed Hardwood | Immediate blotting | Mild soap, Baking soda paste (tested), Specialized wood cleaners | Excessive moisture; never scrape. Penetration of finish. |
| Upholstery/Fabric | Blotting | Vinegar solution (light), Enzymatic Cleaner | Over-wetting, fabric fading/damage |
| Tile & Grout (Sealed) | Blotting | Mild soap, Vinegar solution, Grout cleaner | Grout pores; rinse thoroughly |
| Laminate | Quick blotting; immediate absorb/dry | Mild dampened cloth with dilution of either soap OR weak acetic soln. | Prolonged moisture is bad; use minimal dampness |
| Vinyl/Linoleum | Blotting | Mild soap solution | Generally very resilient; overplay for cleanliness. |
Conclusion: Fresh Start, Fresh Space!
Navigating urine stains might seem like a daunting task, but as you’ve seen today, you’re more than equipped equipped to handle them with simple, everyday items and a bit of patient application. From the cozy comfort of carpets and upholstery to the sturdy elegance of wooden floors and the practicality of laminate and tile, a gentle and strategic approach.