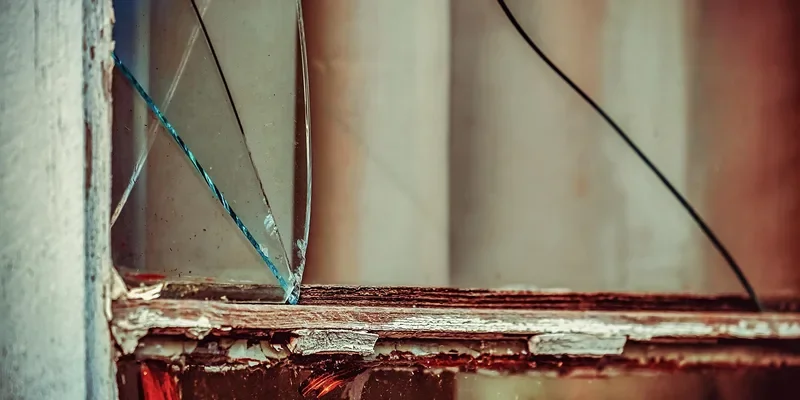
How to Replace a Window Pane in a Wooden Frame: Step-by-Step Guide
Replacing a window pane in a wooden frame might seem tough. But, with the right steps, it’s quite manageable.
Windows are essential for light and ventilation. Sometimes, panes crack or break and need replacement. Knowing how to replace a window pane saves money and keeps your home looking good. This guide will walk you through the process, from removing the old pane to installing the new one.
You don’t need to be a professional. With basic tools and patience, anyone can do it. Ready to learn how to replace a window pane in a wooden frame? Let’s get started!
Tools And Materials Needed
Best Glazier Points for This Repair
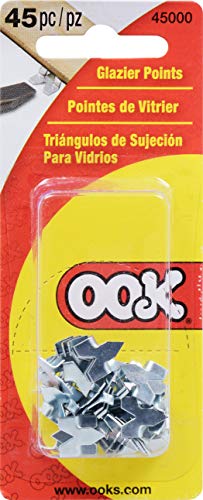 |
OOK Glazing Push Points, Glazier Points, Steel, Zinc FinishOOK | Our pick | View |
You’ll need a stiff putty knife (a 1.5-inch blade works better than a wide one for getting into the tight channel between glass and wood), a utility knife, a small pry bar or old chisel for stubborn glazing, and a heat gun if the existing putty has hardened past the point where a blade alone will lift it — linseed-oil glazing putty gets brittle and grips hard after 10-15 years, which is common on a window that’s never been reglazed. Add work gloves and safety glasses (non-negotiable any time you’re prying glass loose), needle-nose pliers for picking out stuck glazier’s points, and a wire brush or sandpaper for cleaning the wood channel once the old glass and putty are out.
For materials: glazing putty (linseed-oil-based compounds like DAP 33 stay workable longer and are the traditional choice for wood sashes; acrylic-latex glazing skins over faster but is less forgiving to tool), glazier’s points (small diamond or triangular zinc points, spaced every 4-6 inches around the pane), a replacement pane cut to size, and exterior-grade primer and paint to reseal the wood once the new putty has cured. Have the glass shop cut single-strength (about 3/32 inch) or double-strength (about 1/8 inch) glass to match what’s already in the other panes of the same window — mixing thicknesses in the same sash is rarely a problem, but matching is standard practice.

Safety Precautions
Broken glass in a wooden sash is rarely one clean crack — it’s usually a web of loose shards under tension, some still gripped by old putty, that can let go while you’re removing an adjacent piece. Treat every pane as fully broken until it’s out of the frame.
Protective Gear
Leather work gloves (not thin fabric ones) and wraparound safety glasses are the two pieces of gear that actually matter here, since most window-glazing injuries are cuts from handling shards or hardened putty edges, not blunt impact. Long sleeves keep stray slivers off your forearms while you’re scraping overhead or at an awkward angle, and a dust mask is worth adding if the old putty or paint predates 1978, since lead paint was still common on window frames through that era and sanding it releases lead dust.
Work Area Preparation
Lay a drop cloth directly under the sash before you touch the old glazing — small glass slivers bounce and roll further than you’d expect, and a cloth makes final cleanup a matter of folding it up rather than sweeping a room. Work the sash flat on a bench or sawhorses if it’s removable, rather than balanced in the opening, since a stable surface is what actually prevents the frame shifting while you’re prying with a chisel.
Removing The Broken Pane
Score around the perimeter of the old putty with a utility knife first, then work a putty knife under the glazing at a low angle and pry upward in short sections rather than trying to lift the whole bead at once. If the putty has hardened into the wood, a heat gun on a low-medium setting held 3-4 inches away for 20-30 seconds will soften linseed-oil putty enough to scrape cleanly — keep it moving to avoid scorching the wood, and stop well short of the paint’s ignition point if the frame is painted.
Once the putty bead is gone, the old glazier’s points underneath are usually still holding the glass — pull these with needle-nose pliers rather than trying to pry the glass past them, since forcing a pane over a point is a common way to crack it further. Lift out the pane in one piece if it’s still intact; if it’s already shattered, work from the top down and use a gloved hand or the putty knife to walk each shard loose rather than pulling on a piece that’s still wedged.
Cleaning The Frame
With the glass out, scrape the wood channel (called the rabbet) down to bare wood, removing every trace of the old putty bead — new glazing compound won’t bond well over old, oxidized putty residue. A heat gun again helps on stubborn spots, and a sharp 1-inch chisel handles corners a putty knife can’t reach cleanly.
Sand the bare rabbet with 100-120 grit to knock down any raised grain or old paint ridges, then wipe it clean of dust. This is also the point to check the wood itself for rot or soft spots (press a screwdriver tip into the channel — it should resist, not sink in); glazing compound seals out water but won’t fix wood that’s already decayed underneath, so repair or consolidate any soft wood before setting new glass into it.
Measuring For New Glass
Measure the opening at three points across both width and height (top, middle, bottom; left, middle, right) — old wooden sashes are rarely perfectly square, and using just one measurement per dimension is how you end up ordering a pane that binds on one side. Use the smallest of the three measurements for each dimension, then subtract about 1/8 inch total (roughly 1/16 inch per side) so the glass has clearance to seat without binding against the wood as humidity makes the frame expand and contract seasonally.
Take these final numbers to a glass shop rather than a big-box hardware counter if you can — a dedicated glazier will double-check odd-sized openings and can usually turn around a single pane same-day or next-day. Confirm the thickness (single- or double-strength) matches your other panes, and ask that the edges be seamed or lightly ground, since a raw cut edge is sharper and more prone to chipping when you’re pressing it into the frame.
Installing The New Pane
With a clean, dry rabbet and a correctly sized pane in hand, the installation itself is really two things: bedding the glass in a thin layer of putty, then locking it in place with glazier’s points before the finish bead goes on.
Applying Glazing Compound
Roll a small amount of glazing putty between your palms into a rope about 1/4 inch thick, then press a thin, continuous bed of it into the bare rabbet before the glass goes in — this bedding layer is what actually cushions the pane and keeps water from wicking underneath, and skipping it is the single most common reason a “repaired” window fails again within a year or two. You don’t need much; a bead that’s too thick just squeezes out unevenly once the glass presses down on it.
Setting The New Glass
Press the pane gently into the bedding putty until it seats evenly all around, checking that a consistent bead squeezes out on the interior side. Then push glazier’s points into the wood every 4-6 inches around the perimeter, angling the putty knife flat against the glass and pushing the point in with the blade rather than your thumb — fingers alone rarely generate enough force and risk slipping onto the glass edge. The points do the actual structural holding; the putty bead that goes on next is weatherproofing, not the primary fastener.
Securing The Pane
The points hold the glass in place mechanically; the final putty bead over them is what actually weatherproofs the joint and gives the repair its finished look.
Adding Glazier Points
If you haven’t already set points at 4-6 inch intervals, do it now — every corner needs one within about an inch of the edge, since corners see the most stress from wind load and thermal movement. Slide each point flush against the glass surface and drive it in with the flat of the putty knife so it sits below the level the finish bead will cover; a point left standing proud will telegraph through the putty and eventually rust-stain the paint.
Smoothing The Glazing Compound
Apply the finish bead at roughly a 45-degree angle to the glass, running the putty knife in one continuous pull per side rather than several short strokes, which is what produces the crisp triangular bead you see on a professionally glazed window. Wipe the blade clean between passes and dip it in a little linseed oil or mineral spirits if the putty starts dragging. Let linseed-oil putty skin over for about a week before painting — painting too soon traps the surface and prevents it curing properly underneath, while true full cure can take several weeks depending on temperature and humidity.
Finishing Touches
The last stage protects both the new glazing and the surrounding wood, and it’s worth doing properly rather than rushing now that the harder work is done.
Painting The Frame
Once the putty has skinned over (about a week for linseed-oil compound), prime the new putty bead along with any bare wood you sanded earlier — exterior-grade oil or acrylic primer both work, but the putty manufacturer’s own guidance takes priority if it specifies one. Carry the paint line slightly onto the glass itself, about 1/16 inch, when you topcoat; this seals the putty-to-glass seam against water intrusion, which is standard glazier practice even though it looks unusual until you know why it’s there. Two thin topcoats, each fully dry before the next, outlast one heavy coat and are far less likely to crack along the putty’s flex line.
Inspecting For Gaps
Run a hand along the inside and outside of the new glazing looking and feeling for any spot where the putty pulled away from either the glass or the wood as it cured — a hairline gap here is where water eventually gets in and starts the rot cycle over again. A small bead of paintable exterior caulk fixes a minor gap without redoing the whole putty job; anything larger than about 1/16 inch is worth re-puttying that section rather than caulking over it.
Frequently Asked Questions
How Do You Replace A Glass Pane In A Wooden Frame?
Remove the old glass carefully. Clean the frame thoroughly. Apply new putty. Insert the new glass pane. Secure it with glazing points and add putty. Let it dry.
Can You Replace The Glass In Wood Windows?
Yes, you can replace the glass in wood windows. It’s a common repair that improves efficiency and appearance.
What Holds Glass In A Wooden Window Frame?
Glazing points and putty hold glass in a wooden window frame. Glazing points secure the glass, while putty seals it.
Can You Replace A Window Pane Without Replacing The Frame?
Yes, you can replace a window pane without replacing the frame. Ensure the frame is in good condition. This process saves time and money.
Conclusion
Replacing a window pane in a wooden frame is straightforward. Gather the right tools and materials. Follow each step carefully. Remove the old pane. Clean the frame. Measure and cut the new glass. Secure it with glazing points. Apply fresh putty and let it dry.
Lastly, paint the frame to seal it. By doing it yourself, you save money and learn a new skill. Enjoy your clear, new view.
Sponsored / affiliate links. As an Amazon Associate I earn from qualifying purchases. I may earn additional commission from eligible campaigns.