DIY Shoe Organizer Ideas for a Closet or Entryway
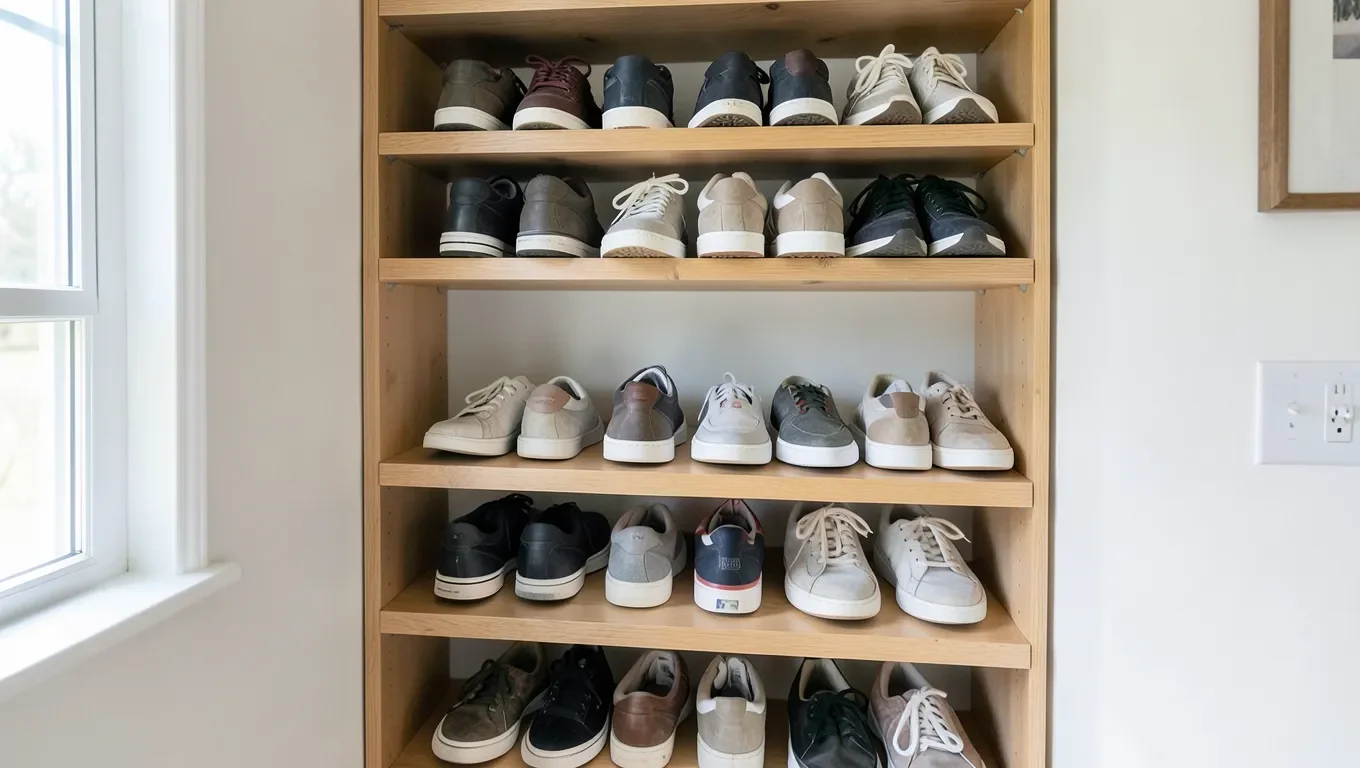
Shoe clutter is almost always a mismatch between storage method and how you actually access shoes – a bin at the bottom of the closet works fine for off-season boots, but it’s the wrong choice for the sneakers you grab every morning. This guide covers the main DIY approaches (racks, over-door, under-bed, wall-mounted, pegboard) so you can match the method to the space and the shoes, rather than building the first idea you see.
Assessing Your Space First
For Wall-Mounted And Pegboard Builds
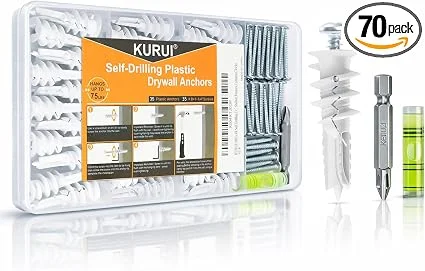 |
KURUI Heavy-Duty Self-Drilling Drywall Anchors, 70pc Rated to hold up to 75 lbs per anchor, which matters more than it looks once a floating shelf or pegboard section is loaded with several pairs of shoes.
|
Measure the height, width, and depth of the space you’re working with before picking a design – a closet floor, a hallway wall, or the gap under a bed all have very different constraints. Count your actual pairs and sort them roughly by type (everyday shoes, boots, formal shoes), since the answer to “how much space do I need” depends heavily on whether you’re storing 8 pairs of sneakers or 30 pairs across several categories. Leave some room to grow rather than building to the exact current count.
Choosing Materials
Solid wood (pine is the easiest to work with for a first build) gives the sturdiest, longest-lasting result, and takes paint or stain well if you want it to match existing furniture. Plywood is a cheaper, more dimensionally stable alternative for shelving and sides – it won’t warp the way solid boards can in a humid closet. Repurposed wooden pallets are essentially free but need sanding down rough spots and confirming they weren’t chemically treated (look for an “HT” heat-treated stamp rather than “MB” methyl-bromide fumigated) before bringing one into a closet. Wire, PVC pipe, and plastic crates are lighter, faster, and less tool-intensive options if wood isn’t necessary for the specific design.
| Material | Cost | Skill Level | Best For |
|---|---|---|---|
| Solid pine/plywood | $$ | Beginner-Intermediate | A rack or shelf meant to last years and take stain/paint |
| Reclaimed pallet wood | $ | Intermediate | Rustic wall racks on a near-zero budget |
| Wire shelving | $$ | Beginner | Closets where airflow/ventilation around damp shoes matters |
| PVC pipe | $ | Beginner | A fast, tool-light build for a garage or mudroom |
| Fabric/canvas bins | $ | Beginner | No-tool storage that still looks intentional on open shelving |
Building a Basic Wood Shoe Rack
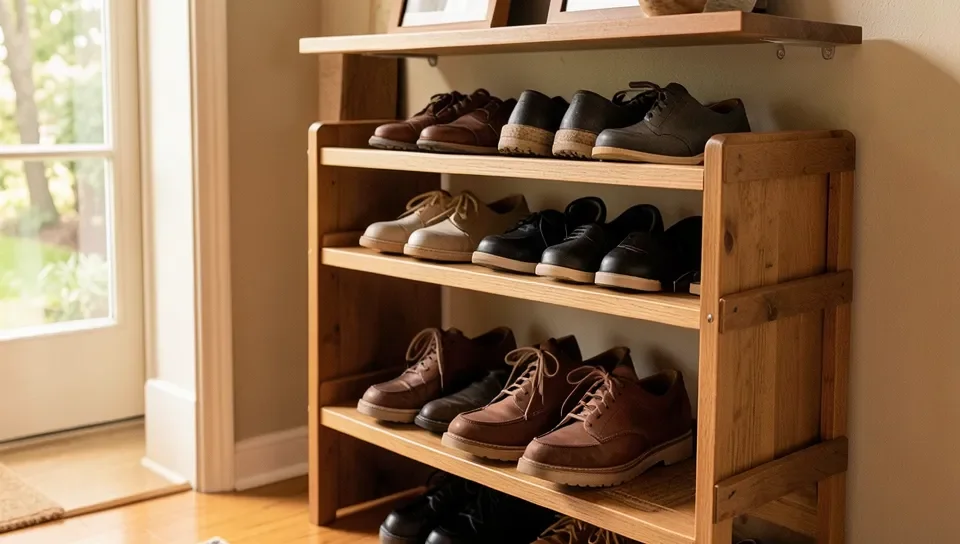
For a fixed-shelf rack you’ll need: a circular or miter saw, wood glue, a drill/driver, 1″-1.25″ wood screws, sandpaper (120 then 220 grit), and a level. Cut side panels and shelf boards to your measured dimensions, then join them with wood glue and screws – pocket-hole joints hide the fasteners better than driving screws straight through the sides, and a pocket-hole jig is worth the small cost if you plan to build more than one piece of furniture. Sand any rough edges and finish with paint, stain, or a clear coat to match your space; let a stain or poly finish cure the full recommended time before loading shoes onto it, since a still-curing finish can transfer onto shoe soles.
For an adjustable version, drill a column of evenly spaced holes (roughly 1″ apart, set back from the front and back edges) into the inside faces of both side panels and use shelf pins or dowels to support each shelf – this lets you reposition shelves as your shoe collection or shoe sizes change, which matters more than it sounds for a household with growing kids. Standard shelf spacing of 6″-7″ fits most flats and sneakers; leave 12″+ on one shelf if you’re also storing boots.
Over-the-Door Organizers
Fabric pocket organizers use the otherwise-wasted space behind a door: sew fabric pockets sized to your shoes onto a long backing strip, then hang the whole strip over the top of the door with an over-the-door hook or hanger. Canvas or heavy cotton duck holds pocket shape better than a lightweight cotton, especially once a pocket is loaded with a full-size sneaker rather than a slipper. Clear plastic pocket versions work the same way but let you see the shoe without unzipping or unfolding anything, which matters if you’re storing shoes you don’t wear often enough to remember by pocket position. Weigh the door itself before hanging a fully-loaded organizer on a hollow-core interior door – a dozen pairs of shoes is more weight than most interior door hinges are used to carrying every time the door swings.
Under-Bed Storage
Rolling bins with wheels make the space under a bed genuinely usable instead of a black hole you forget about – measure the clearance under your bed frame before buying or building anything, since this is the single most common measurement mistake with under-bed storage (a standard bed frame typically clears 7″-9″, but platform beds and some bed skirts leave much less). A custom-built drawer on drawer slides is more work but gives you a flush, finished look and can be sized to fit oddly-shaped clearance that off-the-shelf bins can’t match – full-extension slides rated for the loaded drawer weight are worth the extra cost over cheap slides that bind halfway out.
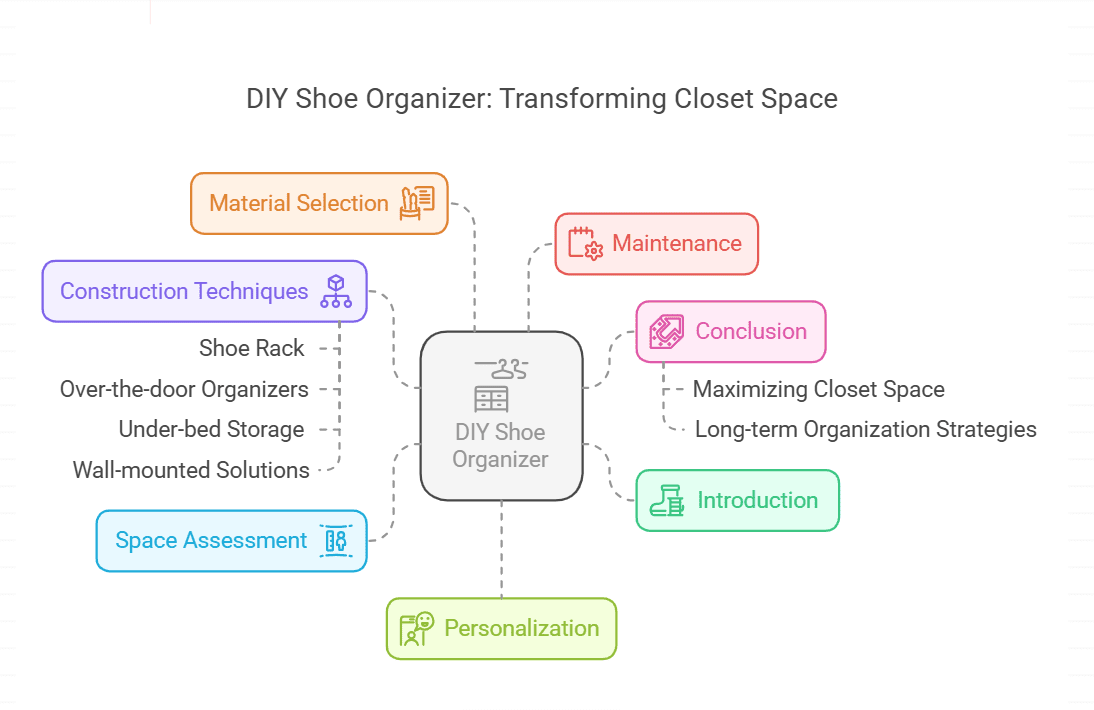
Wall-Mounted and Pegboard Solutions
Floating shelves mounted at staggered heights hold shoes without eating up floor space, and they read as a more finished, intentional design than a floor rack in a smaller closet or entryway. Pegboard is the most flexible wall option: hooks and small shelf brackets can be repositioned any time your storage needs change, which is genuinely useful in a household where shoe sizes and quantities shift over time.
Whatever you’re mounting to the wall, use anchors rated for the actual weight of a fully loaded shelf or pegboard section – a shelf holding several pairs of boots is heavier than it looks, and a mount that pulls out of drywall takes the shoes (and a chunk of your wall) down with it. Studs (usually 16″ apart) are always the strongest anchor point when you can hit one; for spans that fall between studs, a self-drilling drywall anchor rated for the shelf’s actual loaded weight is the safer choice over a plain plastic wall plug, which tends to be rated for much lighter loads.
Pegboard hole spacing is standardized at 1″ on center, so most off-the-shelf hooks and shelf brackets fit any pegboard without custom drilling. Mount the pegboard itself to furring strips first rather than directly to the wall – this leaves enough clearance behind the board for hooks to seat fully.
Personalizing and Maintaining Your Organizer
Paint, stain, fabric covers, or a coat of wallpaper on the back panel are all easy ways to make a built organizer match your space rather than looking like a bare utility shelf. Labels (by category, color, or even a photo of the shoe) make it faster for everyone in the household to put things back in the right spot, which matters more for keeping an organizer actually used than the build quality does.
Dust the organizer weekly and wipe up spills or mud promptly rather than letting them sit and stain the finish. For a wood build, a mild soap-and-water wipe followed by a full dry-down prevents the moisture from mud or wet boots soaking into end grain and eventually warping a shelf. Avoid harsh solvents on a painted or stained finish – they can strip the top coat and leave the wood exposed underneath.
Rotate out-of-season shoes into labeled bins so the active organizer only holds what you’re actually wearing right now – an organizer with a “just in case” pair from every season quickly turns back into a shoe pile. Doing a quick declutter pass (donate anything unworn in the last year) before each seasonal rotation keeps the organizer sized correctly instead of slowly growing into a second, unofficial one.
Frequently Asked Questions
How do you make easy DIY shoe storage?
Create easy DIY shoe storage using a wooden pallet. Attach it to the wall for a rustic look. Use fabric bins or crates for a versatile, stackable solution. Repurpose old bookshelves or ladders to organize shoes efficiently.
How do you organize shoes without a shoe rack?
Store shoes in clear plastic boxes. Use over-the-door organizers or baskets. Arrange them under the bed or on closet shelves. Keep pairs together for easy access. Rotate seasonally.
How do you store shoes in a small space?
Store shoes vertically using racks or shelves. Utilize under-bed storage containers. Hang shoe organizers on doors. Use clear boxes. Stack and rotate seasonally.
What can I use instead of a shoe rack?
Use baskets, wall shelves, or under-bed storage boxes to organize shoes. Benches with hidden compartments also work well.
Conclusion
The best DIY shoe organizer is the one matched to how you actually use your shoes: a fast, simple rack for everyday sneakers by the door, an over-door or under-bed solution for shoes you access less often, and a wall-mounted or pegboard build where floor space is the real constraint. Measure first, pick materials that fit your tools and budget, and the specific build matters less than getting the fit right for your actual space.
Sponsored / affiliate links. As an Amazon Associate I earn from qualifying purchases. I may earn additional commission from eligible campaigns.