How to Stain Pine Wood Like a Pro
Staining pine wood can be a bit tricky. Many folks find it challenging to get a smooth, even finish without blotches. Pine is a soft wood, so it soaks up stain unevenly, which can make your project look messy.
But don’t worry! It’s much easier than you think to get beautiful results. This guide will show you exactly how to stain pine wood like a pro, step by step.
We’ll cover everything you need to know to make your pine furniture or projects look amazing.
Prepare Your Pine Wood for Staining
Getting ready is super important before you even think about opening a can of stain. Proper preparation makes all the difference in how your finished project looks. This section will walk you through all the steps you need to take to make sure your pine wood is ready to accept stain perfectly.
We will talk about cleaning, sanding, and even using a pre-stain conditioner.
Cleaning the Wood
Before you sand, it’s a good idea to clean the pine wood. Dust and grime can get ground into the wood during sanding, making it harder to get a smooth finish. Use a damp cloth to wipe down the surface.
If there are any oils or greasy spots, a little bit of mineral spirits can help lift them off. Let the wood dry completely after cleaning.
A clean surface means your sandpaper will work better and your stain will go on more evenly. It’s a small step but it has a big impact on the final outcome. Don’t skip this part!
Sanding for Smoothness
Sanding is key to a smooth finish. You want to start with a medium grit sandpaper, like 100 or 120 grit, to remove any rough spots or mill marks from the wood. Work with the grain of the wood.
Always sand in the direction the wood fibers run. This removes imperfections and creates a surface ready for stain.
After the initial sanding, move to a finer grit sandpaper, like 180 or 220 grit. This finer grit will polish the wood and make it feel smooth to the touch. A very smooth surface is crucial for even stain absorption.
If you skip the fine grit sanding, the stain might look rough.
Always wipe away all the dust after each sanding step. You can use a vacuum with a brush attachment or a tack cloth. A tack cloth is sticky and grabs even the tiniest bits of dust.
This is very important before you apply any finish.
Using a Pre-Stain Wood Conditioner
Pine wood is known for absorbing stain unevenly, often leading to blotchy patches. A pre-stain wood conditioner acts like a primer for your stain. It seals the wood pores slightly, helping the stain penetrate more uniformly across the entire piece.
Apply the conditioner evenly with a brush or rag. Make sure to cover all the areas you plan to stain. Let it soak into the wood for the time recommended on the product’s label, usually about 15 to 30 minutes.
Don’t let it dry completely; you want it to still be a bit wet when you apply the stain.
This step is like giving the wood a drink of water before a meal. It helps control how much stain it takes in. Using a conditioner is one of the biggest secrets to achieving a professional-looking stain job on pine.
It prevents those dark, splotchy areas that can ruin the look of your project.

Applying Wood Stain for Even Color
Once your wood is prepped, it’s time for the exciting part: applying the stain. This is where your project starts to come to life. We will cover how to choose the right stain, apply it correctly, and deal with any issues that might pop up.
The goal here is to get a beautiful, even color that highlights the natural beauty of the pine.
Choosing the Right Stain
There are many types of wood stains. Oil-based stains are durable and offer rich colors, but they take longer to dry and require mineral spirits for cleanup. Water-based stains dry faster, are easier to clean up with soap and water, but can sometimes raise the wood grain more.
Gel stains are thicker and sit more on the surface, offering more control and less blotching, making them a great choice for pine.
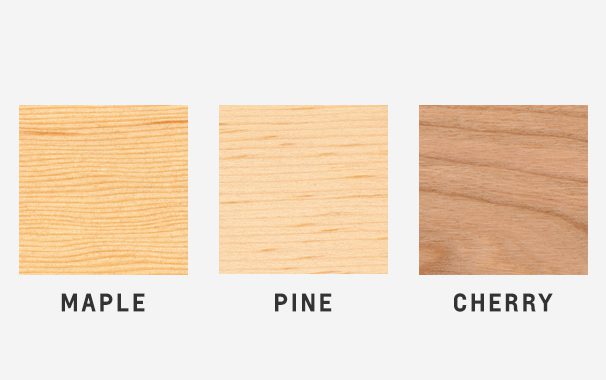
Consider the look you want. Do you want a light, natural look or a deep, rich color? The color of the stain will greatly impact the final appearance of your pine project.
Test samples on scrap pieces of the same wood to see how the color turns out before you commit to your main project.
Many people find gel stains to be the easiest to use on pine because they are less likely to soak in too quickly and cause blotches. They provide a more controlled application. Also, think about the finish of your project.
Some stains have an added sealant, while others require a top coat like polyurethane.
The Application Process
Stain application is a craft. You want smooth, even strokes that blend well. Always apply stain with the grain of the wood.
Use a good quality brush, foam brush, or a clean, lint-free rag. If you are using a brush, work in one direction along the wood grain.
Apply a generous amount of stain to a small section at a time. Don’t let the stain dry on the surface. After letting it penetrate for a few minutes (check the product directions for the exact time), you will wipe off the excess stain.
Wipe with the grain again. Use a clean rag and try to blend the color smoothly. You are essentially removing the excess pigment that didn’t soak into the wood.
Work in sections so you can maintain a wet edge. This prevents lap marks where one section meets another.
It’s better to apply multiple thin coats of stain rather than one thick coat. If you want a darker color, wait for the first coat to dry completely and then apply a second coat. This gives you more control over the depth of color.
Always follow the manufacturer’s instructions for drying times between coats.
Dealing with Lap Marks and Blotches
Lap marks happen when you try to stain an area that has already started to dry. To avoid them, always work in small sections and maintain a “wet edge.” This means blending the new stain into the area you just stained while it’s still wet.
Blotches are those dark, uneven spots that can appear on pine. If you used a pre-stain conditioner, this should be minimized. However, if you see a blotch forming, you can try to lighten it by wiping it gently with a clean rag and a bit of mineral spirits (for oil-based stains) or water (for water-based stains).
Work quickly before the stain dries.
Sometimes, a blotch is hard to fix completely. In such cases, you might need to lightly sand the area and reapply the stain, making sure to use the conditioner again. For very stubborn blotches, you could consider using a wood putty to fill in any large imperfections before staining, or even opt for a darker, more opaque stain that will cover them up.
Drying Times and Second Coats
Patience is key when staining. Always let the stain dry thoroughly according to the product instructions. Drying times can vary based on the type of stain, humidity, and temperature.
Rushing this step can lead to problems when you apply a top coat or a second coat of stain.
If you want a darker color, you will apply a second coat. Ensure the first coat is completely dry before applying the second. Apply the second coat just like the first.
Wipe off the excess evenly. This builds up the color depth gradually. This allows you to stop at the exact shade you desire.
Allowing proper drying time prevents the stain from smearing or lifting when you apply subsequent layers of finish. It ensures the color is set and stable. This is a vital part of the process that many beginners overlook, leading to frustrating results.
Protecting Your Stained Pine Wood
After you’ve achieved the perfect stain color, the job isn’t quite done. You need to protect that beautiful finish. A top coat will guard against wear and tear, making your pine project last much longer and look great for years to come.
This section covers how to apply a protective finish and keep your work looking new.
Choosing a Protective Top Coat
There are several types of top coats you can use. Polyurethane is a popular choice because it’s very durable and water-resistant. It comes in oil-based and water-based formulas.
Oil-based polyurethane offers a slightly warmer tone and is generally more durable, but it can yellow over time. Water-based polyurethane dries clear and is less prone to yellowing, but it may not be as tough.
Varnish is another option that offers excellent protection against moisture and abrasion. Lacquer dries very quickly and can be applied in thin layers, but it’s less durable than polyurethane and can chip. Wax finishes offer a soft, natural sheen but provide minimal protection against scratches and water.
For most projects, polyurethane is a good all-around choice.
Consider the look you want. Polyurethane and varnish can be found in different sheens: matte, satin, semi-gloss, and high-gloss. Satin is a popular choice as it offers a nice sheen without being too shiny, and it hides minor imperfections well.
High-gloss provides a very reflective surface.
Applying the Top Coat
Just like staining, proper application of your top coat is crucial. Make sure your stained wood is completely dry. Then, clean the surface again to remove any dust.
You can use a tack cloth. Stir your top coat gently, don’t shake it, as this can create air bubbles.
Use a high-quality synthetic brush for water-based finishes or a natural bristle brush for oil-based finishes. Apply the top coat in thin, even coats, working with the grain. Don’t try to apply it too thickly, as this can lead to drips and an uneven finish.
A thin coat dries faster and is easier to work with.
Let each coat dry completely according to the manufacturer’s instructions. This is very important for durability. After each coat, lightly sand the surface with very fine grit sandpaper (220-400 grit).
This step is called “de-nibbing.” It knocks down any dust nibs or imperfections and creates a smoother surface for the next coat.
Wipe away the dust after sanding. Then, apply the next coat. Most projects will need at least two or three coats of top coat for good protection.
For high-wear surfaces like tabletops or floors, you might want to apply four or more coats. The more coats, the better the protection.
Sanding Between Coats
Sanding between coats of top coat is a critical step for a smooth, professional finish. It’s not about removing the previous coat, but about creating a perfectly smooth canvas for the next one. Even with careful application, tiny dust particles or slight imperfections can settle on the surface as it dries.
Use very fine-grit sandpaper, such as 220, 320, or even 400 grit. The goal is to lightly scuff the surface, not to sand through the previous coat. This scuffing helps the next coat adhere better, preventing peeling or flaking down the line.
Always sand in the direction of the wood grain.
After sanding, thoroughly wipe the surface with a tack cloth or a slightly damp cloth to remove all dust. This ensures that no particles are trapped in the next layer of finish. This attention to detail makes a significant difference in the final look and feel of your project.
Curing vs. Drying Times
It’s important to understand the difference between drying time and curing time for finishes. Drying time is how long it takes for the surface of the finish to feel dry to the touch. This is usually a few hours for polyurethane.
Curing time, on the other hand, is how long it takes for the finish to harden completely and reach its maximum durability.
Curing can take anywhere from 7 to 30 days, depending on the product and environmental conditions. While you can handle the project gently after a few days, it’s best to avoid heavy use, placing hot items on it, or cleaning it with harsh chemicals until the finish is fully cured. Protecting your project during the curing period will ensure its longevity.
Many people accidentally damage their finish by putting furniture into heavy use too soon. They might place a heavy book or a hot mug on a table that isn’t fully cured, and leave a permanent mark. Knowing these times helps you use your finished piece with care and preserve its beautiful appearance.
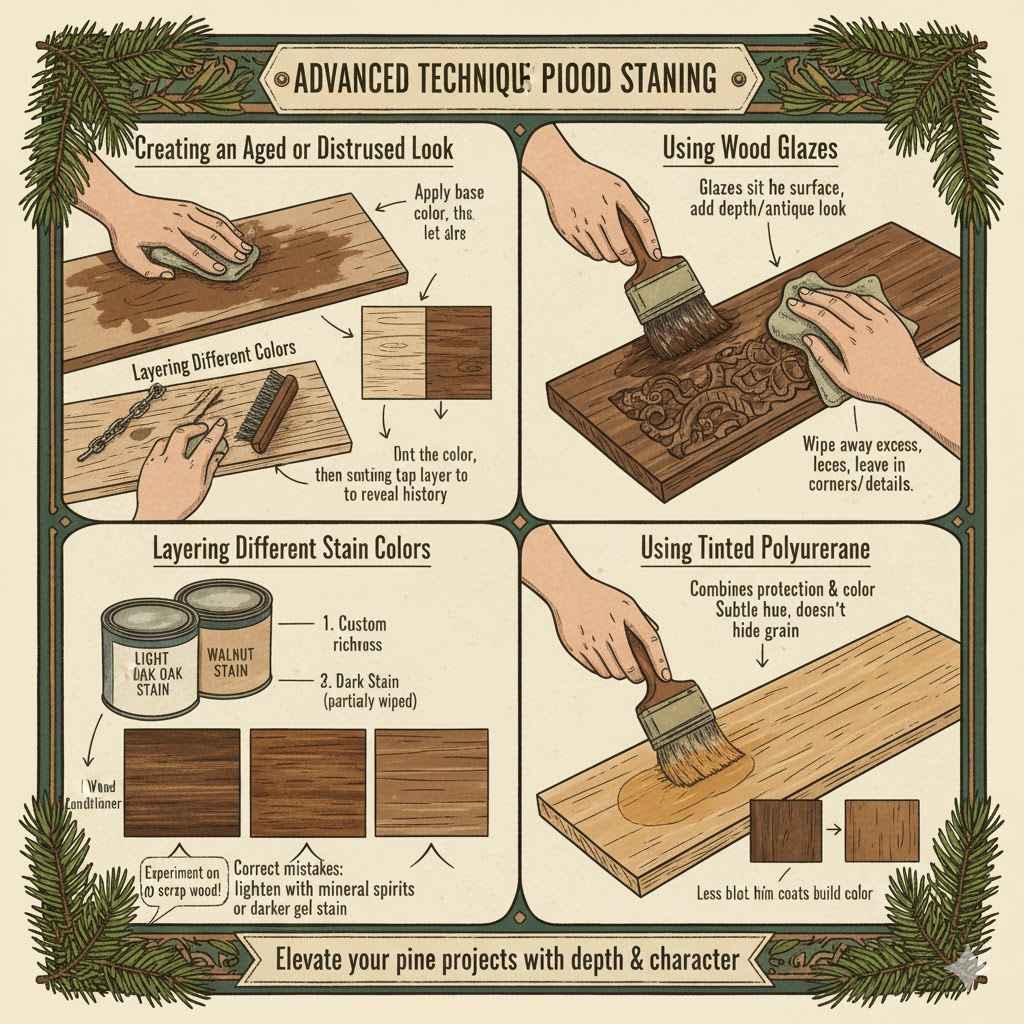
Advanced Techniques for Pine Wood Staining
Once you’ve mastered the basics, you might want to explore some more advanced methods to give your pine projects a unique look. These techniques can add depth, character, and a truly custom feel. We’ll look at creating aged effects, using glazes, and applying different stain colors.
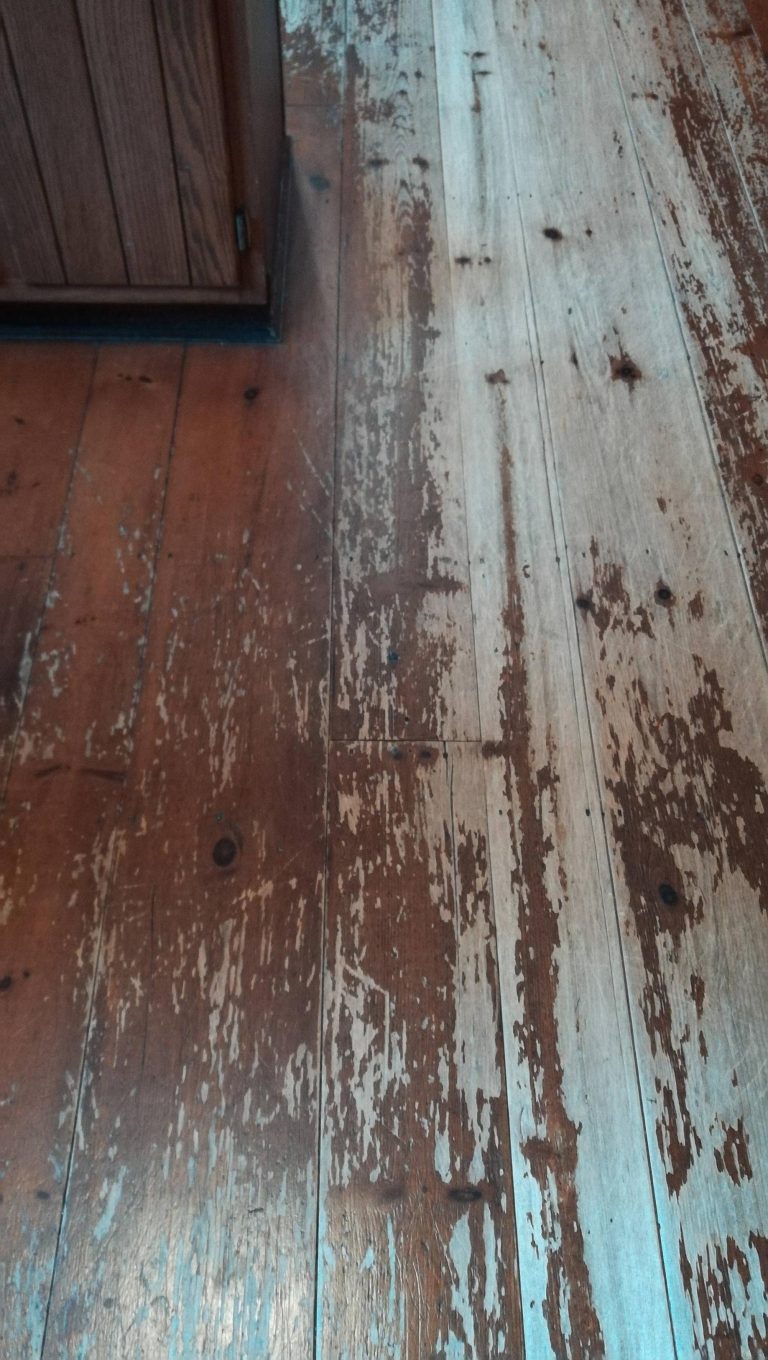
Creating an Aged or Distressed Look
To give pine a vintage or distressed appearance, you can use a few different methods. One popular technique is to apply a stain and then partially wipe it off while it’s still wet, creating a more uneven color. You can also use a rag to dab on the stain, creating a mottled effect.
Another way to distress is by using a wire brush or coarse sandpaper to intentionally create scratches and dents on the wood before staining. This mimics natural wear and tear. You can also use a chain to drag across the wood for a rustic look.
After staining, some people apply a glaze to highlight these distressed areas.
For a truly aged look, try layering different colors. Apply a base coat of one color, let it dry, then apply a contrasting color over it. You can then lightly sand through the top layer to reveal the color underneath.
This gives a look of depth and history. Wood fillers or even small pieces of wood can be used to simulate repairs on older furniture.
Using Wood Glazes
Wood glazes are semi-transparent colorants that are applied over an existing finish or stain. They are great for adding depth, subtle color variations, and an antique look to pine. Glazes don’t penetrate the wood like stain; instead, they sit on the surface and can be wiped away to create a desired effect.
You can buy glazes in various colors or make your own by mixing artist’s oils or universal tints with a clear glaze medium. After staining and sealing your pine project, apply the glaze with a brush or rag. Work in small sections.
Then, use a clean rag or brush to wipe away the excess glaze. You can leave more glaze in the corners or carved details to create shadows and highlight the wood grain. This technique is excellent for giving pine a more sophisticated or antique appearance.
It can make a simple pine piece look like aged, valuable wood.
Layering Different Stain Colors
Layering stains is a fantastic way to achieve custom colors and add richness to pine. You don’t have to settle for the colors available off the shelf. By applying stains in multiple coats, you can create unique hues that are not possible with a single application.
Start with a lighter stain or a wood conditioner. Once dry, apply a second, darker stain. You can wipe this second stain off completely or partially, depending on how much of the base color you want to show through.
This creates a multidimensional effect. For instance, you could start with a light oak stain and then add a touch of walnut over it.
This technique can also be used to correct mistakes. If a stain turns out too light, you can apply another coat. If it’s too dark, you might be able to lighten it with mineral spirits (for oil-based) or by applying a lighter colored gel stain over it and wiping it back.
Experimenting on scrap wood is key to mastering this method.
Using Tinted Polyurethane
Tinted polyurethane is a finish that combines protection and color in one step. Instead of applying a stain and then a clear top coat, you use a polyurethane that already has color mixed in. This can be a quicker way to add a subtle hue to your pine wood.
These products are great for adding a slight tint, like a honey or a light brown, without fully obscuring the wood grain. They are often easier to apply than traditional stains because they don’t soak into the wood as deeply. This reduces the risk of blotching significantly.
When using tinted polyurethane, remember that multiple coats will build up the color. It’s best to apply thin coats and allow them to dry fully between applications. You can also use a clear polyurethane over a tinted coat to build up durability or add a different sheen.
This offers a lot of flexibility.
Frequently Asked Questions
Question: What is the best way to avoid blotches on pine wood?
Answer: The most effective way to avoid blotches on pine is to use a good quality pre-stain wood conditioner. This product helps the pine absorb the stain more evenly. Applying the conditioner according to the manufacturer’s instructions and allowing it to set properly before staining is key.
Also, consider using gel stains, as they are less prone to blotching.
Question: How many coats of stain should I apply to pine?
Answer: For a light to medium color, one coat of stain is often enough for pine, especially if you want to see the natural wood tones. If you desire a darker or richer color, you can apply a second coat. Always wait for the first coat to dry completely before applying another.
It’s best to build up the color gradually to achieve your desired shade.
Question: Can I use any stain on pine wood?
Answer: While you can technically use most types of wood stain on pine, some are better suited for it than others due to pine’s tendency to blotch. Oil-based stains and gel stains are often recommended for pine because they offer more control. Water-based stains can sometimes raise the grain more and may require extra conditioning.
Question: How long should I wait before applying a top coat after staining pine?
Answer: You should wait until the stain is completely dry, which usually means at least 24 to 48 hours, but sometimes longer. Check the stain manufacturer’s instructions for specific drying times. Applying a top coat before the stain is fully dry can lead to the stain smearing or lifting, compromising the finish.
Question: What is the best sandpaper grit to use for pine wood before staining?
Answer: Before staining, start with a medium grit sandpaper, like 100 or 120 grit, to remove any rough spots. Then, move to a finer grit, such as 180 or 220 grit, to create a smooth surface. Fine sanding is crucial for even stain absorption.
Always sand with the grain of the wood.
Conclusion
Staining pine wood like a pro is achievable for anyone. By preparing your wood with care, choosing the right stain, and applying it evenly, you can achieve beautiful results. Protecting your work with a good top coat ensures it lasts.
Follow these steps, be patient, and your pine projects will look fantastic.